Your cart is currently empty!
What is Wheel Throwing? – Pottery on the Wheel in a Nutshell
Published:
Last Updated:
Affiliate Disclaimer
As an affiliate, we may earn a commission from qualifying purchases. We get commissions for purchases made through links on this website from Amazon and other third parties.
If you’re new to pottery, you may have the term throwing on the wheel, and wondered, ‘what is wheel throwing’? It’s a curious phrase and open to some misunderstanding. So, this article is all about wheel throwing and what it means.
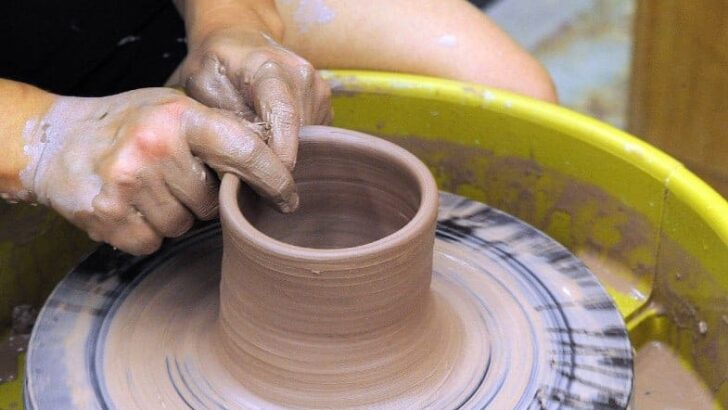
Wheel throwing pottery is the process of shaping clay on the pottery wheel. Throwing usually involves a few steps from the beginning to the end of making a pot. These are centering the clay, opening it up, pulling up the walls, and collaring in the neck of the pot.
There are different ways of making pottery, and wheel throwing is just one of them. The other key ways to make pottery are hand building and slip casting. In this article, I will be focusing on wheel throwing, what it means, and how it’s done.
Why is it Called Wheel Throwing?
There is some misunderstanding about why making pottery on the wheel is called wheel throwing.
Part of this misunderstanding arises from the following. One of the first things a potter does is take a lump of clay and make it into a ball. The next thing the potter will do is slam the clay onto the center of the wheel head. The wheel head is the round metal plate on the pottery wheel that spins.
This slamming action is done so that the clay sticks or suctions onto the wheel head. Sometimes air can get trapped between the clay and the wheel head. This prevents the seal between the clay and the wheel head from being strong enough. And the clay can come loose from the wheel as the potter works.
This is the reason why the clay needs to be slapped or slammed firmly against the wheel. It is often suggested that this slamming action is the origin of the term wheel throwing. After all, the process of wheel throwing starts off with the potter throwing the clay at the wheel.
Whilst this makes intuitive sense, this is not actually the reason for the term wheel throwing. In fact, the word throwing derives from the old English word ‘thrawan’, which means to twist or turn.
Our modern word ‘throw’ is a derivation of the old word ‘thrawan’. So, wheel throwing isn’t named as such because of the action of slamming clay on the wheel head. Rather it arises from the twisting turning motion of the wheel.
What is Wheel Throwing? The Basic Steps
An overview of the steps involved in wheel throwing is as follows:
Preparing The Clay
Before clay is thrown on the wheel, the potter needs to prepare the clay. This involves a process called wedging. Wedging is often likened to kneading because it involves pushing the clay on a work surface like kneading dough.
The purpose of wedging is to remove air bubbles from the clay and give it an even consistency. Wedging improves the consistency of the clay by removing hard and soft patches in it. And also, by aligning the clay particles. If the clay has an even consistency, it will be much easier to throw on the wheel.
Centering the Clay
Once the clay has been wedged, it is patted or shaped into a ball. As described above, the ball is then slapped firmly onto the wheel head. Some potters will also run a finger along the edge of the clay and wheel head. This creates a seal between the clay and the wheel head.
Once it’s roughly positioned in the middle of the wheel head, the potter starts to center the clay properly.
Centering involves moving and shaping the clay so that it is at the absolute center of the pottery wheel. The reason it needs to be right at the center is so that it can be shaped smoothly and evenly.
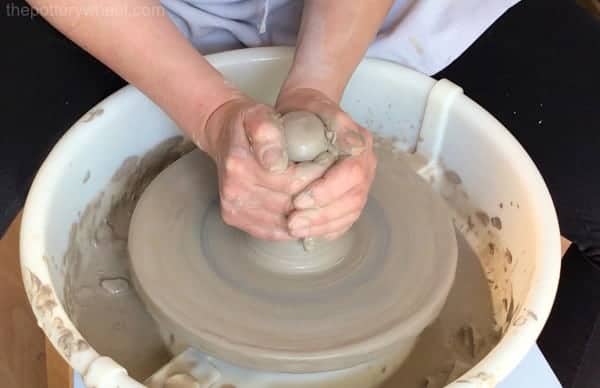
Broadly speaking the potter centers the clay by wetting their hands, and placing them firmly on the clay. By applying force to the clay, using different techniques like coning up and down, the clay becomes more central.
Opening the Clay
Once the clay has been centered, the potter starts to open the clay up. Opening the clay means that they start creating a dip or hole in the middle of the centered clay. Potters have different techniques for opening clay. Some use their fingers, others use their thumbs.
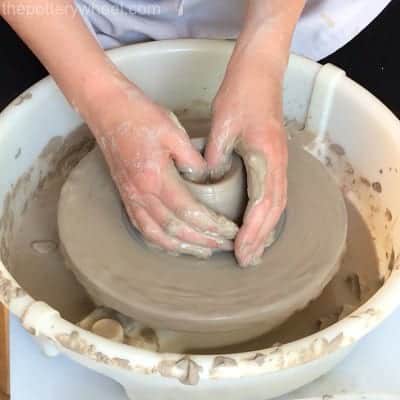
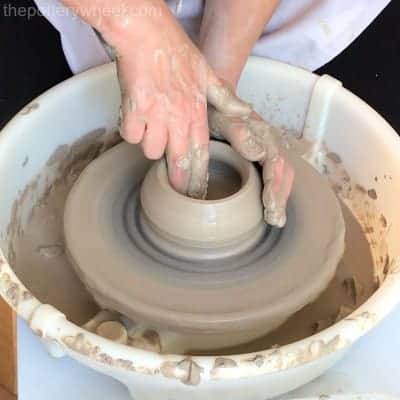
Either way, they push down until the clay at the base of the hole is about 1/3 inch thick. Once the clay has been ‘opened’ up, the potter is ready to start ‘pulling up the sides’.
Pulling the Clay
When the pot has been opened, there is still a lot of clay at the base. This clay needs to be moved up the sides of the piece to make the walls. The process of moving the clay upwards is called ‘pulling’ the walls.
Pulling the clay involves pinching the clay at the base on the inside and outside of the pot. The potter then moves their hands up the side of the pot. This action moves the clay at the base upwards to form the walls of the pot.
As with other wheel throwing techniques, different potters have different ways of pulling walls. Some use their fingertips, others use their knuckles, and some will use a sponge.
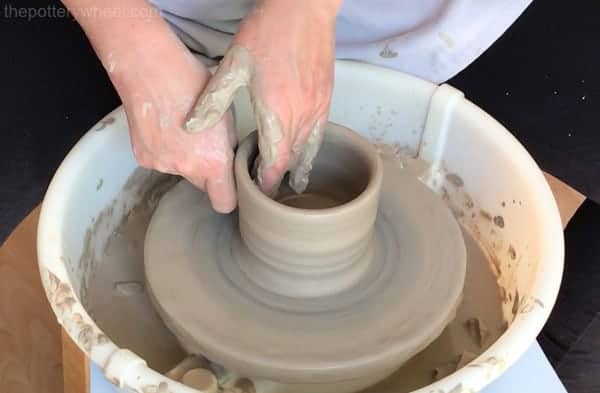
Although this step is called ‘pulling’, in effect the clay is actually being pushed upwards by the pinching action.
It may take a potter a few ‘pulls’ to get the walls to the height and thickness that they want.
Finishing Touches
The 3 steps above are the basic steps of making a pot. Once these have been taken, the rim of the pot can be evened out. And the sides of the pot can be smoothed out with a pottery tool called a rib tool.
There are other steps to throwing on the wheel, depending on what kind of vessel you want to make. And depending on what shape you want your pottery to be.
For example, the potter may ‘collar’ in the neck, this involves squeezing in the top edge of the pot. This narrows the neck and can create more of a jug, vase, or bottle shape.
Throwing and Pulling
Usually, when people refer to wheel throwing, they are referring to the whole process outlined above. However, sometimes throwing is used to refer specifically to the particular step described above as ‘pulling’.
Different Types of Wheel Throwing
Some wheel-throwing techniques have changed over the years. These changes are in part to do with the way that pottery wheels have evolved.
Scholars have mixed opinions about exactly where and when the first potter’s wheel was invented and used. However, it is thought that the first pottery wheels to use a flywheel emerged in the early to middle bronze age.
A pottery wheel that uses a flywheel, has a large heavy wheel at the base near the ground. The flywheel is rotated manually, normally by being kicked. Hence it is known as a kick wheel.
The flywheel is mounted on a shaft, which turns as the wheel is kicked. This stores energy and in turn rotates the smaller wheel head at the top of the pottery wheel.
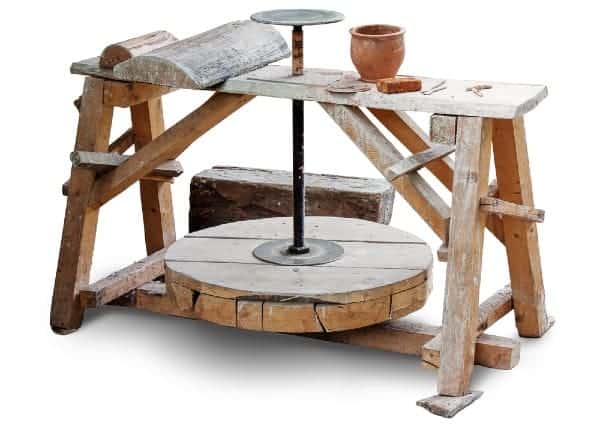
A different kind of manually operated pottery wheel is the treadle wheel. This is also operated by foot. However, instead of kicking the wheel directly, the potter uses their foot to push a lever back and forth. The lever in turn rotates the flywheel, which in turn rotates the wheel head.
The following video is an example of throwing pottery on a treadle wheel.
However, the electric motor was invented in the 19th century. And this enabled the development of the motorized pottery wheel that we are familiar with today. Generally speaking, motorized pottery wheels are controlled with an electric foot pedal.
So, the mechanics of wheel throwing have changed over the years. Wheel throwing does refer to shaping clay on the pottery wheel. However, what this looks like, the motor skills involved, and the aesthetic experience has changed as pottery wheels have evolved.
Most potters today use electric-powered motorized pottery wheels. However, some potters prefer to use a kick wheel or a treadle wheel.
Wheel Throwing – Some Other Differences
Wheel throwing pottery is about shaping clay on the pottery wheel. However, there are lots of different variations in this process. Some of these variations are as follows:
Size Matters
Some potters throw big, other potters throw small. I’m not just talking about the difference between a big mug and a small cup. What I mean is that some potters throw on miniature wheels, making tiny pots. Whilst others throw pots that are so large they have to be throw in sections and joined together. Other potters make pottery so big that they need to work in pairs.
This is an important point because there is a lot of variety in what wheel throwing involves and what it looks like. Potters at either end of the size spectrum are involved in wheel throwing. However, the skills and processes are very different.
To Sit or Not to Sit
Another difference is that some potters choose to stand when they are wheel throwing. Sometimes this is simply a personal preference and also because it can be handy when throwing taller pots. At other times it is for ergonomic reasons, and a desire to avoid back pain.
Final Thoughts
In essence, wheel throwing is simply shaping clay on the pottery wheel, as the wheel turns. Sometimes the term is used in a more specific way, referring to pulling up the walls of a pot. However, usually, it refers to the general activity of making pottery on the wheel.
However, a more complete answer to the question of what is wheel throwing includes differences in throwing technique. And also, differences in the kinds of pottery wheels that potters use.


