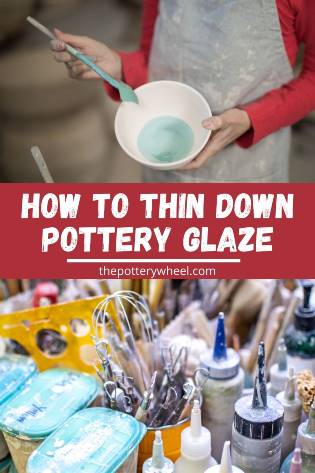
With time pottery glaze can dry out. The water content will evaporate and the glaze can either become too thick to apply. Or it can even become a bit hard and crusty, like old paint. The question is, can you add water to glaze to make it thinner? After all, glaze, particularly commercially made glaze, is not cheap. And you don’t want to waste an older thicker glaze if you can revive it.
You can add water to glaze to make it thinner. Glaze is made of glaze minerals suspended in water, so adding more water will make it more liquid. It’s important not to make glaze too thin. If it’s too thin, you won’t get the kind of glaze coverage you need.
So, the short answer to the question is that you can add water to glaze to make it thinner. However, adding water to glaze is tweaking the glaze chemistry. Therefore, there are a few factors to consider to make sure you are thinning your glaze effectively. Read on, to find out what these considerations are…
Why Can you Add Water to Glaze to Make it Thinner?
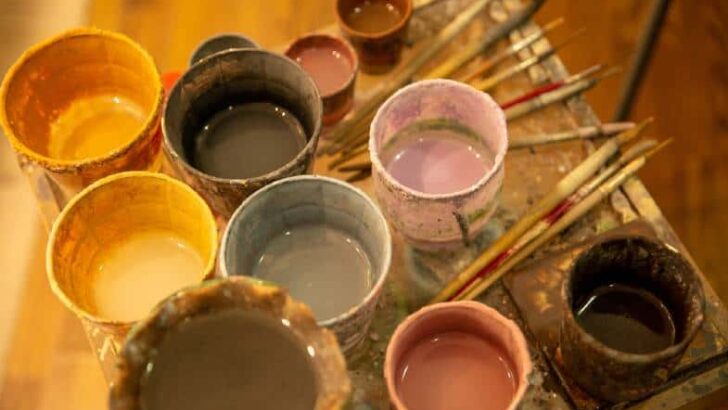
Pottery glaze is made from solid glaze mineral particles that have been ground up to a fine powder. These ground ingredients are then mixed thoroughly with water. So, glaze is simply particles suspended in water.
As such, you can add water to glaze to make it thinner. Glaze is not like an oil-based paint that will emulsify if you add water. Water is compatible with pottery glaze and will just dilute the glaze mixture.
Glaze can be applied in different ways. Some glazes are designed to be applied by dipping the pottery into the glaze. These are called dipping glazes. Other glazes are designed to be applied by brush. These are called brushing glazes.
Most hobby potters use brushing glaze. Dipping glaze is usually contained in large buckets. Overall, it works out cheaper to buy larger quantities of dipping glaze. But having large quantities taking up space is not practical for a lot of pottery enthusiasts. So, brushing glaze is often preferred because of its convenience and ease of use.
Dipping and Brushing Glazes
Dipping and brushing glazes have a different consistency because they need to behave in different ways. Generally dipping glazes are thinner. This is because you need to be able to lower your pottery into the glaze easily. After a few seconds, the pottery is lifted out and the excess glaze is allowed to drip off the pot.
Brushing glazes are thicker because they need to stay in place once they have been brushed on. If they are too thin, they will just run off the bisqueware. Commercially made brushing glazes normally contain a substance called CMC gum. This makes them stick more effectively to pieces they are applied to, rather than running or slumping.
It’s important not to thin out your brushing glaze too much. If you make it too runny it will be hard if not impossible to apply. So, let’s have a look at how to add water to your brushing glaze…
How to Add Water to Brushing Glaze to Thin it Down
Here are some tips on how to add water to brushing glaze to make it thinner:
- To avoid making your brushing glaze too thin, it’s important to add a little bit of water at a time. Add a little water to your pot, give it a good stir, and then shake it and check the consistency.
- To err on the safe side, you could split the batch that you have before you start to add water. Then add water to one batch and thin that quantity out. If you over thin that batch, you can add a bit from the other batch you kept to one side. This will thicken it back up again.
- Tap water is generally fine to use. But if you live in an area that has very hard water, you could consider using filtered or distilled water. Hard water contains a higher percentage of minerals which may alter the chemistry of your glaze just a little.
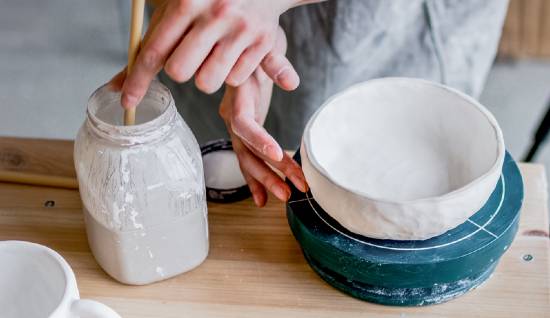
- If the glaze is very dry, you can add some water to the dried glaze and let it sit overnight. This should soften it up enough to then blend the glaze and water together the next day.
Be sure to blend it very well to get rid of any dried lumps of glaze. If the glaze is in a large enough container, you can use an old hand blender to do this.
If you do use a hand blender, you should be sure not to use this for making food again afterward. Once a cooking utensil has been used for pottery making, it needs to be reserved for pottery use. Glazes contain chemicals that you should avoid ingesting.
What is the Right Consistency for Brushing Glaze?
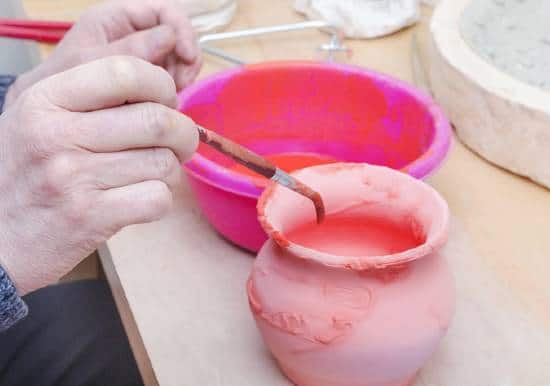
A lot of potters will simply ‘eyeball’ a glaze and decide if it’s the right consistency. Generally, it’s recommended that a brushing glaze is the correct thickness if you can load your brush easily.
This means that you can dip your brush into the glaze and it goes into the glaze smoothly. Then on drawing the brush out, the brush is loaded with a smooth liquid glaze that doesn’t drip. Equally, the glaze on your brush should not be chunky or look lumpy like cottage cheese.
A brushing glaze with a good consistency should paint onto your pottery easily. It should be thick enough to stay in place on your bisque surface without running. But it should not be so thick that it creates a surface that is very lumpy or uneven.
It’s worth mentioning that applying a very even surface of glaze with a brush can be tricky. Because bisqueware sucks water out of glaze quickly, the glaze will dry quickly.
This means that you may be left with a bit of unevenness or some bumps on your unfired glaze. You needn’t worry about this too much. When glaze is fired, it melts, and generally, brush marks will smooth out when the piece is fired.
What if you Want to be Precise? – Measuring Specific Gravity
The thickness of a glaze is measured by what is called ‘specific gravity’. The specific gravity of a substance is a measure of its density. For liquids, this density is normally rated in comparison to the density of water.
On the specific gravity spectrum, the density of water is rated as 1. Any liquid that has a specific gravity (SG) of less than 1 is less dense than water. And liquids that have an SG of more than 1 are denser than water. The larger the number is than 1, the more relatively dense the liquid is.
Most commercially made brushing glazes have a density of 1.3-1.55 (source). If you add water to a brushing glaze you lower its specific gravity.
Measuring Specific Gravity – It’s Simple!
You can measure the specific gravity of a liquid quite easily. Simply pour 100ml of glaze into a measuring vessel and weigh the glaze in grams. Then divide this by 100. So if 100ml of glaze weighs 130g, the specific gravity of the glaze is 1.3.
If you only have 50ml of glaze, you can divide the weight by 50. For example…
| Weight | Volume | Divided by | SG |
| 130g | 100ml | 100 | 1.3 |
| 65g | 50ml | 50 | 1.3 |
The makers of brushing glazes don’t generally put the ideal specific gravity of a particular glaze on a container.
If you really wanted to be precise you could contact the manufacturer and ask them what SG they recommend. A lot of ceramics manufacturers are very accommodating and informative with requests for information of this kind.
Will Thinner Glaze Look the Same?
If you add water to glaze to make it thinner, you are altering the ratio of glaze minerals to water. This means that less glaze material is suspended in the liquid. So, when you paint this on your bisque, the layer of glaze material will be thinner.
Glazes do look different depending on how thick the glaze has been applied. With a thinner glaze, you are more likely to see the texture of the clay underneath. If your clay has a textured surface, the texture may show through the glaze more if the glaze is thinner.
This is not necessarily a bad thing. There are certain glazes that are specially designed to highlight the texture of the ceramics it’s applied to. These are called ‘breaking glazes’.
Whether you are happy with a thinner looking glaze or not is a matter of personal taste. However, if you want to be sure how your piece will look, it’s best to test out your glaze first.
You can experiment with a glaze by adding different amounts of water to small batches. Then apply these to a test tile and see which thickness you like the look of best.
The other aspect of glaze that can be altered by its density, is the color of the fired glaze. Adding water to your glaze can affect the color of the fired piece.
Again, this is not necessarily a bad thing, and the variation in color might look great. However, diluting your glaze can add another element of uncertainty to what your finished piece will look like.
Other Ways of Thinning Glaze
You can thin your glaze out using commercially produced glaze thinning products. These are powerful thinning agents and generally, you need a very small amount to thin out a thick glaze.
The advantage of using a thinner is that you can make a thick glaze more liquid without adding extra volume. With a thinner, you aren’t watering the glaze down, you are altering its chemistry to make it more liquid. This process is called deflocculation.
Final Thoughts
When you add water to glaze to make it thinner you can give an old glaze a new lease of life. Like all water-based substances, the water content will evaporate with time, and this needs to be reconstituted. If you’re making a range of pottery, like a dinner set, you might want a consistent finish to your glaze. If that’s the case you will need to pay close attention to the glaze chemistry. But if you are making a one-off piece you probably don’t need to replicate the results. If that’s the case, you can be more experimental with the thickness of your glaze.


