Your cart is currently empty!
Soft Slab Ceramics – A Guide to Working with Flexible Slabs
Published:
Last Updated:
Affiliate Disclaimer
As an affiliate, we may earn a commission from qualifying purchases. We get commissions for purchases made through links on this website from Amazon and other third parties.
If you are new to making slab pottery, you may have heard the term ‘soft slab ceramics’ and wondered what it is.
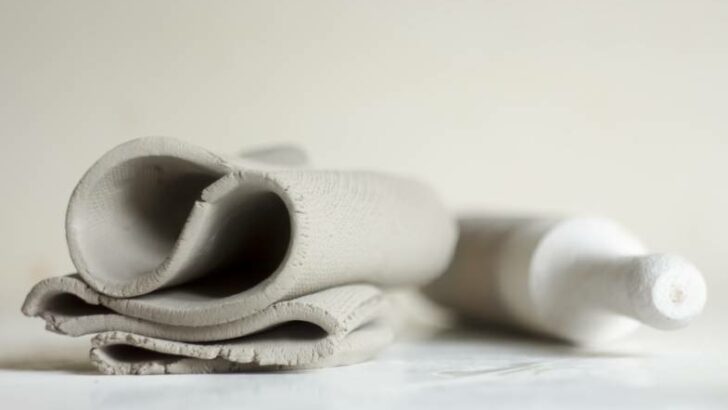
Soft slab ceramics involves constructing pottery out of slabs of clay that are still moist and pliable. Sometimes soft slabs are used straight after they have been freshly rolled. Other times they are left to firm up just a little. However, all soft slab pottery is made from moldable flexible slabs.
This is in contrast with stiff slab ceramics (also called hard slab pottery). With stiff slab pottery, the sheets of clay are left until they are leather hard before they are used for constructing your piece.
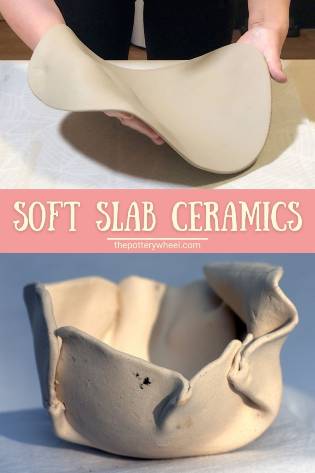
Table of Contents
show
Soft Slab Ceramics
Soft slab ceramics is also called soft slab construction and soft slab pottery. Each of these terms refers to working with slabs that have been freshly made.
Different Ways to Make a Soft Slab
Soft slabs can be made in a number of different ways.
A Rolling Pin
Perhaps the simplest way to make a slab is to roll it out using a rolling pin. When rolling fresh clay in this way, it’s best to roll it onto a piece of fabric. This will stop the slab from sticking to your work surface.
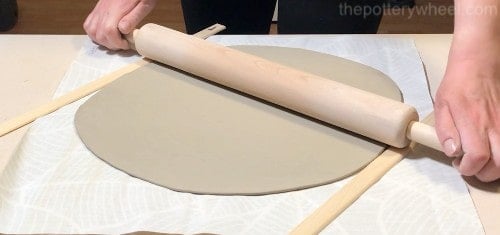
Choose a smooth fabric to roll onto. If your fabric has a distinctive or rough texture, this will be impressed into the surface of your slab. So, it’s best to choose a fabric with a high thread count. An old bed sheet is a good option. Or a smooth piece of canvas.
Another tip is to use rolling sticks. These are strips of wood or plastic that go on either side of the slab that you are rolling. You can get rolling sticks of different thicknesses. This will help you roll and even slab of a particular thickness.
A Slab Roller
Slabs can also be made using a slab roller. This is a large piece of pottery equipment, that consists of a table on which are mounted two rollers.
The rollers are rotated using a wheel or handle mounted on the side of the slab roller. Your clay is fed through the rollers and compressed into an even slab as it passes through.
A slab roller works a lot like a large pasta maker.
Hand Tossing
If you don’t have any equipment, an alternative way to make a soft slab is by hand tossing the clay.
This technique involves dropping the clay at a slight angle onto your work surface or floor. When the clay hits the work surface at an angle, it starts to spread out into a soft slab.
If you’d like a more detailed account of exactly how to make soft slabs, check out my how-to guide here.
Soft Slab Construction
Once you have made your slab, you are ready to start making your slab pottery.
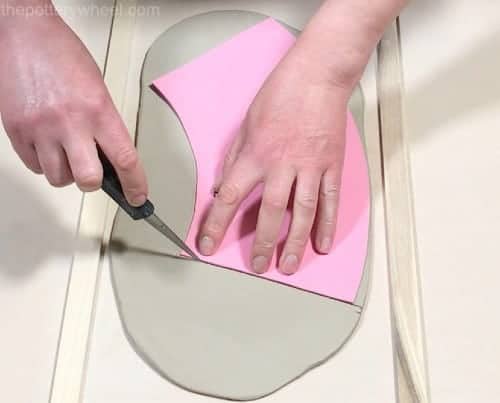
Making slab pottery often benefits from using a pattern or template. This is because with slab building you are piecing together sections of the slab to construct your pottery.
It helps to have a template to cut out your pieces to the right size. Making the templates is often a process of trial and error, finding out which shapes fit well together.
Jim Robison, a slab pottery artist, and author of the book Slab Techniques, points out that slab building is a lot like dress making. He makes this comparison because like dress making, with slab pottery, you cut your pieces out according to a pattern and fix them together.
But he also says that soft slab ceramics is like working with cloth. It’s soft and flexible and can be ‘folded and shaped in many different directions’ (page 33, Slab Techniques).
Working With Soft Slabs
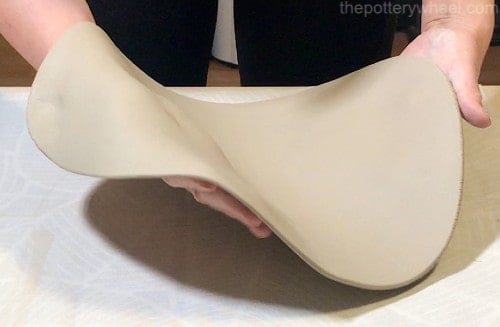
It is possible to work with very freshly rolled soft slabs. These are very flexible and can be tricky to handle without losing their shape. Nevertheless, depending on what you are making using a completely fresh slab can be an option.
An example is when you make a slab bowl using a hump mold. During this process, the soft slab is draped over the mold and shaped into whatever form you want the clay to lie in.
With this technique, you can gently press the slab so that it’s flush against the mold. Or you can easily curve or fold the soft clay to make a fluted edge on the bowl.
It’s possible to work with very soft slabs when you are using a mold in this way because the mold is supporting the slab.
However, if you are making a piece of pottery that is going to support its own weight, then it helps to let the soft slab firm up just a bit.
An example might be making a mug. You need the clay to be soft enough to curve around and be pliable so you can shape it. But you don’t want it to be so soft that the slab collapses in on itself when you make the main body of the mug.
Letting the Slab Firm Up
How long you need to leave the slab to firm up just a little depends on the temperature and humidity of where you are working. For example, if it’s a hot day, I might leave my slab outside for just 5 minutes. And this will be enough for the soft slab to be ready to work with.
Another option is to put the slab briefly in front of a fan blowing air. Just remember to check that slab every few minutes to make sure it isn’t drying out too much.
But if it’s a damp cold day, I might leave it uncovered indoors for an hour or so.
At this point, the slab will still be soft and workable. But it will also be able to support its own weight a bit more, for example when it is shaped into a cylinder.
Turning a Soft Slab
When you are working with soft slabs, you have to pick them up with some care. If you pick your slab up with your fingers by the edge, it’s likely to stretch and sometimes tear.
It’s important to avoid your slab stretching too much when you are picking it up. Clay is said to have a ‘memory’. What that means is that if your clay stretches in a particular direction when it’s very wet, it can want to return to that stretched shape when it dries or is fired.
This can cause your piece to curve (also known as warping) when it is drying out or being fired.
If your slab is small and the clay is light, then you will probably be able to pick it up easily without it stretching. But if the slab is larger, it’s best to find a better way to turn and handle the slab.
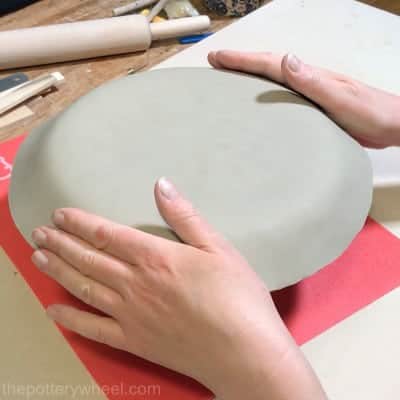
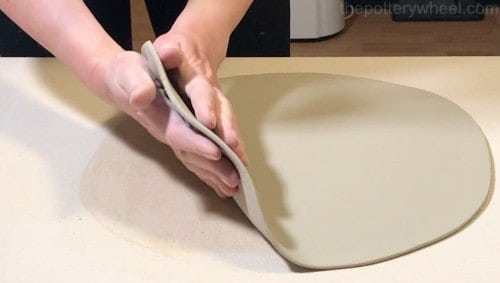
If your slab is medium-sized, then you can pick it up with your hands. The best way to do this is to carefully lift the edge of the slab and put the palm of your hand underneath it so you are supporting it.
If you want to turn your slab over, put your other palm on the top side, and slowly turn the slab over. When you are working with slabs, it’s best to move the clay carefully and slowly.
Turning Larger Slabs
If you are working on a larger soft slab, then there is an easier way to turn the clay over.
Firstly, roll the slab onto a sheet of fabric. When you want to turn the slab over, put another sheet of fabric on top of the slab so the slab is sandwiched between two pieces of material.

Then slide your hand under the lower piece of fabric, and put your other hand on top of the top sheet.
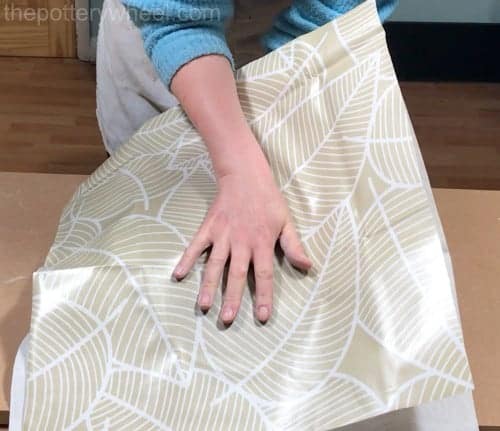
Flip your hands over, so that the clay slab turns over whilst sandwiched between the material. Then lay the slab down onto your work surface. Once the slab is resting on the tabletop, you can peel the upper fabric sheet away and continue working on the slab.
Tip
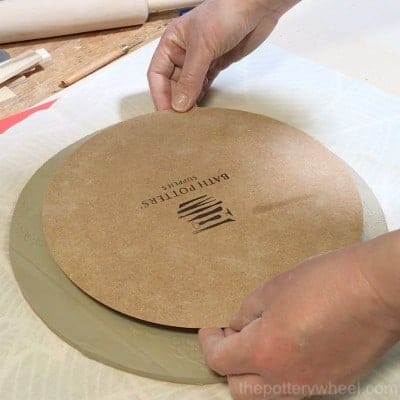
If you want to give your slab extra support when you turn it over, you can sandwich it between two wooden boards and turn the wooden boards over. It’s best to put fabric or paper between the soft slab and the boards so that the clay doesn’t stick to the wood.
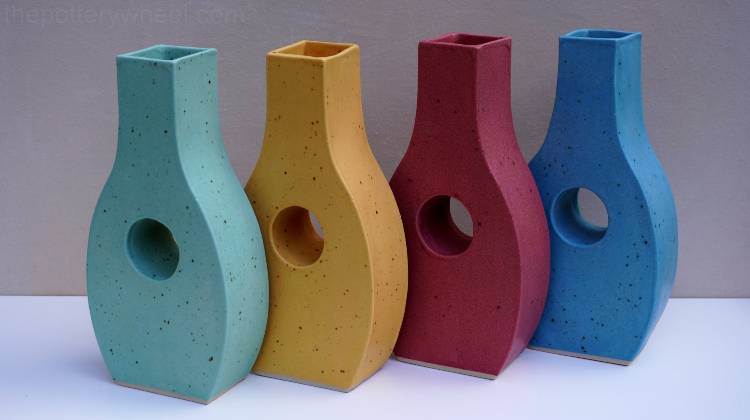
What Can you Make in Soft Slab Ceramics?
As a rule of thumb, soft slabs are usually used for smaller pieces and when you want your ceramics to be curved or have a flowing shape.
The pieces are normally smaller because a soft slab can’t hold too much of its own weight.
Having said that it is possible to make larger soft slab pieces if you use molds and supports to keep the slab in place once it has been shaped as you want it to be.
You can be creative with the supports that you use. There are, of course, the sorts of molds produced specifically for slab pottery. These are often made from wood or plaster and are manufactured in a range of shapes and sizes so you can make different sized and shaped dishes.

However, if you have an idea in your mind of a more individual shape, you can make your own mold or support. For example, you could make a mold out of clay and bisque fire it. Or, if you’re handy with wood, you could make a mold out of wood.
Alternatively, you can make softer supports from sponges, balled-up paper, or foam pieces. The advantage of using softer supports is that they will move as the clay dries. This reduces the chance that your clay will crack as it shrinks.
Advantages of Working with Soft Slabs
Soft slabs are versatile for the following reasons:
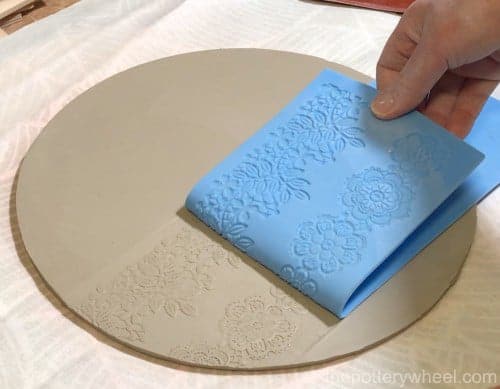
- You can easily add texture to your slab
- The slab can be shaped easily and lends itself well to folding, curving, and modeling
- Soft slabs join together easily. It’s not always necessary to slip and score each join, provided you compress the clay well at the seam.
Disadvantages of Working with Soft Slabs
However, there are some features of soft slabs that it’s important to be aware of:
- Because soft slabs contain a lot of moisture, they shrink when they dry out. As a result, there is a higher risk that your lovingly shaped slab will curl, curve or warp as it dries out. The best way to avoid your soft slabs distorting as they dry is to dry them out very slowly and evenly.
- Soft slabs are not ideal for larger, architectural pieces or for pieces that are very angular.
Final Thoughts
It’s fair to say that I’m a little bit obsessed with soft slab pottery. It’s one of my favorite ways of hand-building pottery. I find a perfectly rolled slab very satisfying, and I love how versatile and forgiving soft slab pottery can be.
If you haven’t tried soft slab ceramics yet, I highly recommend it. I have a few step-by-step guides that you can follow if you’d like some pointers when you are starting out.