Your cart is currently empty!
Sanding Pottery – How and When to Sand your Pots
Published:
Last Updated:
Affiliate Disclaimer
As an affiliate, we may earn a commission from qualifying purchases. We get commissions for purchases made through links on this website from Amazon and other third parties.
If you are reading this article, you probably want to know how to smooth the surface of your pottery. So, you may be surprised to hear that sanding pottery is actually a source of disagreement amongst some potters.
The reason for this is that when you sand pottery, you inevitably create clay dust, which contains silica. Silica is known to be a health hazard if it is inhaled. Therefore, sensible potters are at pains to minimize clay dust when they work or clear up.
For some potters, the risk of creating airborne silica is too high to justify sanding pottery. So, they recommend focusing on methods whilst making the pottery that will ensure a smooth surface. Rather than having to tidy up the surface afterward by sanding.
Nevertheless, a lot of potters do sand their pottery. And there are ways of sanding pottery that minimize any health risks. This article is all about why, how, and when to sand pottery safely. After all, everyone likes a nice smooth bottom. Hey, you can’t write an article about sanding pottery without making a joke about smooth bottoms.
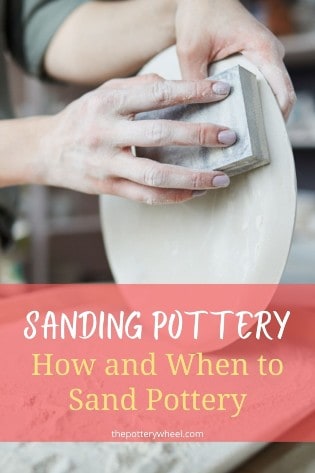
Sanding Greenware Pottery
Here are some of the reasons you might want to sand your greenware pottery:
- If you’re just learning how to make ceramics, your piece may not be as even as you would have liked. Perhaps your pot is a bit wonky and you want to even up the lip or the foot ring.
- You may have added some design features that have left little burrs or bobbles of clay on the surface. For example, perhaps you have done some sgraffito or incising on your clay surface. This may have left little raised edges around the detailing that you want to tidy up.
- Trimming your pottery can leave circles around your pottery where the trimming tools have removed clay. You may want to remove some of these by sanding.
- Leather hard clay can look quite forgiving. When clay has the sheen of being slightly damp, it can look smoother than when the clay has dried thoroughly. It can sometimes help to sand your clay when it’s bone dry to even out the surface.
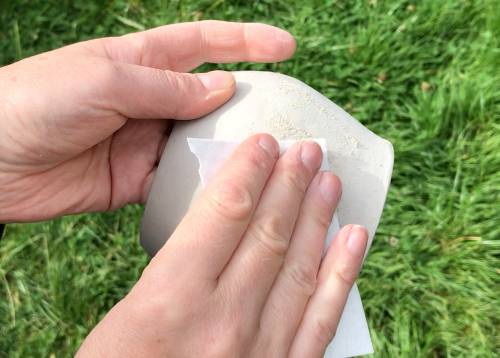
Sanding Greenware Pottery
Whatever the reason for sanding pottery in its greenware stage, here are some tips on how to do it.
If you are sanding unfired clay you need to be careful not to overdo it. Greenware clay is very soft and can be sanded down easily. It’s easy to go overboard and sand away too much detail or shape from an unfired pot.
Grogged Greenware
Dry unfired clay that contains grog or sand does not sand well. When you rub or sand grogged clay, the gritty grog rubs against the soft clay body and scratches the surface. The more you sand, the more scratched the surface becomes. Keep any sanding of grogged greenware clay to a minimum.
If you are using grogged clay, you can avoid having to sand your greenware as follows:
When your clay is still plastic and soft, you can tidy the surface with a metal rib.
Once your clay is leather hard, you can use a rubber rib to smooth and compress your clay. This can work wonders with grogged clay. I invariably smooth my pots with a rubber rib after trimming them to take out any trimming marks.
When you have trimmed your pots, use a damp sponge to smooth the foot and lip of your pot. This is sometimes called ‘wet sponging’.
You can also use a piece of damp chamois leather. Be aware that a wet sponge or chamois on grogged clay can wipe away the smaller clay particles. The result of this is that the larger pieces of gritty grog can be left behind and exposed. So, keep sponging and wiping to a minimum too.
Smooth Stoneware or Porcelain Greenware
Greenware clay that contains smaller clay particles and is without grog, is less likely to scratch when being sanded. For example, smooth ungrogged stoneware or porcelain can tolerate being sanded without encountering the issues described above.
If you have a large surface area of smooth clay that needs to be removed or smoothed, you can start off using sandpaper. Sandpaper is graded according to its ‘grit’. The lower the number used to grade, the higher the grit. So, 80 grit sandpaper is coarser than 220 grit paper.
To sand away significant amounts of greenware you could start with a coarser paper, like 80 grit. And then as you want to smooth the surface, you could switch to 220 grit paper.
Another suggestion when sanding greenware is to use a green kitchen scrubby rather than sandpaper.
When green scrubbies are new, they are quite stiff and abrasive. But once they have been used a few times, they soften up and become less harsh. These are a good way of smoothing down your greenware surface and keeping scratches to a minimum.
Alternatively, fine wire wool can be a good way of smoothing down burrs and rough edges on greenware.
Sanding Greenware and Safety
If you are sanding your pottery once it is bisque fired, you can use wet/dry sandpaper. This will minimize how much clay dust is created when sanding. However, if you are sanding greenware, wetting your pottery is not an option. So, you have to be extra cautious when sanding.
Sanding greenware generates a lot of clay dust. Some potters suggest simply sanding over a bucket of water so that the dust falls into the bucket. However, I have found that a lot of the dust becomes airborne and doesn’t fall into the water. Greenware dust is like icing sugar, and the particles are very light and fine.
Furthermore, greenware dust will stay suspended in the air for hours if not days after sanding. You may not be able to see the dust, but it will linger for a long time after you have sanded. This is evident, as dust tends to settle on work surfaces for days after you have finished sanding.
For that reason, if I’m sanding green pottery, I always sand outside and away from any open windows or doors. If it’s raining and you have a spraying booth, then sand in there. Otherwise, wait until it’s stopped raining and go outside to sand.
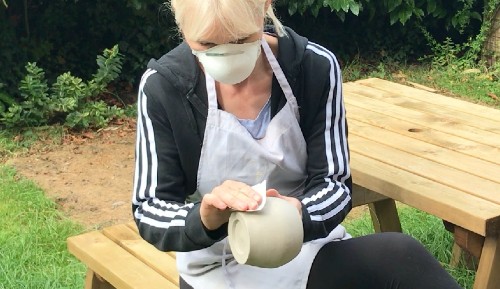
Wear a respirator that is designed to filter out small airborne particles.
When you have finished sanding your piece, don’t take off the respirator and blow the dust off the surface. Instead, brush off the dust with a soft cloth or mop brush.
Sanding Bisqueware Pottery
There are a few reasons why you might want to sand bisqueware.
- You may notice sharp edges and rough patches that you missed before it went into the kiln.
- Pottery may come out of a bisque fire feeling rougher than it did before it went in. This is normally the case for clay that contains grog or sand. The reason for this is that grog is clay that has already been fired and ground up into granules.
Grog has already gone through the shrinking and densification process. The raw unfired clay that the grog sits in dries and shrinks as it’s fired. By contrast, the grog stays as it is, and creates a rough texture on the pottery surface. - If you are using stoneware or porcelain bisque fired pottery is still porous and softer than glaze-fired pottery. It is easier to sand pottery that is bisque fired rather than waiting until it is glaze fired.
- Sharp edges and rough uneven patches in the clay won’t be concealed by glaze. Instead, the glaze will often draw attention to blemishes. If you are using a breaking glaze, it will break over the blemish, and highlight it.
Either way, shiny surfaces tend to accentuate bumps, undulations, and changes in texture. These details might be an intentional design feature. But if they are not, it’s best to get rid of them when the clay is bisqueware or earlier.
Earthenware or stoneware bisque is more likely to need sanding than porcelain or clay with a high porcelain content. This is because porcelain clay particles are more refined.
Also, if porcelain does contain grog, it’s normally a very fine grog. As such, sanding porcelain bisqueware is normally just a matter of smoothing off sharp edges.
How to Sand Bisqueware
After you have bisque fired your pottery, it’s a good idea to run your hand over it carefully. This will help you feel any rough or sharp spots that need sanding.
Unlike greenware, bisqueware is ceramic, and will not dissolve in water. For that reason, you can get bisqueware wet when you are sanding it. This helps keep airborne dust made during sanding to a minimum. It’s therefore generally recommended that you use wet/dry sandpaper to sand bisque.
Nevertheless, wet sanding bisqueware doesn’t eliminate dust completely. So, it’s still a good idea when sanding bisque pottery to do it outside and wear a respirator.
There are different ways to actually wet sand. Some potters run their pottery under a tap, wet the sandpaper, and then sand. Others dunk the pot and paper briefly in a bucket of water, and sand.
Personally, I use a bucket of water. But rather than dunking the pot, I wet the sandpaper. Then I sand the dry bisque using the wet sandpaper. I prefer not to get the bisque completely wet if I can avoid it.
Cleaning your Bisque After Sanding
You can experiment with what works for you and the clay you are using. Whichever method you choose, after you have sanded, you will need to clean the pot surface.
Wet sanding will create a paste on the surface of the pot that needs to be removed before firing. Loose bisque particles on the pot surface will cause problems when you are glazing.
For example, dust and bisque particles can prevent glaze from bonding to the pot surface. You can end up with bare patches on your pottery, where the glaze has crawled away from dust and particles. This is known as crawling.
You can clean up the sludgy paste with a wet sponge. Or you can run your pottery under the tap or dunk it in water and remove the loose bisque.
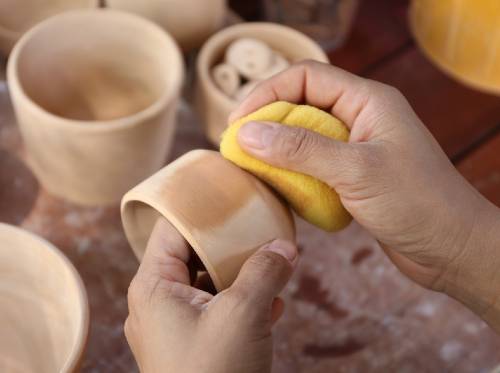
Bisque is absorbent, so if you completely submerge the bisque it can take a day or so to dry out. Whichever way you remove the debris, let the pots dry out before you apply your glaze.
If your bisque is waterlogged, the glaze won’t adhere as well to the pot on application. As a result, you may not get the kind of glaze coverage you were hoping for.
What to Use When Sanding Bisqueware Pottery?
If you don’t have much sanding to do, then you can use regular wet/dry sandpaper. This is the sandpaper that is used for sanding building and DIY materials. Most potters will sand stoneware bisque with wet/dry sandpaper that is 180-220 grit.
The most common types of sandpaper available are aluminum oxide and silicon carbide sandpaper. Aluminum oxide sandpaper is tough, but silicon carbide sandpaper is a finer abrasive (source). As such it’s a good choice for getting a smooth finish on a refined surface like pottery.
Whilst porcelain is a hard ceramic, its surface is also less textured than stoneware. As a result, it’s easier to ruin a piece of porcelain by scratching an otherwise smooth surface with sandpaper.
Some potters use 220 grit sandpaper on porcelain. However, you might be advised to start off with a 320 grit and see how you get on. If you find that the 320 isn’t quite strong enough, you can try something grittier. But, when sanding it’s best to proceed with caution.
Other Materials for Sanding
Sandpaper is the obvious choice for sanding. However, sandpaper is just that. It is sand that has been stuck to a reinforced paper backing.
Whilst sandpaper might sand down bisqueware for a while, it won’t last very long. This is because its construction is quite flimsy compared to the ceramic that it’s sanding.
Sandpaper might be okay for smaller areas or lighter sanding. However, if you want to sand a lot of bisqueware, then you might be better using a sanding screen.
Sanding Screens
A sanding screen is made from mesh, and it has abrasive particles attached to the surface. Sanding screens are often used for sanding drywall because the dust passes through the holes in the mesh.
As a result, the screens last longer than sandpaper. The same is true when sanding ceramics. Screens last longer because the mesh is tougher, and the dust falls away rather than accumulating as you rub.
Another advantage of using a sanding screen is that, although they are tough, they are less aggressive than sandpaper. This is because there are fewer abrasive particles on the mesh surface area.
Like sandpaper, you can get sanding screens with different grit sizes. When sanding larger amounts of bisque, you can start off with a sanding screen. The sanding screen will do the bulk of the work.
Then you can finish off the sanding process with a finer grit sandpaper. Perhaps something like a 320 sandpaper.
Diamond pads
Another alternative is diamond pads. These can be bought as circular pads to attach to power tools. But you can also buy handheld diamond pads that are very handy for smoothing out edges of ceramics. They can be used wet or dry and they are specifically designed for sanding glass, ceramics, and porcelain.
Sanding Glazed Pottery
Here are some of the reasons that you might want to sand glazed pottery.
- After the glaze fire, you notice that the foot or base of the pot is a little rough. It’s important that functional ware, like mugs, bowls, and plates are smooth so they don’t scratch table surfaces.
- You applied too much glaze and it dripped onto the foot of the pot during the glaze fire.
- You may want to reglaze your pottery
Smoothing the Base of Your Glazed Pots
As with sanding bisque, wet sanding will give you a smoother more polished surface. It also helps you avoid silica dust from glaze as well as clay being kicked up into the air.
- If you have just a few pieces to sand, you can hold your sandpaper in your hand and sand away.
- To make life a little easier, you can tape some sanding paper or screen to your worktable. Then you can move the foot of the pot back and forward on the paper until it’s smooth.
- Use Velcro to attach a sanding disc to a wheel bat. Then put the bat on the wheel and rotate the wheel head. You can then hold the foot of the pot on the sanding disc as it rotates. You can wet sand by squeezing some water from a sponge over the sanding disc as it rotates.
- Diamond Core makes a range of sanding discs designed to be used in a similar way on the wheelhead.
- If you’re sanding down a lot of bases another efficient way to do this is to use a wet air grinder. Jeff Campana describes an innovative way of mounting a grinder on a wooden jig over a sink.
When the grinder is securely mounted you hold the base of your pot up against the grinder head. This grinder is designed so that water flows as the head rotates. - The reason this is so efficient is that the grinder head rotates at 55000 rpm. By contrast, a wheelhead rotates at around 200 rpm. So, if you’re smoothing large numbers of pots, the wet air grinder will be less effort and take less time.
John Britt has made a good video demonstrating the wet air grinder setup.
Grinding off Drippy Glaze
If your glaze has dripped during the glaze fire, you can grind the drips off in the following ways.
Using a bench grinder. These are simple inexpensive electrical power tools. The bench grinder has rotating disks on either end. You can attach disks with different levels of grit. If you hold the glaze drips up against the rotating disk, it will grind the glaze off.
The disadvantage of using a bench grinder is that it is a dry method of grinding. So, there it does pose the problem of creating glaze dust. One solution is to use a wire wheel. This generates less dust than a grinding pad.
However, it does not eliminate the dust risk completely. As such, it’s important to wear a respirator when you use a bench grinder. Goggles are also essential to avoid damaging your eyes if pieces of glaze spin off the rotating disk.
Another option is to use a Dremel tool. These are smaller pen-like tools that can offer you a bit more control when grinding off smaller drips. You can attach different-sized bits to the Dremel tool, with different levels of abrasion.
Sanding Your Glazed Pottery for Reglazing
If you are not happy with the finish of your glaze, you can reglaze your pottery. This basically involves applying another layer of glaze to the pot and refiring.
Glaze adheres to bisqueware because the bisque is porous and absorbs the water from the clay. This is not the case with glazed pottery. A glazed surface is not porous.
Therefore, if you are reglazing pottery, you need to find ways to make the glaze stick to the non-porous surface. One way to do this is to sand the existing surface a little. This creates a rough texture that the new layer of glaze can key into.
Final Thoughts
Although sanding pottery is a bit controversial, it is also very useful. Pottery can be sanded at almost any stage. You just need to adapt your sanding approach to suit the stage that your pottery is at. The key tip is to proceed with caution. Once you have sanded your ceramics you can’t un-sand them. So, test your surface first with finer grades. You can always increase the grit of your sandpaper if you need to. The second key tip is to keep yourself safe. Always wear a respirator, and if you are using a grinder of any kind wear goggles.

