One of the best ways to make slab pottery look well-crafted is to start off using a nice evenly rolled slab of clay. There are a number of ways to make a clay slab. In this article, I will look at 4 of the easiest techniques, and go into exactly how to roll clay evenly.
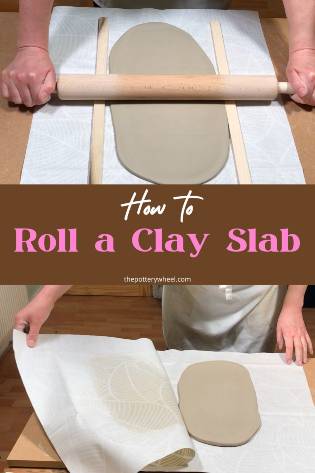
4 Different Ways to Make a Clay Slab
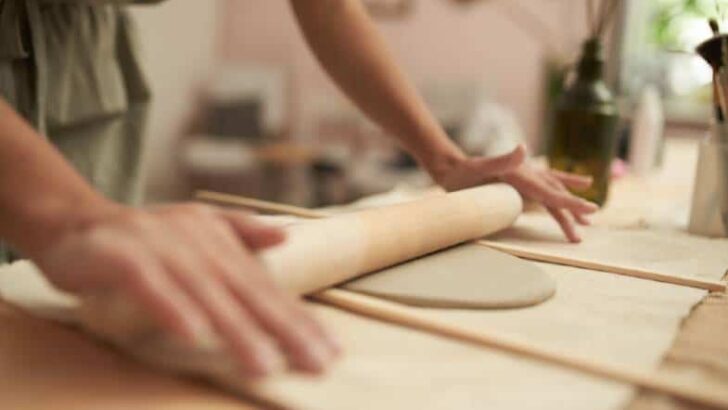
Making a slab of clay is pretty simple and the basis of all good slab pottery. But whilst it’s simple, there is a knack for rolling clay evenly. Let’s start off by looking at how to make a clay slab with a rolling pin.
Method 1 – The Rolling Pin
Here are some of the tools you will need to make a slab of clay with a rolling pin:
You Will Need:
- A non-stick surface, ideally a piece of fabric like a sheet of canvas
- Rolling pin
- Roller guides / rolling sticks
- Rubber rib/kidney
Don’t worry if you haven’t bought these items from a pottery supplier. You can make do with substitutes from your home. I will go over what you can use instead in the description below, so read on…
How to Roll an Even Clay Slab with a Rolling Pin
The first thing to do is to prepare your rolling surface.
Step 1: Choosing a Surface to Roll onto
If you roll a clay slab onto a hard shiny surface like plastic or polished wood, the slab will stick to the worktop. This will make it impossible for you to lift the slab up once it’s been rolled out. And you will have to scrape it off and start again.
Whatever surface you roll onto, it will need to be a bit porous and not entirely polished.
The best surface to roll onto is a section of fabric. This is because the fabric is just a little absorbent, and will draw some of the moisture from the clay. As a result, you will be able to lift the slab away from the fabric quite easily. You can also peel the fabric away from the clay if you need to.
Fabric Options
Here are some suggestions for fabric that you might use:
- A section of an old bedsheet or table cloth. Whatever fabric you choose, select one that has minimal texture or weave. If you use a very textured material, this will get picked up by the clay as you are rolling. So, a nice, smooth fabric is a good idea.
- A sheet of canvas. You can buy canvas from a pottery supplier that is intended specifically for rolling clay slabs. However, you can also buy good clay rolling canvas elsewhere, like this canvas here.
- Stretching a piece of canvas over a piece of hardboard. If you roll your slab onto a piece of loose fabric, you might find the material goes baggy and wrinkly as you roll. This is because the fabric absorbs water from the clay and swells up a little.
These wrinkles can be a bit of a pest because you can get folds of material under your slab. If you roll the clay on the folds of fabric, you get an impression of the fold in your slab.
The best way to avoid this is to stretch the fabric over a piece of smooth wooden board. Pin the fabric to the underside of the board using a staple gun. Then put some masking tape over the staples to prevent them from scratching your work table. - Another great option for rolling clay evenly is to roll it onto a piece of fabric-backed vinyl table cloth. This is a good option because the vinyl table cloth does not absorb too much moisture from the clay. However, the cotton backing on the underside of the cloth stops the slab from sticking to it.

For more ideas on the best surface for rolling clay, read my article on exactly that topic here.
Step 2: Deciding What Shape You Want Your Slab to Be
Depending on what you are making, you will want your clay slab to be a particular shape. For example, if you are making a plate, then ideally you want your slab to be large and round.
Or if you are making a mug out of a rectangular slab, it’s best if you roll your slab into a roughly rectangular shape.
Before I start rolling the clay, I think about what shape I want the final slab to be. Then I shape the clay a little so that I know it will stretch into that shape once it’s rolled out.
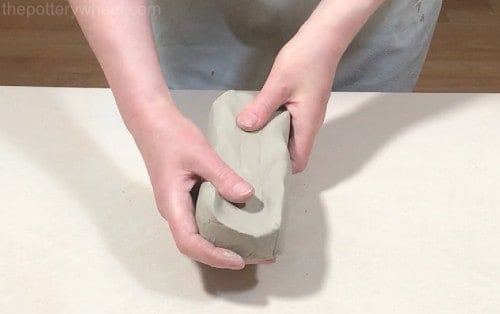
If I am making a plate, I will compress the clay with my hands into a circular disc. Or if I’m using a rectangular template for a mug, I will pat the clay into a rectangle.
If I was to take a hunk of clay and start rolling, the final slab is likely to be a random shape. With a random shape, there is no guarantee that my template will fit onto the slab. And it’s likely that I will have lots of clay off cuts from the slab.
Off cuts are fine because they can be wedged again and re-used. But, creating a lot of off-cuts is just creating extra work for yourself. It’s best to just roll a clay slab into the right sort of shape in the first instance.
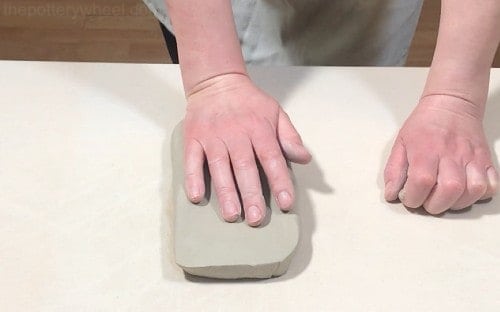
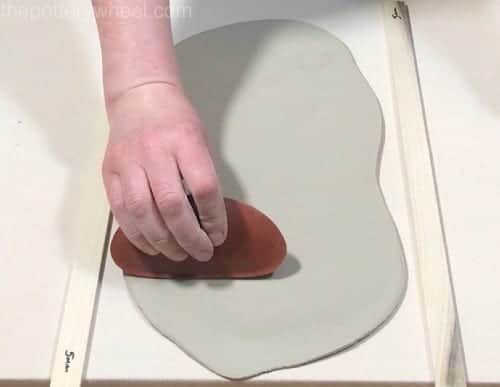
Step 3: Flattening the Clay
Before I start rolling the clay, I flatten it down a little with the heel of my hand. This compresses the clay, thinning it out a little and making the job of rolling a little easier.
If you are starting off with a large block of clay, you can also flatten it down by beating the clay with your rolling pin. This will flatten the clay out a bit and make it easier to roll.
Rolling a big block of clay is hard work. Make it easier on yourself by compressing it down and getting rid of some bulk before you start rolling.
Step 4: Choosing the Thickness of the Slab
At this point, you can simply start rolling the clay with your rolling pin. However, it can be hard to roll clay evenly. If you want to create a slab with a nice even thickness, it’s best to use roller guides.
Roller guides stop you from rolling out your clay too thin. And prevent you from rolling one section of the clay thinner than another.
You can use different types of roller guides. Some guides fit over the end of your rolling pin. These can work well if you are making smaller slabs of clay.
However, they are often made from rubber and are a bit bendy. I find that they can bend a bit when I’m rolling and can be a little awkward to use.
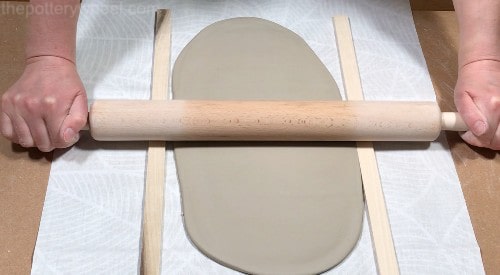
My preference is to use wooden rolling sticks. These are wooden guides that you put on either side of your clay when you are rolling.
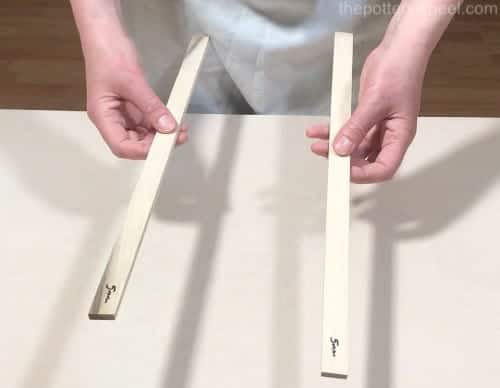
As you roll, the rolling pin will eventually start to make contact with the rolling sticks on either side. This will let you know that you have rolled your slab at an even thickness. And the sticks will stop you from rolling your clay too thin.
You can buy rolling stick guides from a pottery supplier. And you can buy a range of different thicknesses depending on how thick you want your slabs to be.
Alternatively, you can use strips of balsa wood. Or you can buy some wooden beading from a local hardware store and cut it to length. Another option is to cut an old wooden yardstick in two.
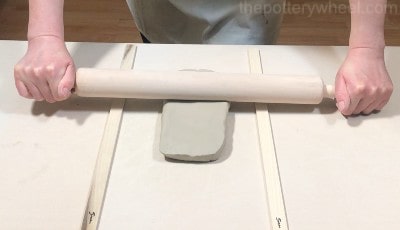
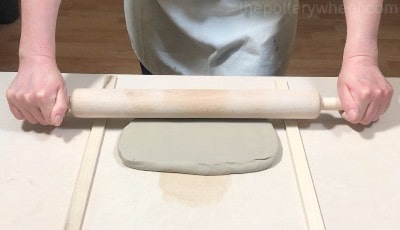
Step 5: Rolling a Clay Slab
Roll the slab in one direction a few times. Then pick the clay up and turn it around so that you change its orientation on your worktop. When you change the position of the clay and start rolling again, you are stretching the clay in a different direction.
Lifting and turning the clay is important for a couple of reasons. They are:
- By lifting the clay, you avoid it sticking to your rolling surface.
- When you roll a clay slab, the clay is stretched a lot, which puts the clay particles under some stress. By changing the orientation of the clay, you make sure that it isn’t stretched too much in one direction.
It’s also a good idea to flip the slab over now and again, so you roll the slab on both sides.
This is easy to do when the slab is quite small and the clay is thick. But as the slab gets bigger and thinner, it can be harder to lift the slab without stretching the clay too much.
This leads me to step 6, which flip your clay slab over.
Step 6: Lifting and Turning a Clay Slab
If you are rolling a large slab, it’s best to roll it on a loose piece of canvas or fabric. Then when you want to flip it over, place another piece of fabric on top of the slab.
Slide one hand underneath the lower piece of fabric and place your other hand on the top piece of fabric. Then lift the slab up, sandwiched between the two pieces of canvas. Flip your hands over and place the slab back down on your work surface.
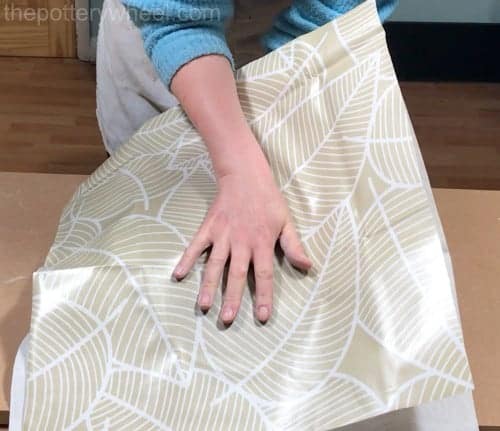
Then peel the top piece of canvas away so you can continue rolling out the slab.

2 Extra Tips on Rolling Your Slab
Here are a couple of extra pointers when rolling soggy or different colored clays…
Tip on Rolling Soggy Clay
If your clay is a bit soggy and might stick to your rolling pin. This then creates a texture on the rolling pin which will transfer itself onto your clay slab.
However, there is a way to make a clay slab even if your clay is a bit too wet and sticky. Simply sandwich your clay between two pieces of canvas. Then, roll your clay out between the sheets of material.
Tip on Rolling Different Types and Colors of Clay
It can be a good idea to have different rolling pins, and different sheets of canvas to roll different clay bodies.
You can get red streaks and flecks in your white or buff clay if your rolling pin still has traces of lovely rich red terracotta clay on it.
Apart from spoiling the overall look of your slab, this cross-contamination can cause problems when you fire your clay. Different types of clay don’t always mix well together.
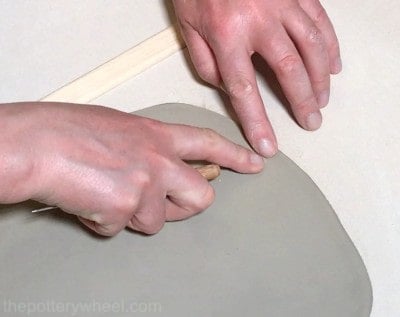
Step 7: Compressing the Clay
After you have rolled your clay slab out to the size, it’s important to compress the clay. Take a rib tool (or an old bank card) and run this over the surface of the slab.
This will remove any texture that has been created on the clay by your worktop. And it will also help to align the clay particles and make the clay slab stronger.
Once you have compressed one side, turn the clay slab over and compress the other side too.
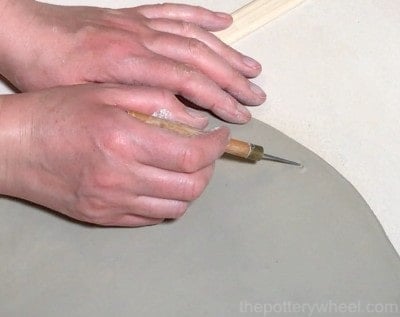
A Word About Air Bubbles
You may notice air bubbles on the surface of your clay. Even if you wedge your clay well, you can still sometimes get small pockets of air in the clay. These will show up as little air bubbles or blisters on your slab.
To get rid of air bubbles on your clay slab, pierce the clay blister with a needle tool. Then gently squeeze the air out of the bubble with your fingers and smooth the clay over with your rib tool.
You can watch my video on this process here if you’d like.

Method 2: Slicing a Clay Slab
An alternative to rolling a slab of clay is to slice it. There are various different techniques for slicing clay. And you can buy or make a variety of gadgets for slicing.
I find the simplest way of slicing clay is to use what’s called a ‘bow harp’. Bow harps are most often made from metal. I imagine they get their name because they are shaped like a bow from a bow and arrow. And they have a piece of wire strung across the two ends like a harp string.
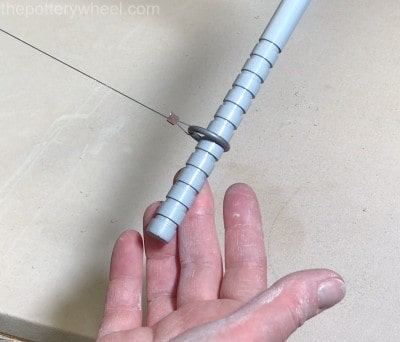
There are notches on the two sides of the bow, so you can change the position of the wire.
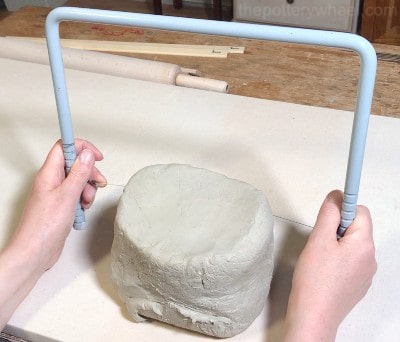
Using a Bow Harp to Make Clay Slabs
- I wedge my block of clay into the shape that I want my slabs to be, for example, circular or rectangular.
- Position the clay on the worktop in front of me.
- Adjust the wire on the bow harp so that the wire is at the ‘highest’ setting.
- Place the harp behind the clay block so that both feet of the harp are resting on the table.
- Draw the harp towards me slicing through the clay.
- Adjust the position of the wire by moving it down a notch.
- Repeat the process, pulling the wire through the clay and slicing the block again at a slightly lower position than before.
- I repeat this process until I’ve sliced the block through several times at each position on the bow harp.
At the end of this process, the block of clay has been sliced into several slabs. These can then be peeled away from the block.
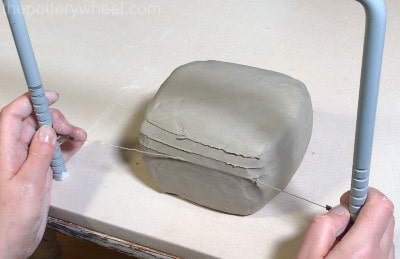

You can either use these clay slabs as they are. Or if you want the slab to be thinner than the notch on the bow harp, you can roll the slab a little more to thin it out. Either way, this is a very time-efficient way to make a selection of clay slabs.

Different Styles of Bow Harp
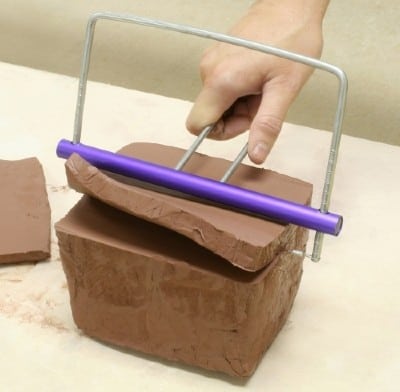
There are other types of bow harps, sometimes called ‘clay slicers’. These have a bar above the wire that moves up and down the length of the slicer. The bar is designed to rest on the top of the clay as you slice the block.
Amaco Clay Slicer – View on Blick
You can move the bar up and down the slicer to change the distance between the bar and the wire. That way you can adjust the thickness of the clay slab you slice.
Method 3: Using a Slab Roller
If you want to roll bigger slabs of clay, then a slab roller is a good way to do this. A slab roller is a fairly large piece of pottery equipment, and they are also quite expensive.
Because they take up a lot of space, slab rollers are mainly used in schools, colleges, and by production potters who are making large amounts of slab pottery.
However, you can buy smaller-scale table-top slab rollers, such as the Minimight Table Top Roller
by Bailey.
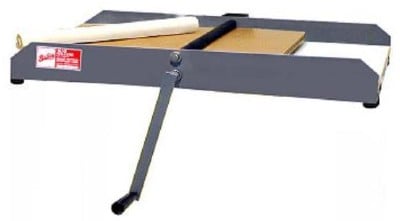
Bailey Minimight Slab Roller – View on Blick
As the name suggests, these are smaller and are designed to be used on a tabletop.
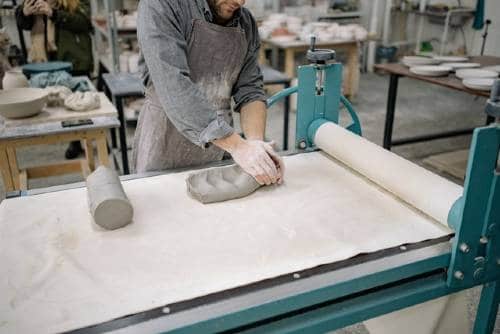
How Does a Slab Roller Make Slabs?
A slab roller has two long rollers that you feed your clay through. This flattens the clay out into a nice even slab.
You can change the distance between the two rollers to adjust the thickness of the slab it creates.
This is how a slab roller works…
- Thin out your piece of clay a little. You can do this with the heel of your hand or pound it with a rolling pin. It’s important to flatten the clay a bit, as a large chunk of clay will not pass through the slab roller.
- Also, flatten the edge of the clay that is going to be the first section of clay that is fed through the rollers. Giving the clay a thin wedge-shaped edge will help it feed through the rollers and for the rollers to gain traction.
- The clay is sandwiched between two sheets of canvas.
- Adjust the distance between the two rollers.
- Then turn the handle and feed the canvas and clay through the rollers.
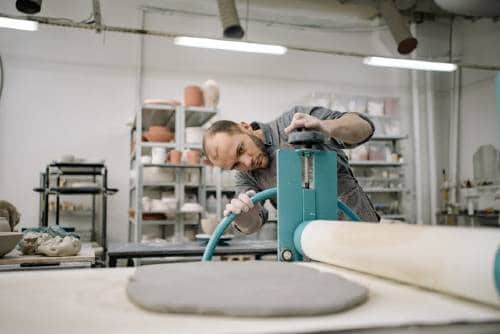
Once the clay has passed through the rollers it will have been compressed into a nice even slab of clay.
Usually, you will need to pass the clay through the slab roller a few times. Each time you can adjust the distance between the two rollers to make a thinner slab.
Method 4: Throwing Out a Slab of Clay
This final way to make a clay slab doesn’t involve any equipment or pottery gadgets at all. It simply involves a bit of physical coordination.
Slice off a section of clay from your clay block. Hold one edge of the thick clay slab with both hands gently but firmly between your fingers and thumbs. With a sweeping action bring the clay slab down through the air and drop the clay.
You can do this on a worktop or on the floor, depending on what feels most comfortable to you. If you are throwing the clay at the ground, make sure that your floor is clean.
Whether you throw the clay on a worktop or the ground, the surface needs to be smooth but porous. A porous surface like a canvas stretched on board is important to stop the clay from sticking.
The idea is that the clay hits the surface at an angle. And as it hits the surface it stretches out into a thinner slab.
Pick the slab up again and repeat the process until the clay has stretched out to the thickness that you want it to be.
I really like this demonstration by Sae-Won Lee.

Final Thoughts
It’s amazing that there are so many different ways to make the humble slab. My preference is to make a clay slab with a rolling pin. But I’d suggest that you experiment with the above ways to roll clay evenly and see which one works best for you. If I ever get the space or finances to own my own slab roller, I’ll let you know!


