Your cart is currently empty!
Can You Put Wet Clay in The Kiln? – Avoid it Exploding!
Published:
Last Updated:

Affiliate Disclaimer
As an affiliate, we may earn a commission from qualifying purchases. We get commissions for purchases made through links on this website from Amazon and other third parties.
It can be daunting learning how to fire pottery. There are lots of factors to think about. And you may have found yourself wondering if you can put wet clay in the kiln. Or perhaps you are in a hurry, and you want to fire your pottery in time for a deadline. Potters do sometimes put clay in the kiln that is a little damp. But how safe is it and will it damage your pottery or the kiln?
You can put slightly wet pottery in a kiln, provided you set it at a low heat for several hours. This is called candling and is a way of pre-heating the kiln before firing. Candling dries the clay out completely before the firing schedule starts, and prevents pottery exploding.
A firing schedule refers to the temperatures a kiln reaches as it heats up. It is also the length of time it takes to reach those temperatures. When the schedule starts, the temperature of the kiln will start to climb steadily. Before the schedule starts the clay needs to be bone dry.
You may be wondering why candling stops pottery from exploding in the kiln. The reason for this is that moisture in your clay will likely cause your pottery to crack or explode. And candling is used to get rid of any residual moisture.

Why Does Wet Clay Explode in the Kiln?
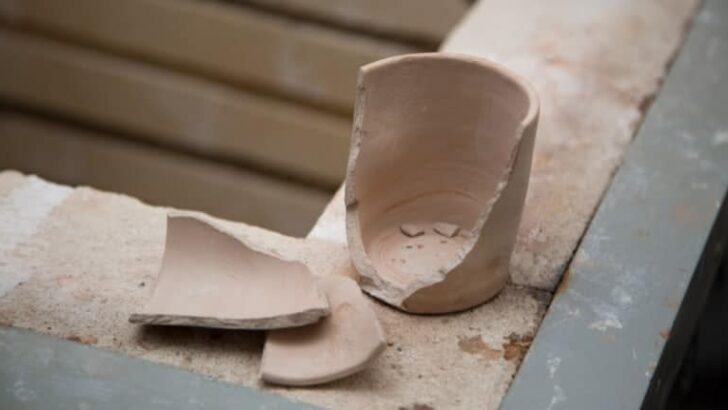
As clay heats up the kiln, any moisture in the clay evaporates and expands rapidly. If there are small air pockets in the clay, the expanding steam goes into the gaps. This puts stress on the clay and can cause it to break or sometimes explode.
It’s therefore considered best practice to let your pottery dry as much as possible before bisque firing. Often potters will leave their pottery to air dry for up to 7 days before firing.
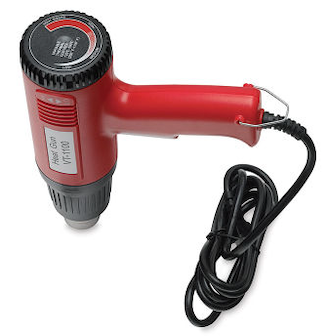
It’s best to let your pottery dry slowly and naturally. Potters use different ways of speeding up the drying process, such as hot air guns.
These look a bit like hair dryers and can be used to dry your pottery more quickly

Hot Air Gun For Pottery – View on Blick
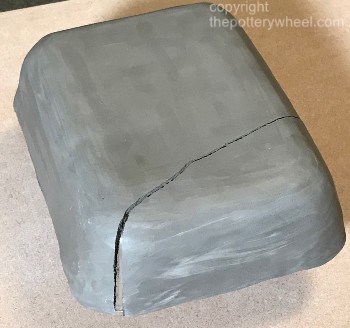
However, speeding up the drying process can cause your pottery to dry unevenly. If one part of your pot gets a lot drier than another, it puts the clay under stress. This can cause cracks as the clay dries out. So, letting it dry naturally is preferable.

But even if your pottery looks and feels bone dry, it will still contain a little moisture. Let’s have a closer look at why this is and whether it’s a problem…
Why Does Wet Clay Explode in the Kiln?
Clay contains a lot of water when it’s in its plastic workable state. In fact, water makes up at least 25% of the weight of wet clay (source).
Water in clay is usually divided into two categories. Free water and chemically bonded water. Free water is the liquid that sits between the clay particles. Chemically bonded water is water that has become part of the clay particle itself.
When you are drying your clay in the atmosphere, the water that it loses is free water. However, even in an arid environment, there is normally some free water nestled in clay that feels bone dry.
This residual moisture only leaves the clay once the clay is in the kiln. Part of the function of the first part of the firing schedule is to drive out residual free water. This is why the first part of the firing schedule is slow and steady.
As it is heated in the kiln, the residual water turns to steam and evaporates from the clay. However, if it is heated too fast, it may turn to steam while still trapped in the clay. This is what can cause the pottery to explode.
Water turns to steam at the boiling point of water, which is 212F (or 100C). So, the first part of the firing schedule needs to stay below 212F until the free water has left the clay.
If the clay feels bone dry, then the amount of free water is minimal. And it will have evaporated before the kiln reaches 212F. However, if you put wet clay in the kiln, there will likely be insufficient time for the water to evaporate.
Water that hasn’t had a chance to escape before 212F will expand as steam. And this will cause problems with your pottery.
Is it Ever Safe to Put Wet Clay in the Kiln?
Clay goes through different stages as it dries out. It starts off in its workable soft wet state. Then as it dries it becomes leather hard. Leather hard clay is still damp, but it has dried out enough to become hard. As it dries out further it eventually becomes bone dry.
It’s never a good idea to put wet or leather hard clay in the kiln. Even if you do pre-heat the kiln before firing, there will be too much moisture in the clay.
Also, if you try to speed dry wet clay, it will most likely crack. Water that is deeper in thicker parts of the clay will take longer to reach the surface of the pottery. So, certain parts of the clay will dry out faster, and this can cause cracks.
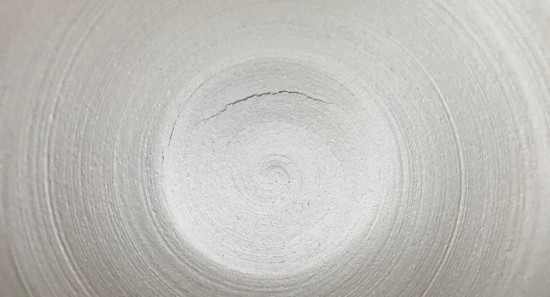
Some cracks may look like fine hairline cracks when the clay is bone dry. However, these can open up further or break completely when the clay is fired.

There is a point that clay reaches just before it’s bone dry. It’s not quite bone-dry, and you may be able to see slightly darker patches on the pottery. This is the wettest you want the clay to be before you put it in the kiln on a pre-heat.
In an ideal world, you should wait until the clay is bone dry before putting it in the kiln. However, if it is not quite bone dry, you can get away with putting it in, provided you candle. So, let’s have a look at candling…
Candling
Candling is the next best alternative to atmospheric drying. Its major benefit is that it saves time. You can speed up the drying process by slowly heating the clay in the kiln at a controlled temperature. This is known as candling. Ideally, candling gives the mechanically-bound water a chance to evaporate from the mix.
If you are located in a humid environment, candling might just be your best drying method. Your clay will only ever become as dry as the atmosphere allows it to be. So, if your air is damp, your clay is likely to be a bit damp too.
Candling is best at a temperature below the boiling point of water (212° F). Basically, the kiln is heated up to a low temperature and held at that temperature for a period of time.
You can let your pieces sit in the kiln for about 3 to 5 hours at 73 – 88° C or 185 – 200° F before starting a bisque firing. Some potters candle for up to 24 hours, at lower temperatures.
A common practice is to candle overnight. However, leaving your kiln unattended, even whilst it is just candling, is an area of debate. Some potters are adamant that leaving a kiln unattended is bad practice. Others, candle overnight as a matter of course.
If you want to read more about leaving a kiln unattended, check out this article.
How to Know When to Stop Candling
To monitor how much moisture is left in your pottery as it candles, you can try the following tip.
Open one of the peepholes on the kiln, and hold a mirror just above the opening. If the mirror fogs up, it means that the water is still evaporating from the clay.
If this is the case, continue candling and check with the mirror every 2 to 3 hours. Once the mirror does not fog up, the pottery is ready to be fired.
Some potters choose not to check with a mirror. The reason that there may be some pottery buried at the bottom of the kiln that is still damp. If it is buried deep enough, the moisture will not reach the peep hole. For this reason, some potters simply choose to candle overnight and have done with it.
Other Ways to Avoid Putting Wet Clay in The Kiln
Without a doubt, it is best practice to avoid putting wet clay in the kiln. Other ways to help avoid explosions in your kiln include:
- Don’t make your pottery walls too thick. The thicker the walls of the pottery, the more likely there will be residual moisture at deeper levels. Also, it takes longer for the water to migrate to the surface in the kiln.
- Try to make your walls an even thickness. If parts of your pottery are much thicker than others, the thinner areas will dry out quicker.
This can put stress on the clay and it is more likely to crack when it dries. If you do have thinner areas like handles, wrap them in plastic as the pottery dries. This will slow the rate at which they dry down so that your piece will dry more evenly. - Make a hole in the clay for steam to escape. If you make a piece with an enclosed section that contains trapped air, make a few discrete holes in it. If moisture evaporates and expands into the enclosed section, it can escape through the hole.
You can do this with a needle tool or a sharp modeling tool. It can be inconspicuous, but it does need to be sufficient to let steam out.
Final Thoughts
Putting wet clay in the kiln is not advisable if you want to avoid explosions and breakage. However, you can get away pottery in the kiln when it’s a little damp if you candle for a long time. But, ideally, it’s best to leave it long enough so that it’s bone dry.


