Your cart is currently empty!
3 Ways To Fix Cracks in Bone Dry Clay – They Really Work
Published:
Last Updated:
Affiliate Disclaimer
As an affiliate, we may earn a commission from qualifying purchases. We get commissions for purchases made through links on this website from Amazon and other third parties.
If your pottery has cracked whilst it is drying, don’t worry, all is not lost. Here are 3 things you can do to fix cracks in bone dry clay.
Table of Contents
show
Why is Fixing Cracks in Bone Dry Clay a Challenge?
Fixing cracks in bone dry clay is a challenge because the clay is so dry. If you simply add a patch of fresh clay or slip into the crack, the dry clay will draw all the moisture from the new clay. As a result, the new clay will also crack and flake off.
Sometimes you are better off scrapping your project and starting again. However, if you have spent a long time making something, and you don’t want to start over, there are some effective ways to fix cracks in bone dry clay.
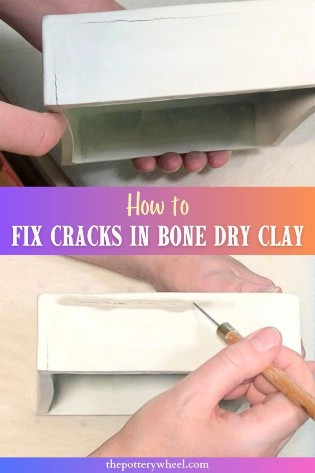
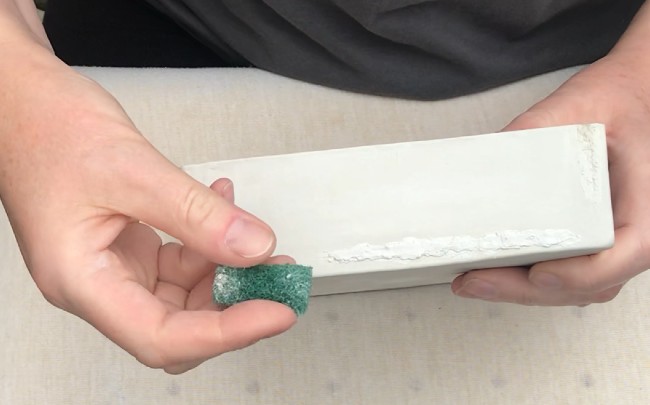
The picture below is the bone dry lid of a slab built ceramic box. There are two cracks in the lid. One crack is along the top edge and the other is in the corner. In this article, I’m going to show you how I fixed both cracks using slightly different techniques. Both methods worked well.
Fixing Cracks in Bone Dry Clay
This is the method that I used to fix the crack that ran along the top edge of the lid in the picture below.

Method 1 – Vinegar and Paper Clay Slip
For this first method you will need:
- White vinegar
- Paper clay slip (instructions on how to make this are below)
- Small soft paintbrush
- A sharp pottery tool, like a needle tool, or fine metal sculpting tool
- A fine wooden pottery tool
Step 1) Adding Moisture
The first thing is that you may need to open up the crack a bit more. This may feel like a nerve-wracking thing to do, but you have to be able to get into the crack to repair it.
Dip your soft paintbrush into white vinegar and dab the crack with the brush. Allow the vinegar to run into the crack.
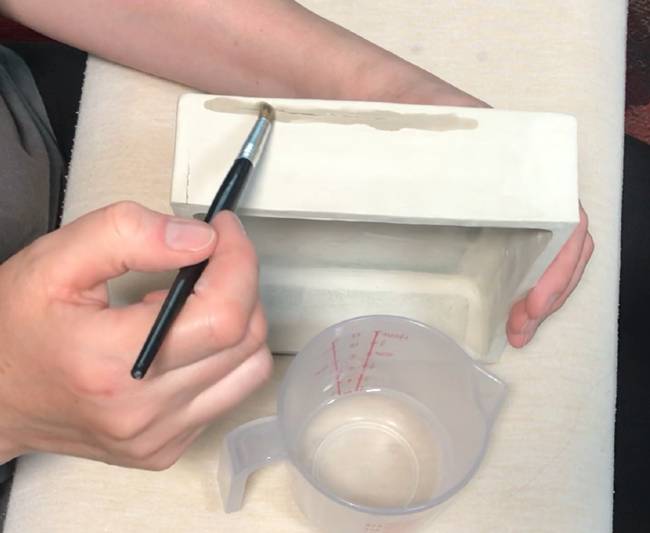
You don’t want to make the clay very mushy, so don’t drench the clay in vinegar. But you need to add enough so that the clay becomes moistened. I add a few drops and monitor how wet the clay is becoming.
It’s better to use vinegar rather than water because vinegar makes the clay particles stick together. Vinegar is a flocculant, which means that it causes the clay particles to attract rather than repel one another. The vinegar helps to make the moistened clay sticky.
Step 2) Preparing the Crack
Once the clay around the crack is moistened, take your needle tool or a sharp modeling tool and scratch it.
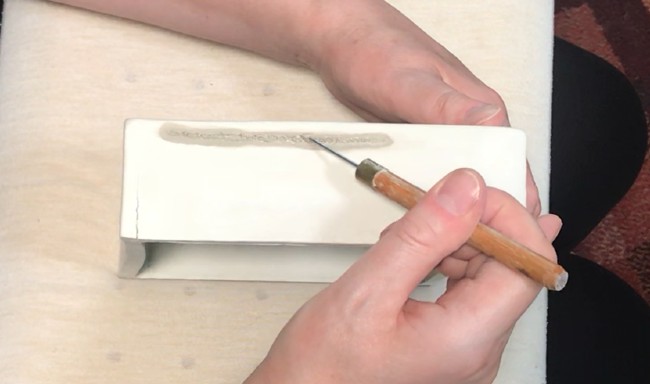
This will do a couple of things. Firstly, it will open the crack up a little, which will enable you to fill the gap more effectively later. Secondly, it will create a rough textured surface on the clay.
You might find that the clay starts to dry out as you scratch at it. If this happens, add a little bit more vinegar and continue to score up the surface.
Step 3) Filling the Gap
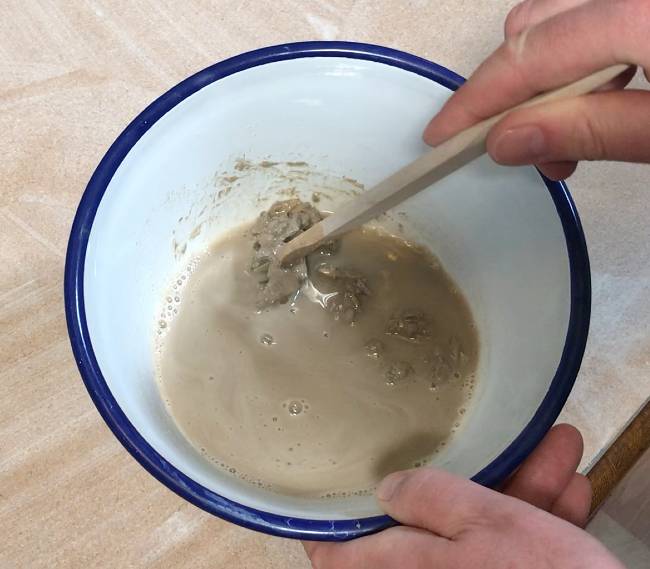
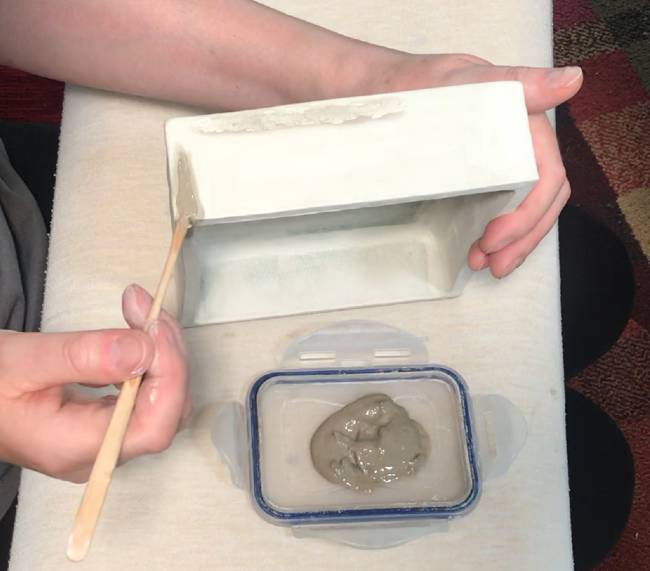
This next step is when you start to fill in the gap with paper clay slip. Paper clay slip is basically slip that has been mixed up with paper fibers. Making paper clay slip is very easy, and here is the method that I use…
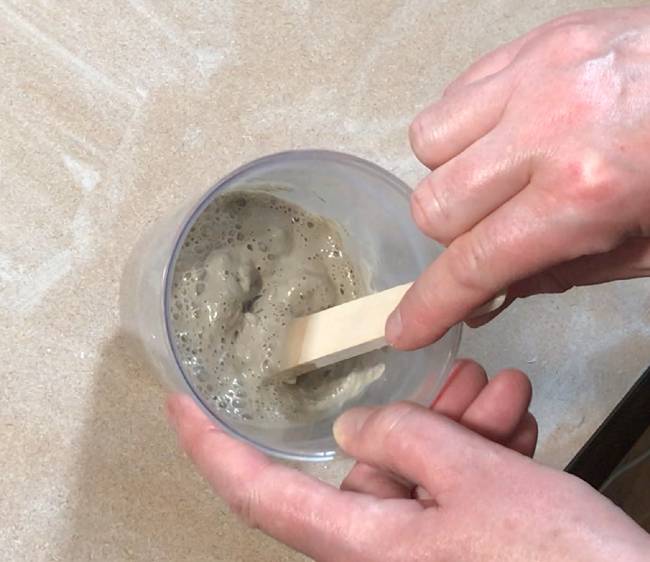
Making paper clay slip
There are various different recipes for making paper clay slip. But the one that I like the most is the one by Martha Grover. This is the one she recommends…
- Put about a cup (8 fluid ounces) of white vinegar into a container
- Tear up a few sheets of toilet paper and put it into the vinegar. I use 4 sheets of 2-ply paper
- Whizz the vinegar and tissue with a stick blender to make a pulpy mixture

- Add some crushed bone dry clay to the mixture (use the same clay as the piece that you want to fix)
- Stir the crushed dry clay into the mixture. I like to make paper slip with the consistency of chocolate mousse.
- Allow the slip to sit overnight
- You can add a couple of drops of bleach to the slip to prevent mold from forming in the slip
- Once the clay has broken down into the vinegar, transfer it into a container with a lid on it for storage
This slip works well when fixing cracks for a couple of reasons. Firstly, the vinegar and clay mix is very sticky. Secondly, the paper fibers prevent the slip from shrinking too much as it dries. This gives the slip some internal strength and makes the mended patch strong.
Fixing the Crack
Load some paper clay slip onto your wooden pottery tool, and press it into the gap. Exactly how much paper clay slip you need will depend on the size of the crack.
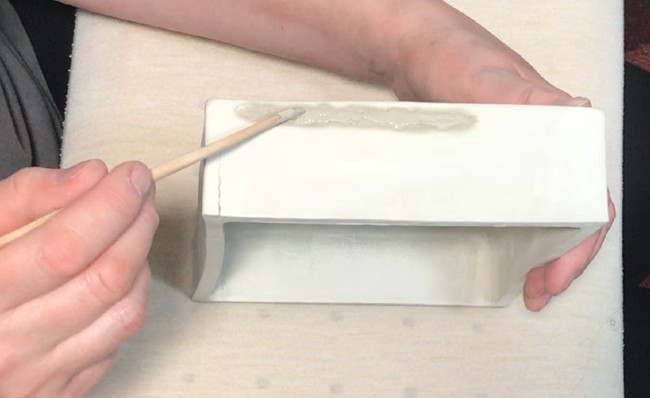
If the gap is large, you may need to do this in stages. It’s a bit like filling a gap in a wall with plaster. You might need to let one application dry a little before you can completely fill the gap.
Once the gap in the clay has been filled, try to smooth out the surface of the paper clay slip.
Don’t worry too much if the texture is a little rough. It’s hard to get it perfectly smooth at this point. But you don’t need to worry about that. You can sand it down when it’s dried.
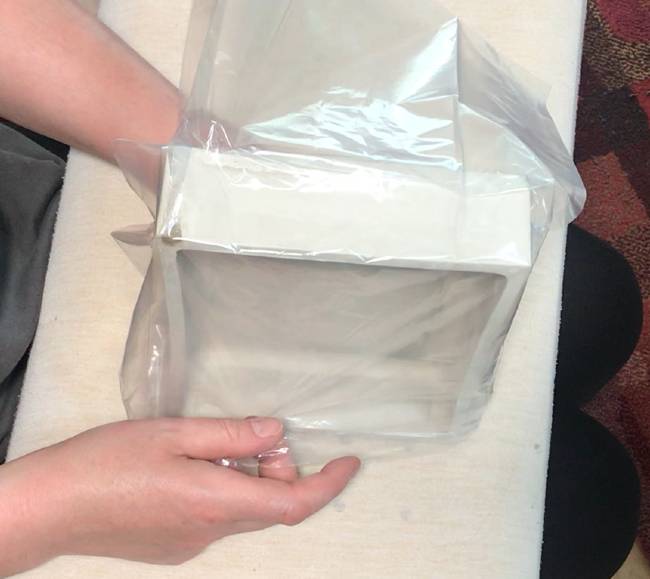
Step 4) Let the Fixed Crack Dry
Because your pottery is bone dry, the fixed area will dry out quite quickly too.
If you have just packed the gap with clay slip or soft clay, it would shrink when it dried and the crack would open up again. However, paper clay slip doesn’t shrink as much and works well as a filler.
Nevertheless, as with drying all clay, it’s a good idea to slow the process down. So, generally, I cover the repaired part with a plastic bag and keep it away from drafts and breezes.
Step 5) Checking the Repair
Once the repair has dried, inspect it and see if it’s filled the crack properly. Sometimes you will find that a fine hairline crack has re-appeared in the repaired clay.
This is almost certainly going to be a smaller crack than before. Nevertheless, you may need to repeat the process outlined above to patch any small hairline cracks that have appeared.
It can take patience to fix cracks in bone dry clay, but if you take your time, the cracks can be repaired in most cases.
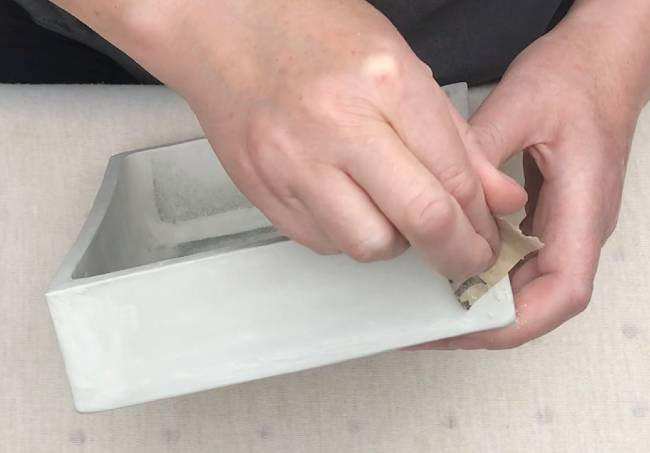
Step 6) Sanding The Repair
When you are happy that the crack has been repaired, you will need to sand down the repair a little.
Be careful when you are sanding. Bone dry clay is very soft, and you can easily sand it down too aggressively and distort the shape of your pottery.
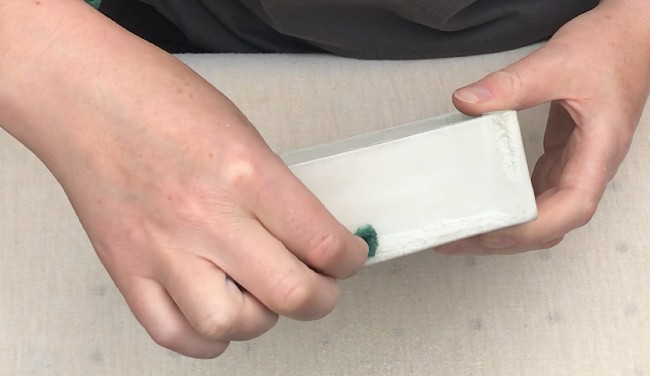
When paper clay slip has dried, it is quite soft and doesn’t need aggressive sanding. I tend to sand down my repairs with a small piece of green scrubby. This is abrasive enough to remove the rough texture of the repair.
I snip off a section of scrubby with scissors and then use this to rub away at the surface of the repair.
It’s best to sand down pottery outside to avoid the build-up of clay dust in the atmosphere. And always wear a respirator mask when you are sanding pottery.
This gets rid of any rough texture on repair and helps it blend in with the rest of the pottery. You can check out my guide to sanding pottery here.
Once you are happy the with repair, the pottery can be bisque fired and glazed as normal.
Method 2 – Magic Water and Spooze
You may have noticed in the pictures above that I had mended the crack in the corner of the lid too. This is the second method that I used to fix the smaller crack.
It’s a similar technique to the first method. The difference is that you are using something called ‘spooze’ and ‘magic water’ instead of paper clay slip and vinegar.
Let’s take a quick look at how to make spooze and magic water.
Spooze is similar to paper clay slip in that it’s designed to join clay together well and can be used to fix cracks.
How to Make Spooze
The original recipe is credited to potter Peggy Heer.
The ingredients are:
- 1 part white vinegar
- 1 part corn syrup
- 1 part crushed up bone dry clay
Simply mix these together, into a paste-type slip.
As with the paper clay slip, the clay in the spooze needs to be the same clay body that you are repairing. You can also add a drop or two of bleach to prevent the corn syrup from breeding mold.
You can watch a full video on how I make paper clay slip and spooze later in the article. If you’d like to see that now, you can jump to that section here.
How to Make Magic Water
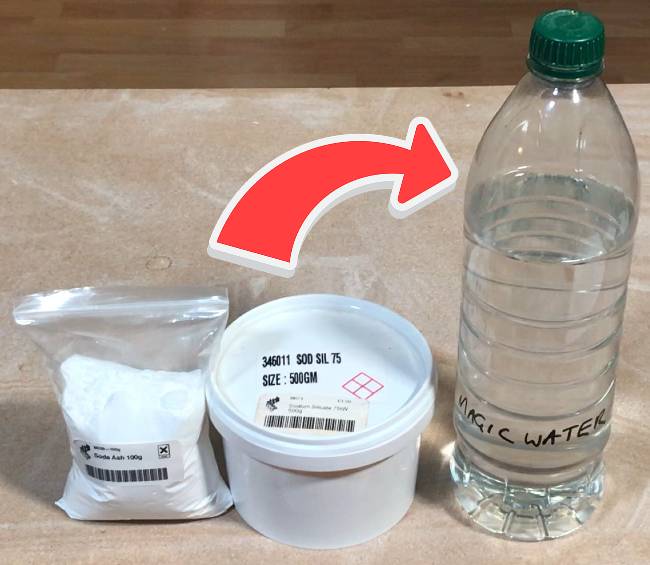
Making magic water is extremely easy, it only has 3 ingredients.
Ingredients:
- Sodium Silicate
- Soda Ash
- Water
Sodium silicate and soda ash are easy to get hold of. Don’t be put off by the scientific-sounding names. Most pottery suppliers will sell them.
Often the recipe for magic water recommends using a gallon of water, 3 tablespoons of sodium silicate, and 1 ½ teaspoons of soda ash. But this is a lot of liquid and unless you are making industrial quantities of pottery, it’s probably too much.
I make smaller quantities of magic water, and these are the amounts that I use.
- 1.3 pints of water
- ½ tablespoon of liquid sodium silicate
- ¼ teaspoon of soda ash
I simply mix the ingredients together, give it a shake and that is that.
Fixing Cracks in Bone Dry Clay with Spooze and Magic Water
The steps are similar to method one…
- Dampen the crack in the bone dry clay with magic water using a small soft brush
- Score into the crack to open it up a little and create a damp rough surface
- Smear the spooze into the gap
- Allow the spooze to dry
- Repeat the process if necessary
- Sand down the repaired surface carefully. Spooze dries harder than paper clay slip, so you will need to use sandpaper to sand it down. I start with a medium-grade sandpaper then switch to fine grade.
Magic water and vinegar act in different ways, but can be used to achieve the same thing.
Vinegar is a ‘flocculant’, which works by making the clay particles attract one another. By contrast the ingredients in magic water are deflocculants. Deflocculants make clay slip and glaze more fluid and less gloopy.
Nevertheless, magic water can be used to bond clay and repair cracks for a couple of reasons. The first reason is that it makes the clay more fluid, which means that it will mix in and mingle with the repairing slip.
The second reason is that magic water acts as a flux and a glass former. Fluxes reduce the temperature at which clay and glaze melt when they are fired. And sodium silicate contains silica which is a glass former.
As a result, when magic water is added to clay it creates a strong bond when the clay is fired.
Like paper clay slip, spooze creates a hard, sticky slurry that doesn’t shrink much when it dries out. As a result, it makes a good repair agent.
Checking the Repair
After the repair has dried, you need to check it to see if any hair line cracks have opened up. Although spooze is a strong mending agent, I find that it’s a bit more prone to cracking again after the repair has dried.
You can see in the picture below that a very fine crack was still visible after the first crack had been fixed. This is not uncommon and the best thing to do is to repeat the process of wetting the area and re-filling it with spooze.
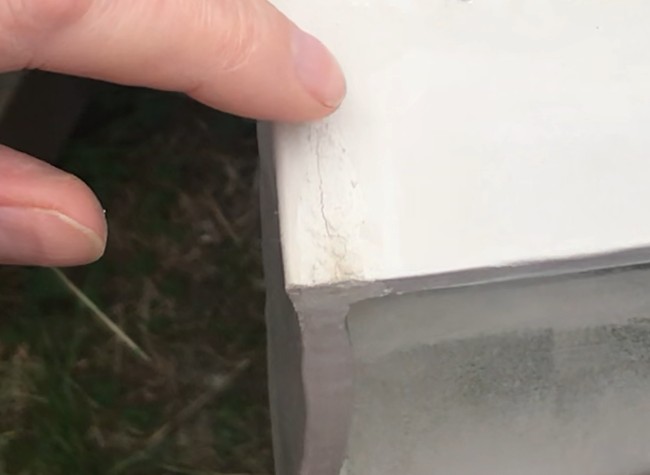
Once I had repeated the mending process using the spooze I sanded it down again and the repair was perfect.
Some potters also blend a bit of toilet paper into the spooze vinegar to give it some additional strength. This also makes the spooze less likely to crack again as it dries in the repair.
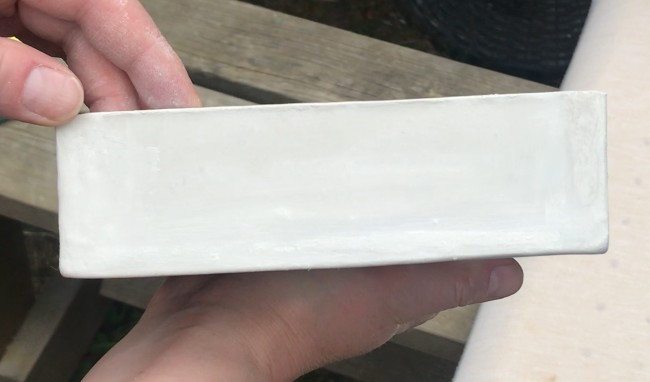
As you can see from the photo below, methods 1 and 2 both worked well on repairing the two cracks on this slab lid.
Method 3 – Rehydrating Your Pottery
A third and final way to fix cracks in bone dry clay is to rehydrate the entire piece of pottery. The amazing thing about clay is that it can be rehydrated and then dried out again as many times as you need to.
So, if your clay is dried out, you can rehydrate it, make it workable, and repair the crack when the clay is moistened again.
How to Rehydrate Your Bone Dry Clay
The trick to rehydrating your clay is to do it gradually. If you simply put bone dry clay under a tap or submerge it in water, your pot will disintegrate.
However, you can rehydrate it gradually in a damp box. A damp box is a container that has high humidity. A simple way to make a damp box is to fill the base of a storage container with Plaster of Paris.
When the plaster has hardened it is still porous. So, you can pour water on it and the water will soak into the plaster. If you then put a lid on the box, the air in the box will have a high level of humidity.
Also, if you put your bone dry clay on the damp plaster, the clay will slowly absorb water from the plaster and rehydrate.
After about a week or so inside a damp box, a piece of bone dry clay should have become moist enough so that you can work the clay a little again. You can read about how to make a damp box for clay here.
Fixing a Crack on the Rehydrated Clay
Now that the clay is moistened again, you can fix the crack. How you fix the crack depends upon where it is. For example, if the crack is at a joint, you should separate the joint again and open it up just a little.
You can then carefully score the two surfaces to be joined and apply slip to both. Rather than just using regular clay slip, you can use paper clay slip, spooze, or magic water. Any of these will ensure that the joint adheres firmly.
Once you have applied slip to both scored surfaces, press them together again to make a strong joint.
How to Fix Cracks in Bone Dry Clay

Final Thoughts
Whilst it’s possible to fix cracks in bone dry clay, it’s a good idea to weigh up the pros and cons. I tend to repair cracks if it’s a piece of pottery that has taken a long time to make.
However, there are times when I think it’s best to recycle your clay and start again. For example, if a handle had cracked at the point where it joins onto the clay, I generally get rid of the pot rather than repairing it.
It’s very important that handles are 100% secure. This is particularly the case for mugs, teapots, and other pots designed to lift hot liquid. I wouldn’t want to sell or give a mug to someone if I wasn’t absolutely sure that the handle was rock solid.
I do fix cracks in bone dry clay for decorative, non-functional ware, and I sometimes fix tiny hairline cracks on the curve of a handle. However, I don’t use the above methods to re-attach handles that have come away from mugs and teapots as they dry.