Your cart is currently empty!
How to Make a Slab Pottery Jug and Wash Bowl
Published:
Last Updated:

Affiliate Disclaimer
As an affiliate, we may earn a commission from qualifying purchases. We get commissions for purchases made through links on this website from Amazon and other third parties.
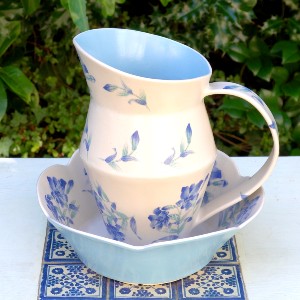
I love the old-fashioned combination of a jug and wash bowl. They add vintage charm to a room or add a modern twist. This is a simple step-by-step guide on making a jug and wash bowl using the slab pottery technique with a printable template.
Table of Contents
show
Making The Jug & Wash Bowl
If you want to make the jug and wash basin, you can get a copy of the template here:
Get The Template Here
You can get a copy of this template (and my other slab pottery templates) from my online shop here…
You Will Need:
- Clay
- A wide rolling pin
- Roller guides
- Fabric to roll the clay on
- Clay knife
- Flexible chopping board
- Platter tool
- Rubber pottery rib
- Clay scoring tool
- Serrated rib tool
- Wooden modelling tool
- Stylus tool
- Chamois leather
I make the jug first before making the washbowl.
How to Make the Jug
The steps below cover how to make the jug.
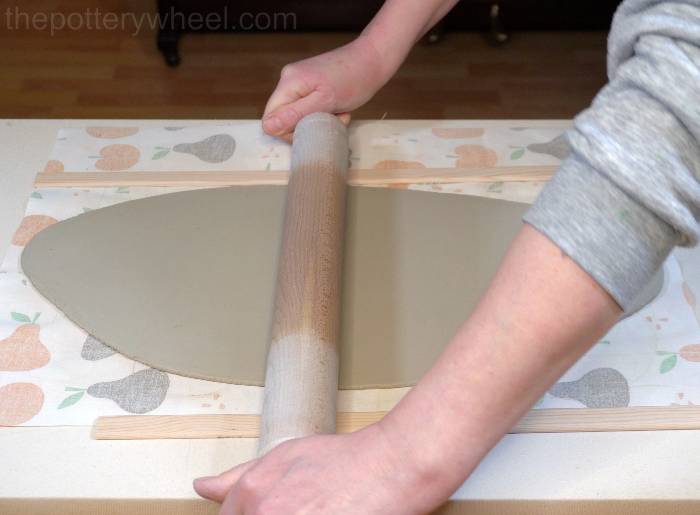
Step 1 – Roll a Slab of Clay
Roll a large slab of clay using 3mm roller guides. Rolling a clay slab is simple, but if you are new to slab pottery, you may find this guide on how to roll a clay slab helpful.
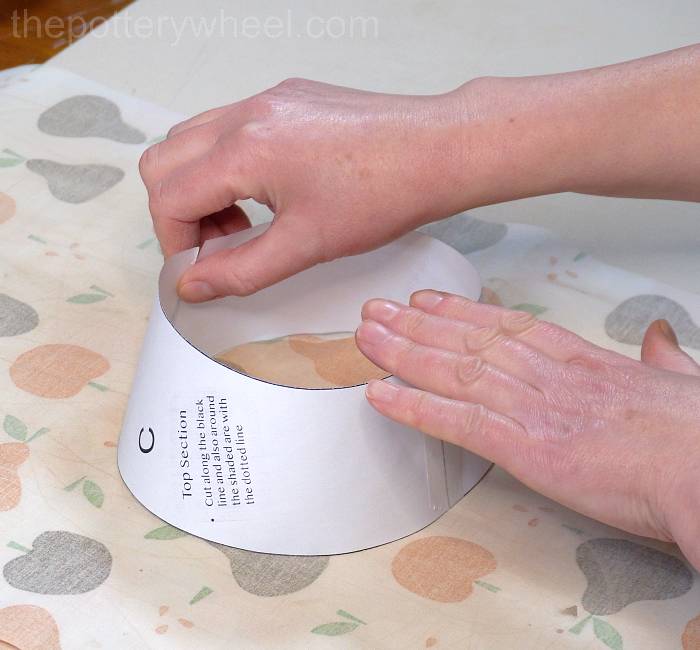
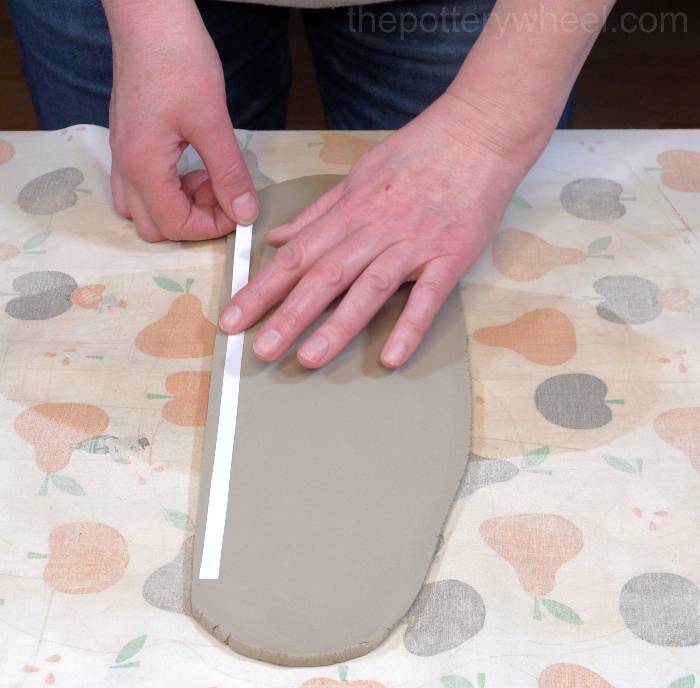
Step 2 – Cut Out the Parts of the Jug Using the Template
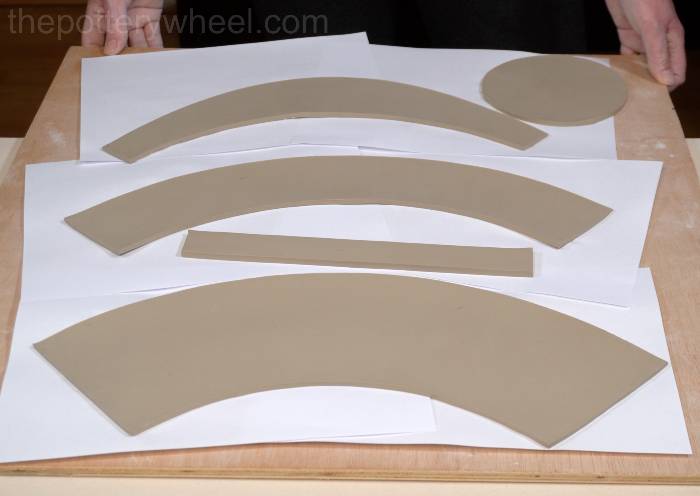
Put the templates for the jug onto the freshly rolled slab and cut around it with a clay knife.
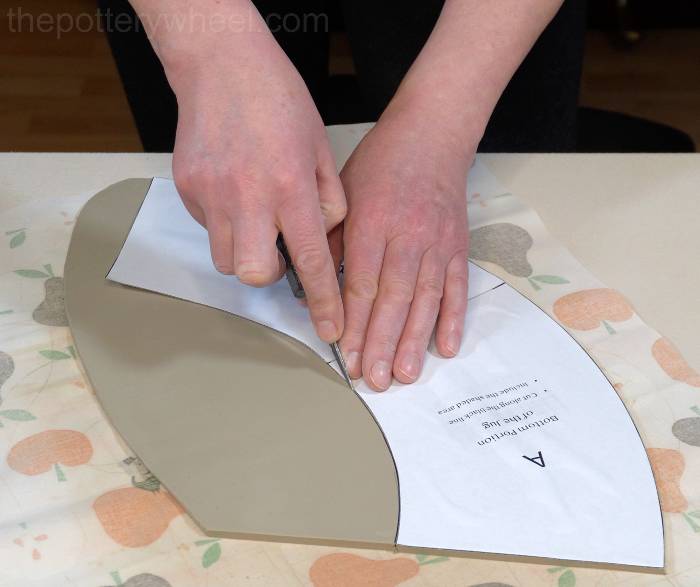
When you have cut all the way around, peel the paper template away.
At this point, the clay slab is very soft and the cut pieces must be put to one side to firm up.
Move the cut clay slabs onto a wooden drying board. An easy way to do this is to put some paper on the cut slab. Then put a flexible chopping board on top of the paper.
Slide your hand under the sheet that you have been rolling the clay on, and flip the whole thing over. Then peel the fabric off the top of the clay slab.
Now it’s easy to lift the slab by sliding your hand underneath the chopping board. You can slide the paper off the chopping board onto your wooden drying board.

Leave all the pieces of the clay on the wooden board until they are soft enough to bend but firm enough to handle without losing their shape. It helps to put another wooden board on top of the cut slabs to keep them flat as they firm up.
Once all of the pieces of the jug have been cut out, the drying board looks like this…
NOTE: You don’t want the clay strip that makes the handle of the jug to become too firm. So, wrap this in some cling film (cellophane) to stop it from drying out too much.
Step 3 – Preparing the Slabs
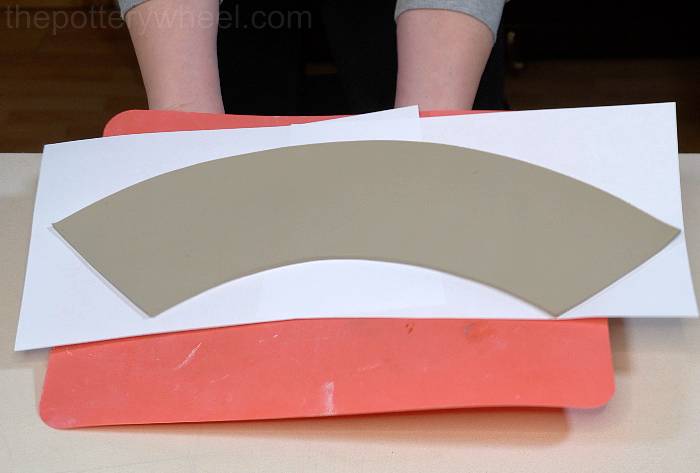
When the slabs have firmed up a bit, prepare them to be assembled. The first slab that you are going to use is the slab made from template A and B. You can see from this picture of template A and B curved into a cone shape, what the bottom portion of the jug will look like.
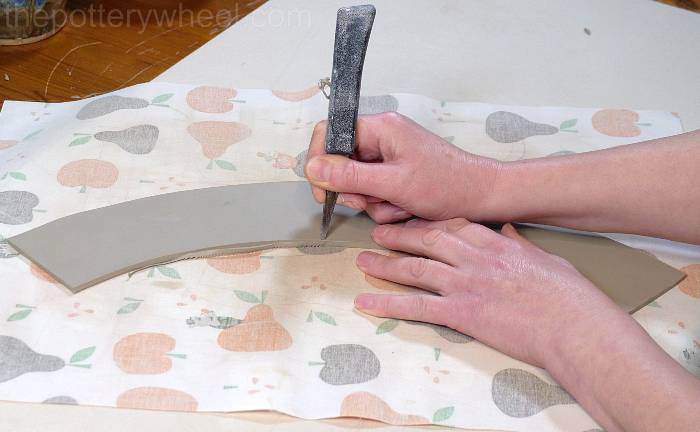
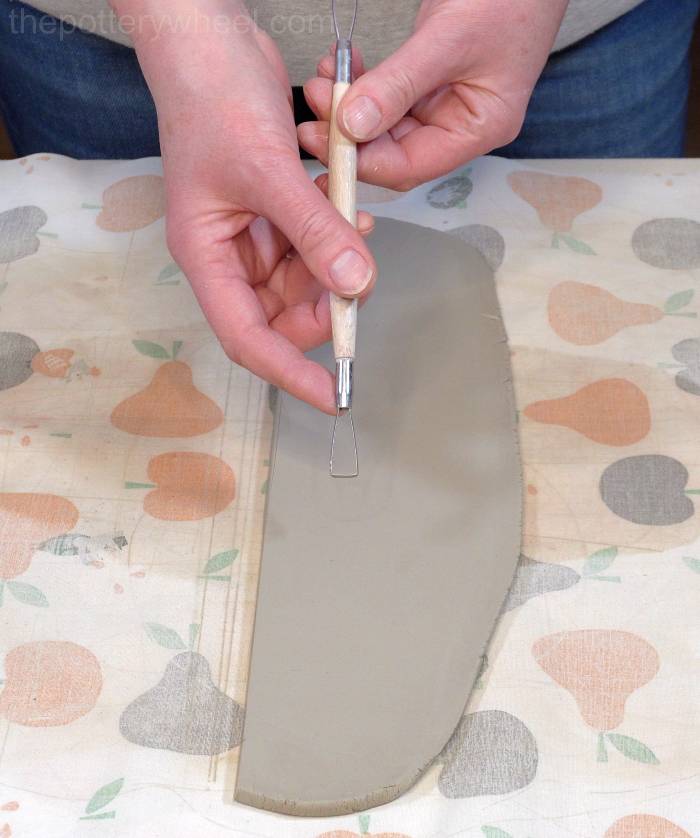
Bevelling Clay Slab Edges
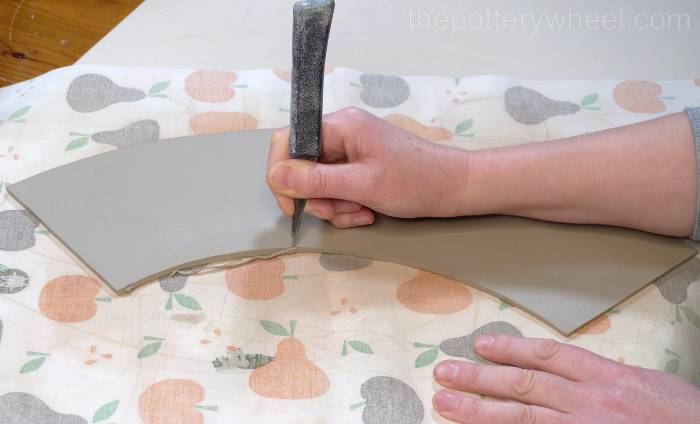
The first thing to do is bevel some of the edges. Bevelling means that you cut the edge of the slab at an angle.
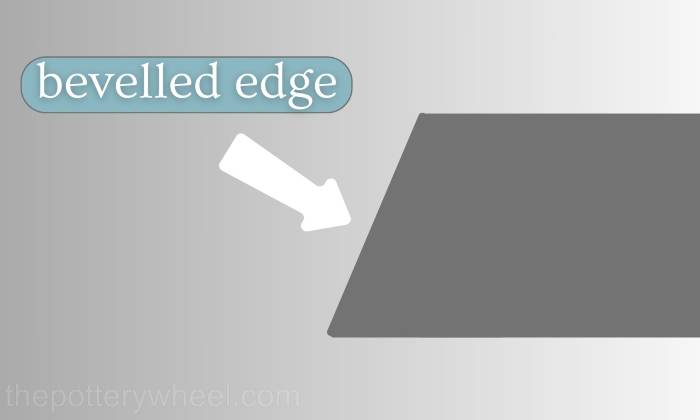
When you curve the slab round into a cone shape you want the bottom edge of the cone to sit flat against the base of the jug.
To make sure that the bottom edge sits flat, cut the edge at a bit of an angle. You don’t need to take off much clay. Aim to shave the clay off at around a 70-degree angle. The shorter of the two curved edges will join to the base of the jug.
Also, bevel the longer of the two curved edges. This is because ideally the shoulder of the jug will sit flat against the top edge of the lower portion. Like this…
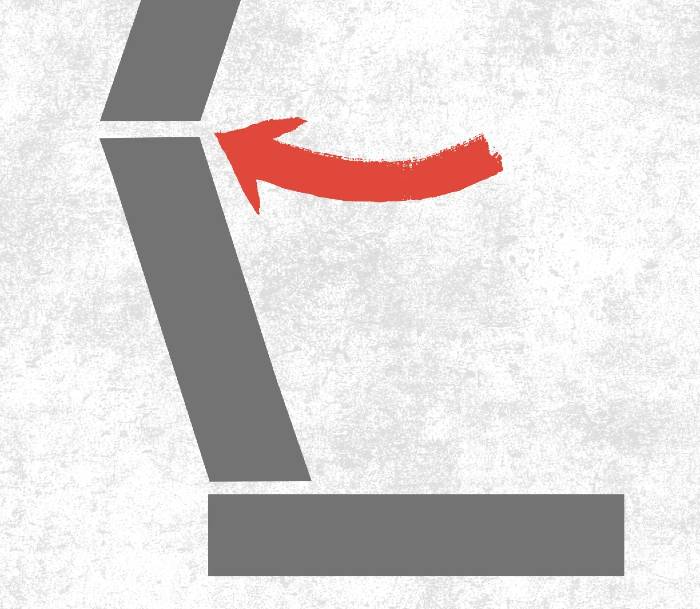
IMPORTANT! Before you bevel the longer curve, be sure to turn the clay slab over. If you don’t turn the slab over you will be cutting the bevel in the wrong direction. Take a look at diagram A above.
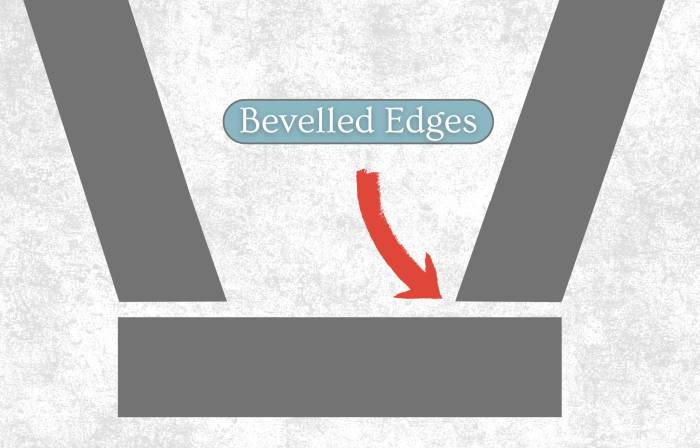
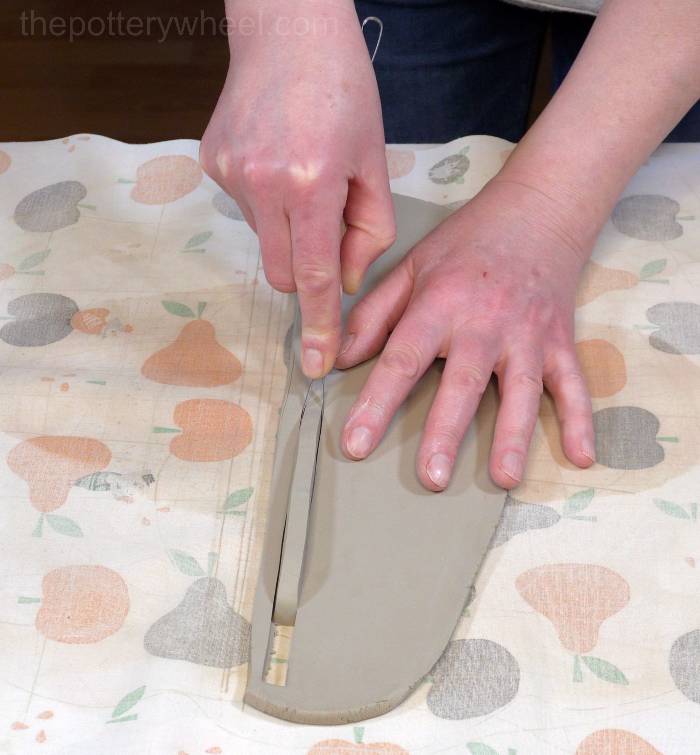
Lastly, bevel the two short straight sides too. This is because you are going to curve the slab around and overlap these two short ends. If you bevel the two edges you can make a flush overlap and a smooth surface.
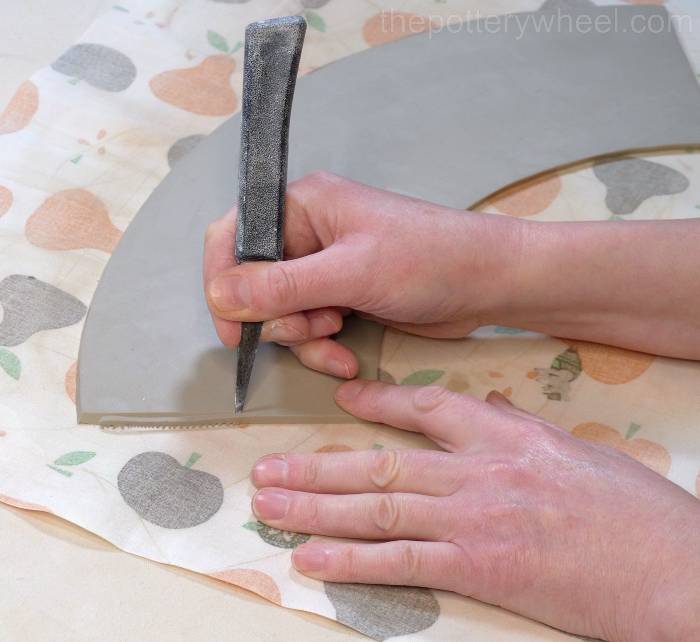
NOTE – After you’ve bevelled one short end, remember to turn the slab over before you bevel the second straight edge. If you don’t turn the slab over the edges won’t overlap when you curve the clay around.
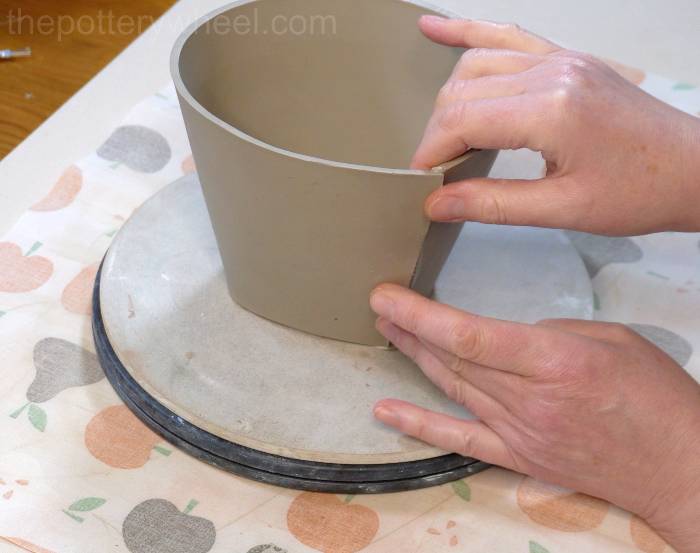
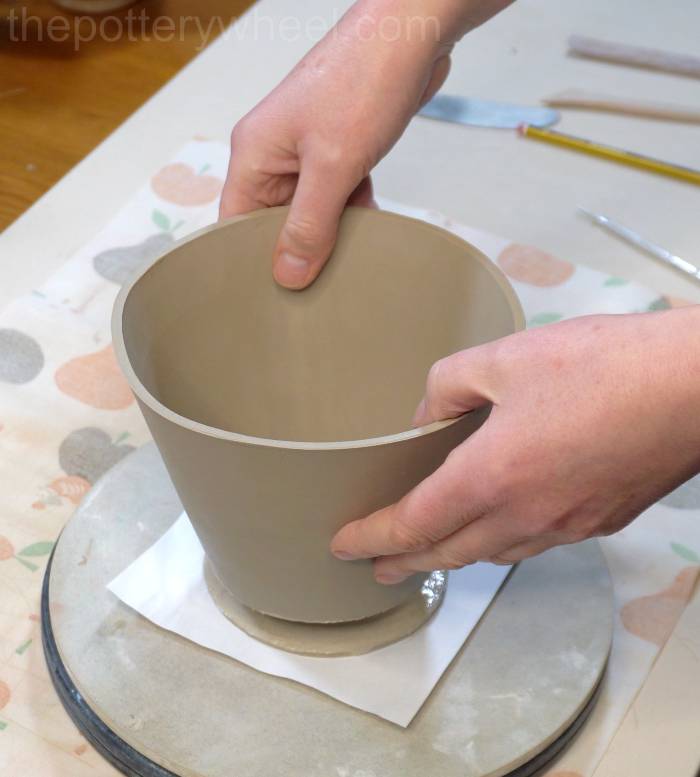
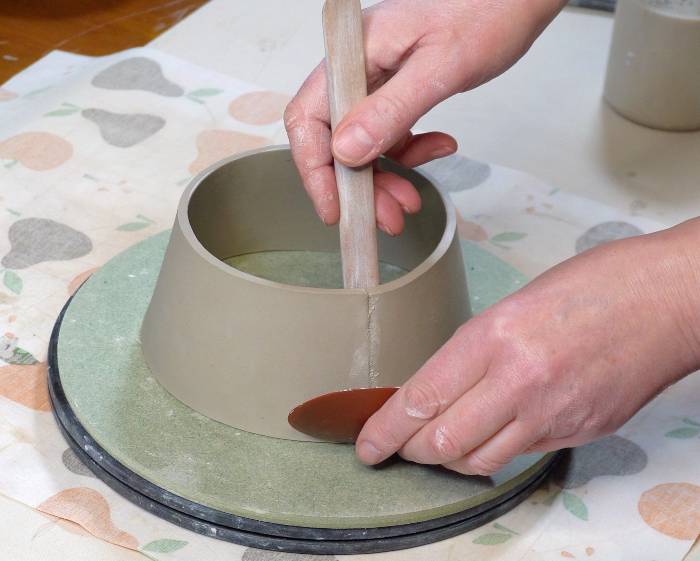
Step 4 – Building the Bottom of the Jug
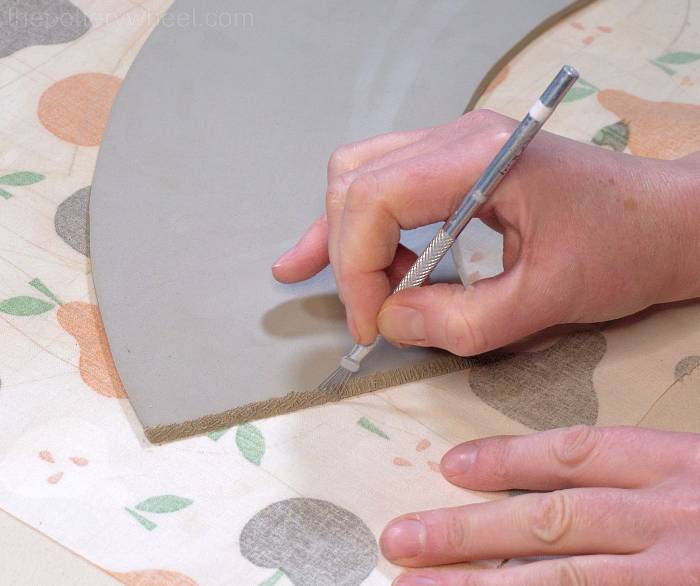
Score both the straight bevelled edges with a clay scoring tool.
Lift the slab and curve it around into a cone shape.
IMPORTANT! – When you curve the clay cones around, be sure to curve them so that the bevelled edges are going to be flat against the surface that they are joining.
Line up the scored edges so that they are almost overlapping one another. Apply some clay slip to both the scored edges.
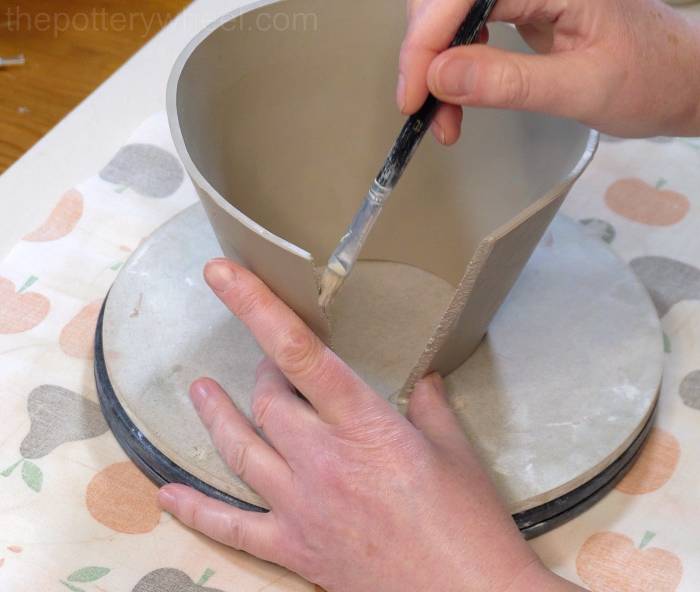
Press the two edges together.
When the two edges are stuck together, smooth and compress the outside surface of the join by running a rubber rib over it.
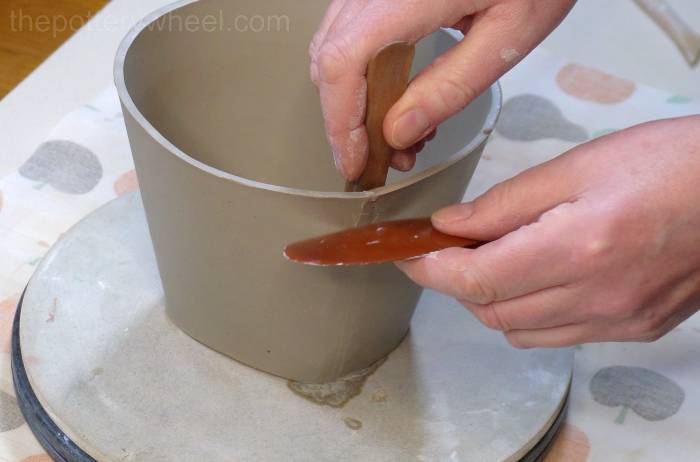
Then use a wooden modelling tool to blend the two edges together on the inside of the clay cone.
You can smooth away any marks left in the clay by the wooden tool using a rubber rib.
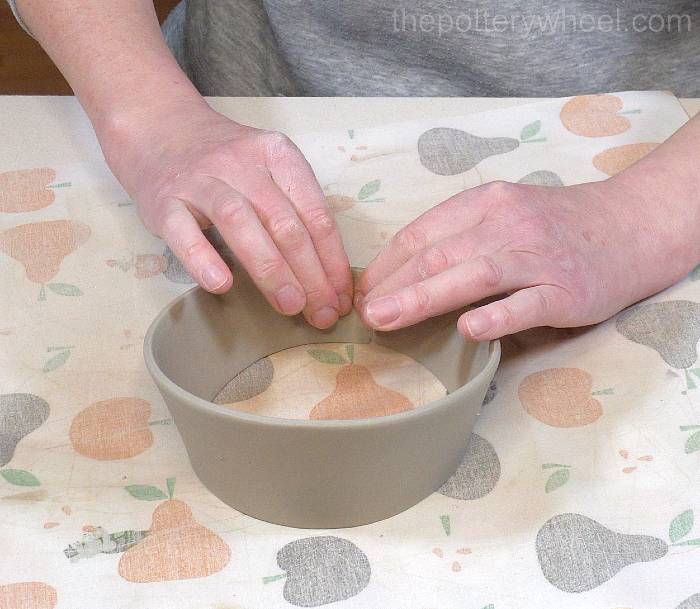
Score around the outside edge of the slab that will form the base of the jug. This is the slab that was made using template G
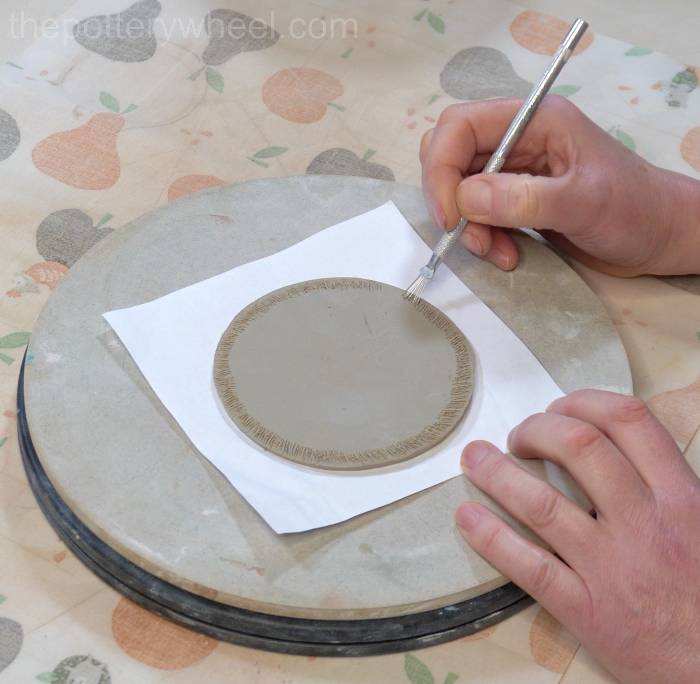
Then score around the bottom edge of the clay cone. I find it easier to score around the bottom edge using a serrated rib tool.
Apply clay slip to both of the scored edges. Then lower the clay cone into place over the base slab.
Attaching the Bottom and the Base
The template used for the base of the jug (template G) is slightly larger than the bottom of the clay cone. This is to give you a bit of wiggle room when you are attaching the two. Once the bottom of the clay cone is in position, trim off a bit of the excess clay.
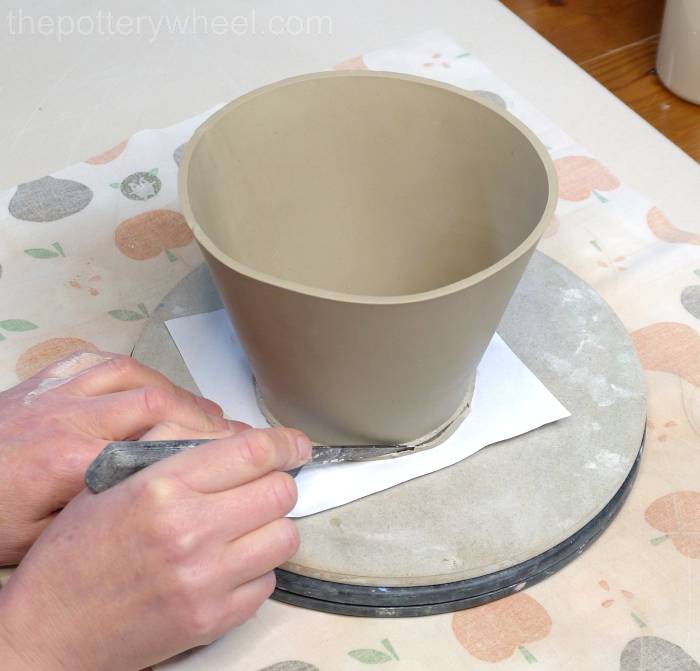
I aim to leave about 1mm of excess clay around the base of the jug. This will give you some extra clay to blend the two parts of the jug together.
Use a wooden modelling tool to blend the bottom of the jug onto the bottom of the clay cone.
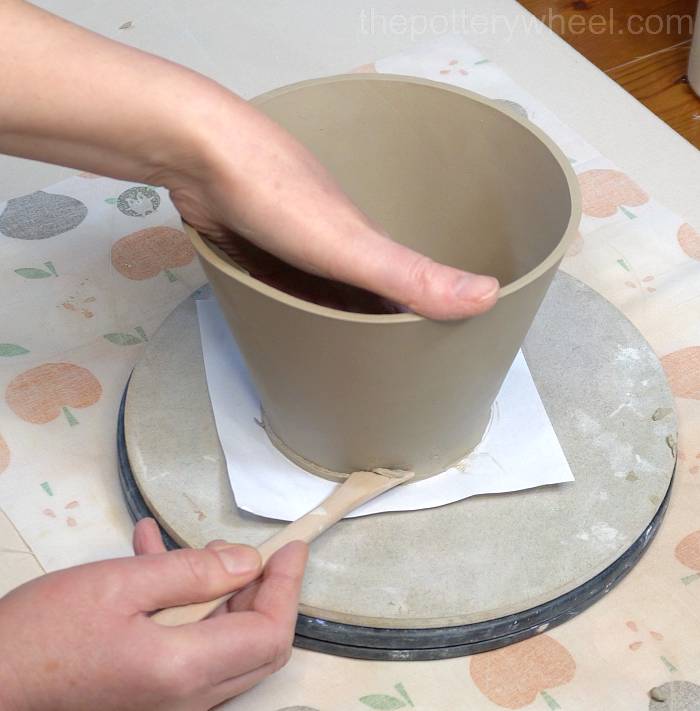
Roll a thin coil of clay. You can find some tips on how to roll a coil of clay here.
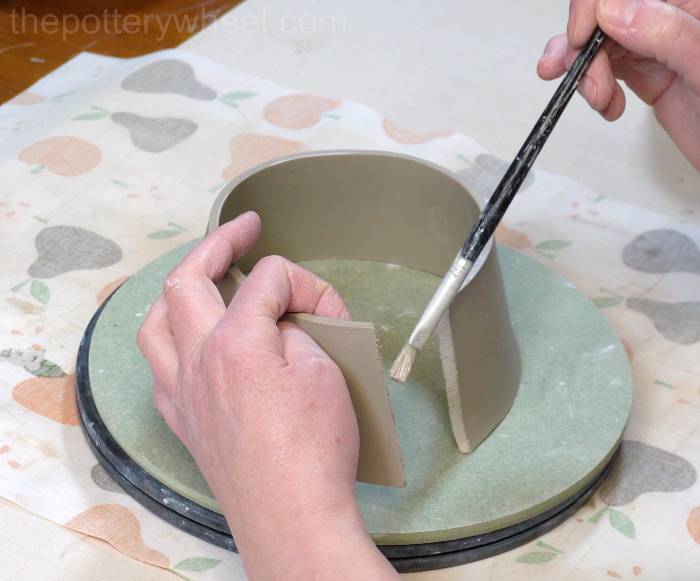
Run some clay slip around the inside surface of the join with a soft brush. This will freshen up the clay.
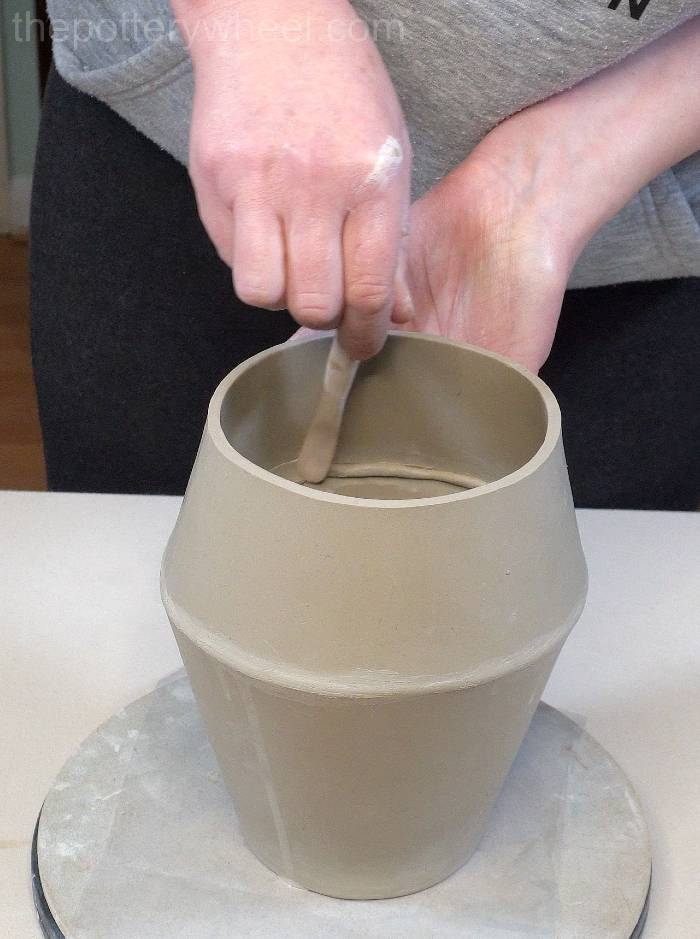
Dangle the clay coil into the join and press it into position with your fingers.
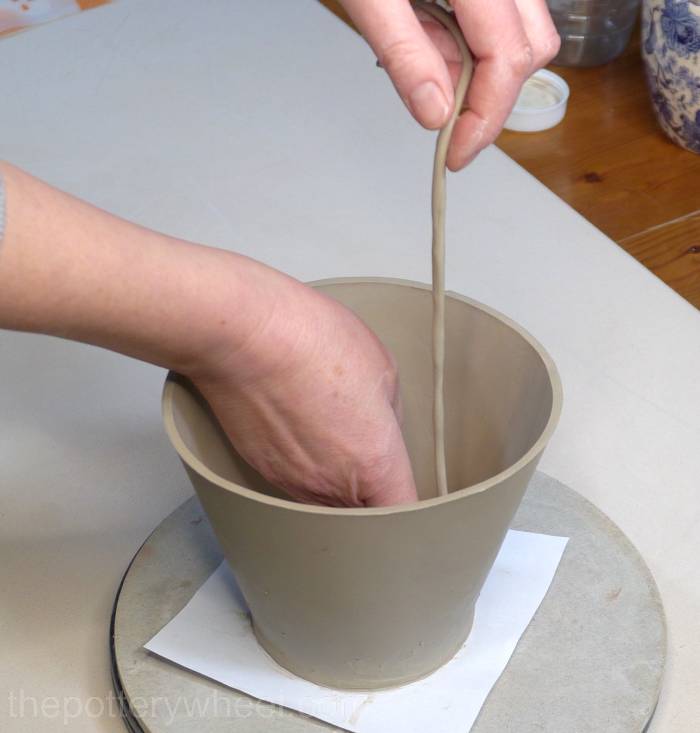
Using the tips of your fingers, a wooden tool or ideally a stylus tool blend the clay coil into the bottom edge of the base.
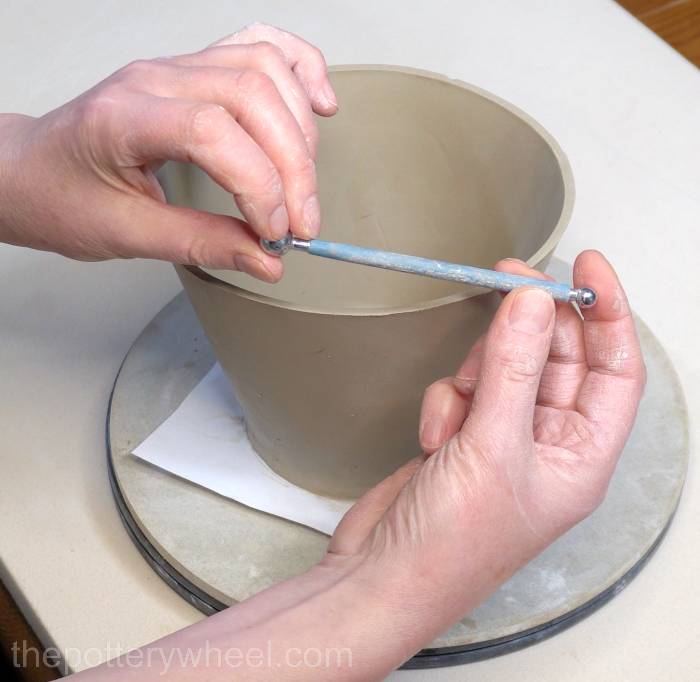
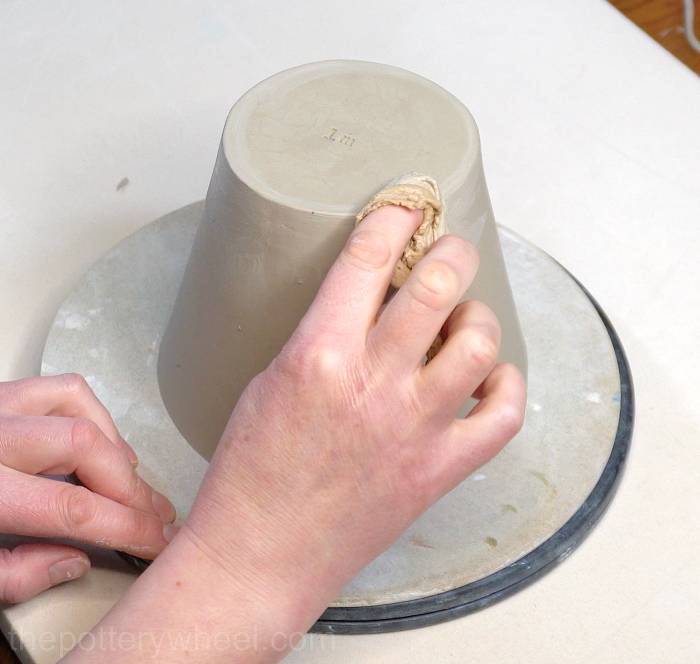
The stylus tool will have left some marks on the blended clay. You can wipe away these marks and make a smooth surface with a damp piece of chamois leather.
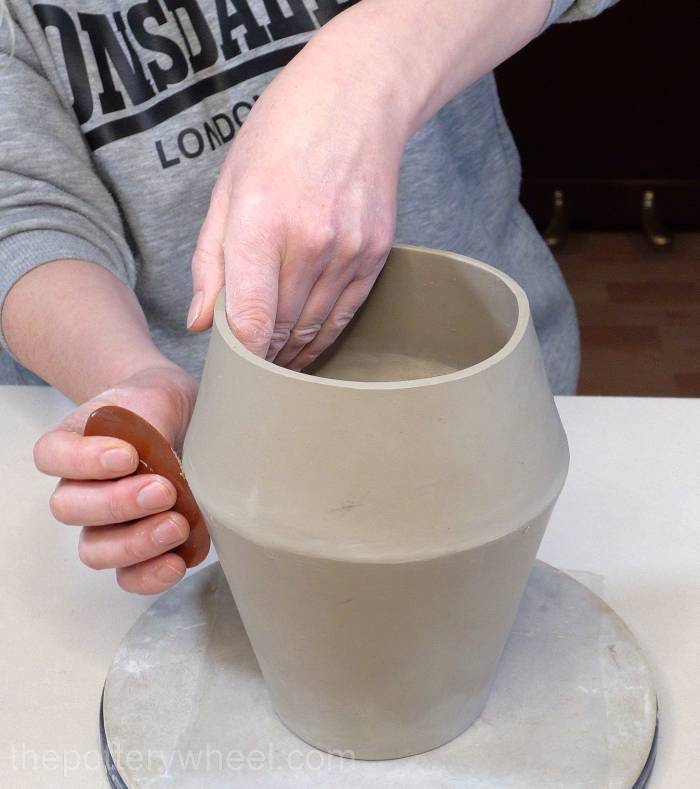
Tidying Up the Outside of the Base
Turn the bottom of the jug over and rest it on its rim. Use a wooden tool to shape and scrape away any excess clay along the bottom. I also use a clay knife to trim away any little bits of clay left behind.
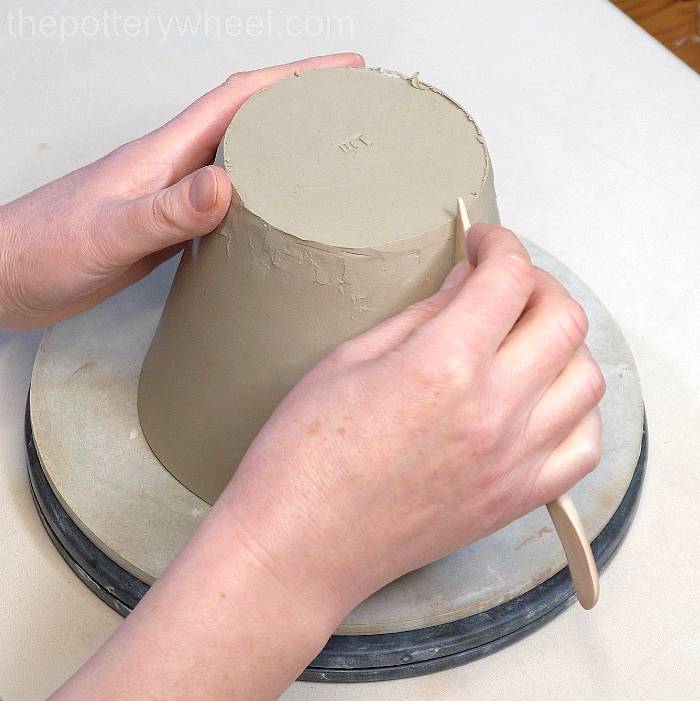
Use a rubber rib tool to smooth down some of the marks left behind by the wooden tool.
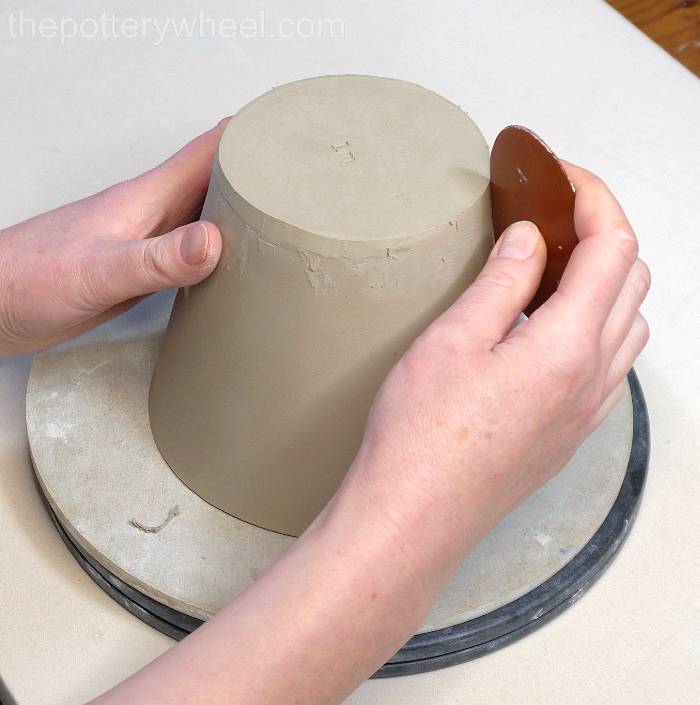
Then finish off the tidying up by running a damp chamois leather over the surface.
Once the surface has been tidied, cover this part of the jug with a plastic bag to stop it from drying out too much. Then put it to one side and start work on the shoulder of the jug.
Step 5 – Building the Shoulder of the Jug
The shoulder of the jug is made from the long curved slab of clay that you cut out using templates C and D.
This slab is going to be joined to the bottom section of the jug. And the rim of the jug will be attached to the shoulder. For that reason, I bevel both of the long curved edges of the clay.
As with the bottom of the jug, bevelling the curved edges allows you to make a flat join between the shoulder of the jug and the base and rim.
IMPORTANT! – As mentioned above, it’s important to turn the slab over after you have bevelled one curved edge.
I then bevel both short straight ends and score into them with my clay scoring tool. Then I curve the clay around into a cone shape and apply some slip to both scored ends.
The process of joining this slab into a cone is the same as it was with the base of the jug. I press the two slipped and scored ends together, and blend them with a wooden modelling tool and a rubber rib.
When the slab has been formed into a clay cone, I put it to one side for the join to firm up. To keep the shape of the cone nice and round, I put the clay cone over the smooth bottom of an inverted bowl.
It also helps to put a bowl on the top end of the cone too. This will keep both of the rims circular as the clay firms up.
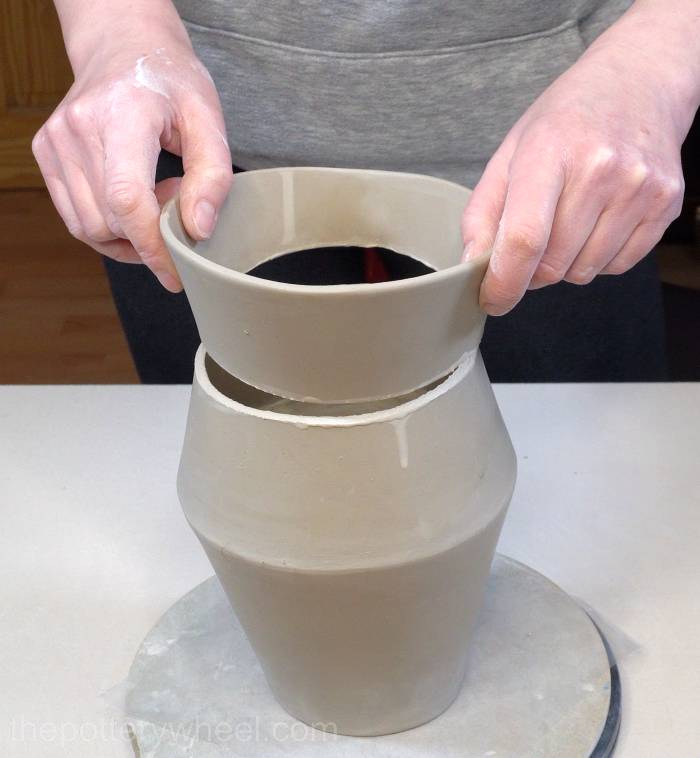
Step 6 – Joining the Bottom and the Shoulder of the Jug
Score the top edge of the base of the jug and also the bottom wider edge of the shoulder. Apply a generous amount of slip to both scored surfaces. Then lower the shoulder of the jug into position on top of the base of the jug.
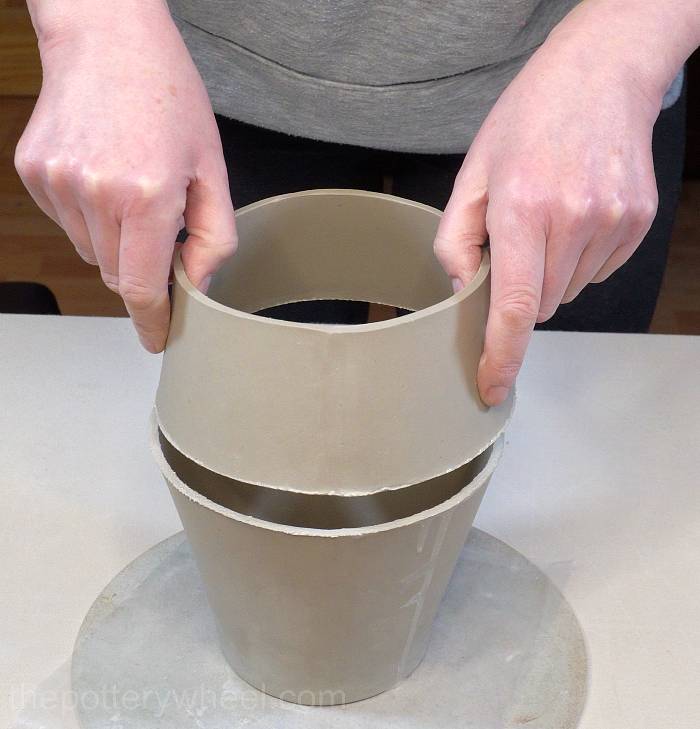
Once the shoulder is in position use the tip of your finger and blend the outside surface of the join together.
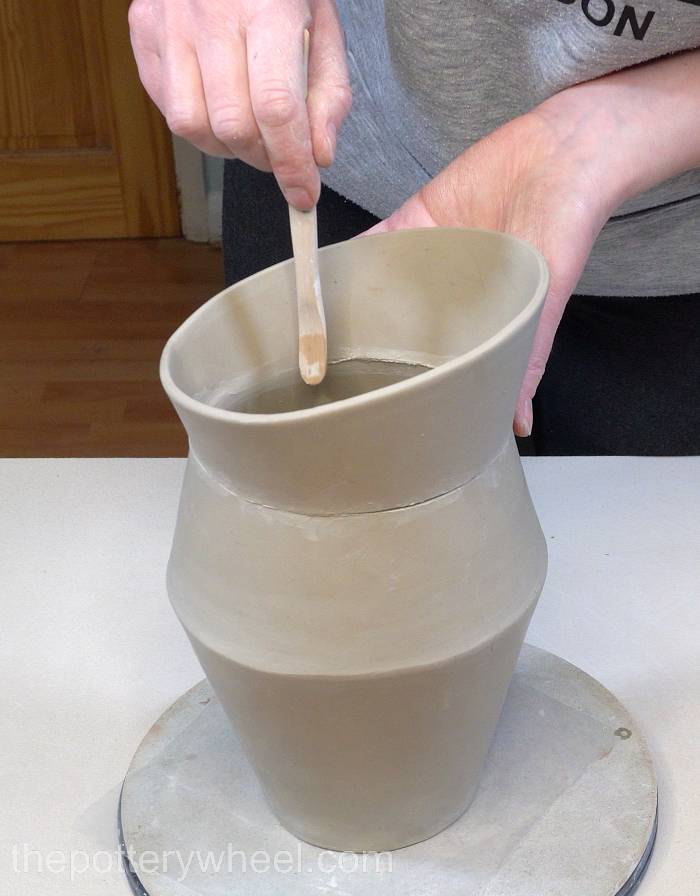
Roll a thin coil of clay and apply some slip to the inside surface of the join with a paintbrush.
Gently press the clay coil onto the join on the inside surface. Then using a wooden tool, blend the coil over the join between the base and the shoulder. Support the outside surface with your free hand as you blend in the clay coil.
After the coil has been blended in, smooth the surface of the join with a damp chamois leather.
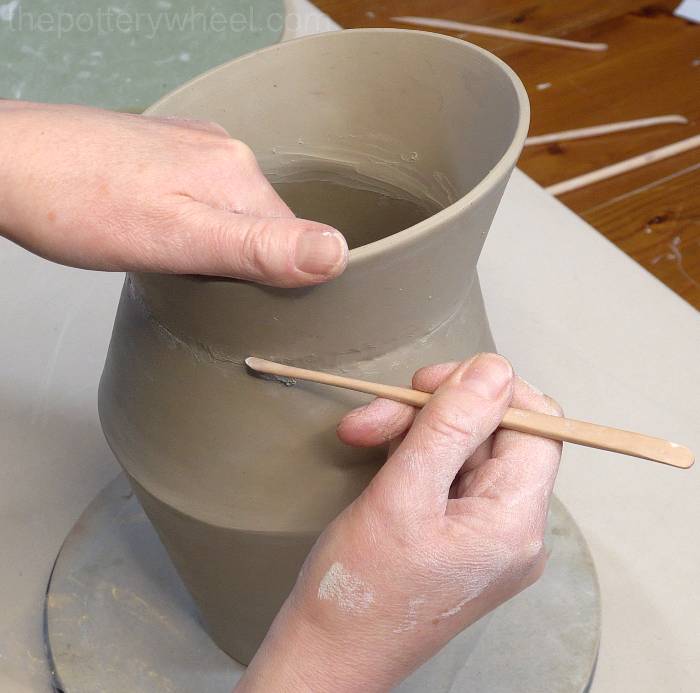
Blending in the coil will probably have caused the join to open up a little on the outside surface. Use your fingertip to blend this join closed again.
Then go over the join with a rubber rib to compress it and to tidy it up too.
I put a plastic bowl into the opening of the shoulder to keep the rim round. Then I put the jug to one side while I work on the rim.
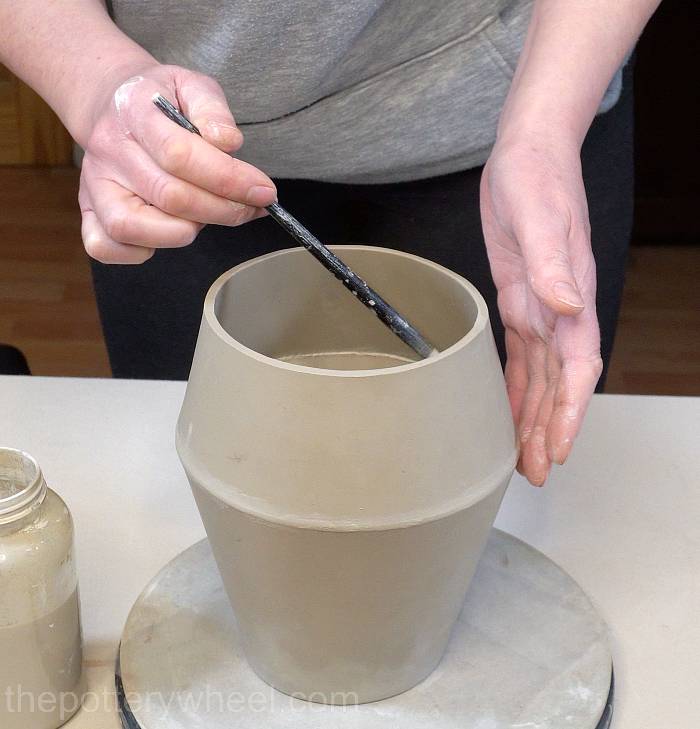
Step 7 – Making the Rim of the Jug
The rim is made from the last curved piece of clay slab that you cut out earlier using template E and F.
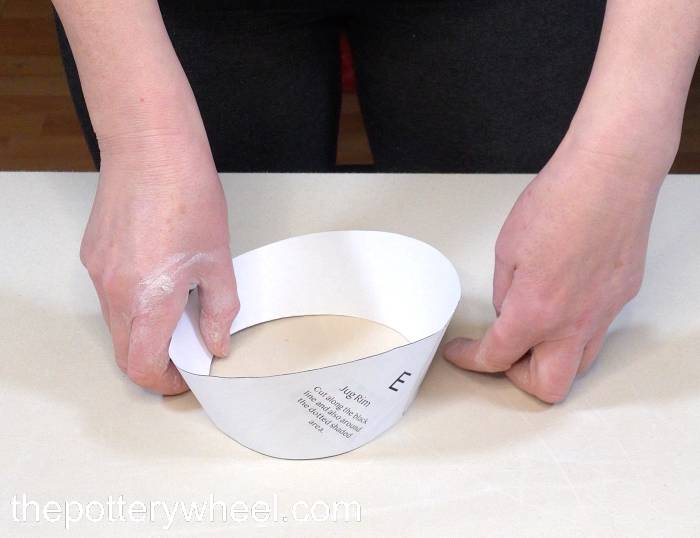
Again, because the rim is going to join onto the shoulder, I bevel the shorter of the two curved edges. I also bevel the two straight edges.
However, I don’t bevel the longer of the curved edges. The longer of the curved edges is the rim of the jug, and I want the rim to be nice and smooth.
Before I build the rim, I run a damp sponge over both sides of the longer curved edge. This softens off the edge.
Score into both of the short ends and curve the clay round into a cone shape.
Remember – When you curve the clay cones around, be sure to curve them so that the bevelled edges are going to be flat against the surface that they are joining.
Apply slip to both short scored edges and press the two edges together. Join the cone using a combination of your fingers, a modeling tool, and a rubber rib.
Step 8 – Joining the Rim and the Shoulder of the Jug
Attach the rim onto the shoulder in the same way that you added the shoulder to the base. Score both edges that you are going to join, and add some slip to both scored surfaces. Then lower the rim into position.
TIP! – When you are adding the shoulder with the base, and the rim with the shoulder, it’s a good idea to align the joins in the clay. So, the join in the shoulder lines up with the join in the base, and the join in the rim lines up with that on the shoulder.
Lining up the joins isn’t essential. However, if the joins line up, you can add the handle at that point later which can distract from any potential unevenness in the surface at the join.
Once the rim is in position, press it gently into place. Then use your wooden tool to blend the join together on the inside surface.
Then use a small wooden tool to blend the clay together on the outside surface too.
If you want, you can add a thin coil of clay to the outside or inside surface of the join. This will help to reinforce the join. However, I find that adding a coil to this join can add a bit of bulk to the neck. So, instead, I tend to make sure that the two surfaces are thoroughly blended.
Wipe down both the inside and the outside of the join with a damp chamois leather to create a smooth finish.
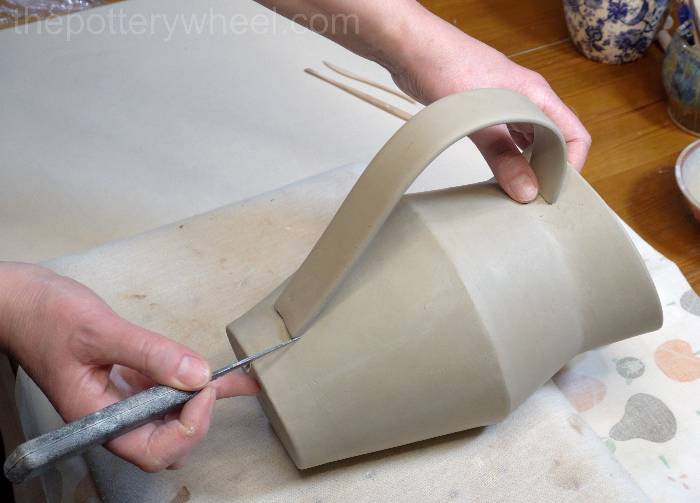
Once the rim is joined, gently squeeze the rim at its widest point to create a gradual spout shape for liquid to run out of the jug when it’s being used.
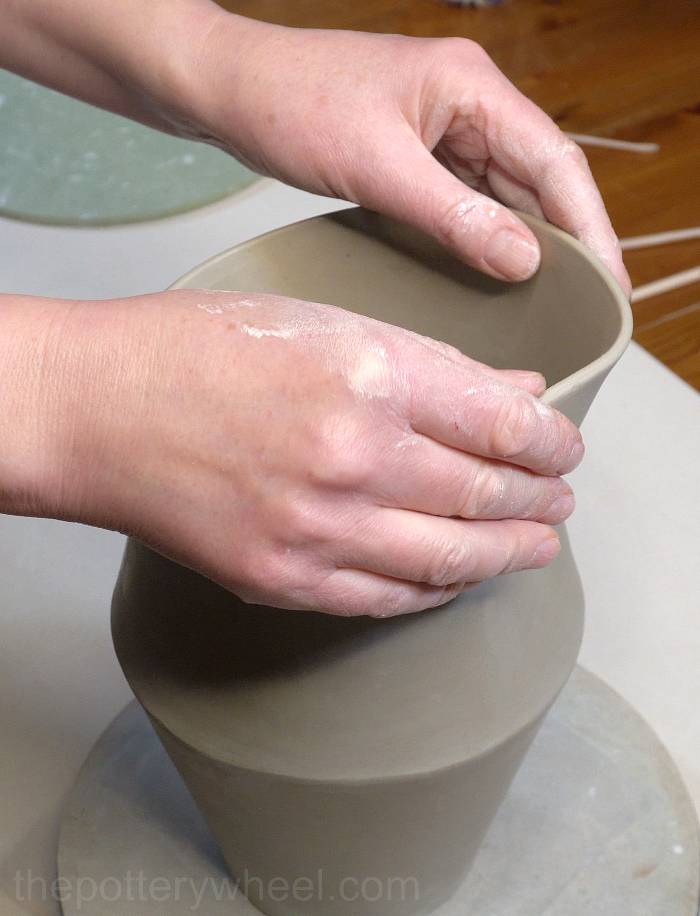
Step 9 – Attaching the Handle to the Jug
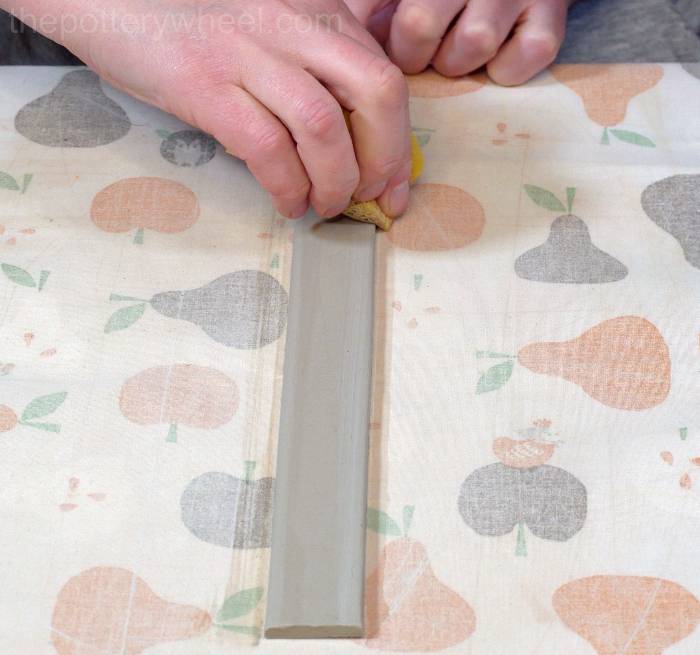
The handle is made from a long strip of clay that you cut out earlier using template H
To prepare the handle, run a damp sponge down each of the long edges of the clay strip. This will soften off the edges and make the handle more comfortable to hold. It’s easier to soften the edges before the handle has been attached.
Curve the handle into the shape that you want it to be, and place it on a wooden board so that it firms up in that shape.
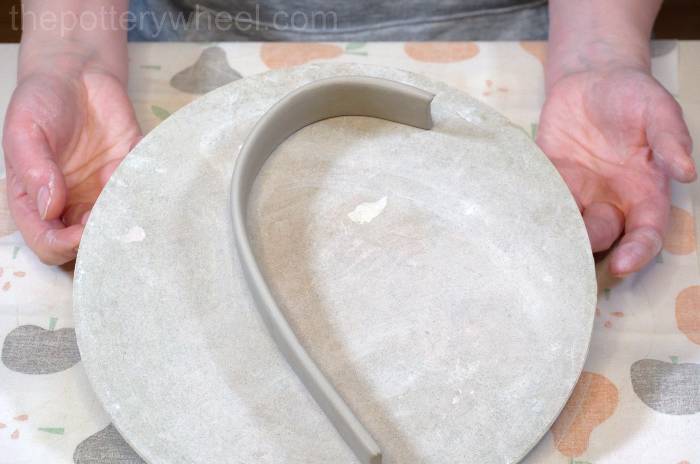
Once the handle has become soft leather hard trim both ends. It helps to trim the ends into a concave shape, this will help the ends of the handle fit the curve of the jug.
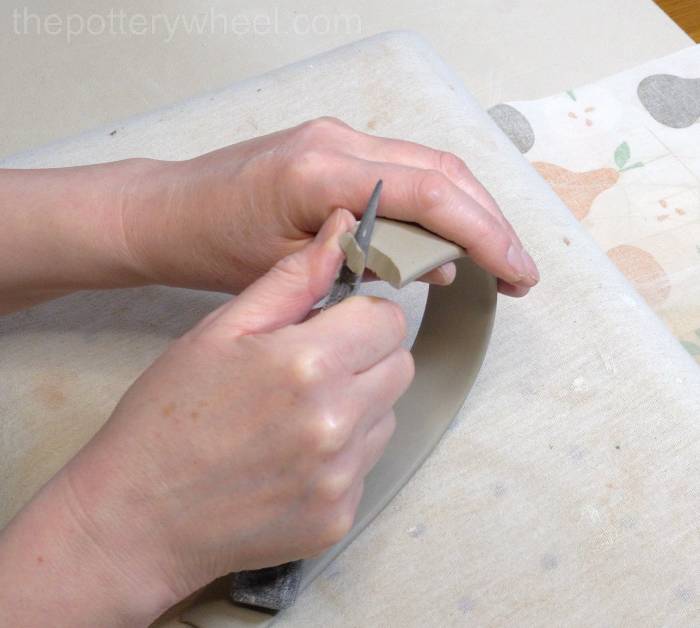
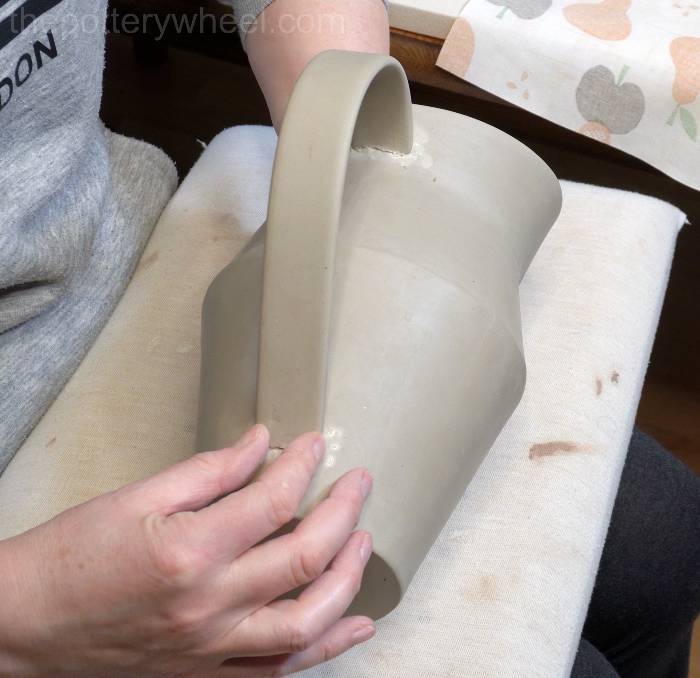
Hold the trimmed handle up against the jug, and line it up into position. Then make some small marks on the jug where you want the handle to be attached.
Remove the handle from the side of the jug, and score the surface of the jug and also the trimmed ends of the handle.
Apply slip to the scored surface and both scored ends. Then re-position the handle and gently but firmly press it into place. It’s a good idea to put your hand on the inside of the jug so that the jug doesn’t lose its shape when you press the handle on.
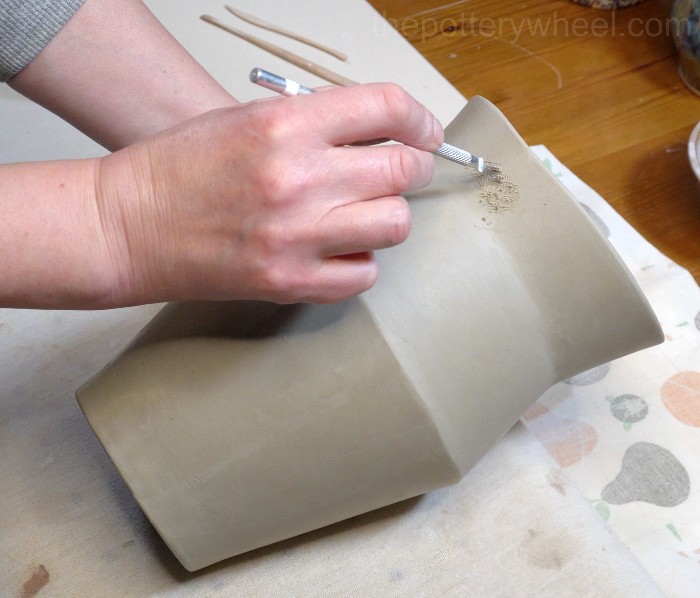
Securing the Jug Handle With a Coil
Wrap a small clay coil around the handle where it joins the mug. Press the coil into the join and blend it into the join using a wooden tool. Do this to both ends of the handle.
Wipe the blended coil in with your damp chamois leather after the handle has been attached to create a smooth surface.

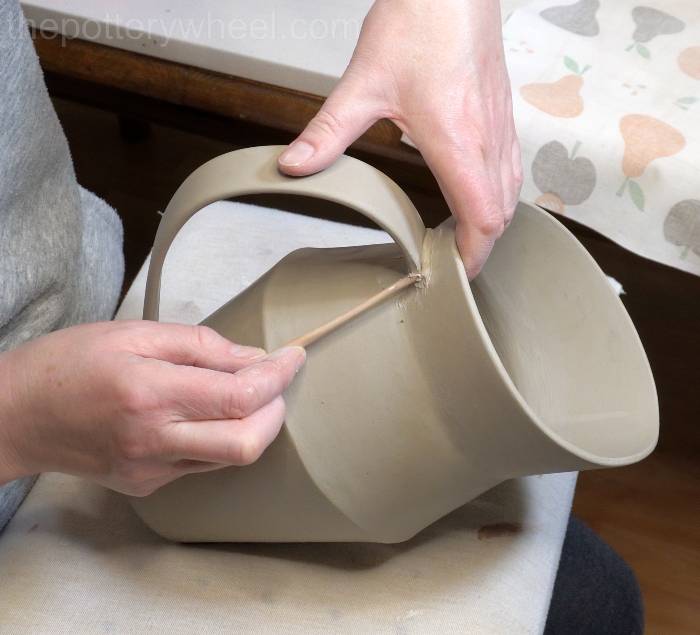
After the handle has been attached you can gently bend it a little to perfect the shape.
How To Make the Bowl
There are two templates for making this jug and washbowl combination. One of the bowl templates has a scalloped edge, and the other has a plain straight edge.
In this guide, I will show you how to make the washbowl using the scalloped template. However, the process is the same for both styles of bowl.
Step 10 – Making the Clay Slabs for the Bowl
As above when you are making the jug, you need to roll out a large slab of clay. I find that 3mm roller guides make a nice lightweight but strong bowl. But you can use thicker or thinner roller guides if you prefer.
Cut out the slabs for the bowl template. This includes the side of the bowl which is made up of templates N, O and P joined together. It also includes a circular slab for the base of the bowl made from template L.
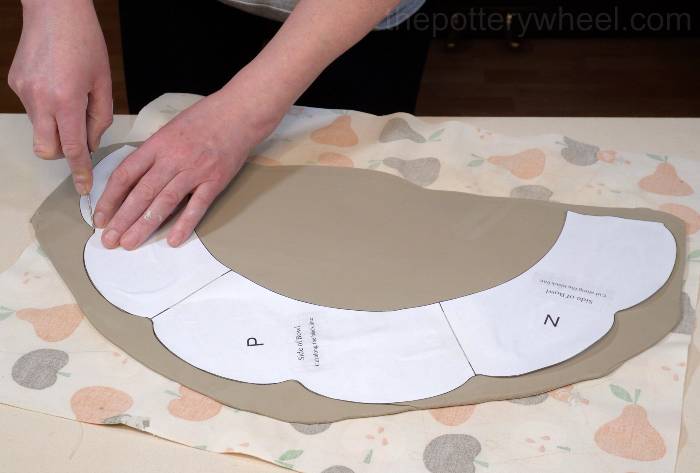
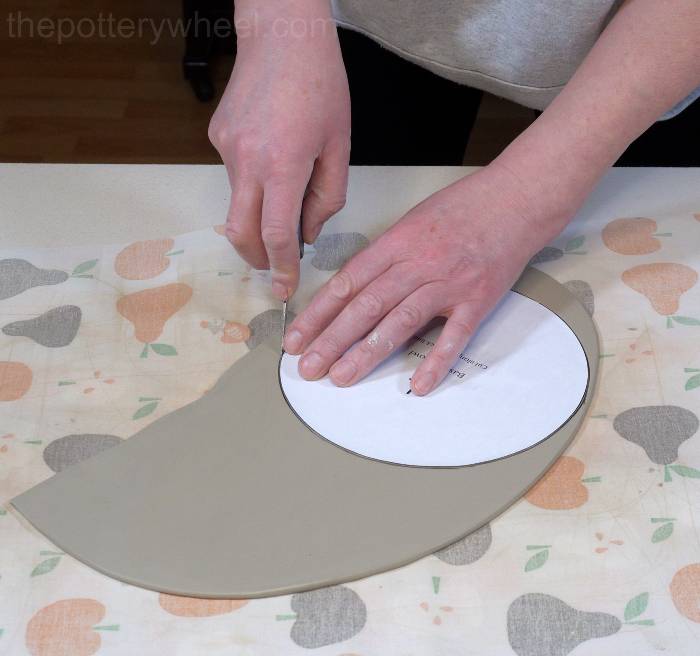
Put both of these slabs onto a wooden drying board to allow them to firm up. They need to be soft enough to bend without cracking, but firm enough to pick up without flopping about.
Step 11 – Preparing the Clay Slabs for the Bowl
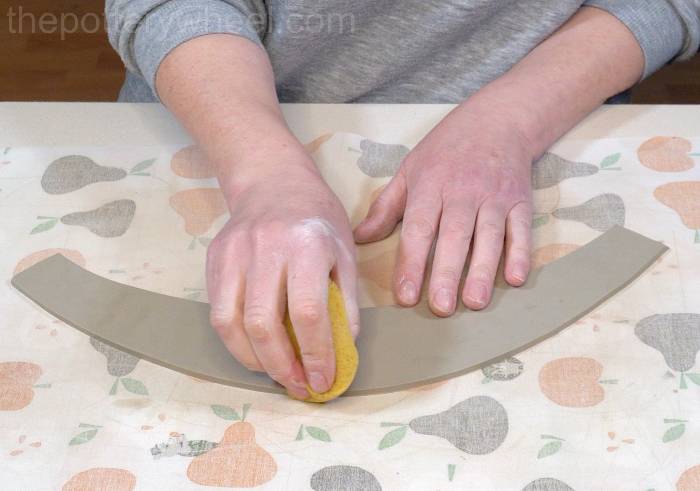
Bevel the curved bottom edge and the two short ends of the scalloped clay slab.
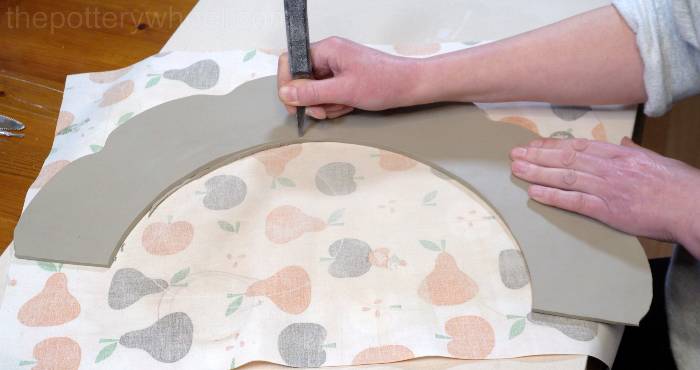
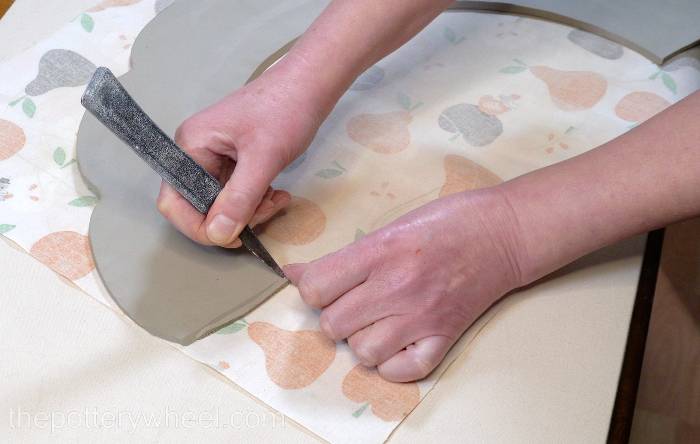
Smooth both sides of the top edge of the clay slab. It can be easier to smooth the top edge of the scalloped slab with a piece of damp chamois leather wrapped around your finger.
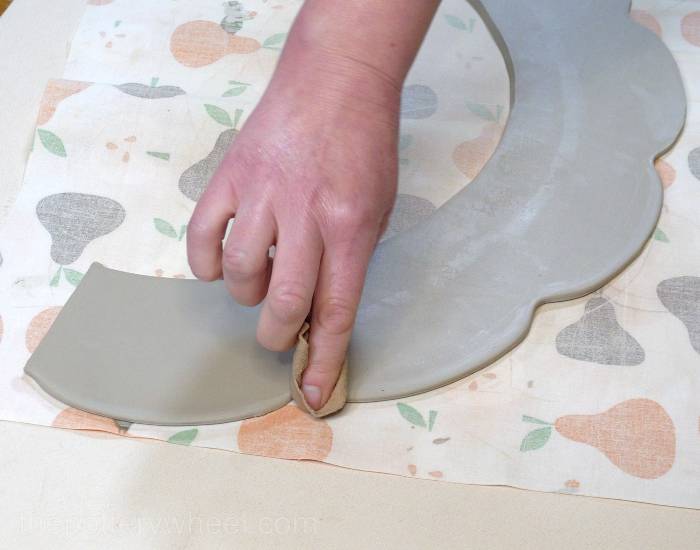
Step 12 – Joining the Curved Washbowl Slab
Score both of the short edges and then curve the slab around.
Make sure that you are curving it so that the bottom bevelled edge is flat on your worktop.
Apply slip to both short scored ends and join the two ends together using the same method outlines above.
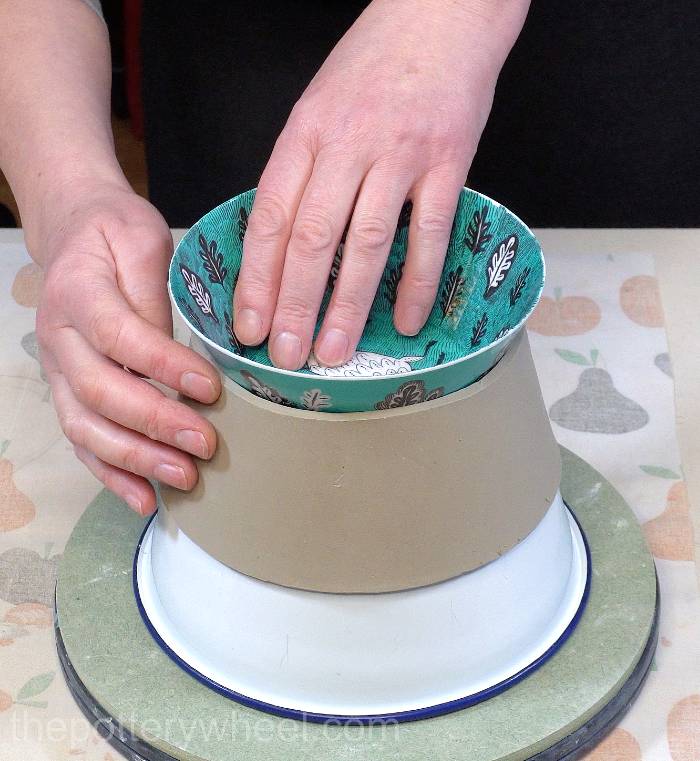
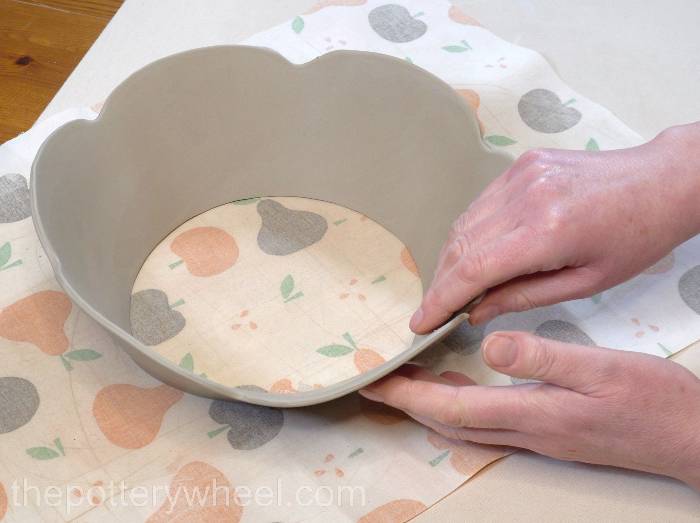
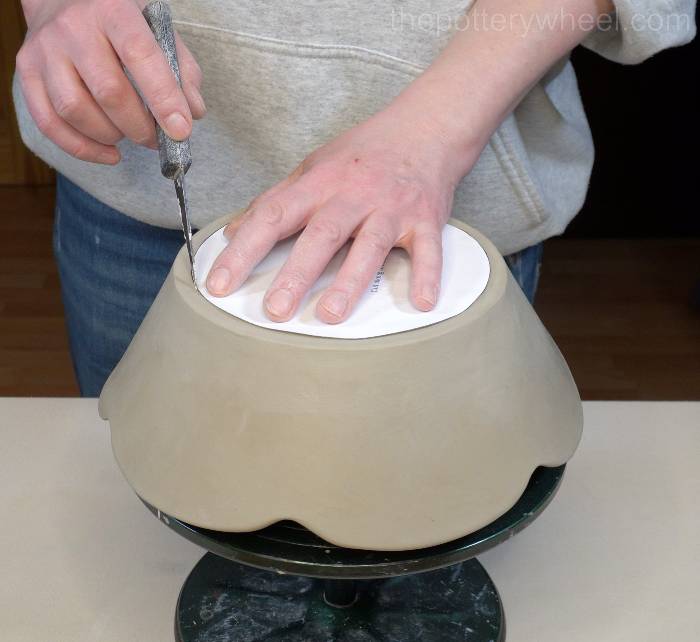
The side of the bowl needs to be put aside now to firm up a bit. Before you let it become leather hard, make sure that the base of the bowl is nice and round.
You can use template Q to do this. Lift the bowl and position it onto template Q. Use your fingers to shape the base of the bowl so that it follows the circle of template Q.
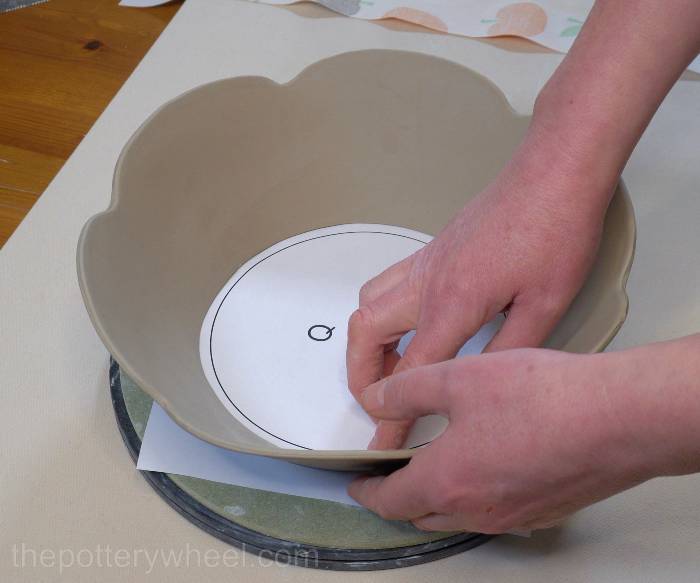
The circle on the template is a little smaller than the base. This is to allow for the fact that you might be building the bowl using thicker slabs than the one I’m using in the picture.
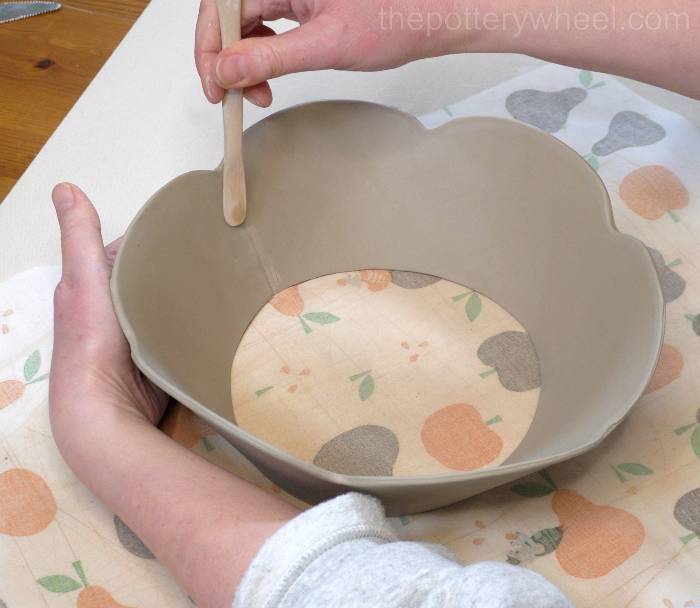
Let the side of the bowl rest on the template for a while so that the freshly joined seam bonds together well.
Once the join has had a chance to bond, you can lift the clay slab onto an inverted bowl. This will keep the base of the clay bowl nice and round as it becomes leather-hard.
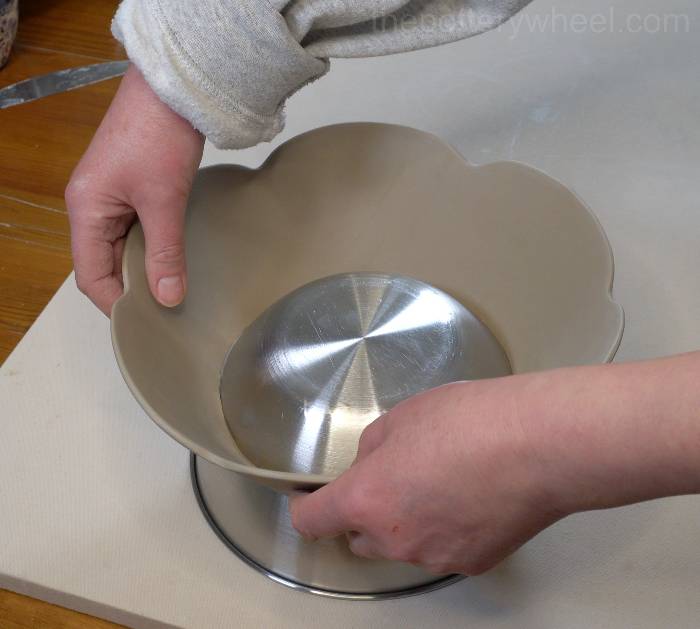
If you don’t have a metal or ceramic bowl the right size or shape, you can just leave the base of the bowl on template Q to become leather hard.
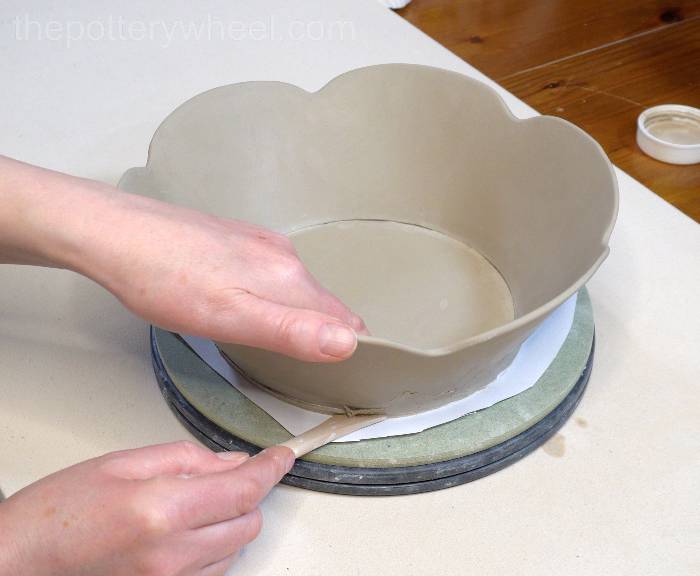
Step 13 – Adding the Base to the Washbowl
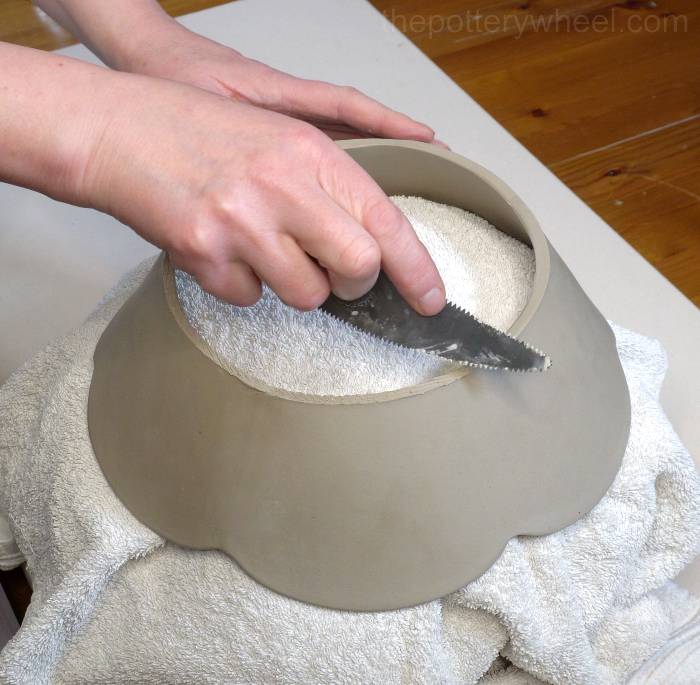
When the side of the bowl is leather hard, turn it upside down and rest it on something soft. I use a bundle of old plastic carrier bags covered with an old towel. You might have an old cushion or something similar. Score into the bottom edge of the side of the bowl.
Also, score all around the edge of the circular base of the bowl. Apply slip to both scored surfaces and lower the side of the bowl into position on top of the slipped and scored base.
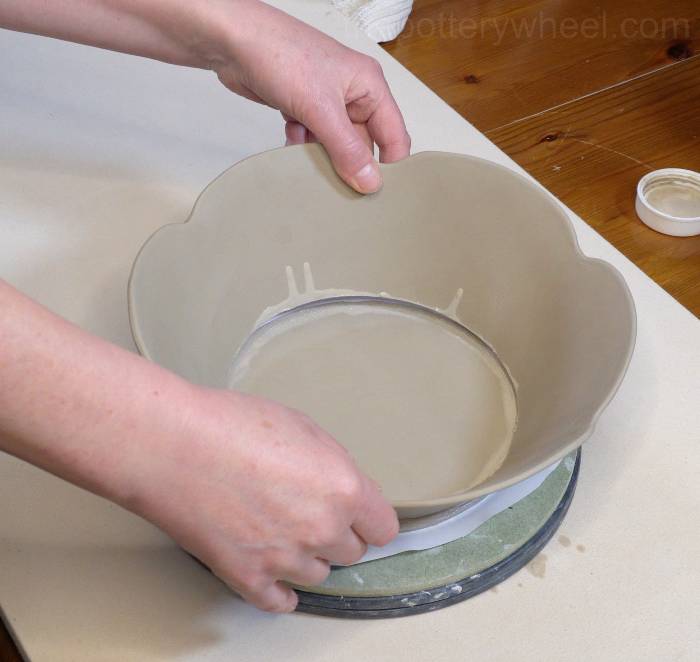
As with the jug, the base of the bowl is a bit bigger than the bottom of the side of the bowl. This is to give you some excess clay to work with. Trim off some of the excess clay leaving about 1mm all the way around of extra clay.

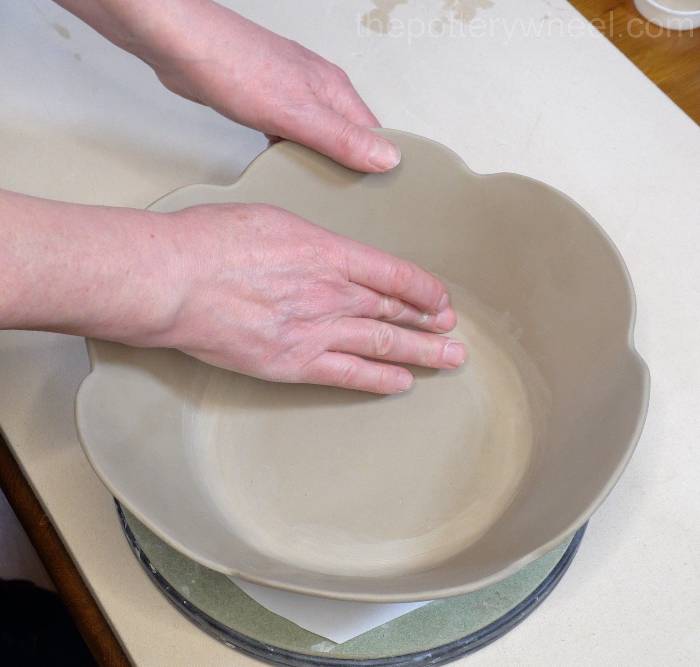
Using a wooden tool, blend the base of the bowl onto the bottom edge of the side.
Add a thin coil of clay to the inside surface of the join, and blend this in with a stylus tool.
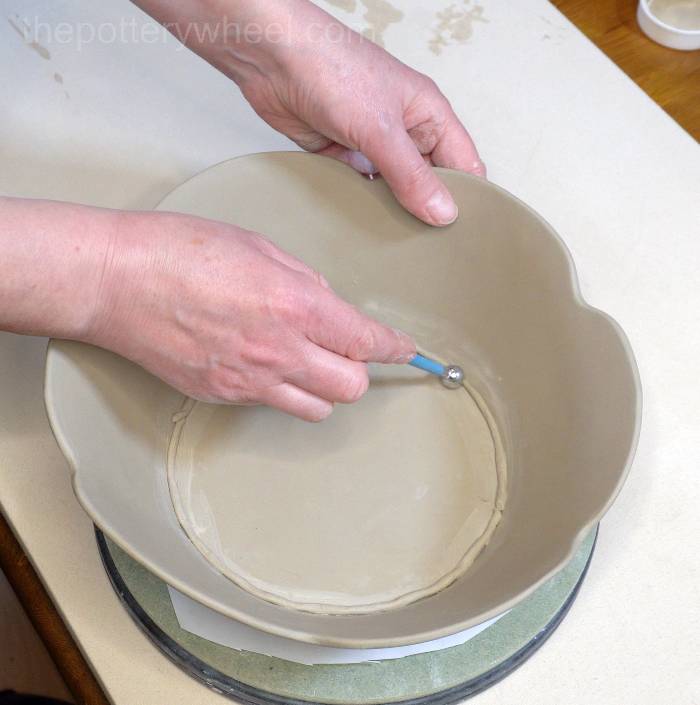
Once it’s blended in with the stylus tool wipe down the surface to create a smooth finish on the inside of the bowl.
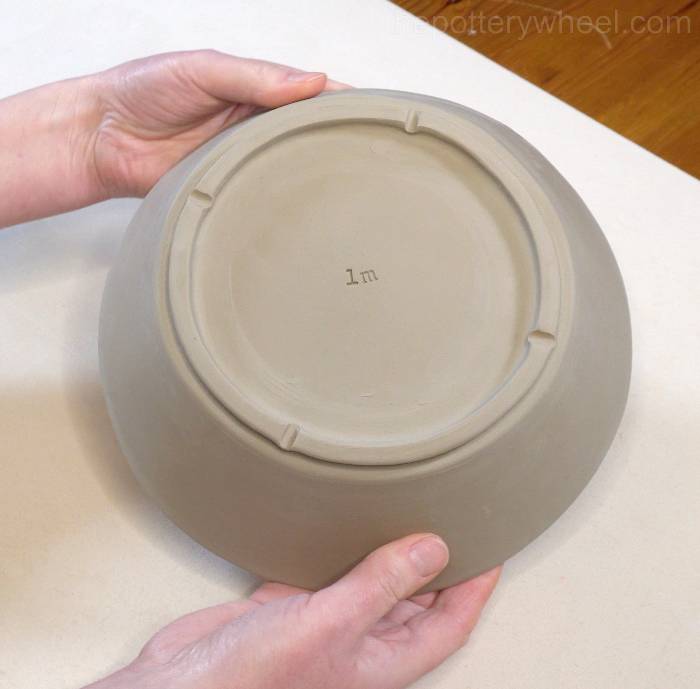
Step 14 – Adding a Foot Ring to the Washbowl
You don’t have to add a foot right to the washbowl. However, a foot ring can give the wash basin a nice finished look. Also, large flat bases are prone to cracking when they are fired. A foot ring can help to prevent these cracks.
Making the Foot Ring
Roll out a slab of clay. I’d recommend rolling it out using 6mm roller guides.
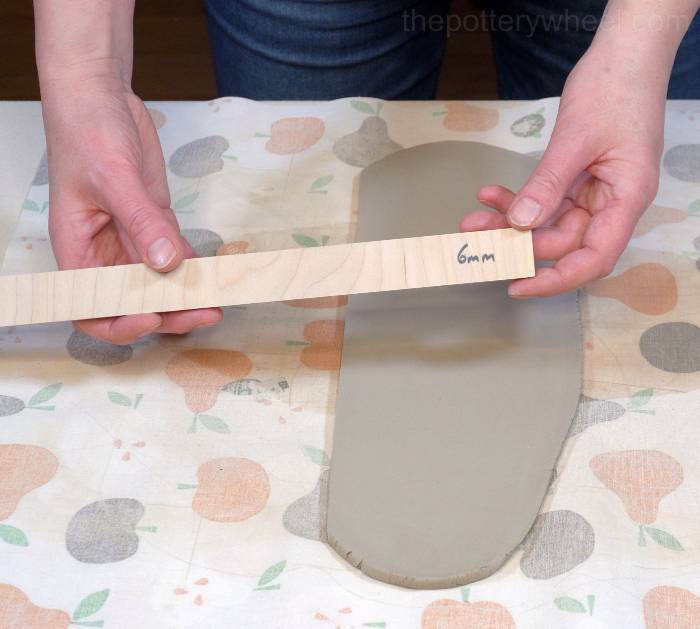
You need to cut a few narrow strips of clay from this slab. There are a few ways you can do this. Here are a couple of suggestions:
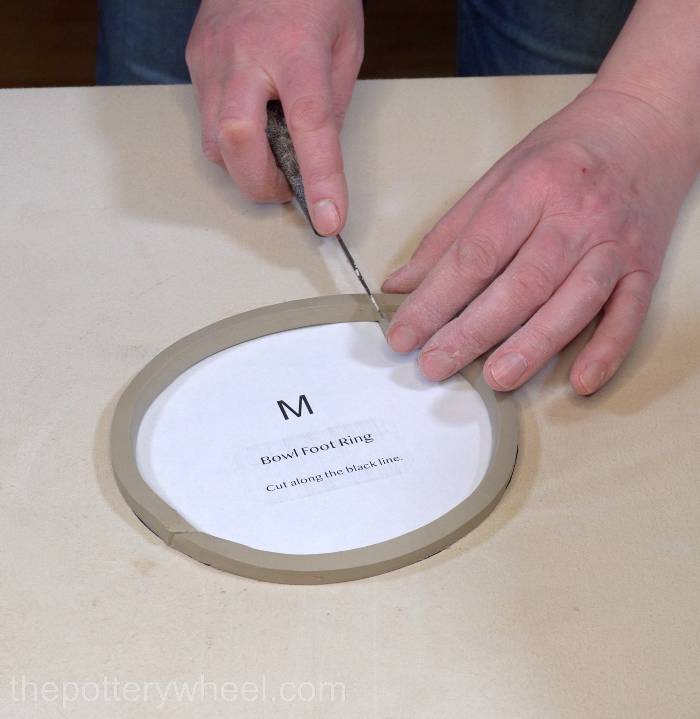
There is a long thin template in the template pack labelled template R. Place this template on the clay slab and cut around it using a straight edge. Cut out two strips of clay using this template.
A second way to make the foot ring strips is to use a square-ended trimming tool. Press the trimming tool into the clay slab and drag it through the clay. As you drag the tool, you will create a strip of clay that you can peel off.
Adding the Foot Ring
Turn the bowl over so that the underside is facing upwards. It’s a good idea to rest the bowl on an old container so that the bottom of the bowl is supported and the sides hang down.
Mark a circle on the bottom of the bowl with a clay knife or a needle tool. This is just a guide for where you will put the foot ring. If you have my template, you can use template M as a guide circle to draw around.
Once you have marked the circle, use a clay scoring tool to score all around the inside of the circle.
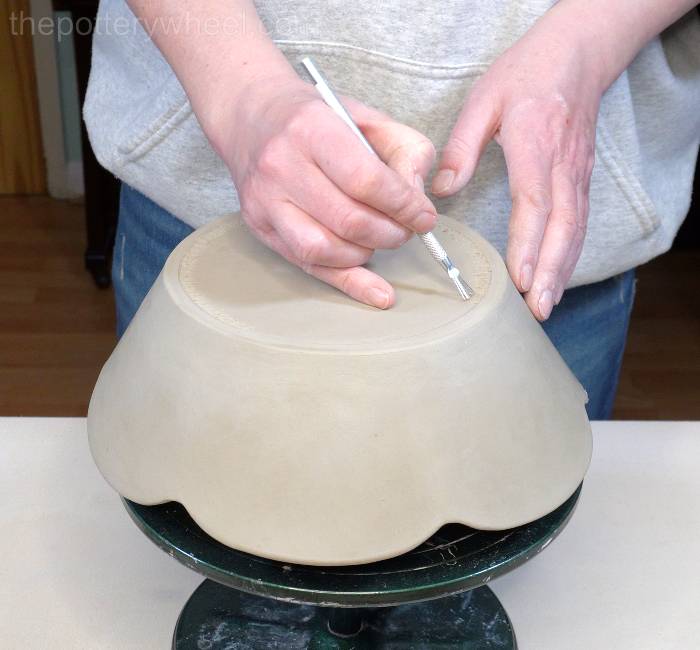
Trim the strips of foot ring at a bevelled angle. You can use Template M to cut the strips to the right length.
Score the underside of each of the trimmed strips. Then apply slip to the scored strips and the scored circle on the underside of the bowl.
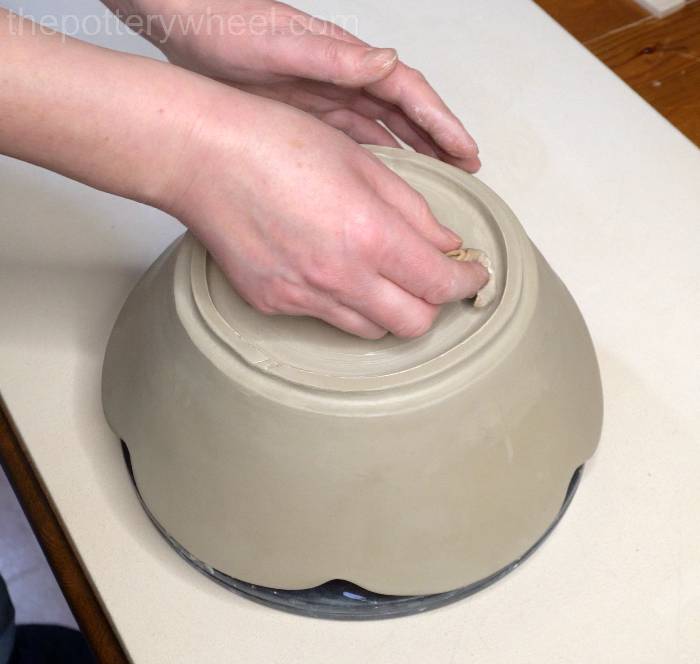
Position the strips around the bottom of the bowl. Then using a wooden tool, blend the side of the strips onto the base of the bowl. Blend the inside and outside edges of the strip onto the bowl.
When the strip has been blended in position, use your damp chamois leather to remove the marks from the wooden tool.
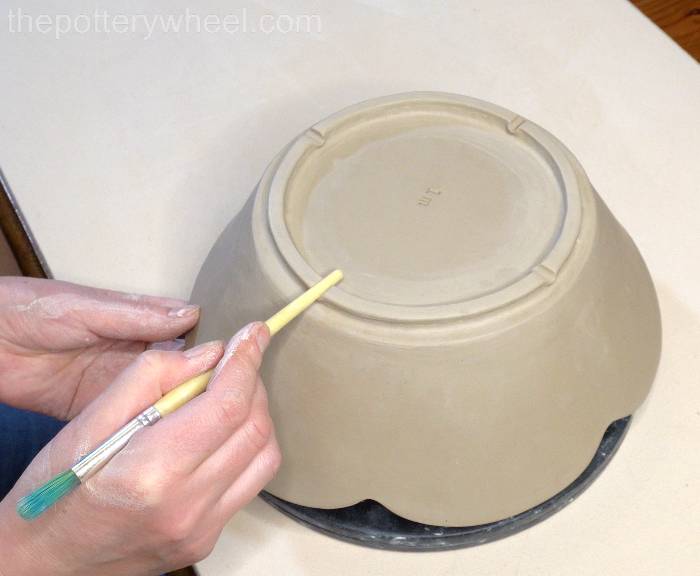
Adding Notches to the Foot Ring
Finally, it can help to put notches or indents in the foot ring. These small u-shaped marks allow air to circulate and gases to escape when the bowl is being fired. They can also help to reduce the chance that the base of the basin will crack when it’s being fired.
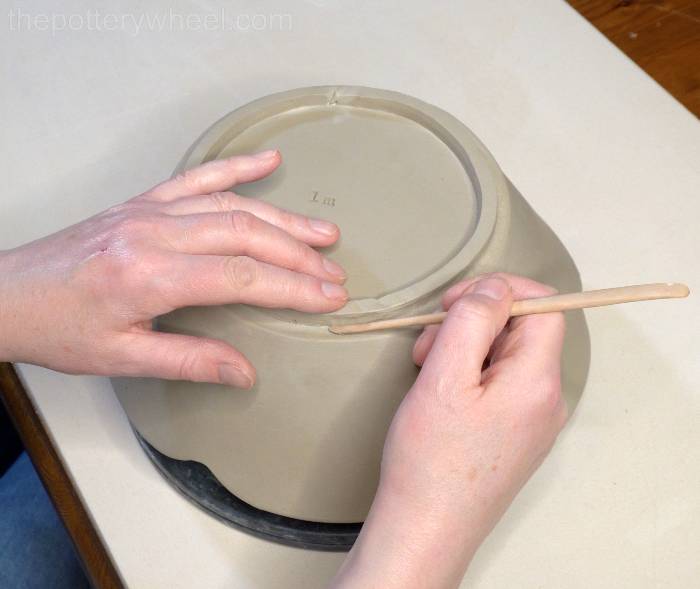
One way to do this is to press a piece of round dowl or a round paintbrush handle into the foot ring and slide it out carefully. I like to make 4 notches at equal spaces around the bottom of the bowl.
Once the foot ring is finished, the bowl is ready to be dried and then fired.
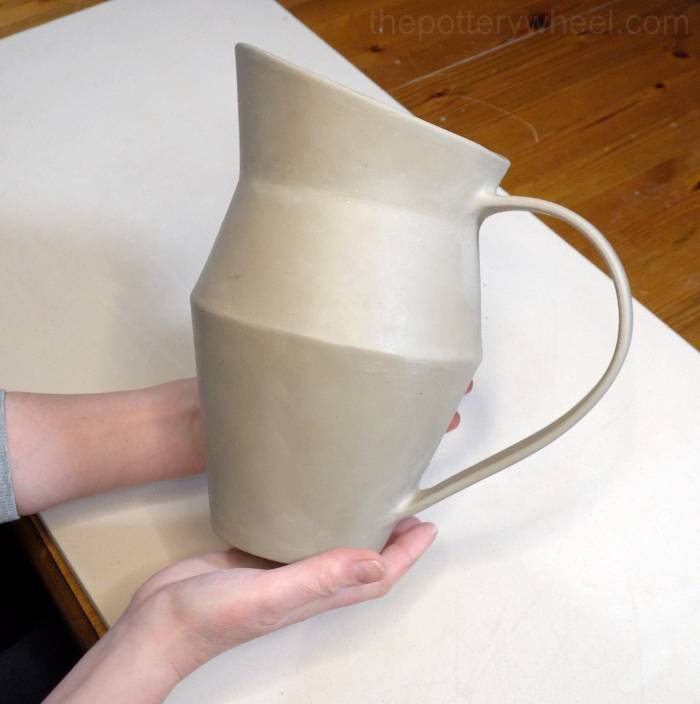
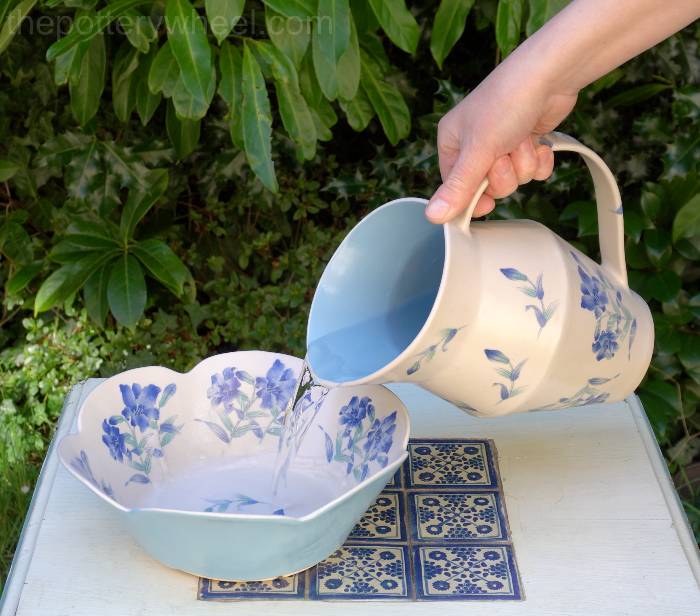
Here is the finished jug and fluted wash basin.
If you would like to get a copy of the template you can pick one up in my online store here.
Get The Template Here
You can get a copy of this template (and my other slab pottery templates) from my online shop here…
2 responses to “How to Make a Slab Pottery Jug and Wash Bowl”
-
Your pottery classes are absolutely amazing and are helping me expand my skills so much. I am having so much fun learning from you.
-
Thank you so much, that’s wonderful to hear 🙂
-

Leave a Reply