Your cart is currently empty!
How to Get Rid of Mold on Clay – 7 Ways to Clean Moldy Clay
Published:
Last Updated:

Affiliate Disclaimer
As an affiliate, we may earn a commission from qualifying purchases. We get commissions for purchases made through links on this website from Amazon and other third parties.
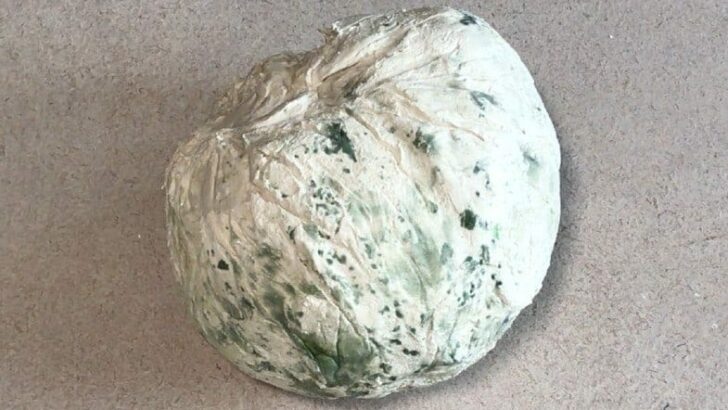
Finding that your pottery clay has gone moldy is very common. Clay needs to be kept moist to stay workable and it contains organic matter. These are perfect conditions for the growth of mold. So, what can you do if you open up your bag of clay and it’s growing green and black mold? Here are a few tips on how to get rid of mold on clay.
Some ways to get rid of mold on clay include adding bleach, hydrogen peroxide, vinegar, Dettol, or Epsom salts to your clay. Whichever substance you choose to add, you need to add the right quantities at the right concentration. Alternatively, you can slice the mold off, or wedge it in.
Some potter’s swear that a little mold on their clay makes it more plastic and easier to use. For them, getting rid of the mold is not the objective. They simply wedge it into the clay and start making pots.
But, there are good reasons for wanting to get rid of mold on clay. The first is simply that it grosses you out. Being turned off the clay by the mold is a legitimate reason for wanting to be rid of it. The other reason some people want to get rid of mold is that they may be allergic to the spores. If that’s the case, then yes, getting rid of mold on clay makes absolute sense.

7 Ways to Get Rid of Mold on Clay
Let’s consider these options in a little more detail, so you can decide which approach is best for you.
Option 1 – Bleach
Adding a little bleach to clay is a common practice for potters who want to get rid of mold. There are different ways you can do this. You can make up a water and bleach solution and put it into a spray bottle. Then spray the moldy clay and leave it in a bag overnight. Or you can simply pour a little of the solution into the clay bag.
How much liquid you add depends upon whether your clay has hardened up or not. Mold is often a sign that the clay has been sitting around unused for a while. So, it may also have toughened up and need softening before you can work with it.
If that’s the case, then adding a little more water and letting it absorb the liquid overnight will help. I find the best way to soften up clay is to wrap it in a damp towel overnight.
Remember to put the towel into a plastic bag to stop the water from evaporating. If you add a little bleach to the water you can get rid of mold on clay too. Just remember to use an old towel, as the bleach may make it tie die!
Once the clay has been allowed to sit in the solution overnight, you can wedge the clay.
How Much Bleach to Use?
Although adding bleach to get rid of mold is quite common practice, it is not without its drawbacks. The first one is obviously that bleach is a potent chemical and needs to be used in a dilute form.
If you read up, there are different recommendations for ratios of bleach to water. Some say a cup full of bleach for a gallon of water (source).
However, usually, you are making the bleach water solution in much smaller quantities than a gallon. It’s more likely that you are going to use a cup of the solution if that. A more useful suggestion is to use a capful of bleach for a cup of water (source).
It’s sometimes recommended that you use 9 parts water 1 part bleach. Using that ratio, you can scale the quantities down to whatever amount you need.
Either way, even with a dilute solution, it’s a good idea to wear gloves when you are wedging the clay afterward. Wedging the clay will the solution into the clay. Once it’s wedged, you should be ok to use the clay without wearing gloves.
But even then some potters find that using bleach to get rid of mold on clay makes their hands unhappy. So, what are the other options?
Option 2 – Hydrogen Peroxide
Hydrogen peroxide is another chemical that can be used to get rid of mold on clay. It is sometimes used in preference to bleach because it is generally considered to be less harsh than standard bleach.
Hydrogen peroxide can be used as a bleaching agent and it will get rid of mold, bacteria, and fungus. It can be bought in pre-diluted solutions that can be used for cleaning the house.
It’s also used by some as an antiseptic solution. So, when sufficiently diluted, it is less likely to cause the same kind of skin irritation that bleach can cause.
Spraying moldy clay with a food-grade mixture of hydrogen peroxide is a non-toxic way of dealing with the problem.
Option 3 – Vinegar
If you want to avoid using chemicals, you can add a little vinegar to your clay. Vinegar is acidic and therefore kills mold. But it’s milder than bleach or hydrogen peroxide and is a safe way to get rid of mold on clay.
Because vinegar is relatively benign, you don’t have to dilute it. You can simply spray a little vinegar onto the mold in the clay bag. Or add a capful of vinegar to your clay. Add enough to cover the moldy area of clay and allow it to sit overnight. Then, you can wedge the clay to even out its consistency.
Vinegar has the added benefit of making clay more plastic. When clay is plastic, it is soft and workable, and it keeps the shape that it is given when molded.
The drawback with vinegar is that it can make clay a little smelly if it isn’t used relatively quickly. So, if you use vinegar to get rid of mold on clay, use the clay sooner rather than later.
Option 4 – Dettol
One solution that does not have the same issues with making clay smell bad is Dettol. A few drops of Dettol will help to get rid of mold on clay. You could moisten the clay with water and then wedge a few drops of Dettol into the soft clay. Or you could add a water / Dettol solution to the bag of clay and allow that to soften the clay.
Dettol is less harsh than bleach, so you don’t need to be as cautious using Dettol in your clay. Nevertheless, the makers of Dettol point out that skin irritation can be caused by a number of factors. And they recommend wearing gloves when using their products.
Wearing gloves when you are wedging is one thing. But rubber gloves when you are throwing or building your pottery are more awkward. If you find that your hands don’t like Dettol in clay, you might like to try the following option….
Option 5 – Epsom Salts
Potters sometimes use Epsom salts to get rid of mold on clay. Epsom salts come in either granules or powdered form. If you are going to use Epsom salts in your clay, it’s important to make it into a solution first. You do this by adding the salts to warm water and dissolving them into the water first.
If you don’t do this, the granules of Epsom salts in your clay can cause blistering when you fire your pots.
Epsom salts are used by potters as a flocculant. Flocculants make the clay particles that make up the clay body stick together more. If your clay is a bit too sticky and soft, adding a little flocculant can make it more workable. But adding too much flocculant can make it a bit too solid and stiff.
So, if you are using Epsom salts to clay, it’s best to add a small amount at a time. It may help get rid of mold on clay, but it can also make your clay heavy to use.
Option 6 – Slice the Mold Off
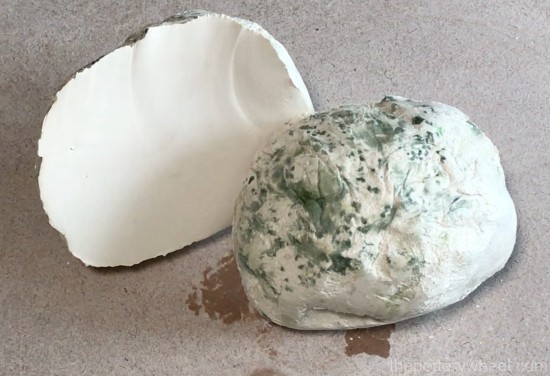
A lot of the time mold on clay is only on the very surface of the clay. So, a simple way to get rid of it is just to slice it off. Generally, you only need to take the very top layer of clay off to get rid of it. So, you aren’t wasting a lot of the clay.

Occasionally you might find that mold has grown in deeper layers of the clay. This has sometimes to do with the way the clay has been manufactured.
But more often than not, mold on clay is a surface response to a combination of moisture, bacteria, and oxygen. I find the easiest and cleanest way to remove it is to slice it off with a clay cutting wire.
Option 7 – Wedge the Mold into the Clay
Your other option is to simply wedge the mold into the clay. A lot of potters claim that mold on clay adds to its plasticity.
It’s pottery folklore that clay that has a bit of mold on it is easier to throw on the wheel. The reasoning behind this is that organic matter, moldy, slimy, or otherwise, helps the clay particles glide over one another.
Whether this is actually the case is a matter of debate. However, even if it doesn’t add to the plasticity, mold does simply burn off when you bisque fire. So, if you choose to wedge the mold in, any mold spores, discoloration or streaks will disappear when it’s fired.
Of course, if you have an allergy to mold, then wedging it in, is not really an option. But if the mold doesn’t bother you too much, then it might be the simplest solution.
Final Thoughts
It’s relatively easy to get rid of mold on clay, and the good thing is you have options to try. It’s a simple fix. So, throwing your clay away just because it has a bit of mold on it is not necessary. See which solution works best for you, and save yourself some money.


