Your cart is currently empty!
11 Tips to Get Better At Throwing on The Wheel
Published:
Last Updated:
Affiliate Disclaimer
As an affiliate, we may earn a commission from qualifying purchases. We get commissions for purchases made through links on this website from Amazon and other third parties.
When you are first learning how to throw on the potter’s wheel, it’s easy to get disheartened. It’s not easy in the beginning. Here are some top tips that I learned along the way that improved my wheel throwing skills…
Table of Contents
show
How to Get Better at Wheel Throwing
Wheel throwing is a combination of fine motor skills and developing your own style. Like learning to play an instrument this takes time and patience. However, with time, it’s entirely possible to get better at throwing on the potter’s wheel.
1) Practice, Practice, and Practice Some More
The absolute number one thing that is going to make a difference to your wheel throwing skills is to practice as much as you can.
This doesn’t mean that you have to spend all day, every day at the wheel. But it does mean that the more time you spend on the wheel, the more quickly you will improve.
I started out as a hand builder and although I tinkered on the wheel, becoming proficient seemed impossible. The main thing that turned my wheel throwing ability around was regular practice.
One day I decided that I was going to throw every day until I got better. And much like deciding to practice a musical instrument every day, my wheel throwing slowly but surely improved.
If you don’t have a wheel at home practicing every day is harder. So, practice whenever you can. Or, alternatively, you could invest in getting a pottery wheel that you can use at home.
Wheel throwing can be a bit messy, so you are keeping it in your home, you just need to give it a good clean after you’ve finished practicing. But it’s entirely possible to get a wheel to practice on.
Pottery wheels come in all different price ranges, from $150 to $1500. If you don’t want to splurge on a top-end wheel, you could begin with a budget pottery wheel and use that to level up your skills.
I started with this pottery wheel by Vevor. It’s inexpensive, compact, and good for tucking away in a corner of your home when you aren’t using it. You can take a look at my review of the pros and cons of this wheel here.
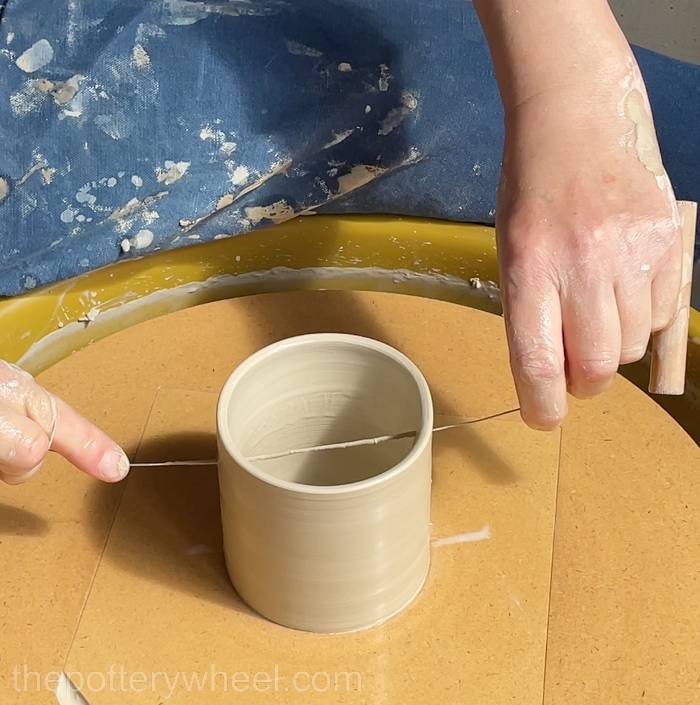
2) Slice Your Pots in Two
Don’t get too attached to your pottery. Treat each pot like a learning experience to see how you can improve.
Clay can be recycled again and again. If a pot doesn’t work out as you’d hoped, don’t stress about it, just put it in a bucket with some water in it, recycle the clay, and use it again to practice some more.
A really helpful exercise to see where you need to improve is to slice some of your pots in two. Run a clay wire under your pot on the wheel to separate it from the wheel head.
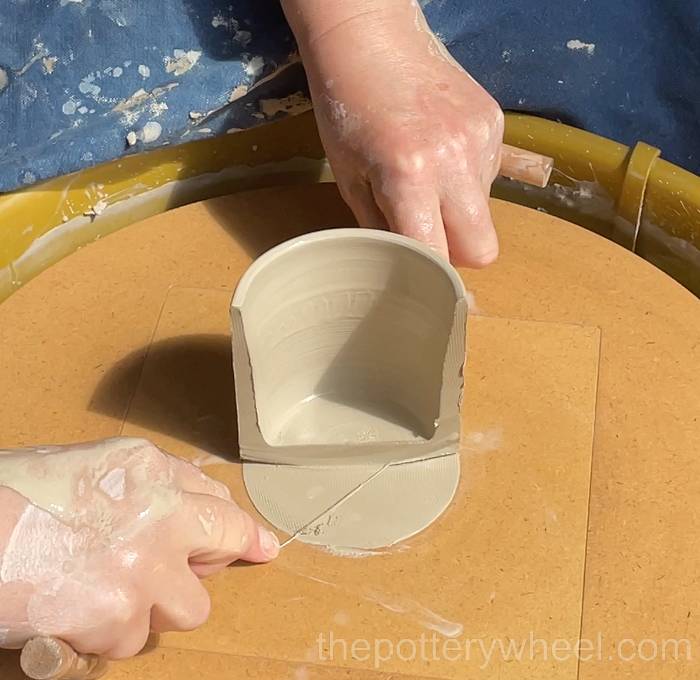
Then run the wire under again so the wire is in the middle of the pot at the bottom. Draw the wire up the middle of the pot to slice it into two pieces. This will give you a cross-section of the pot.
You might feel reluctant to slice your pots in two if you have spent ages trying to perfect the shape. But it’s an invaluable source of information. It will show you when you have uneven walls, and if your pots are thicker at the base.
My pottery teacher told me that you need to slice 100 pots in two in order to get better!
3) Prepare Your Clay
If your clay is too dry and hard, it’s going to be harder to throw with it. You can soften clay off in a few ways.
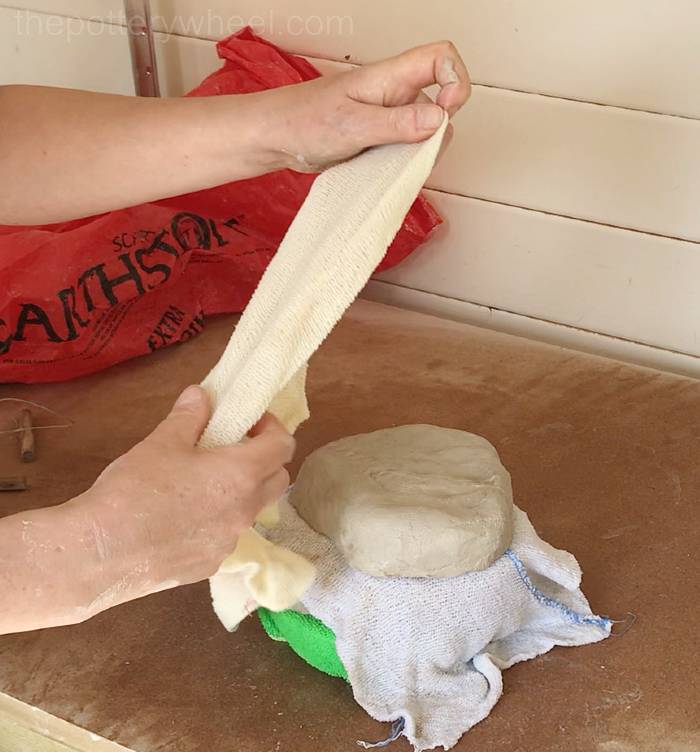
One of the easiest ways to do this is to slice the clay into sections of the size that you are going to throw with. Then wrap each ball of clay in a damp cloth.
Put clay and damp cloth into a plastic bag and seal the bag. Leave the clay overnight to allow it to absorb some of the water. The next day it will be much softer and easier to use.
If your clay is too wet and soft, you can firm it up by rolling it into a fat sausage shape. Then curve the clay sausage into a horseshoe shape and put the horseshoe in an upright position on your worktop.
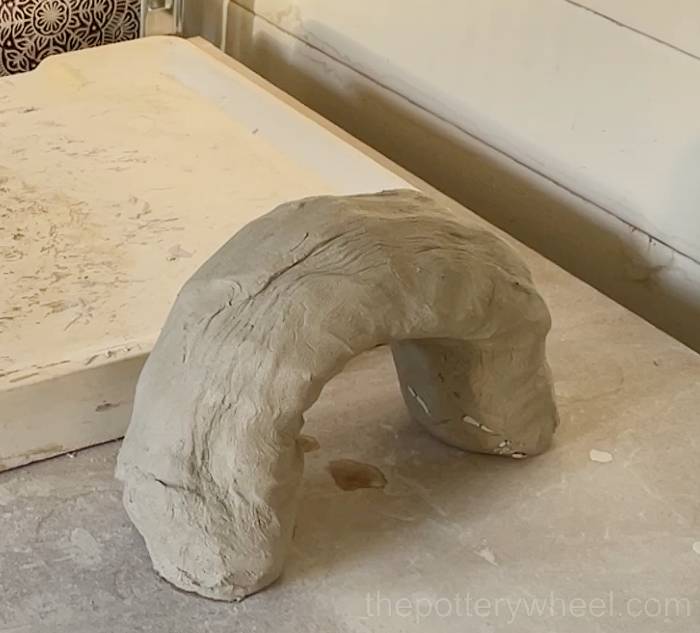
This will allow the air to circulate around the clay and firm it up. You can read more about preparing your clay for pottery here.
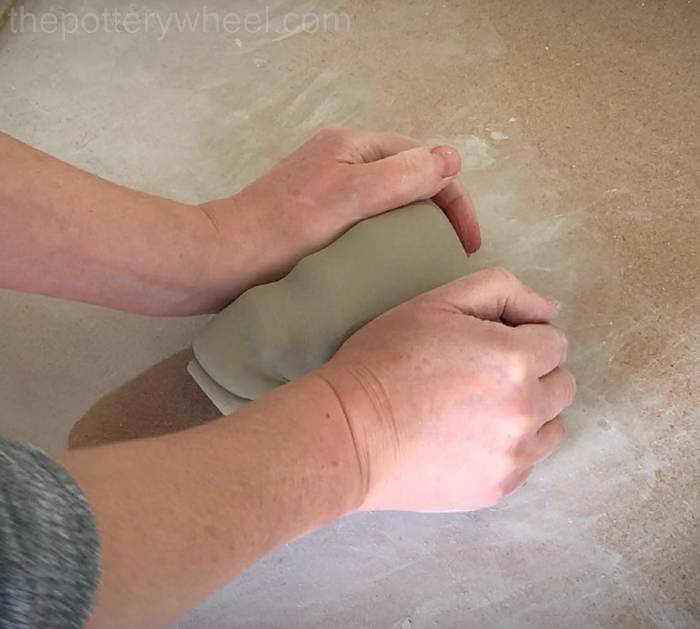
4) Wedging your Clay
Another way to prepare your clay is to wedge it. Wedging clay is a bit like kneading dough. The difference is that when you are kneading dough, you are trying to get air into the dough. It’s the opposite with wedging. When you wedge you are trying to get rid of air bubbles from the clay, and also to even out the consistency of the clay.
Wedging also takes a bit of time to learn. When you are learning to wedge, you might find that you are actually creating more air bubbles in the clay and making the clay worse. Again, don’t stress about this. Wedging is a learning curve too and you will master it with practice.
In the meantime, what should you do if you aren’t sure of your wedging technique yet? If you are using clay straight from a bag of commercially supplied clay, I would suggest simply patting the clay into shape rather than wedging it. Clay fresh from the bag is unlikely to have air bubbles in it.
However, if you are using recycled clay or clay scraps you will need to wedge it well. Air bubbles in your clay make wheel throwing more difficult. An air bubble will make it harder to center your clay and can make the walls of your pot wonky and uneven.
Also, wedging will even out the consistency of your clay too. If your clay has an uneven consistency, your pottery will probably have uneven walls too. Harder sections of your clay will create thicker spots on the pottery wall. In contrast, the softer clay will form thinner parts on the pot wall.
As you practice your throwing skills, practice your wedging skills too. Learning to wedge well will give your throwing a boost. You can learn more about wedging here.
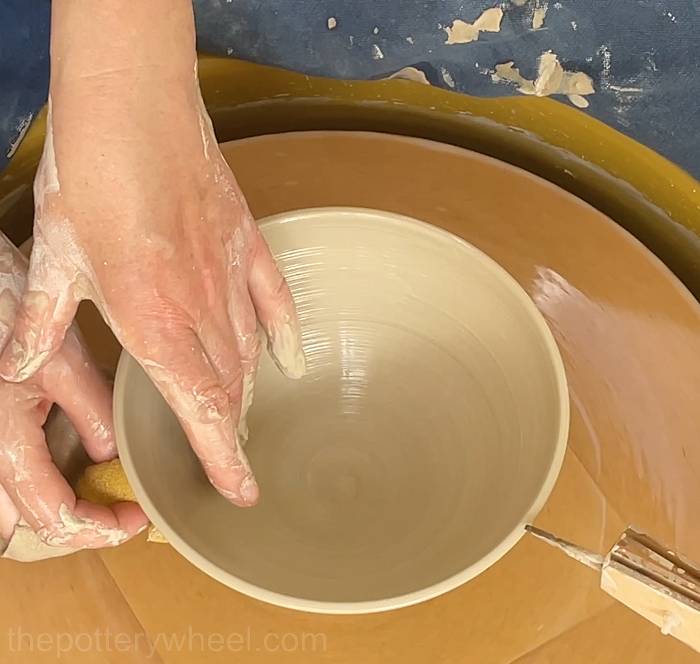
5) Keep Your Hands Clean
Keep a bowl of clean(ish) throwing water near you and keep your hands clean when you are throwing. If your hands are covered in lots of sticky clay slip this will create friction as you are throwing. Friction will cause your hands to grab onto the clay and pull your pottery off center.
I regularly scrape my hands clean with a rib, or on the edge of a bucket and wet them with clean water when I’m throwing. You want your hands to be wet, but not covered with sticky clay slip.

6) Be Mindful of How Much Water You Are Using
Water is important when you are throwing to make sure that your pot is well lubricated and not sticking to your hands or throwing tools. However, using too much water will cause your clay to become waterlogged and very soft. If the clay becomes too wet, the walls of your pot are more likely to sag or collapse.
Use enough water to keep your hands and clay slippery, but not so much that your pot is swimming in water. And as you work mop up excess water that is sitting in and around your pot, so it isn’t making the clay overly soft.
7) Take a Pottery Class
If possible take yourself along to a pottery class, and get some invaluable guidance from a pottery teacher.
Pottery classes, especially group classes are a lot of fun. In addition to being enjoyable, you will learn a lot of new tips and you will unlearn bad habits that you may have picked up!
If you live in a remote area, then accessing a pottery class in person may not be possible. If that’s the case then there are lots of online pottery classes available, and of course, there are always a tonne of videos and ‘how to’ resources on YouTube.
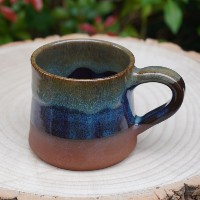
Visit The Pottery Wheel Store
Fancy treating yourself to some homemade pottery? Looking for a unique gift? Check out my handmade pottery store…
8) Learn How to Recycle Clay So You Can Keep Practicing
When you are learning to throw on the potter’s wheel, it can help if you think of everything you make as being a practice piece. Be prepared to put the pots that you aren’t happy with in the clay recycling bucket.
No pot is wasted because with each pot you learn something new. It’s helpful to become willing to ditch some pots and try again. I mentioned earlier on that you should throw practice pots in the clay bucket and recycle them.
To avoid wasting clay, it’s a great idea to learn how to recycle your clay. That way, you can try and try again with your clay supply until you are happy with what you have made. You can take a look at my step-by-step guide on how to recycle clay here.
9) Use a Mirror When You are Wheel Throwing
When you are throwing, you see your pots from above and also from the side, if you bend over. But it can be very handy to see them from a different angle too. I have a mirror sitting on a stool just in front of my pottery wheel.
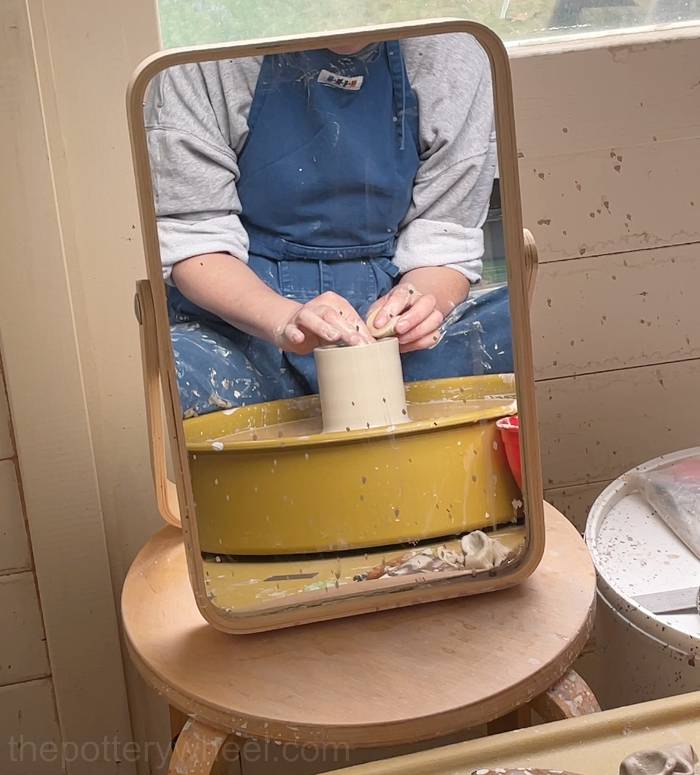
The mirror is angled so that when I’m sitting at my wheel, I can look in it and get a good idea of what the pot looks like from top to bottom. This will give you a better idea of the shape and proportions of your pot than you get from leaning over to the side. An inexpensive mirror is worth investing in.
10) Have Patience in Yourself
If throwing was easy, it wouldn’t be considered a craft. It takes time to learn and I don’t think you ever stop learning or improving. Some of the most talented potters I know still take classes, get things wrong, and push themselves to try new things.
Like learning an instrument, regular practice will help speed up the process, but even with practice, you need to be patient with yourself and accept where you are at any given time.
11) Don’t Despair
I remember watching a video by an amazing potter when I started out, and he said ‘We all suck at throwing when we start out’. And that’s true. Everyone, even the really extraordinary potters that you might see today, once had to learn the basics of centering, opening, pulling, and shaping their pots.
If you are having a bad day on the wheel and everything you make is going wrong, take a breath, clean your wheel, and come back to it on another day. You’ll have good days and bad days on the wheel, but don’t despair, if you keep at it you will steadily improve.
8 responses to “11 Tips to Get Better At Throwing on The Wheel”
-
I agree with all that you wrote here. … had to chuckle when you said to practice making pottery every day, much like practicing music…. because I’ve noticed since I became so hooked on my daily activity with ceramics that I’ve gotten to the point where I never play my musical instruments and am now very rusty at music! Good grief!!!
-
I know exactly what you mean. There are only so many hours in a day!
-
-
Thanks so much Lesley, for this post. I had been feeling exactly as described. I’ll definitely work on being more detached with each piece that I throw, and will put a quota on numbers that need to be sliced for each session. I currently spend way too long on them, which I know is counter productive.
-
Yes, it’s painful to start slicing your pots, but once you get used to it, it starts to feel ok. And you learn so much from doing it.
-
-
This was very helpful to me as a novice pottery maker. Thank you for sharing your expertise!
-
You’re welcome. I’m glad it was helpful 🙂
-
-
J’ai un problème avec mon tour shimpo, plus moyen de centrer correctement !
J’ai ce tour depuis de années et jusqu’à présent tout se passait bien et ça fait plus de 43 ans que je fais de la poterie.
J’ai contrôlé les niveaux et suis bon dans tous les sens … La girelle tournant je ne vois pas de tremblement …
Je ne sais plus que faire ni d’où ça peut venir …
Merci de votre réponse et conseils .
Godefroid Jean-Claude.-
Bonjour, désolé, je viens seulement de voir ce message. Je me demande si vous avez réussi à résoudre votre problème ? Il est étrange que vous rencontriez soudainement des difficultés si la roue semble bien fonctionner et que la tête de roue ne vacille pas. Avez-vous changé votre technique ? Comment ça se passe maintenant ?
-


Leave a Reply