Your cart is currently empty!
Best Surface for Rolling Clay – 8 Ways to Stop Clay Sticking
Published:
Last Updated:
Affiliate Disclaimer
As an affiliate, we may earn a commission from qualifying purchases. We get commissions for purchases made through links on this website from Amazon and other third parties.
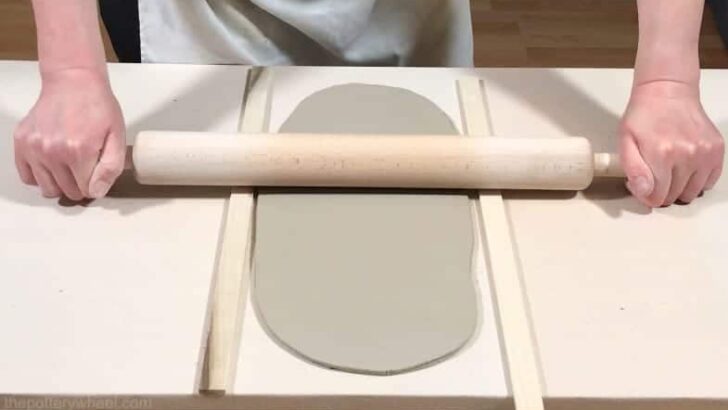
Rolling a nice, even slab is essential for slab building pottery. However, a common problem when learning to roll slabs of clay is to find that they stick to your work surface. This problem can usually be solved by rolling on the right kind of surface. But what is the best surface for rolling clay? In this article, I will go over the most effective ways to stop your clay from sticking to your work surface.
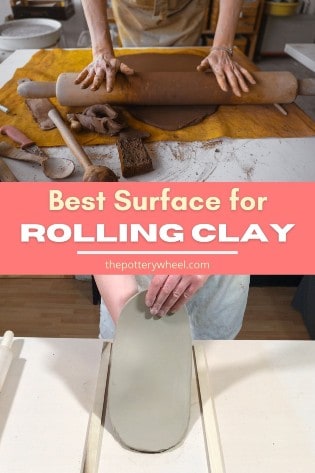
What is the Best Surface for Rolling Clay?
The main thing to avoid when you are rolling clay is to use a shiny, non-porous, super smooth surface. For example, if you have a melamine kitchen table, a clay slab will stick to it firmly and make it impossible to lift or remove.
Surface 1: Rolling on Fabric
One option is to cover your work surface with some fabric and roll your clay onto the fabric. Then when you’ve rolled your slab out, you can lift the fabric, turn it over, and peel the fabric off the bottom of the slab.
What kind of fabric works best when rolling clay?
Fabrics have a range of different textures. Canvas is a popular choice for rolling clay on, but it generally does have a bit of a textured weave on it. And this texture will get picked up by your clay slab.
Duck Canvas
Getting a bit of texture on your clay from the canvas isn’t a big problem though.
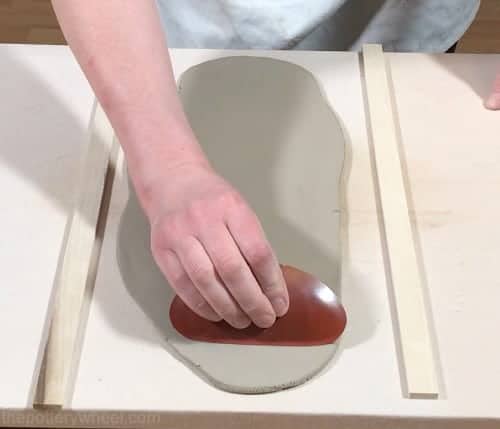
After you’ve rolled your clay slab out, you can remove the texture by running a rib tool over the slab.
If you don’t have a rib tool, then the edge of an old bank card or any kind of card with a smooth, firm straight edge will do.
If you want to avoid picking up a texture on your slab, you can roll your clay on a fine-grade fabric like an old bedsheet. This is a good option because a fine weave bedsheet has almost no texture and your slab will have a smoother finish.
TIP – Compress Your Slab
Even if you use a fine fabric without texture, it’s a good idea to go over your slab with a rib tool once you’ve rolled it out. This is because running over your clay with a rib compresses the clay. Here are a few reasons why compressing your slab is a good idea…
- It strengthens your slab. Typically slabs of clay are a little weaker than other ways of shaping clay. The reason for this is that when you are rolling the clay, you are stretching it out and putting the clay under quite a bit of stress.
The clay particles are being spread apart rather than being pushed together and being made denser. Compressing your clay is a way of giving your slab a bit of strength that it has lost when it’s being rolled. - Compressing helps to align the clay particles. When the clay is rolled the particles (or platelets) are randomly arranged. Running a rib over the clay helps to orient them in a uniform way.
It also helps to remove some of the tiny craters and textures in the clay. This reduces the chance that the clay slab will crack if you bend or curve the slab later on. It also reduces the chance of cracking during drying and firing.
Problems with Rolling Clay on Fabric
The issue of the clay picking up texture from fabric is easily resolved by running a rib over the slab surface.
However, another issue that often occurs is that the fabric becomes baggy and wrinkled when you are rolling the clay. If you’ve tried rolling clay on fabric you might have found that as you roll, the fabric starts to stretch and become misshapen as the slab grows.
This can be a pest because often folds of fabric will form underneath your slab. Then you get an impression of the fabric fold in the underside of your slab. What a pain!
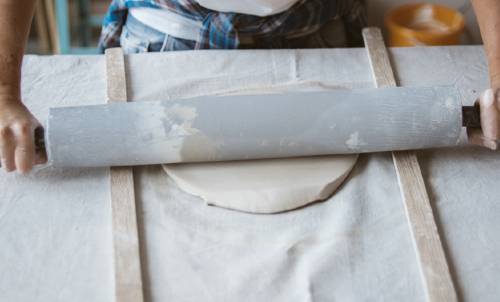
One solution is simply to lift the slab frequently as you roll and smooth out the fabric beneath it. However, if you are working on a big slab this isn’t always easy to do. Plus, it isn’t fool proof, and sometimes folds will form sneakily underneath the slab without you noticing.
The best way to avoid this is to stretch your fabric over a board and pin it to the edge of the board using a heavy-duty staple or nail gun.
Stretching fabric over a board works best with thicker material like canvas. This is because you can really pull the canvas quite tight and get a nice taut surface.
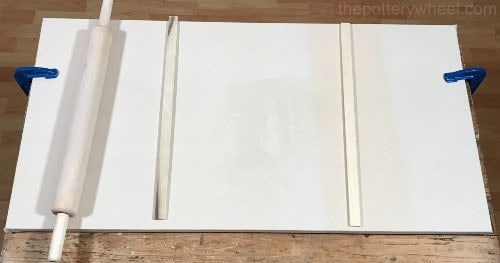
How to Stretch Canvas over a Board
Here are the simple steps you need to take to stretch and pin canvas onto your slab-making board.
- Choose the board you want to use. Any kind of wooden boarding is fine, such as plywood, or MDF.
- Line your canvas up on top of the board and draw a line on the canvas around the board. This will indicate how much fabric you need to cut out to cover the board.
- Cut the canvas about 3 inches wider than the line you marked around the board.
- Fold the canvas around one edge and staple it to the underside of the board. The easiest way to do this is with a staple gun rather than a hammer and nails.
- Once you have stapled one edge of the canvas, turn the board around and pull the canvas tightly across the surface of the board. Then staple the other edge of the canvas to the opposite edge of the board. Work your way along the side of the board until the canvas is pinned tightly all the way along.
- You can then repeat this process with the two remaining edges. Be sure to pull the canvas nice and tight before you staple it.
- It’s a good idea to run some thick, heavy-duty duck tape around the edge of the canvas on the underside of the board. This will cover the staples and stop them from scratching your worktop if they are sticking out a little bit from the surface of the board.
- The board can then be clamped to your work surface to stop it from sliding about as you roll your clay.
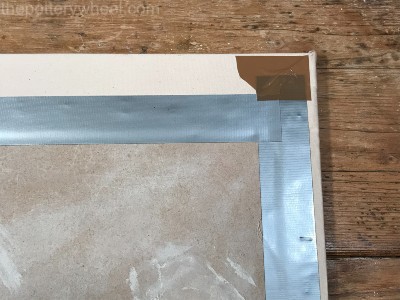
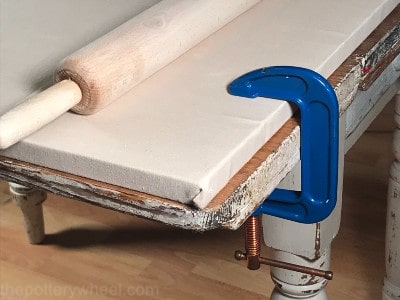
A canvas-covered board like this makes a great surface for rolling clay. However, if you are limited on space and you want a surface for rolling clay that you can fold away, there are other options. Let’s take a look at those now.
Surface 2: A Fabric Backed Vinyl Table Cloth
You can buy vinyl tablecloths with flocked or cotton backing at most homeware stores and also online. They are relatively inexpensive and they make a brilliant surface for rolling clay.
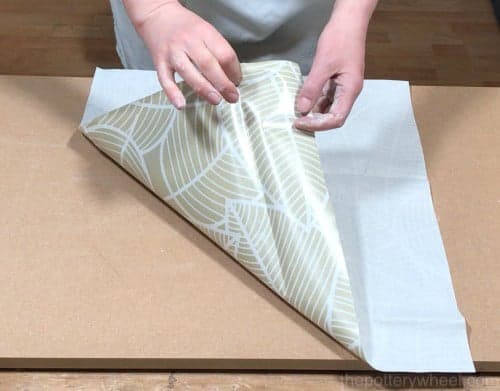
They make the perfect surface for rolling clay for a few reasons:
- Your slab won’t stick to the fabric side of the table cloth.
- The vinyl side of the cloth stops the table cloth from stretching and getting baggy like a regular piece of fabric.
- You can fold or roll the table cloth up and store it away when you aren’t using it.
- You can cut it to whatever size you need to roll out your slabs.
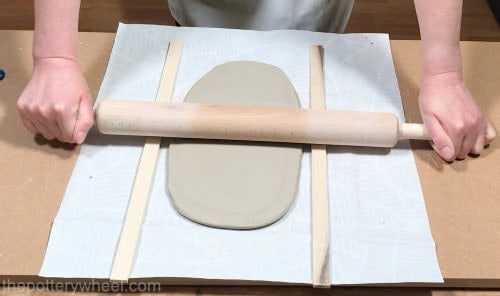
However, there is another really great advantage to using a loose slab rolling mat like this. When you are rolling slabs, it’s important to turn the slabs over every few rolls.
But, when you are rolling larger slabs of clay, it can be tricky to pick them up and turn them over. If you pick them up the clay can stretch and become misshapen or torn.
The beauty of using a flexible rolling surface like a table cloth is that it can help you flip your slab over.
Flipping Your Slab Over
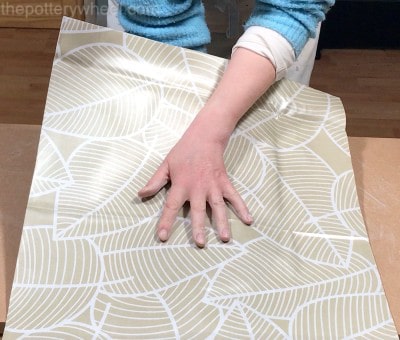
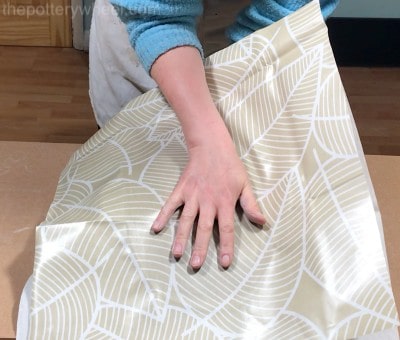
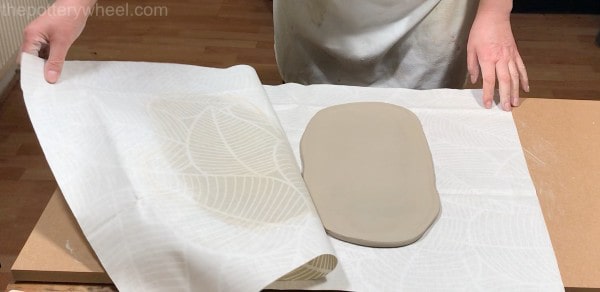
- Roll your slab out on the section of table cloth that you have cut to size.
- When you are ready to flip it over, put another piece of table cloth on top of the slab. Be sure to put the fabric side of the table cloth against the slab. You will now have your clay sandwiched between two sheets of vinyl.
- Because the clay is being supported by the fabric/vinyl, you can lift the sandwich up and turn it over without stretching the clay.
- Once it’s been flipped over, you can peel the upper sheet of fabric/vinyl off the top side of the slab and continue rolling.
TIP!
Some vinyl table cloths have quite fluffy or woolly flock lining on the back. This will leave a texture on your clay slab. However, others are backed with fine-grain cotton. These are better for creating a smoother surface on your clay.
Surface 3: Interfacing / Interlining for Fabric
Another simple inexpensive surface for rolling clay is the soft interlining or interfacing that is used to line curtains and upholstery.
This is a good option because it’s made of synthetic fibers and does not stretch when you are rolling out your slab.
Interfacing comes in different thicknesses. You can buy light medium or heavy. Medium or heavy is better as a surface for rolling clay. The heavier grade has more of a texture but is also a bit stronger. You can always rib the texture of the surface of your slab as you would if you were rolling on canvas.
Interfacing is good if you are rolling on clay that is a little too wet. Wet clay will stick to your rolling pin.
You can avoid this happening if you roll your clay between two pieces of interfacing. So, you are rolling your clay on a piece of fabric and a piece of interfacing is also lying on top of the slab creating a barrier between the clay and the rolling pin.
There are non-fabric options that you can use as a surface for rolling clay. So, let’s take a look at those now…
Surface 4: A SlabMat
A SlabMat is a mat specifically designed to be used as a surface for hand building with clay. It’s a non-stick surface and can be used as a single sheet surface for rolling clay. Or it can also be used on a slab roller.
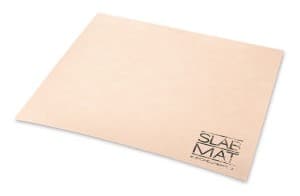
You can buy them in a range of sizes to suit your needs.
One of the advantages of the slab mat is that it’s not as absorbent as canvas. So, you can use it to make multiple slabs. Canvas tends to get a bit saturated and become sticky. Whereas the SlabMat will stay non-sticky for longer, meaning you can roll out multiple slabs.
It’s worth noting that if a SlabMat gets very moist for a long period, it can dry with a bit of a wave in it. You can fix this by drying it out sandwiched between two pieces of drywall.
But it’s best to be aware of this tendency to curve because if you dry your slab out on the SlabMat, your slab might warp too. It’s best to transfer your slab onto another surface if you want to let it dry out.
Surface 5: A Non-Stick Silicone Pastry Mat
Another somewhat inventive idea as a surface for rolling clay is to use a dough or pastry rolling mat.
The advantage of this surface is that it can be rolled up and stored easily.
I do have a pastry mat which I use now and then as a surface for rolling clay. It’s a handy option as it creates a slab with a very nice smooth finish.
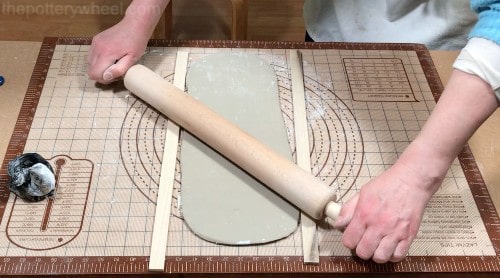
However, I find that even the non-stick silicone mats are a little sticky if my clay is quite fresh and plastic.
If you did find that your clay was sticking to the silicone mat, you can let your clay sit for a while, until it’s less tacky.
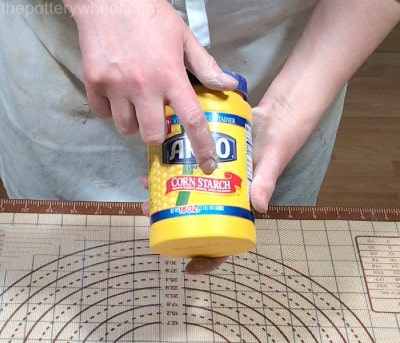
Or alternatively, you can sprinkle a little cornstarch onto the surface of the silicone mat.
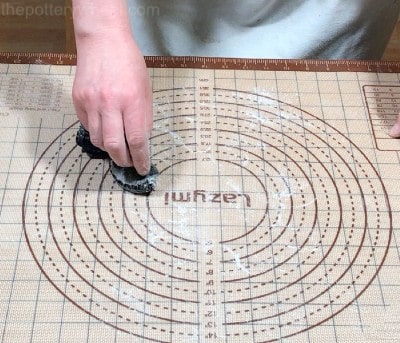
The best way to add a thin coating of cornstarch is to pour a little bit into an old nylon knee-high stocking and pat it onto the surface of the mat.
This will give the mat a thin mist of cornstarch, rather than a thick sprinkled layer. The cornstarch will just burn off the clay when it’s being fired.
Surface 6: Roofing Felt
Another option as a surface for rolling clay is a section of roofing felt. Full disclosure here – this is not something that I’ve tried. However, I thought it was worth mentioning in case you wanted to give it a go.
I came across a video made by Janis Wilson Hughes of Evolution Stoneware Pottery, in which she recommends using roofing felt as a DIY slab mat. Here is the video, let me know if you find it works for you.
I’m going to give this a try, but to date, I can only find roofing felt with quite a grainy texture. But I’m going to keep on the lookout for some with a smooth finish and give it a whirl.
Surface 7: Wooden Boards
Lots of potters use solid wooden boards as a surface for rolling clay. As mentioned above, one of the difficulties of rolling directly onto a work surface is that your clay slab can stick.
However, if you are rolling onto a reasonably absorbent wooden surface this is less of a problem.
Two things can help if you are rolling onto a wooden surface:
The first thing is to make sure that your clay is not too wet and sticky. If it’s very tacky the clay will stick to your wooden board.
The second thing is that over time, as your wooden board is used as a surface for rolling clay, it will become less sticky. This is because gradually clay particles will nestle into the grain of the wood making the surface less grabby.
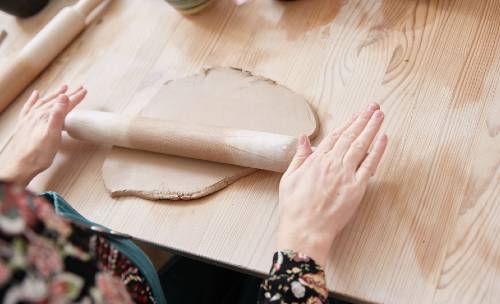
If you are rolling directly onto a wooden surface, you may experience a little sticking now and then. But it will be much less of a bother than if you were rolling directly onto something like a melamine or plastic table.
Some of the wooden surfaces that potters use are:
- Plywood
- MDF
Surface 8: Cement Board
Cement board is also a popular choice as a surface for rolling clay. Most cement boards are slightly absorbent. This means that provided your clay is not too wet and tacky, your slab will probably not stick as it’s being rolled out.
The other advantage of cement board is that it doesn’t retain moisture either. So, it won’t swell up or lose its shape over time. This is an asset when you are making flat clay slabs.
The disadvantage of using a solid board like cement board is that if your slab does stick, it’s hard to remove. Unlike a piece of fabric, you can’t simply flip your slab over and peel the fabric of a sticky slab.
There are various types of cement boards, and a brand that is popular with potters is HardieBacker board.
My Personal Favorite Surface for Rolling Clay
At a pinch, I find that rolling clay on a simple MDF board works if my clay isn’t too wet. However, my clay slab never sticks to a board that has been covered tightly with a sheet of canvas.
So, my favorite surface for rolling clay is probably a canvas-covered board. However, I do also really like using a fabric-backed vinyl table cloth. It’s a great option because it’s so easy to store. And it makes it easy to flip larger slabs of clay without stretching them.


