Your cart is currently empty!
20 Ingenious Ways of Transporting Greenware Pottery Safely
Published:
Last Updated:

Affiliate Disclaimer
As an affiliate, we may earn a commission from qualifying purchases. We get commissions for purchases made through links on this website from Amazon and other third parties.
Bone dry pottery is extremely fragile. In particular handles on mugs and jugs, and other fine details can be broken off easily. But many potters, particularly in the first few years of making pottery don’t own their own kiln. Instead, they rely on finding a local kiln service to fire their work. This raises questions about transporting greenware safely.
The key to transporting greenware pottery is positioning it in a shallow box and using padding between pieces. Use soft non-abrasive padding to protect them and prevent the pieces from moving. Make sure the pieces don’t touch or knock together. Put pieces with handles on their side with the handles upwards.
There is no way around it, transporting greenware safely is nerve-wracking. However, with a few simple steps, you should be able to move your pottery with few or no losses.
First, I will outline a few general guidelines that are good to follow, whatever way you are transporting your greenware. Then I will share 20 top techniques to choose from for moving your pottery about.
Table of Contents
show
General Guidelines on Transporting Greenware
Clay is much stronger when it still has a little moisture left in it. So, leather hard clay is tougher than bone dry pottery. It is often recommended that if you have to transport greenware, do it before your pottery is completely dry.
Your greenware pottery is less likely to be damaged if it is not completely dry. And if leather hard pottery does get damaged it is easier to repair than bone dry pottery.
However, it’s not always possible to move your pottery when it’s leather hard. If you are taking it to a pottery firing service, most likely they will want it to arrive bone dry.
If that’s the case, then another suggestion is to make pieces that are more robust. Fragile pieces with thin details are more likely to suffer in transit. The sturdier your pottery the more likely it will be to survive any bumps and jostles when it is transported.
However, understandably many potters don’t want their creative style to be cramped by practical considerations in that way. So, it’s important to understand other measures that you can take when transporting greenware pottery.
Tips on Transporting Greenware
Here are some other suggestions about how to get from A to B without breakages:
Arranging Your Pottery
- Don’t let any pieces of pottery touch one another as they are being moved. If they touch, they are more likely to break and surface textures will be damaged.
- Make sure all your pieces of greenware are well packed and stationary, so they don’t rub and jostle. At the same time, it’s good to avoid cramming them in too tightly. Don’t accidentally crush them in your efforts to keep them steady.
- Avoid stacking your items. Some potters recommend placing pieces inside one another if they fit to minimize movement. If you are pushed for space you might want to experiment with this, but most potters strongly advise against stacking.
When pottery is stacked and you go over a speed bump, it is more likely to break. If your car is small (like mine!) and you have limited space, you might decide to stack your pottery.
However, if you do, make sure the heavier pieces are at the bottom. And that all of your work is very carefully wrapped up.
- Pack similar-sized items together, putting small items in one box and tall items in another. If you have a large piece, it’s a good idea to give this a box of its’ own. That way, if it does roll or fall, it won’t take out your smaller pieces too.
What to do About Handles, Lips, and Rims
A general point about transporting greenware with handles is to be thoughtful about where you position the handles. Some potters recommend pointing the handles into the corners of the box.
Others prefer to put their mugs and jugs on their side and have the handles placed upwards. Both of these methods work, the important point is to treat handles with extra care. It is detailed work like handles that are most likely to suffer in transit.
Another tip is to place items with lips or rims downward on a flat cushioned surface. First, line your box with a soft material (see below for suggested materials). Then place your bowls, plates, and platters face down.
An exception to this suggestion would be if the lips are uneven (e.g. a jug) or fragile/thin. Then it is best to place them face up.
Tips About Loading Your Car and the Journey
Before you put your pottery in the car, give the box a gentle jiggle to see if the pottery moves. If it does, you will know to put some more packing in, until they are well-supported.
Drive slowly and carefully, avoiding bumps and dips in the road.

When you are driving, there is usually more bounce and movement in the front seats. Put your box of pottery on the back seat. Or better still, if there is room, put it on the floor of the car in the back. That way if you do have to stop quickly, it won’t slide from the seat to the floor. Another alternative is to put a seatbelt around the box or piece of pottery.
Another way to stop boxes from moving about is to put towels or blankets around the boxes. This will stop them from sliding around on the seat. A towel underneath the box will also reduce the chance of it sliding. Or you could use a rubber shelf liner. You can put this inside the box and also between the box and the car seat.
Be careful when you are putting your box of pottery into the car. It can easily get knocked and bumped as you prepare to travel.
Be Philosophical
One final piece of general advice when transporting greenware is to breathe and be philosophical about it. A lot of potters accept that they will have some losses when they move their pottery from A to B.
It’s a precarious process, and losses are not uncommon. I’ve heard the comment ‘it’s just mud’ made by potters when they are coming to terms with losing a piece. This is a good tip to try to bear in mind.
Although your work is precious, this is a good moment to try to practice a Zen-like attitude of letting go. Take the steps that you can to protect your work and then let go of the outcome. Easier said than done!
That being said, here is a list of top ingenious ways of transporting greenware to minimize breakages and disasters….
20 Great Ways to Transport Bone Dry Pottery
You will need to find two things to transport your greenware safely. Firstly, packing material, and secondly, a suitable container. First, let’s have a look at some ingenious options for packing materials…
1) Shredded Newspaper
This is soft and cheap and unlike plastic, is less of a problem for the environment. You can buy ready-made shredded paper.
This is the sort of paper you would use to line an Easter basket. It’s sometimes called crinkle cut paper.
This shredded paper can be stored between trips to the kiln. When you take it out of storage you can just fluff it up and re-use.
Or you can buy a shredder, and shred your own paper.

The idea is to simply pack the soft shredded paper between your pieces when they are nestled in a box.
2) Crumpled Paper
It isn’t essential to shred paper. You can simply crumple up the paper and then smooth it out again. Then wrap each piece in the pre-crumpled paper and pack carefully. You can then use more bits of paper to pack between your pieces of greenware.
3) Paper Towels and Toilet Paper!
Not very glamorous but it works. Paper towel rolls for the kitchen and toilet paper make a soft option that is readily available.
4) Bubble Wrap
An oldie but a goodie! Bubble wrap is an obvious packing choice. It’s lightweight, reusable, and comes in different bubble sizes – what is not to like?
5) Balloons!
An alternative to bubble wrap, but a similar idea is to use balloons. An inflated balloon positioned between your bits of greenware, or between your pottery and the box, is cheap and effective.
A tip if you are using balloons is to partially inflate the balloon. It does need to be inflated sufficiently to support your pottery. However, if it’s a little soft it will mold to the shape of your piece. Also, it will cooperate a bit more when you are putting it in the box.
Another tip is to use the long thin balloons that children’s entertainers use to make balloon art.
These are great to sandwich between pottery. They are thin, so they don’t take up too much space, and they are bendy.

6) Soft Crinkly Grocery Bags
You will need quite a lot to pack out even a medium-sized box. However, the advantage of grocery bags is that they can be reused indefinitely.
The best way to use these is to wrap each individual piece in a bag. Then once they are in the box, gently push more bags between the pieces. It’s also a good idea to put a layer of bags on the bottom of the box before you start packing them in.
I know that we are all supposed to be cutting down on our use of plastic bags. But once you buy a pack of these, you could continue to use them for years to come. Then, if/when you do buy a kiln, you can use these for your groceries!
7) Dry Cleaning Plastic Bags
Whilst we are on the plastic theme, it’s worth mentioning this option. Many potters recommend packing your greenware using dry cleaning plastic. You can buy this in the form of a bag that the dry cleaner would place over your clothes.
Or you can buy it on a roll. It’s relatively inexpensive, and it is very soft and slippery. This makes it ideal for packing delicate bone dry pottery.
A similar suggestion to dry cleaning plastic is to use a soft plastic painter’s drop cloth. This is also very soft and slippery and will not damage the surface of your greenware.

8) Soft Fabric
If you would prefer to avoid the plastic option, you can use fabric. One suggestion is to pack kitchen wash clothes between pieces. Like plastic, these can be re-used, and are in the long run bio-degradable.
You can, of course, use old towels too. Depending on the size of your work, you might want to cut the towels up so they are not too bulky.
9) Diapers (Unused!)
Diapers are a good option for transporting greenware because you can open them up and use them as individual pockets. They are designed to be cushioned and absorbent.
Also, when opened up into a cup shape they can be lined up next to one another. Your pottery is simply placed inside each diaper.
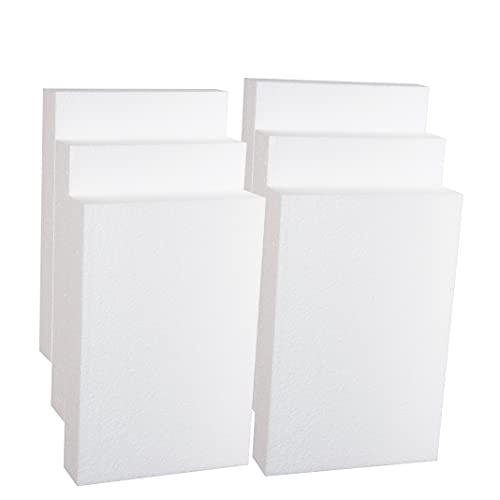
10) Polystyrene or Styrofoam slabs
You can cut holes in polystyrene or styrofoam blocks and nestle your pottery in the holes. This will keep your greenware in place. It’s worth pointing out that although it is supportive, polystyrene is firm.
For that reason, it’s a good idea to cut the holes a bit larger than you require. Then, line the spaces with something softer.
Anything soft and flexible would do. Kitchen roll, for example, would work. You just need something to cushion your bone dry clay.
11) Honeycomb Packing Paper
This packing paper is cut so that you can stretch it out. As it’s stretched it takes on a soft, cushioning quality.
At the same time, it’s quite supportive, so it’s good for holding the weight of greenware and fired pots too.
It’s a good alternative to bubble wrap and it’s biodegradable too.

12) Upholstery Foam
You can buy upholstery foam in slabs, that you can cut with scissors or a knife. Simply cut out the shape of the pottery you want to transport.
This works on the same principle as using polystyrene but it is softer. It costs a little more than polystyrene. However, if you regularly make pottery of the same size and shape you can reuse it each time.
13) Packing Peanuts
Packing peanuts are a good option if your greenware varies in size and shape from trip to trip. Ideally, you should line the bottom of your box with something soft. Place the pottery in the box and pour the peanuts around your work.
If you’re packing a few items in one box, make sure that there is enough space between each one. If they are close together, they may shift in transit and end up sitting next to one another. This can cause breakage or surface damage.
If your greenware is large, use a separate box with packing peanuts for each item.

It’s a good idea to put a lid on boxes when you are using packing peanuts. This will keep the packing in one place. Alternatively, if you are using a box without a lid, place a blanket or pillow over the top.
14) Wood Shavings
Wood shavings work much like packing peanuts, though arguably they are better for the environment. Like packing peanuts, you don’t have to wrap your pieces individually. And you can keep your boxes of wood shavings to one side for future use.
Alternatively, you could use shaving nesting liners. These are used to line chicken pens/nests. So, they are ideally suited for cushioning or cradling fragile items like eggs. A weird suggestion, I know, but works brilliantly for transporting fragile bone dry pottery.
15) Kapok or Poly-fil
If you would rather not deal with tidying up bits of wood shaving, you could use kapok or poly-fil.
These soft fillings are both used for stuffing pillows, cushions, and stuffed toys. You can either cut open an old cushion you aren’t using. I’d never encourage anyone to behead a teddy. Or you can buy kapok or poly-fil at most craft suppliers.
Poly-fil is polyester fiber, whereas kapok is made from cotton. Both work very well as a way of cushioning pottery when you are transporting greenware.


16) An Egg Crate Foam Mattress pad
This is the textured foam mattress topper that is usually recommended to reduce pressure points when you are sleeping.
It has an undulating texture, that can be useful for securing smaller pieces of greenware. It can also be wrapped around larger pieces to cushion pieces from one another.
If you have an old egg crate mattress that you don’t use anymore, then you can use that.
Alternatively, a cheaper option is the acoustic foam that is usually used for soundproofing. This looks very similar to an egg crate mattress, with the same undulating soft surface, but it is a lot cheaper.


17) A Yoga or Exercise Mat, or Felt Carpet Pad
I’ve listed these options together because basically, you use them in the same way.
Cut out a section of the yoga mat, exercise mat or felt carpet pad to line the bottom of your carrying box. Then you can cut the remaining mat or pad into the right size strips to sandwich between your pieces. Each of these products is relatively thin, so whichever you choose, you’d be advised to double it up.
18) Scraps of Foam Rubber
Foam rubber is one of those things that potters and crafty people often have lying around. Possibly because foam rubber is quite handy in the studio.
If you don’t have any, you can buy it in roll and then cut it into smaller chips or pieces.
You may not have the patience or time to cut up the roll yourself. In that case, you can buy shredded foam that has been cut into a mixture of chunks and fiber. It’s generally used to re-stuff sagging armchairs. But it’s also good for packing greenware.
19) Old Sheets or Towels
Old sheet material tends to be soft and ideal for packing around greenware.
Whilst old towels are not quite as soft and pliable as sheet fabric, they do offer bulk and support. Using an old towel cut up and positioned between your greenware is an inexpensive effective option.
20) A Mover’s Blanket
I know a potter who does not like fuss of any kind. He regularly transports bone dry greenware by spreading it out on a mover’s blanket in the back of his van. And, he doesn’t cover it or use any packing.
Instead, he simply gathers the blanket up around the pieces to stop them from rolling around as he drives. He swears that he has never broken any pieces using this method. So, I guess the moral is that you should do what you feel comfortable with and hope for the best.

Failing all of the Above…
If none of the above appeals, you could work towards owning your own kiln! That would make life simpler. In the meantime, here are some more tips for transporting greenware…
Ideal Boxes to Use For Transporting Greenware
Shallow packing boxes work best. They give you easy access and will give sufficient support to the base of your work. Some suggestions are:
- Fruit boxes – use a single-layer fruit box, for bananas, grapes, apples, or oranges. These are specifically designed to keep the damage to fruit to a minimum, so they work for pottery too.
- Cat litter trays – these are a popular choice! They are shallow, rigid, and relatively small. As such they will fit neatly on the floor of your car, or on the seat if you prefer.
- Pack your pottery in a laundry basket. This is a great idea as they generally have handles and are it’s designed to be carried with ease.
- Under the bed storage trays – these are a good idea because they are large, flat, and sturdy. Also, they often have a lid on them, which will protect your greenware from falling objects.
- Egg cartons – if your greenware is small and fragile, egg cartons lined with a soft forgiving packing material are ideal.
- Plastic stacking tub – plastic storage boxes with lids on are good because you can stack them.
- Wooden wine boxes – any kind of wooden crate or box is a good option because it is sturdy. This is particularly important if your greenware is larger and heavy. It is preferable to have a box that won’t bend and flex as you lift it in and out of the car.
- Smaller items can be securely packed into a Tupperware box.
- Pizza boxes are great for transporting plates and platters. I wouldn’t recommend recycling used pizza boxes, as they are likely to transfer grease to your greenware. However, you could ask your local pizzeria if they have any spares, or you can buy some. They are an inexpensive and easy option.
Can You Use a Bag to Transport Your Greenware?
Bag it up! Of course, you don’t have to use a box. Some potters prefer a bag, like a tote bag or a plastic bag.
They simply wrap their pottery carefully in a packing material like bubble wrap and carry it in a bag. If your piece is large enough, it can be secured in the seat with a seat belt, like a precious passenger.
Final Thoughts
Transporting greenware safely can be a nerve-wracking experience. But for lots of potters, it is simply the way they work. Many potters spend years driving bone dry pieces of pottery from A to B to get their work fired. It is entirely doable, you just need to give it a bit of consideration and drive slowly!