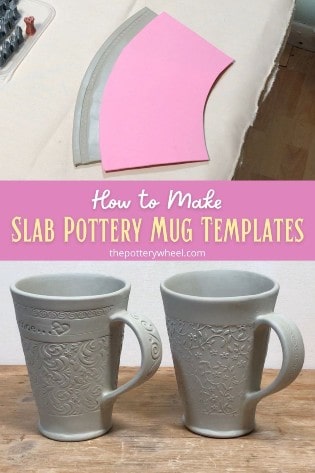
Whilst you can freestyle it when making slab pottery, it often works out best when you use a template. And mugs are no exception to this. So, I’ve put together this guide which covers some of the best and easiest ways to make slab pottery mug templates.
I will be covering how to make templates for different styles of slab mugs. These mug styles include the following. You can use the links below to jump to a section that you are interested in…
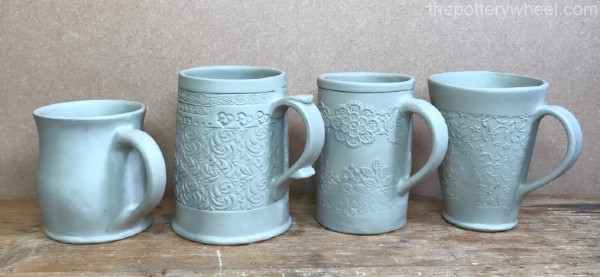
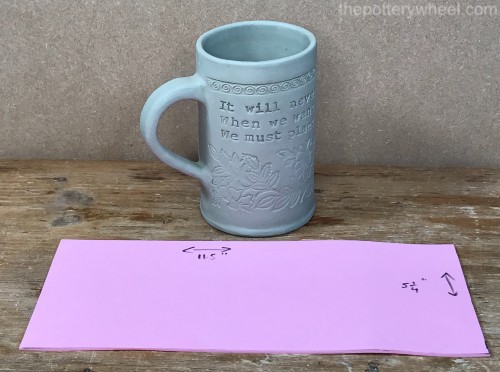
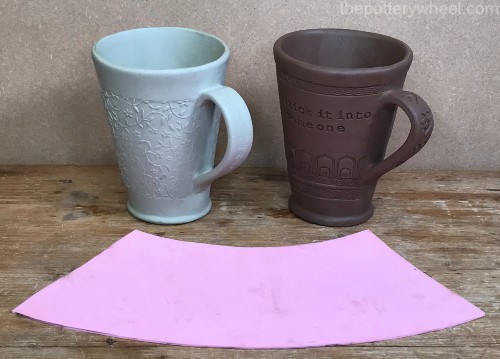
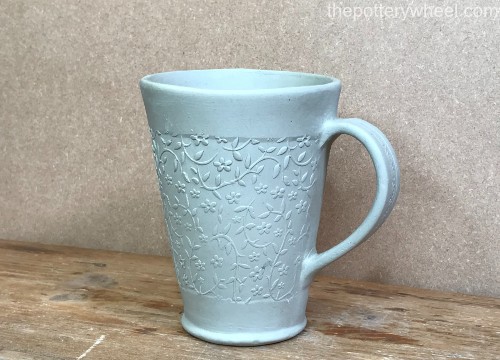
The picture above is of some mugs I made using the slab pottery mug templates I describe below. However, the templates are very flexible and you can adapt them to make exactly the size and shape of mug that you want. So, they can be adjusted to suit your style exactly.
Let’s dive into how I made the templates for each of these mugs. Starting with the straight cylinder slab mug…
Cylinder Slab Pottery Mug Templates
Cylinder-shaped mugs require the simplest slab pottery mug templates you can make, so let’s start here.
Really a template for a cylinder-shaped slab mug is a simple rectangle. However, there are a few important things to consider to create the perfect template. So, let’s dive into some of the best ways to make slab pottery mug templates…
Template Making Technique #1
Here are the steps you can take to create a cylinder template with your perfect proportions.
Step 1: Selecting the Dimensions of Your Mug
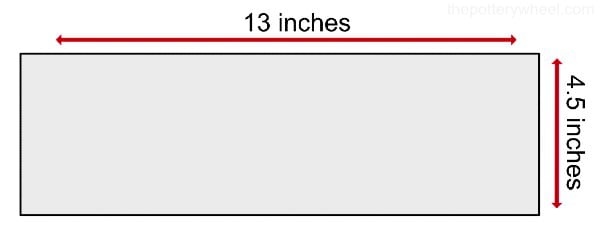
Deciding on what size you want your mug to be is really just a matter of personal choice. If you want to make a cylinder mug, you just need to decide what height and diameter you want the mug to be.
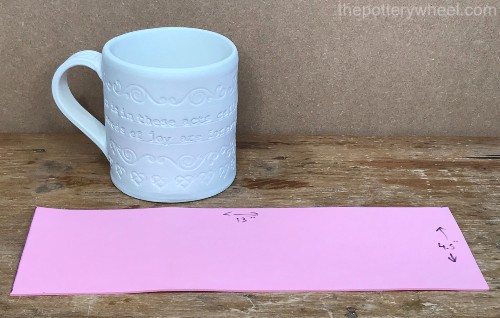
The template for this large coffee mug is 13 x 4.5 inches.
But the beauty of making your own slab pottery mug templates is that you can customize them completely to your own taste.
For example, the mug is also made from a simple rectangular template. However, the measurements of the template are 11.5 x 5.25 inches. This template creates a narrower taller looking mug.
If you’re not sure what size to make your template, take a look at one of your favorite mugs. How tall is it? And what is the diameter of the rim? (The diameter is the distance from one side of the rim to the other).
You can take the proportions of your favorite mug and use them as a guide for making your own template.
Let’s say your favorite mug is 5 inches tall and the lip is 4 inches wide. You’re going to make a rectangle that matches these proportions.
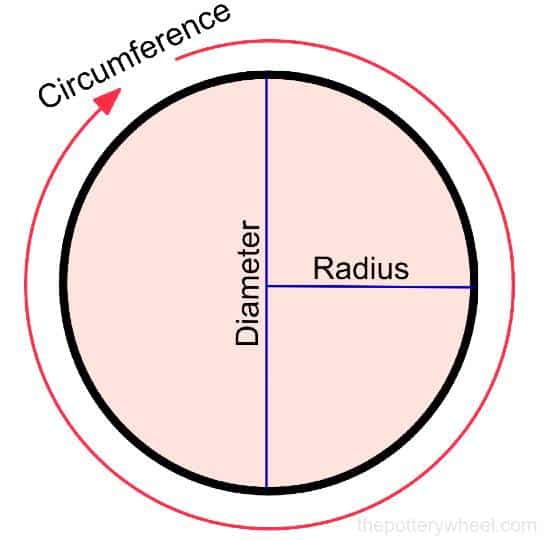
Although you know the diameter of the rim, you need to know the circumference of the mug. The circumference is the length of the rim all the way around the top edge. You’ll need to know the circumference to make your template the right length.
If you’re good at math, you can probably work that out yourself. But if like me, you are mathematically challenged, you can use an online tool like this one to help you figure out the circumference. Just type in the diameter of the rim and it will work out how long you need your template to be to create a mug that size.
Step 2: Factoring in Clay Shrinkage
Clay shrinks when it is fired. And different clay bodies have different rates of shrinkage. Some shrink more than others. It’s helpful to know what kind of clay you are going to use and how much it shrinks.
The clay that I use has a shrinkage rate of around 10%. This means that once it’s been fired, it will be about 10% smaller than when the pot is fresh clay.
Try to find out how much your clay will shrink too. Most pottery suppliers will say on their website how much the clay shrinks when dried and fired.
Then adjust the measurements of your template to take this shrinkage into account. For example, if you want your fired mug to be 5 inches tall you need to make your template 10% taller. So, your template would need to be 5 ½ inches tall.
Step 3: Making a Trial Template
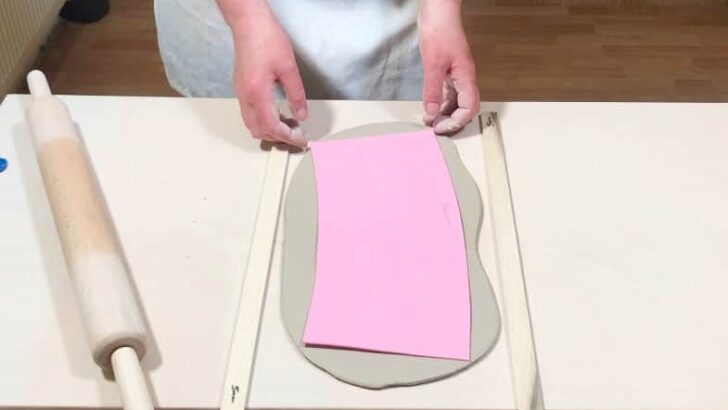
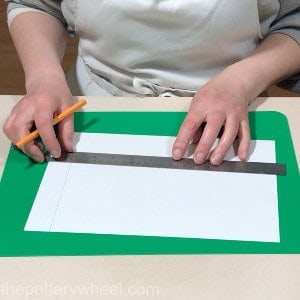
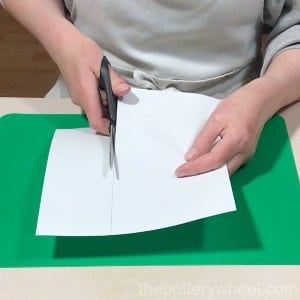
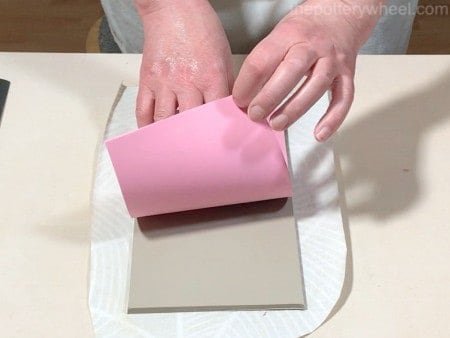
Usually, when I’m making a template, I make a test template out of paper in the first instance. To do this, I simply draw a rectangle on a piece of paper using my measurements above from step 2.
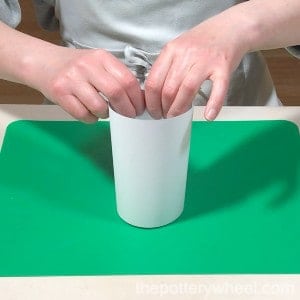
Cut out the rectangle and curve the piece of paper around into a cylinder. Check that you are happy with the size and shape. Bearing in mind that your mug will be smaller when it’s fired.
Tip
Making mugs that are wider in diameter makes it easier to tidy up the inside of your pottery when you are building your mug.
It’s ok to build a narrow form, but it’s a little trickier to tidy up the inside seam and base.
Ideally, when you start building slab pottery, I’d suggest building a wider form. Once you’ve got the hang of it, you can experiment with narrower forms.
Step 4: Road Testing Your Template
Once I’m happy with the shape and size of my template, I usually use the paper template to make a few mugs and see how they turn out.

The trouble with paper templates is that they don’t last very long. The paper absorbs water from the clay and they warp and tear easily. So, if I like the template shape I will recreate it using a more durable material like a sheet of craft foam.
Step 5: Making Your Template Out of Durable Material
Making your template out of something more durable than paper is easy to do. You can either measure out your rectangle again onto your craft foam. Or you can trace around the paper template if the paper template is still in good shape.
I love craft foam for templates. It’s inexpensive, you can write on it, it doesn’t crease and it isn’t absorbent.
But, you don’t have to use craft foam. There are lots of different materials that you can use to make slab pottery mug templates. Here are some suggested materials that are good for templates:
- Craft foam
- Tyvek
- Vinyl Shelf Liner
- Transparent acetate sheets
- Heavier grade copier paper – sprayed with acrylic sealer
- Notebook dividers
Really anything that is non-absorbant, flexible, and not too sticky will work.
Making a Template for the Base of the Mug
I make a template for the base of the mug once I’ve built the sides of the mug. I use the base of the walls as a guide to help me create a template that matches the mug exactly. There are several ways to do this, here are 3 of them…
Method 1
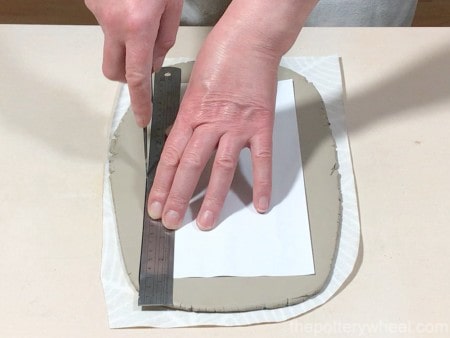
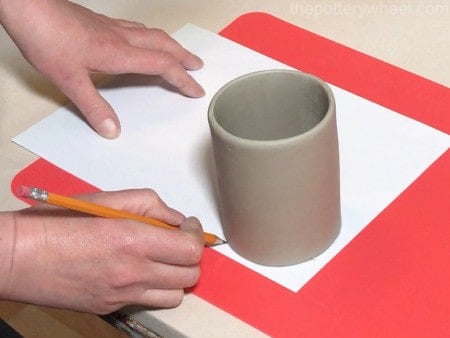
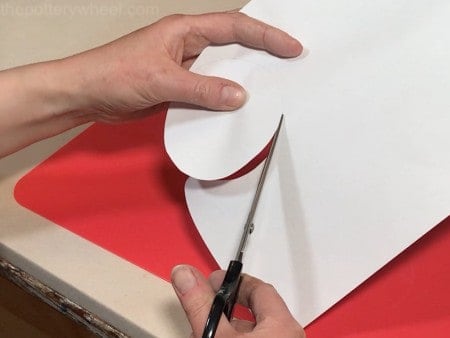
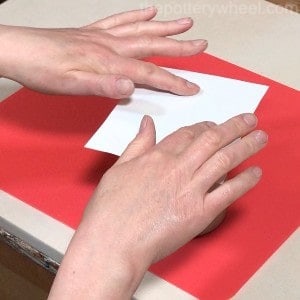
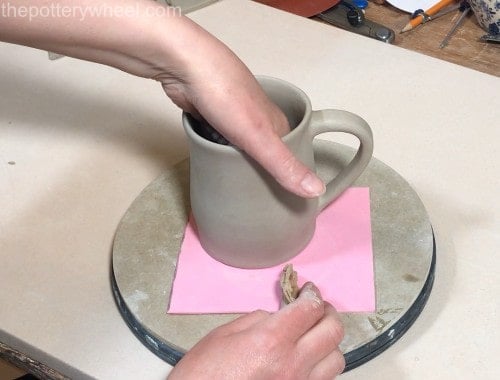
One easy way to make a base that fits is to carefully draw around the base of the pot onto a piece of paper. Then cut around the piece of paper and use that as a template to cut out a slab base.
Method 2
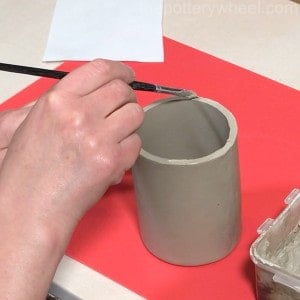
Alternatively, you can cover the base with a little bit of slip, and then press a piece of paper gently against the slip. Peel the paper away from the slip.
This will leave an impression on the paper that matches the bottom of the mug. You can then cut around the impression on the paper and use this as a template for your base.
Method 3 – Making a Base Template with a Perfect Circle
Whilst the above methods are fine and will fit your mug well, the shape is unlikely to be a perfect circle.
Also, as stated before, paper templates are okay, but they don’t last very long. So, if you think you will reuse this size of base, it’s best to make it out of something like craft foam.
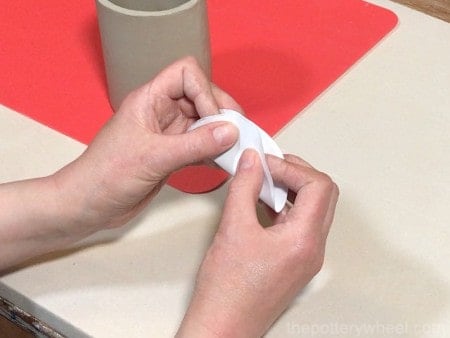
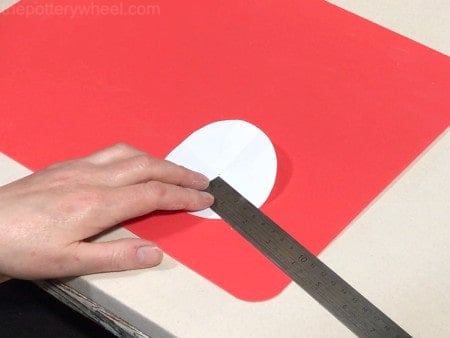
The way that I do this is to fold the paper template that I’ve made in half. Then I fold it in half the other way. This way I get two creases across the paper base template, which let me find the center of the circle easily.
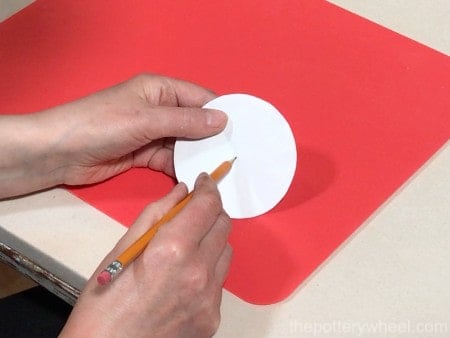
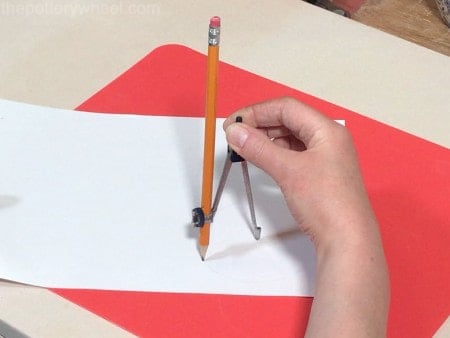
I measure the radius of the circle. This is the distance from the central point, to the outer edge. Then I set my compass so that it is at the same length as the radius of my base. And I draw a circle on another piece of paper.
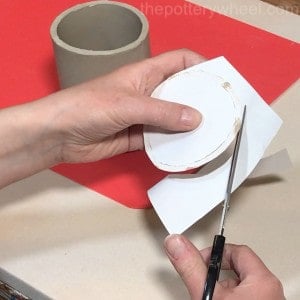
Cut out this second circle. It will have the same radius as your original base template, but it will have the advantage of being a perfect circle shape.
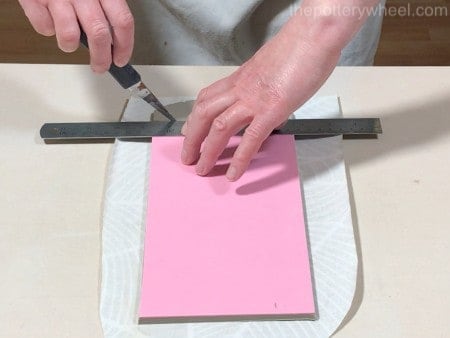
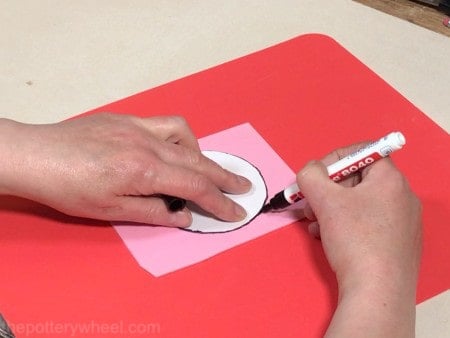
Then draw around this circle on a piece of craft foam and cut the foam circle out. You now have a craft foam template that will last a long time.
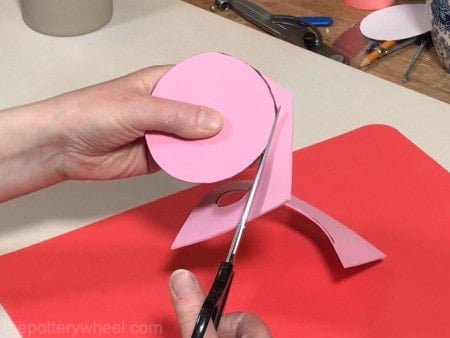
This base template will fit the bottom of your mug well and it will be perfectly round. I normally make the template for the base just a little bit bigger than the base of the mug. This gives me a little extra clay to use to blend the base securely onto the bottom of the mug.
So, what’s next….?
Now we have covered making simple cylinder-shaped slab pottery mug templates, let’s take a look at some other designs…
Conical Slab Pottery Mug Templates
A conical shape is another way of saying ‘cone shaped’. And a conical template is an easy way of making a cone-shaped mug that has one end that is wider than the other.
The template for a cone-shaped mug looks like an ark or a rainbow shape. These look simple to make, but without a template, it can be tricky to make your mug look well crafted.
So, how do you make a conical-shaped slab pottery mug template? If you are a whizz at math, you may be able to figure it out using geometry. But there are much easier ways of making conical-shaped slab pottery mug templates. Here are 3 of the simplest methods that I’ve used…
Template Making Technique # 2
With this technique, you will be making a single slab pottery mug template using simple materials.
You will need:
- A large sheet of paper
- A large compass
- Pencil
- Scissors
- Ruler
- Straight edge
- A marker pen
- Craft foam
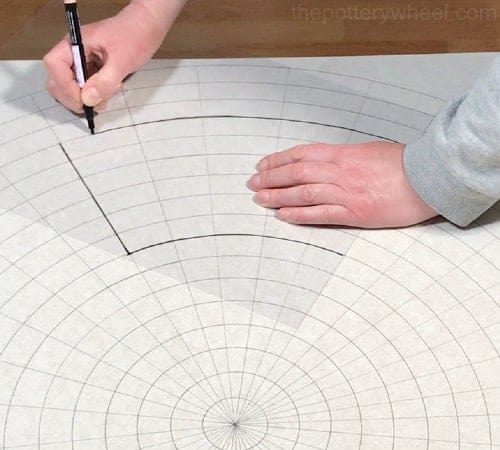
Step 1: Drawing Out the Template
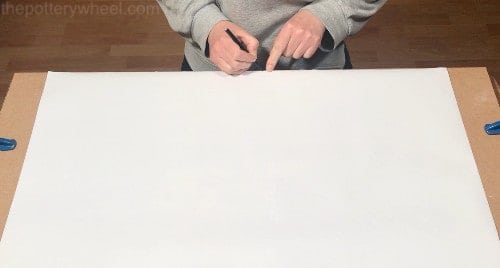
Mark a point just next to the edge of your large piece of paper. If you don’t have a large sheet of paper you can stick A4 sheets together. But it may be easier to just buy a large roll of paper. Any plain paper will do. You can buy an inexpensive roll of white wallpaper and this will do fine.
You are going to draw two half circles on the paper with your compass. I will make some suggestions here about measurements, but you can experiment with these to find a template that you like.
The following measurements will give you a nice big conical-shaped coffee mug.
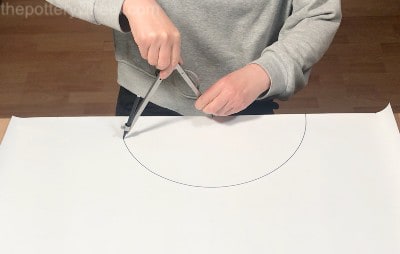
The first half-circle will have a diameter of 15 inches and a radius of 7.5 inches. Check out the picture above to clarify the difference between diameter and radius.
To make a half circle with these measurements, I make a small dotted mark on the edge of my paper. Then set my compass at 7.5 inches wide. This is why you need a large draughtsman’s compass. A small school compass is just not wide enough.
Put the point of your compass on the dot you marked and draw a half-circle.
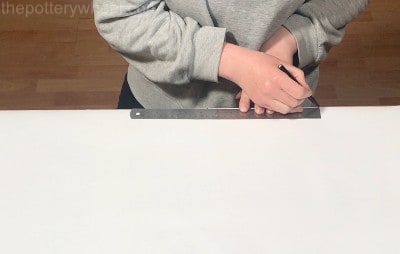
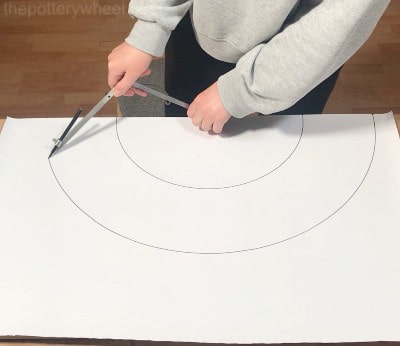
I then make two small marks on either side of the half-circle. This mark is 5.5 inches away from the first circle. Open up your compass and draw a second half circle between these two new points.

Draw a selection of lines from the smaller to the larger circle. Let’s call these ‘radial lines’ as I will be mentioning them earlier. When you draw these lines, make sure that your ruler lines up with the point you drew at the edge of the large sheet. This will ensure that each line radiates out from the center of the circle.
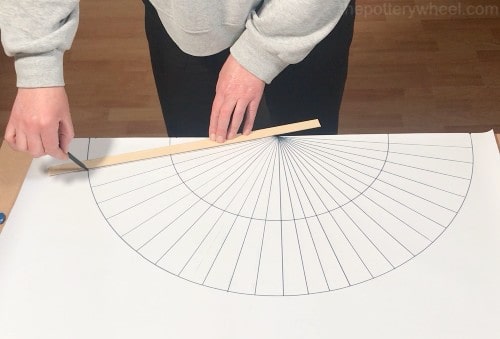
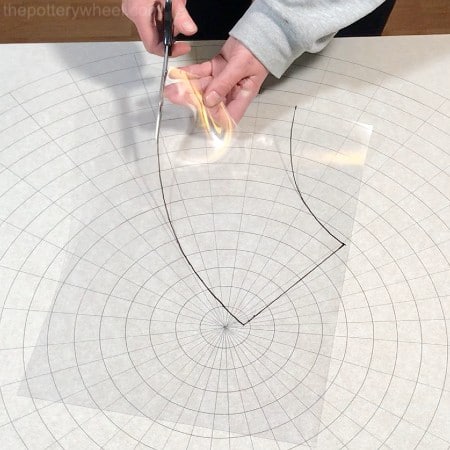
Step 2: Cutting Out the Paper Template
Cut out the half-circle, cutting along the lines of the larger and smaller circles. You will end up with an arch or horseshoe-shaped piece of paper.

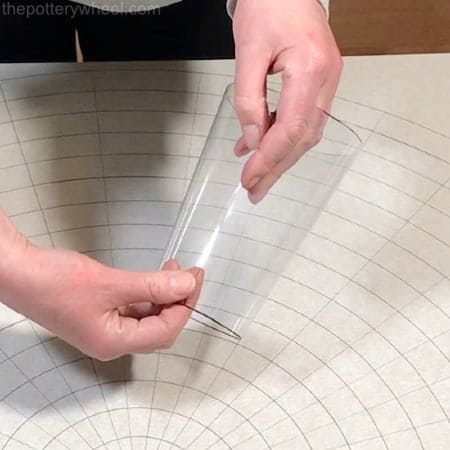
Step 3: Deciding The Size of Your Mug
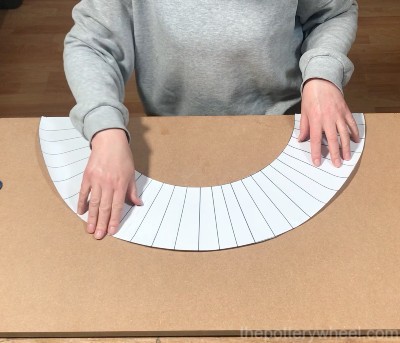
You can then curve the piece of paper around to see which sized mug or bowl you want to make. Do this by lining the straight edge of the template up with one of the radial lines you drew earlier.
Test out which conical shape suits you best by holding the edge up against each of the different radial lines that you drew.
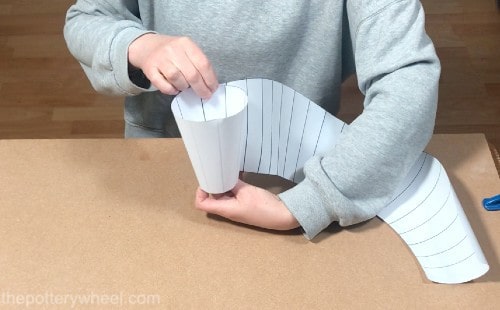
Decide which conical shape you like. Then trim the template by cutting the paper along the radial line of your choice.

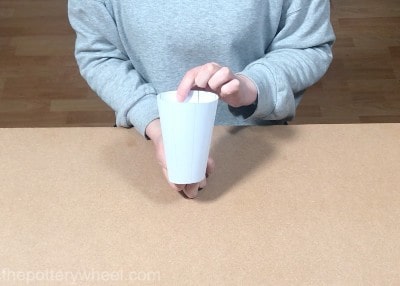
You now have a paper template for a conical shape that you have selected.
It’s possible to use the paper template as it is. However, paper and card absorb moisture from the clay. You could probably use this template a few times and it would be fine. But a paper template is fragile, tears easily, and gets soggy after a few uses. So, it can be helpful to take one final step.
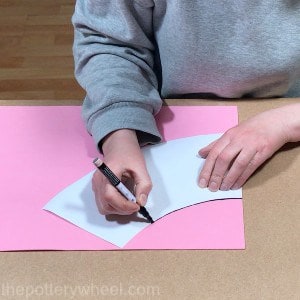
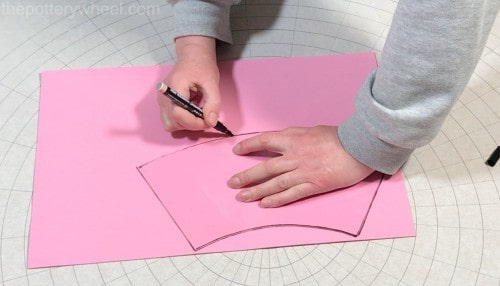
Step 4: Using a Durable Template Material
Select a flexible, non-absorbent material like craft foam and draw an outline of your paper template onto your craft foam. You can then cut out the template shape from the craft foam. This will make a much more durable template that can be used again and again.

I like using craft foam because it’s inexpensive and it does the job. But there are lots of other materials that you can make templates out of. Have a look at the list of some of these mentioned above.
Template Making Technique # 3
The above technique is useful if you want to make one template at a time. However, if you love slab building and you may want to make a range of different sizes. In that case, it would be worth making a board that will help you create multiple slab pottery mug templates.
This is a very simple process but will be an invaluable addition to your tool kit.
You will need:
- A board about 33 x 35 inches in size
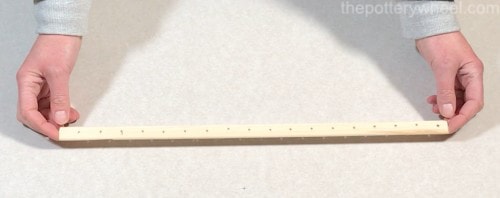
- Strip straight strip of wood about 18 inches long
- A drill with a fine drill bit
- Ruler
- Marker pen
- A small nail like a carpet pin
- Hammer
Step 1:
Choose a piece of board that is around 35 x 35” in size. It doesn’t have to be that large. However, the larger your piece of board, the wider the range of templates you will be able to make.
You can use all sorts of material as the board. For example, hardboard, balsa wood, MDF, plywood, or thick cardboard. You can even use paper, although paper isn’t very long-lasting.
Step 2:
Make marks along your straight strip of wood at intervals of an inch. Then drill holes along the strip of wood at the point of each mark.
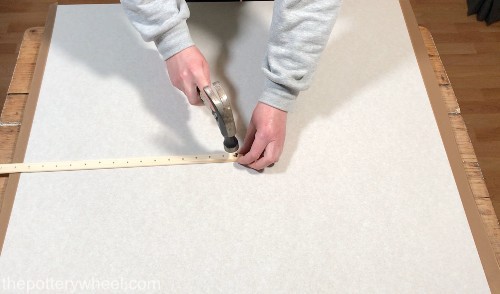
Step 3:
Fix one end of the wood strip to the center of your board. How you fix the wood strip depends on the board you are using.
If you are using cardboard, you will be able to fix the wood strip using a long drawing pin. But if your board is made of harder material like MDF or hardboard, you will need to use a hammer and small nail.
The hole at the end of the balsa wood should be large enough so that the strip rotates around easily on the board, like the hands-on a clock.
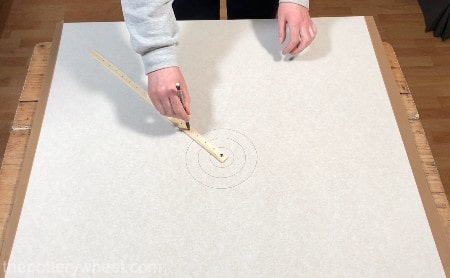
Step 4:
Put a pen nib or pencil into the first hole that you made on the wood strip. Rotate the wooden strip around to mark a circle on your supporting board.
Repeat this process with each of the holes that you made along the balsa strip. This will leave you with a pattern of concentric circles on your board.

Step 5:
Draw a selection of radial lines on the board. These are lines that start at the central point of the board and radiate outwards towards the largest circle.
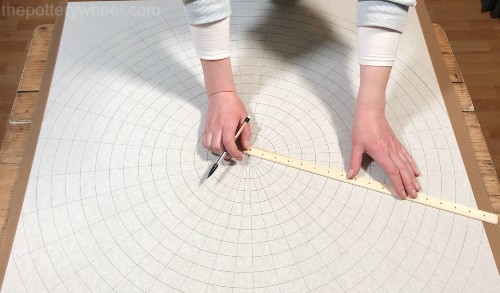
Step 6:
You can then place any kind of transparent sheet onto the board and trace out your template. Your transparent sheet could be tracing paper, clear plastic, or clear acetate sheets. Really, you just need something you can see through and draw on.
Cut the template out and curve it around into a conical shape to check if you like its size and dimensions. If you aren’t exactly happy with it, you can trim the ends of the template to cut it to size.
Tracing paper is fine as a temporary template. But if you use something like clear acetate sheets, your slab pottery mug templates will last much longer.
Some see-through, non-absorbent sheets like acetate will stick to your clay slabs when you use them to make your pots. So, I tend to use acetate sheets to get the template size.
Then once I have the measurements, I trace around the acetate onto craft foam. And then cut the slab pottery mug templates out of the craft foam.
Template Making Technique # 4
This 4th technique is very handy if you have limited equipment and you want to make a single template in a short space of time.
There are various different template-making apps online that you can use to print off template shapes. The site that I like most is templatemaker.nl. So, let’s take a look at how you can make slab pottery mug templates using this free software.
Step 1: Finding the Right Shaped Template
Visit the site here, and you will see on the home page that there is a row of icons at the top of the page. These indicate the different shapes that you can create. To create a template for a conical-shaped mug, click on the icon that is called ‘cone (truncated)’.
Step 2: Adjusting the Settings
On this page, you will see a diagram of a conical-shaped template. You can change the size and shape of the cone by adjusting the settings on this page.
The changes that you make will change the shape of the diagram, so you can see what your template will look like as you work on it. Follow these simple steps to adapt the template to suit your needs. Below are the steps that I took to make a template for the following mug…
- Choose whether you want to enter your measurements in cm or inches.
- Add your chosen measurements into the section called ‘key parameters’. You can play around with the settings in this section and decide what shape and size you want your mug to be. These are the settings that I used to create the mug above.
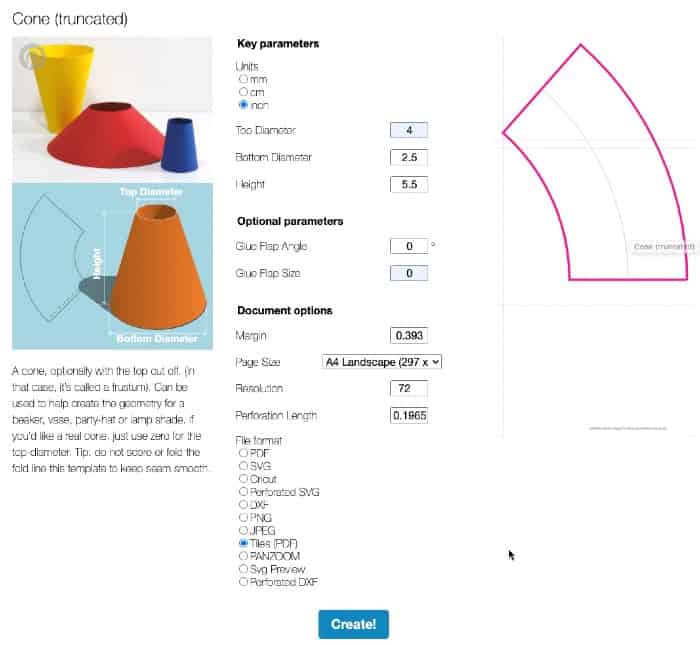
- Top diameter: 4 inches
- Bottom diameter: 2.5 inches
- Height: 5.5 inches
- Set the ‘optional parameters’ to zero
- Under ‘Document Options’, I select a page size that works for my printer. In my case, that is A4 Landscape, but this may be different depending on your printer type. I’d suggest experimenting with this according to your printer.
- Finally, under ‘File Format’, select ‘Tiles’.
- Once you have chosen your settings, you can click the ‘create’ button. When the template has been downloaded, you can print it off.
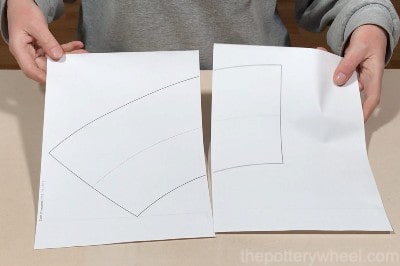
Step 3: Assembling Your Template
Most mug templates will be too large to fit onto one sheet of A4 paper. So, it’s likely that your template will be split into 2 or 3 pieces of printed paper. This is fine, you just need to cut out the various shapes that have been printed off and stick them together.

When you’ve stuck the various sections of the template together, you can use the paper template. Or you can use your paper template as a guide and draw around it onto a more durable material like craft foam.
Here is my video on the above 3 ways of making a conical mug template.

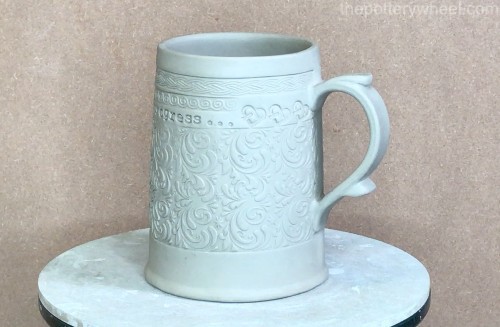
Tankard Slab Pottery Mug Templates
There are lots of different styles of ‘tankard mug’. However, one of the most common designs is a straight cylinder shape, with a base that is just a little wider than the rim of the mug.
In addition to this, another feature of a traditional style tankard mug is to add a thumb and pinky rest to the handle. This gives it an old-fashioned rustic look.
Template Making Technique # 5
Making slab pottery mug templates for tankards is quite simple. These are the steps that I take when making a tankard template…
Step 1: Choose How to Make Your Conical Mug Template
To make a tankard template, you need to make a conical template in one of the ways described above. Your first step is to decide which method to use to make your conical template.
I would suggest that the best approach for a tankard mug is to use the online template maker, as described in method #4.
This is because the difference between the width of the base and the rim of the mug will be quite slight. You don’t want to make a mug with a rim that is a lot narrower than the base. A mug with a very narrow base is awkward to drink out of.
So, to give your mug that nice tankard shape, the base will be just a little wider than the rim.
You could use one of the methods where you draw an ark for the template. However, your drawing would have to be very large to create such a gentle curve in your conical shape.
It’s much easier to use the online generator to create a conical-shaped template with a wide arc.
Step 2: Create Your Template
Visit this site: templatemaker.nl to create your conical-shaped template.
You can follow the instructions outlined above in method #4.
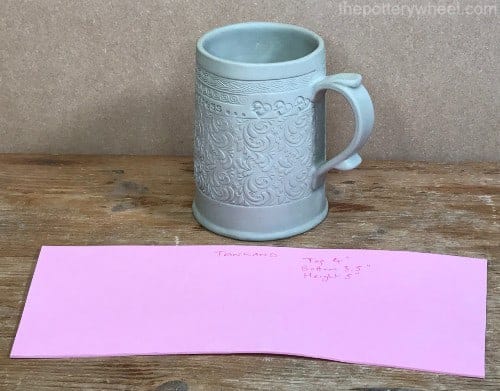
However, I use the following measurements to make a tankard mug:
- Top Diameter: 3.5 inches
- Bottom Diameter: 4 inches
- Height: 5 inches
These are the measurements that I use to make a nice solid tankard mug like this:
The tankard mug is just an upside-down conical-shaped mug that has a slightly wider base.
Bellied Slab Pottery Mug Templates
You aren’t restricted to making mugs with straight edges if you are making slab mugs. You can also hand-build curved slab mugs with a bellied wall.
Template Making Technique # 6
These are quite easy to make, and the slab pottery mug templates that you need are also quite simple.
To belly out the mug, you first need to build the walls of the mug and also attach the base.
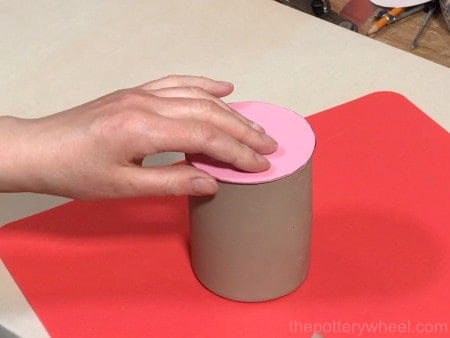
Once the mug and base are constructed, you need to be able to put your hand inside the mug.
Press your fingertips against the inside wall of the mug and gently press the clay outwards. It helps if your fingertips are a bit damp. You can also use a sponge, rib, or the back of a spoon to press the clay outwards.
I prefer to use my fingertips as I feel that I have more control over what the clay is doing if I can feel it with my hands.
Because I use my fingertips, I need to be able to fit my hand inside the mug. So, when I’m making the template for the bellied mug, I make it wide enough to fit my hand inside.
You can belly out a straight, conical, or tankard mug.
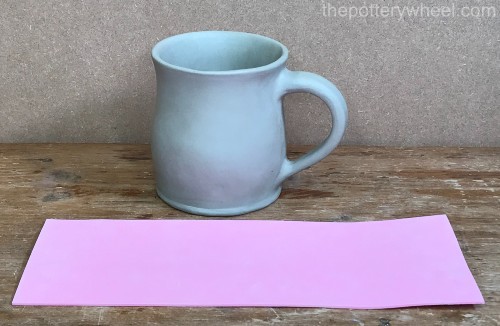
For this bellied straight cylinder mug, I used a rectangular slab template. The measurements of this template were 11.5 x 4.5 inches.
But really, you can experiment with different templates and see which shapes are complimented when you belly the walls out a little.
Final Thoughts
These slab pottery mug templates are very customizable. You can adapt them to suit whatever size and shape mug you want to create. Experiment a little and see what works for you. Once you have the techniques down, you can create whatever shaped slab pottery mug you like. Enjoy!


