Your cart is currently empty!
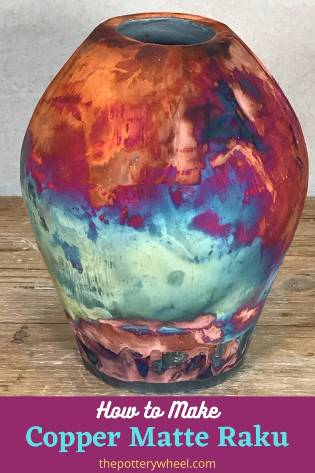
Copper Matte Raku – How to Make Copper Fuming Raku Pottery
Published:
Last Updated:
Affiliate Disclaimer
As an affiliate, we may earn a commission from qualifying purchases. We get commissions for purchases made through links on this website from Amazon and other third parties.
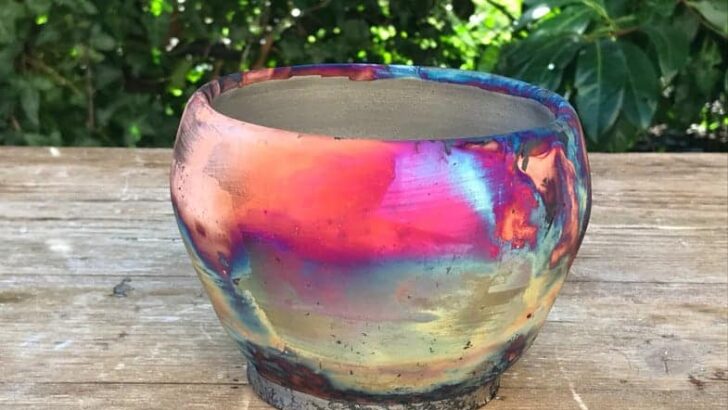
Copper matte raku, also known as copper fuming raku is a low fire technique that can produce iridescent multi-colored pottery. It involves the application of a simple copper oxide wash to bisque pots. These are then raku fired and put into a post-firing reduction atmosphere to create a vivid array of rainbow colors.
There are a number of recipes available for a copper matte raku mix. And different potters have their own ways of practicing this technique. This is a description of how I have made copper matte raku pottery. I will describe how I make the copper matte wash. And how I have raku fired the pots to achieve the copper fuming effect.
Various sources will point out that copper matte raku is a tricky technique. Its success depends on a lot of variables. The steps taken in the process need to be tweaked and adjusted. Through trial and error, you will hopefully get the copper fuming effect you are looking for. You may want to include other steps that you find in other sources. In the meantime, this is the method that I have used.
Table of Contents
show
Making Copper Matte Raku
In this article, I’m going to cover the following steps. If you are particularly interested in any stage, you can jump straight to that section. Otherwise, I will start at the beginning.
- Making Copper Matte Glaze
- Applying the Copper Matte Raku Mix
- Firing the Pots
- Post-Firing Reduction
- The Results
Making Copper Matte Glaze
As stated earlier, there are a few different recipes floating around for copper matte raku glaze. This is the recipe that I have used:
- 89% Copper Oxide
- 9% Frit – Alkaline or Borax Frit
- 2% Bentonite
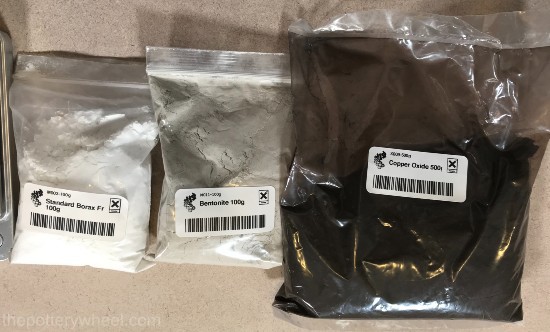
I had a 500g bag of Copper Oxide. And I wanted this to be 89% of the overall weight of the ingredients. So, I calculated the above percentages into the weights of the other ingredients needed.
The weights of the ingredients used in this wash were as follows:
| Ingredient | % | Weight |
|---|---|---|
| Copper Oxide Borax Frit Bentonite | 89% 9% 2% | 500g 50.56g 11.23g |
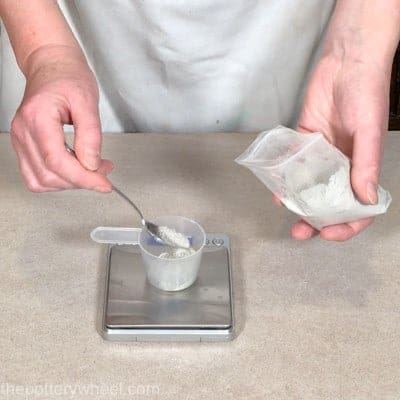
Using a precision scale like this one that weighs to 0.00g, I weighed out the frit and set it to one side. Then I measured out the bentonite into a separate container. I was using all of the copper oxide, so that didn’t need to be weighed out.
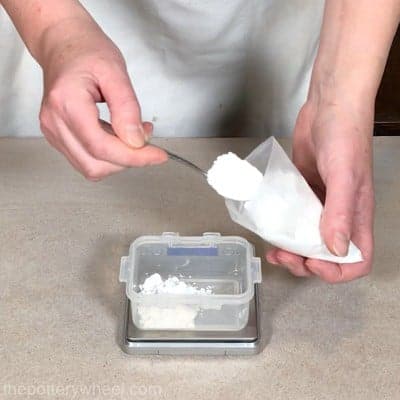
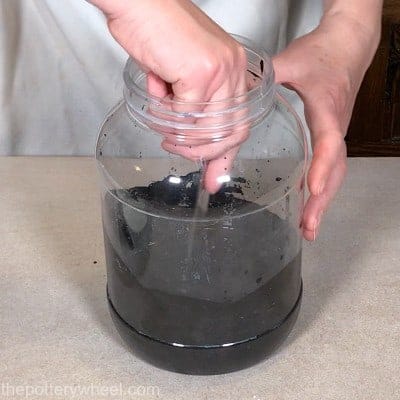
All of the ingredients need to be added to water. I don’t have an exact measurement of water to mix the ingredients with. I aim to create a liquid that has a consistency between single cream and whole milk. It is a copper oxide wash.
So that I don’t make the wash too dilute, I start off with just ¾ of a pint of water. This allows me to dissolve the powders into water, and then add more water to make it the right consistency.
Adding the Powders
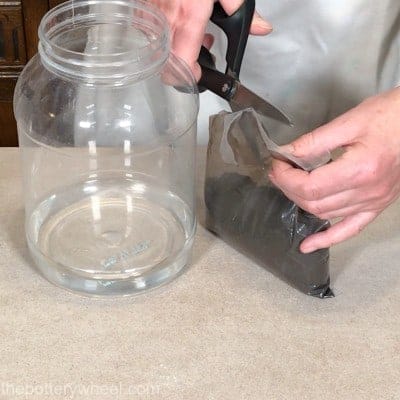
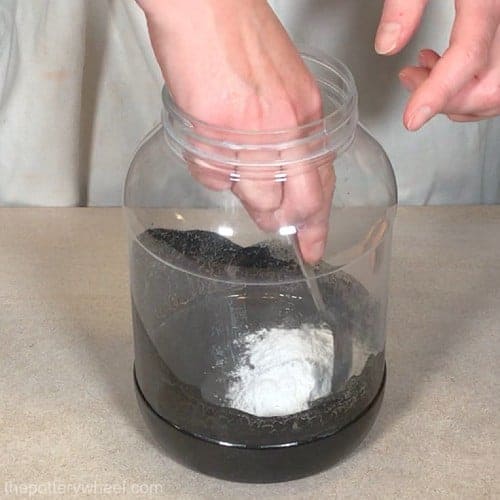
First, I empty the copper oxide into the water. It’s important to wear a respirator mask when you are handling glaze ingredients.
Also, I drape a cloth over the lip of the jar as I’m dropping the powder into the container. This prevents particles of the powder from becoming airborne and keeps them inside the container as much as possible.
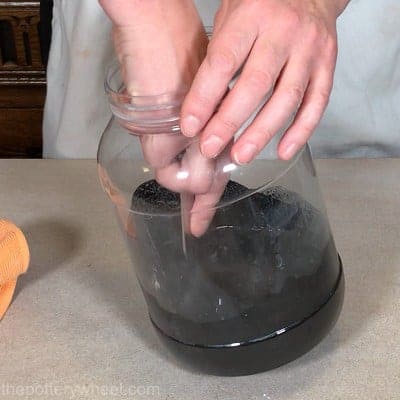
Once the copper oxide is in the container, I stir the mixture gently so that it folds into the water. Stirring gently also minimizes clouds of powder billowing up into the air you are breathing.
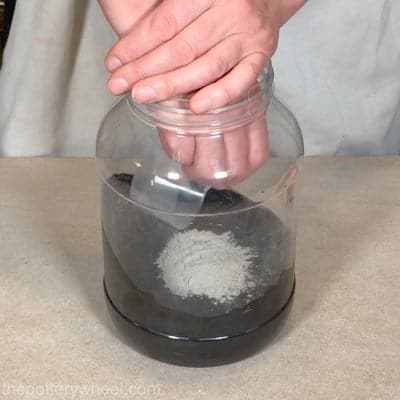
When the copper oxide is thoroughly mixed in, I repeat the process with the Borax Frit. Again, this is mixed in slowly with a spoon.
Finally, I add the bentonite using the same technique. Bentonite is a clay powder made up of extremely fine particles. It works as a binder in washes and glazes.
Bentonite particles are so small that they fill up the gaps between the other ingredients (source). This makes the liquid denser and helps it adhere to surfaces more securely.
The copper matte raku mixture on its own is very crumbly once applied. Adding bentonite gives the wash a bit more strength and helps it stick together.
The problem with mixing bentonite into liquid is that it swells up when it’s mixed with water. This is because it’s made of clay. Because it swells up and gets sticky it can get lumpy when you mix it into the wash.
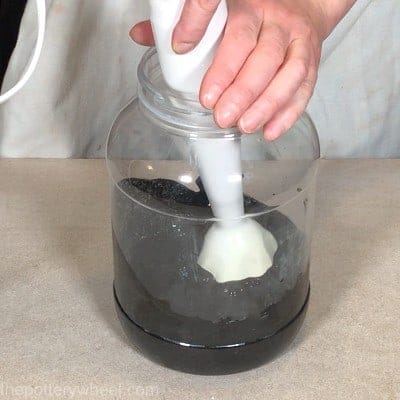
Various potters have different ways of mixing bentonite into glazes and wash. I find that if I mix it up with a hand blender, this seems to deal with the clumps adequately.
Applying the Copper Matte Raku Mix
Once all the ingredients have been mixed in, I add a little more water and stir. I add small amounts of water at a time until it’s reached the right consistency of whole milk.
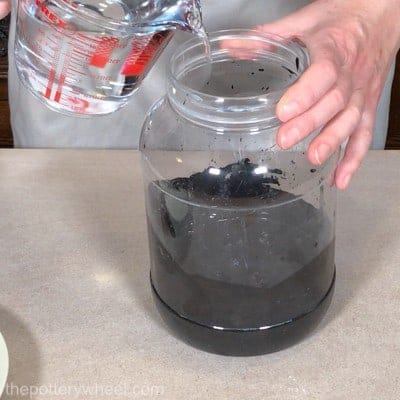
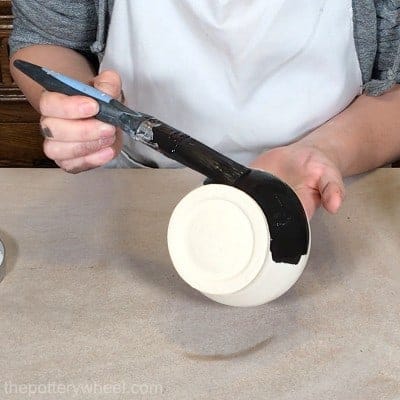
It’s then ready to apply to your pots. If you leave the mix for even a short period of time the particles will sink to the bottom. You will need to mix it up again thoroughly, preferably with a handheld electric mixer.
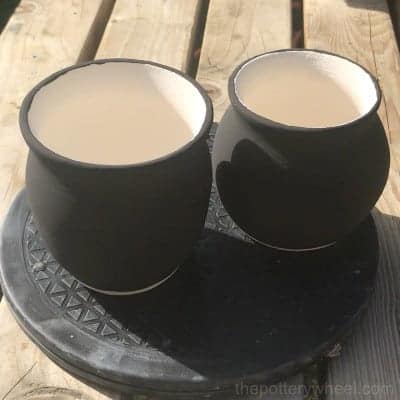
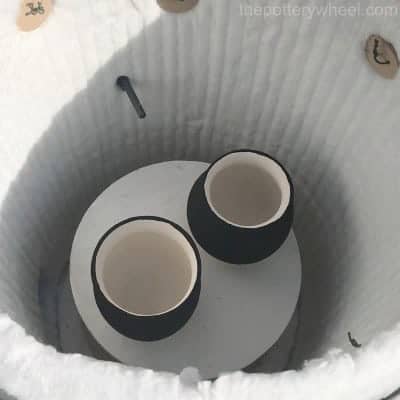
Then, apply one coat of the mix to your pots. Leave a clean foot as the mix can stick to the kiln shelf if it’s painted on the base.
Firing the Copper Matte Raku Pottery
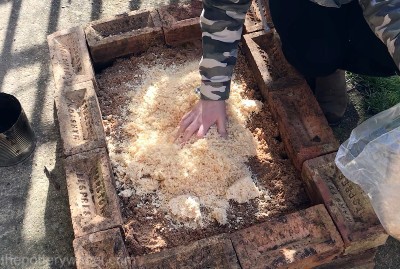
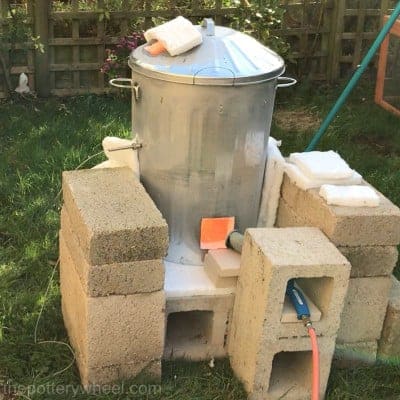
Timing is important with the copper fuming raku. So, it’s good to get things prepared. I line up 3 concrete blocks on the ground and cover them with about 1 inch of sand.
Then I put a layer of sawdust down on top of the sand. I also shred some newspaper beforehand too and keep it in a bucket for the post firing reduction.
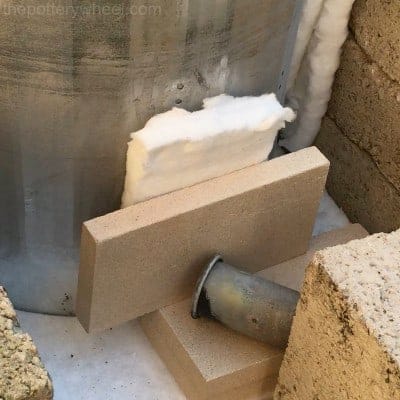
I fire my raku in a raku kiln that I built myself. It’s made from a galvanized steel trash can, lined with ceramic fiber. If you’d like to know more about how I did this, check out this article. The kiln is heated with a propane burner torch.
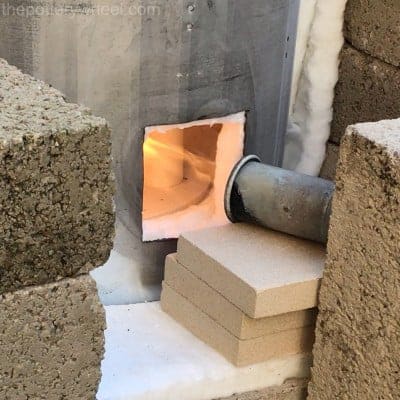
The heat from the burner can be quite ferocious in a small raku kiln like this. If I open up the propane torch fully right at the start, the kiln can reach 1000C in 20 minutes.
However, I keep the rate at which the temperature ramps up quite slow until the kiln reaches 600C (1112F). The pottery passes through the quartz inversion 573C (1063F). So, I wait until well past that, at 600C to open up the burner a bit more. There is more about how I use this raku kiln in this article here.
My target temperature when firing copper matte raku is 1030C (1886F). Once the kiln has reached that temperature, I turn off the burner and close up the flue on the lid. I do this by covering it with some ceramic fiber.
I also close up the burner port with some ceramic fiber. This is held in place by a fire brick and the torch, which is now off.
I wait until the temperature in the kiln has dropped to around 760C (1400F), and then I remove the pottery.
Other potters will let the kiln drop to different temperatures. I follow this suggestion which I picked up at a raku workshop run by rakudays. It seems to work for me, so I’ve stuck with it.
Post-Firing Reduction
Letting the kiln cool to 760C before removing the pots creates a bit of a reduction atmosphere. So, the pots have already been in reduction before they are removed.
When removing the pots from the kiln, it’s important to wear a respirator mask. Copper oxide volatilizes at temperatures over 1877F (1025C) and the fumes are hazardous (source).
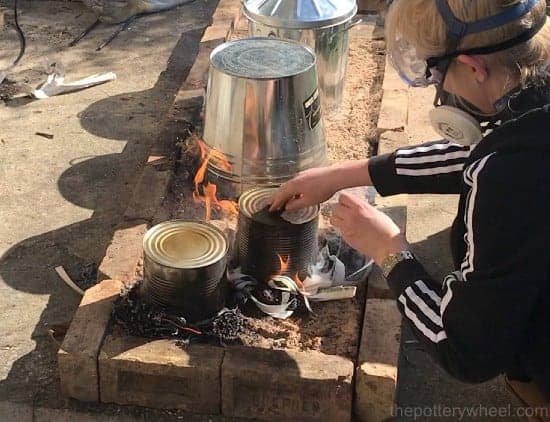
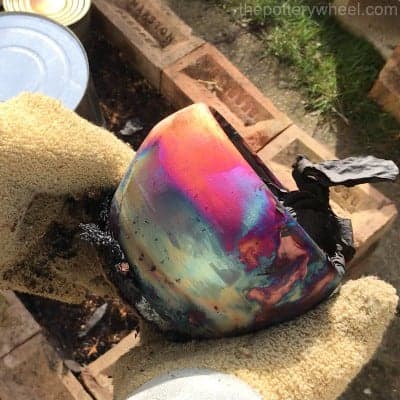
I remove the pots with some raku tongs and place them one by one on the sawdust bed. Each pot is flamed by covering it with some shredded paper.
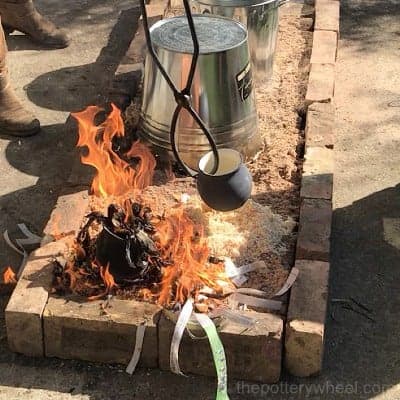
After a pot has been flamed for about half a minute, I cover it with a snug-fitting metal container. It’s important that the metal tin is a snug fit, to limit the amount of available oxygen.
This creates a reduction atmosphere as the paper continues to burn inside the container. Some potters will add a bit of extra paper or straw to the inside of the container too. This will add to the combustion going on inside the tin.
Give the container a bit of a wiggle to make sure that the edge is buried in the sand. This ensures that there is a seal around the edge and that oxygen is not able to get in.
Having a Burp
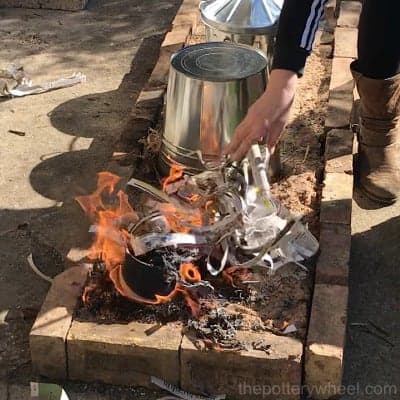
After the pots have been sitting for a couple of minutes, I ‘burp’ the metal tins. This means that the reduction chamber is lifted briefly to let some oxygen at the pots.
I have found that raising the tin right to the top of the pot works best. My experience is that it’s not enough to simply tilt the tin and open up a crack at the base.
The tin is lifted for a couple of seconds and then lowered again.
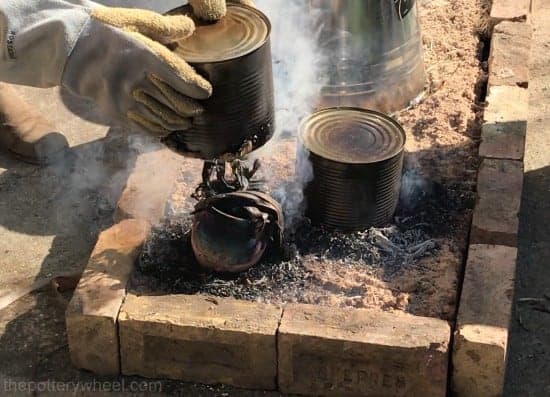
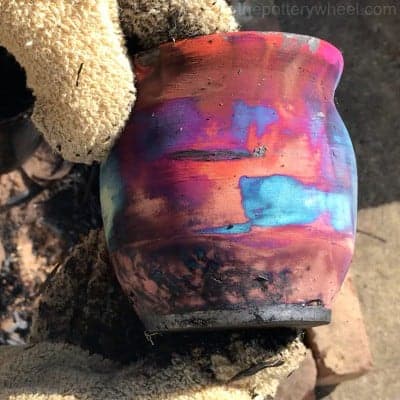
Then the pot is left undisturbed in the reduction chamber for an hour. After an hour the reduction chamber can be removed. You might find that sawdust clings to the bottom of the pot. But this can be brushed off easily with a heat-resistant glove.
The Results
Sometimes when you lift the reduction chamber, the pot looks amazing straight away. Other times, it takes a while for the pot being exposed to oxygen to bring out all the colors.
Some pots look a bit unexciting when they come out of the reduction chamber. But after an hour of sitting in the open air, they can look great.
In general, copper matte raku is unpredictable. Sometimes the results of copper fuming are magnificent. And on other occasions, they are not so exciting.
For me, this is part of the excitement of it. It’s an amazing feeling when you lift the reduction chamber to find a real gem.
It’s sometimes advised that you seal the copper matte raku pots with a polyurethane sealant once they have cooled. If copper fumed ware is left in direct sunlight, the colors will reoxidize and eventually given time turn black.
One solution to this is to seal the surface with something to act as a barrier to oxygen. I’ve found that this can make the surface look a bit like plastic.
One of the lovely things about copper matte raku is the texture of the finish. It can look almost like iridescent velvet. My feeling is that this is lost with a sealant.
Another way to protect your copper fumed ware from reoxidation is to keep them out of direct sunlight. I’ve found that provided they’re kept out of the sunlight, they don’t lose too much of their original charm.
If you want to watch the complete step-by-step process, check out my video on How to Make Copper Matte Raku pottery.
Where to Buy Copper Matte Raku Pottery
There is a phenomenal art brand called Raaquu, that makes and sells very beautiful copper matte pieces. You can take a look at some of their pieces for sale here.
This lovely vase below was made by the artists at Raaquu.
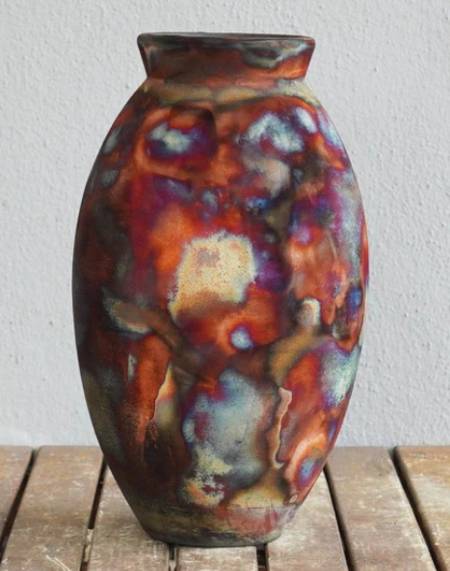
Artwork produced and on sale by Raaquu
Copper Matte Raku is Decorative
Beautiful though they are, copper matte raku is decorative rather than functional. It is not suitable for dinnerware, food or drink, or holding water.
Like all raku, copper matte fuming is a fast low fire technique. As such the glaze does not create a non-porous sealed glassy surface. This makes it unsuitable for use with food and drink.
Liquid will seep through the copper matte glaze and permeate the pottery. And food particles will get into crevices and harbor bacteria. So, the bottom line is that copper matte raku is decorative ware only.
Final Thoughts
Copper matte raku has a reputation for being a tricky technique. Certainly, I’m learning more about it and adjusting my approach each time I fire my raku kiln. Also, different potters have their own individual techniques. It seems that no one glove fits all. Hopefully, this article will have been a good starting point and that you can experiment. Ultimately finding a honed down method that works for your kiln and your style of pottery.