Your cart is currently empty!
Kiln Wash on The Kiln Floor? – Does it Protect Your Kiln?
Published:
Last Updated:
Affiliate Disclaimer
As an affiliate, we may earn a commission from qualifying purchases. We get commissions for purchases made through links on this website from Amazon and other third parties.
When I first looked into kiln maintenance, I heard it was advisable to put kiln wash on the kiln floor. Whilst I could understand the point of this, painting anything on my kiln made me feel nervous. Kilns are an expensive piece of kit and I didn’t want to ruin the kiln brick. So, I looked into the question of putting kiln wash on the kiln floor and this is what I discovered….
Most kiln suppliers recommend applying kiln wash to the kiln floor. It creates a barrier, so any glaze that drips onto the floor is easy to remove. It also prevents damage to the fire bricks. However, not advised to use kiln wash on the floor elements are embedded in the kiln floor.
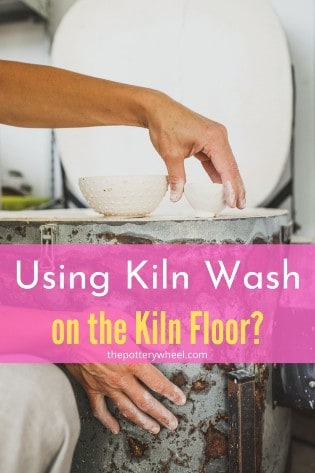
Table of Contents
show
Why Put Kiln Wash on the Kiln Floor
When glaze or glass is fired in a kiln, it becomes molten. Sometimes glaze drips or splatters. It can splatter because when it gets hot it bubbles in the kiln. If it’s fired correctly, the bubbles will settle down, and smooth out again.
Some glazes are quite static and don’t run very much. Other glazes are very runny when they are hot. These are called ‘flowing’ glazes. A flowing glaze might run if you apply the glaze too thickly to the ware. As it fires, the glaze will run onto the kiln shelf.
Alternatively, you may fire your pottery at a temperature that is too hot for that particular glaze. This can cause glaze to run too. In fact, if you ‘over fire’ some pieces of pottery, the clay itself can melt into a puddle on your kiln shelf.
However, it’s not just your kiln shelves you need to worry about. A very runny glaze can drip over the edge of a kiln shelf. Some kiln shelves are called ‘half-shelves’. As the name suggests, these shelves are two half circles that are positioned together to create a whole shelf.
Half shelves are handy because you can get them in and out of the kiln easily. However, if you position a piece of pottery across the two halves, glaze can run between the two shelves. This may drip onto the shelf below. But if it’s the lowest shelf it will drip onto the floor of the kiln.
Glaze Drips on the Floor or Shelves
Molten glaze that drips onto the kiln floor will absorb into the porous fire brick. When the kiln switches off and the glaze cools it will fuse to the brick.
The next time you fire the kiln, the glaze will melt again and soak further into the brick. And, in fact, each time you fire the kiln the glaze will eat a little further into the fire brick. So, if drips occur, it’s important to remove them. Because the drips have absorbed into the surface, it’s important to remove that section of brick. As a result, removing drips of glaze involves gouging sections of insulating brick from the kiln.
If a lot of glaze drips onto the kiln floor, this can ruin the kiln floor. As a result, all the bricks on the floor may need to be replaced.
How Does Kiln Wash Protect the Kiln Floor
Kiln wash is made up of highly refractory materials. ‘Refractory’ means that a material can withstand very high temperatures without melting. Most kiln washes are made up of Alumina and Kaolin (or EPK). Some also contain silica. All of these materials have a high melting point.
When these materials are mixed with water, they can be applied in liquid form to a kiln shelf or floor. They create a non-melting barrier between the surface of the kiln and any drips of glaze. Because the kiln wash doesn’t melt, it creates a barrier that prevents the glaze from fusing to the kiln.
Once the kiln has cooled the drips of glaze become solid. It is then easy to remove the drops without damaging the kiln floor (or shelves). The best way to do this is to use a paint scraper. Carefully slide the scraper under the blob of glaze. This always reminds me of scraping meringues off parchment paper after they come out of the oven. The kiln wash acts a little like parchment paper in an oven.
How to Apply Kiln Wash to the Kiln Floor
Before you apply kiln wash to your kiln floor, you will need to prep the kiln. Here are some steps….
Steps to Applying Kiln Wash
- Remove any existing drips of glaze that may already have fused to the kiln floor. You can do this with a paint scraper or screwdriver. It’s important to get rid of all the glaze. But equally, try to remove as little of the fire brick as you can.
- Vacuum the kiln before you apply the kiln wash. It’s important to use a soft brush nozzle when vacuuming the inside of a kiln. This prevents any accidental damage to the soft brick as you vacuum. Ideally, use a vacuum cleaner that has a HEPA filter on it. This will remove hazardous particulates from the debris that is being sucked out of the kiln.
- You can make your own kiln wash, or you can buy it. Shop-bought kiln wash comes either as a ready-made liquid or a powder that you need to mix with water. Different recipes and different manufacturers will recommend different thicknesses.
- Apply the kiln wash to the base of the kiln with a soft brush. A paintbrush or a haik brush works fine.
- It’s important to prevent the kiln wash from going onto the elements of an electric kiln. Kiln wash will attack and corrode electric elements and cause them to stop working. You can hold a piece of cardboard up around the edge of the kiln as you apply the kiln wash to the floor. This will prevent any kiln wash from splashing accidentally onto the elements.
- Some kiln suppliers recommend that you paint the kiln wash ½ an inch up the kiln wall too. I personally don’t do this, as I want to keep it off the kiln walls. But this might be something you want to consider.
Touching Up your Kiln Wash
I’ve found that kiln wash lasts for quite a long time. Generally, I will vacuum my kiln once every few times I fire it. This is part of general kiln maintenance. Vacuuming removes dust and any small flakes from the kiln wash on the floor. If it starts to flake, I remove the flakes and apply a little more wash to the exposed area. It isn’t necessary to remove and reapply the whole coat.
Similarly, if you do get a drip of glaze, just remove the drip. Touch up the exposed area with a little kiln wash if necessary.
When Not to Apply Kiln Wash to the Kiln Floor
There are a couple of occasions when it’s important to avoid applying kiln wash to the kiln floor.
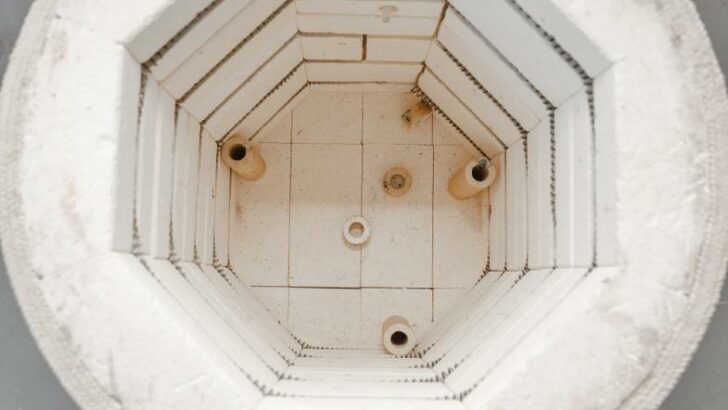
Some kilns have elements embedded in the kiln floor. One reason for this insure even heat distribution during firing and avoid cool spots at the base of the kiln. However, the risk of kiln wash getting onto elements is much higher if there are elements embedded in the floor. For that reason, it’s best to avoid the practice if you have a kiln with this particular design.
Also, if your kiln has a burner port or a vent system, it’s important to avoid kiln was getting into these. One reason for this is that the port or vent is likely to blow flakes of kiln wash around your kiln. If kiln wash settles on your glazed pots as it’s firing, it will cause glaze defects.
Final Thoughts
I found it nerve-wracking to paint kiln wash on the kiln floor. However, in hindsight, it seems like a no-brainer. It’s such a simple, inexpensive way to protect your kiln, there seems little reason to not take up this practice. If you have any reservations, it’s always a good idea to consult the kiln supplier. They will have suggestions about best practices with your particular model of kiln.