Your cart is currently empty!
How to Make Terra Sigillata | Easy Peasy Terra Sig
Published:
Last Updated:
Affiliate Disclaimer
As an affiliate, we may earn a commission from qualifying purchases. We get commissions for purchases made through links on this website from Amazon and other third parties.
There are a lot of different accounts of how to make terra sigillata available. Some of these methods seem more precise than others. There also seems to be quite a bit of conflicting information.
So, I did some research into the various recommendations made by different potters and cherry-picked the best suggestions. I tested these recommendations and then put together a step-by-step guide on how to make terra sigillata.
Making terra sigillata involves mixing water and a suitable raw clay powder with a small quantity of deflocculant. This is left to settle, and the deflocculant helps separate fine and coarse clay particles. Once settled, the top layer is siphoned off and condensed down through evaporation to create terra sigillata.
Making Terra Sigillata – Is it Difficult?
Flicking through the heading subtitles for this article, you might be forgiven for thinking this is a complicated process. You will see references to reading ‘specific gravity’ and the like. Please don’t be put off. It really is a very simple process.
It’s generally agreed that the basic ingredients of terra sigillata (terra sig) are clay powder, water, and a deflocculant. However, there is disagreement about the relative quantities to use and what deflocculant to use. In addition to this, individual potters use different techniques for making the terra sig.
As such, I sifted through the information and combined what seemed like the most efficient and effective techniques.
How Much Terra Sigillata to Make?
Some potters make huge batches of terra sigillata in one go. The reason for this is that it takes a while to make. I guess they want to make the most of the time invested.
However, I didn’t want to have gallons of it sitting around, so I scaled down the quantities to suit my needs. If you need more, you can, of course, scale up using the same ratios and get the same result.
How to Make Terra Sigillata – Let’s Talk Ratios
There is a lot of variation in recipes around the ratio of clay to water used. Some recipes recommend a much higher ratio of clay to water than others. And there is also a lot of variation in the suggested amounts of deflocculant to use.
Quantities of Clay to Use
I had often heard potters complain that their terra sigillata cracked either when drying or firing. This sometimes happens when the terra sigillata has been applied too thickly. I also wondered if it happened because the ratio of clay to water was too high when it was being made. Perhaps the chemistry of their mixture wasn’t quite right.
Of the recipes I read, a couple of approaches seemed to be the most well-researched and backed up with some science (source). So, I decided to use their suggested ratio of clay to water. In short, the best ratio seems to be around 1:4 clay to water.
A much-cited approach by Vince Pitelka suggests that for 5 gallons of water, you need around 11 lbs of ball clay. If you are using another clay body like Redart then he recommends 14lbs. In her book, Surface Design for Ceramics, Maureen Mills recommends a similar ratio of around 1:4.
These ratios use a lower clay volume than other recipes I researched, but the authors had a lot of authority. So, I decided to nail my colors to their mast.
Quantities of Deflocculant to Use
The purpose of a deflocculant is to separate out the particles suspended in a liquid and make the liquid thinner. It does this by creating an electrical charge in the particles which then repel one another.
When making terra sig, the deflocculant encourages the large coarse particles to settle at the bottom of the jar. Whilst finer particles remain suspended in the upper layer. This more refined layer can then be siphoned off and concentrated down before being used as terra sig.
There are a number of deflocculants available that can be used for terra sigillata. Some that are recommended by potters are Darvan 7, Dispex, sodium silicate, and soda ash. You can buy Darvan 7 on Amazon here.
Some potters successfully use Calgon as a deflocculant. However, this is a source of contention with other potters strongly arguing against it.
I use a mixture of sodium silicate and soda ash in this recipe. Generally, soda ash comes as a powder, and sodium silicate comes as a suspension. You can weigh out the sodium silicate solution as if it were a solid weight.
You only need to add a small quantity of deflocculant to your terra sig ingredients. The most precise suggestion that I found for quantities of deflocculant was to use 0.25% of sodium silicate (source). I also used 0.25% of soda ash. This means that the sodium silicate and soda ash are 0.25% of the weight of the clay used.
What Concentration of Sodium Silicate Solution to Use for Terra Sigillata
You can buy sodium silicate suspension with different levels of concentration. Often this is described as the % volume of sodium silicate in the suspension. However, the correct way of referring to the degree of concentration is using the Twaddell scale (source).
The Twaddell scale is based on specific gravity. 0tW equates to 1.00 specific gravity (the SG of water). Each degree of TW equates to 0.005 SG.
The recommended TW for sodium silicate solution for terra sigillata is 75tW (source). A 75tW solution has a concentration of just under 40% (source) Sodium silicate solution is also typically available commercially in higher concentrates of 120tW and 140tW. However, these higher concentrations are usually used for industrial slip casting. 75tW (or 40%) is sufficient for making terra sigillata.
With all that in mind, here is the recipe I used for Terra Sig:
Terra Sigillata Recipe:
- 2800 g of water (this is around ¾ of a gallon)
- 750 g of raw ball clay
- 1.87g soda ash
- 1.87g sodium silicate
If you want red terra sigillata, then you can use Redart, Albany, or Barnard clay. Ball clays can be used to make white terra sig.
How to Make Terra Sigillata – Method:
There are a few steps to making the terra sig. The first is to mix the ingredients…
Mixing Ingredients
- Measure out your quantities of soda ash and sodium silicate. You will need scales that measure to 0.00g. Most ordinary kitchen scales don’t measure in small enough increments to weigh powders in small quantities accurately. So, you may need to get a more accurate set.
- Mix 1.87g of soda ash and 1.87g of sodium silicate in a small amount of hot water.
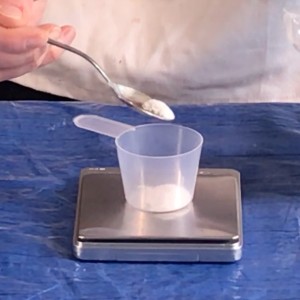
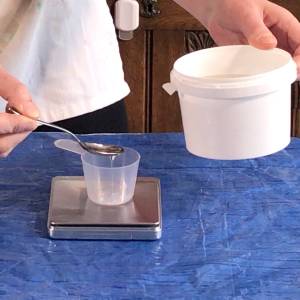
- When dissolved, add this to 2800g of water. This doesn’t need to be hot, room temperature is fine. Some people recommend using distilled water. However, I use tap water, and it works fine.
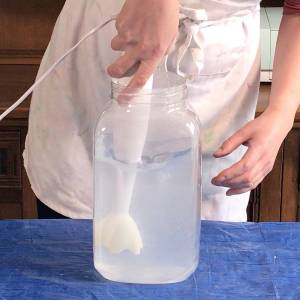
- Mix this solution with a stick blender or a drill with a mixing bit on it.
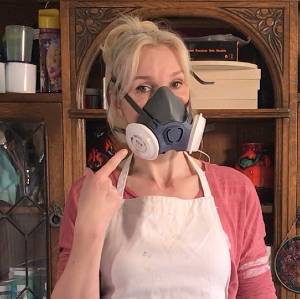
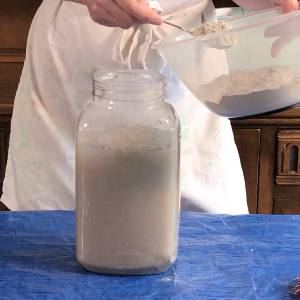
- Wearing a respirator, empty the contents of the clay powder into the solution.
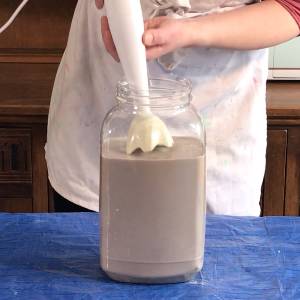
- Mix with a blender again until thoroughly mixed.
Get a Baseline Specific Gravity Reading for the Terra Sigillata
Specific gravity is a measure of how dense a substance is compared to water (source). On the specific gravity scale, water has a value of 1. A substance with an SG of 1.05 is 1.05 times denser than water.
There are two simple ways to measure the specific gravity of a solution. One involves using a hydrometer, the other uses scales.
Using a hydrometer:
Pour some of the terra sigillata mix into a graduated cylinder (tall thin measuring vessel!). Then carefully lower the hydrometer into the mixture and take your baseline reading. You will need a hydrometer that measures a specific gravity range between 1 and 1.20.
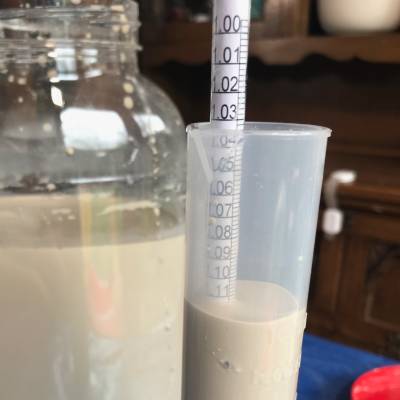
The hydrometer will raise the surface level of the liquid in the cylinder, so don’t fill it up. If you fill the cylinder, it will overflow and spill when you lower the hydrometer. When I’m measuring the specific gravity of terra sig with a hydrometer, I half-fill a 100ml cylinder. That is enough liquid to support the hydrometer, without the cylinder overflowing.
Using scales:
Using this method, you don’t need a hydrometer. All you need are some scales and a graduated cylinder.
Put your graduated cylinder onto your digital scales. Pour 100ml of terra sigillata into the cylinder and weigh it.
Divide the weight of the terra sig in grams by 100 to get the baseline weight. So, for example, if your terra sigillata currently weighs 112g, your specific gravity is 1.12.
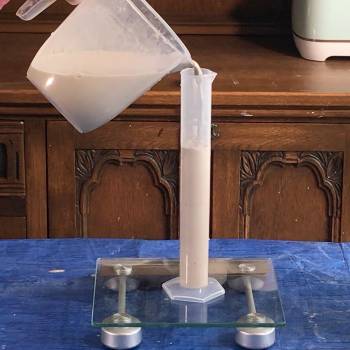
Stir The Terra Sig Before Measuring
It’s important to stir the terra sigillata immediately before measuring the specific gravity. The larger particles of clay settle to the bottom very quickly. So, to get an accurate reading you need to mix the sediment up and measure the specific gravity immediately. Otherwise, your reading will be inaccurate.
I find the best way to do this is to put my hand into the mix with my fingers. That way you can feel if there is any sediment sitting at the bottom of the container.
Ideal Specific Gravity Before Siphoning
A lot of potters don’t bother getting an initial baseline reading of the specific gravity. However, it’s useful to determine whether you have got the initial ratio of clay to water right.
Vince Pitelka states that after the initial mix, a ball clay terra sig should have a specific gravity of 1.15 (source). Other clays like Redart, should have an SG of 1.20. In fact, he recommends adding water to the clay powder bit by bit and checking the specific gravity at intervals. That way, you can stop adding water when you reach the optimal reading.
You could use this method the first time you are using a particular raw clay. By checking at intervals, you can record how much clay you used to reach the correct specific gravity reading. Then next time, you will have the exact amounts necessary and can add them without monitoring as you go along.
Other potters are not as particular and will accept a lower initial specific gravity reading. The thinking behind this is that terra sig will later be reduced until it reaches the right specific gravity.
I have to confess I fall into the latter category. I generally don’t add the clay incrementally and check the specific gravity as I go along. I usually just add the powder, mix it up, then measure the specific gravity. If I use the ratios outlined in the recipe above, the specific gravity will be about 1.12 after the initial mix.
Letting the Mixture Settle
Once the ingredients are blended, pour them into a clear bottle. With the quantities I’m using, I pour my mixture into a gallon container. This then needs to be left undisturbed to settle. You will be siphoning off the top layer, so it’s a good idea to place it on a raised surface. That way, you avoid agitating the mixture by moving it later on to a raised surface to siphon it.
There is disagreement about how long to leave the mixture to settle. Some potters advise leaving for 3 days. Others recommend 24 hours, and others say leave for 20 hours (source) I generally leave mine for 24 hours.
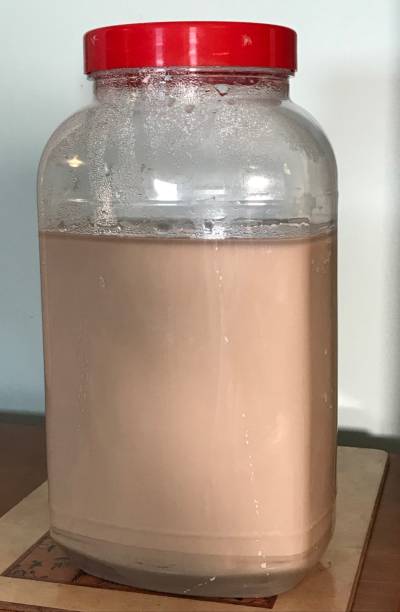
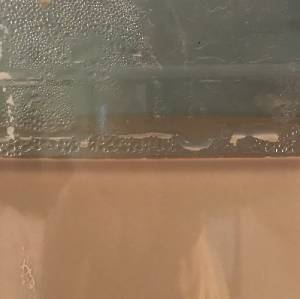
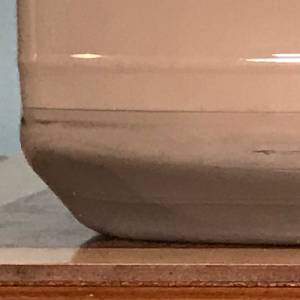
The mixture will settle into 3 layers. The very top layer will be largely water with a few fine clay particles suspended in it. The very bottom layer is a slurry containing larger courser clay particles. The middle section is the terra sigillata mixture that you want to keep.
Siphoning the Terra Sigillata
The way to separate the middle section from the sludge at the bottom is to siphon the terra sig. An easy way to do this is with plastic tubing that is used for winemaking.
Some potters recommend siphoning off the top layer of water and discarding it. Others don’t bother. The top layer is just water with a small number of fine clay particles suspended in it. So, it won’t do the terra sig any harm if it gets mixed in with it.
After siphoning, you reduce the mixture to evaporate some of its water content. So, the top layer of water will just evaporate out too.
A Few Useful Tips When Siphoning the Terra Sigillata
- Let your mixture settle on a surface that is relatively high up. This will mean that you can easily siphon the terra sigillata into a container placed at a lower level.
- You can start the siphoning process off by sucking on the end of the tube to draw the mixture up. Once the liquid has started to flow you can simply let it drain into an empty container.
- Be aware that once the liquid starts to move down the tube, it travels quickly! You can avoid getting a mouthful of clay water by standing above the container of terra sigillata. Then you will be above the terra sig and can draw the mixture up the tube slowly using suction.
- When the mixture is more than halfway up the tube, stop drawing on the tube. Put your finger over the end of the tube that was in your mouth. This will stop the liquid from dropping back into the terra sigillata container. And it will stop the terra sigillata from going into your mouth.
You can then lower the tube into the empty container which is positioned at a lower level. The liquid will drain into the container.
When to Stop Siphoning – How Much Mixture Can You Use?
Some potters gauge visually where the terra sigillata ends and the sludge starts. They then lower the tube into the container until it is sitting just above the bottom layer. They then siphon the terra sigillata off into another container.
Other potters put the tube just below the surface and gently lower it down as the level drops. They watch to see and feel when the flow of the terra sig slows down. When this happens it’s an indication that the mixture is getting thicker and they are reaching sludge. At this point, the tube is removed and the siphoning stops.
A handy tip is that if you are using ball clay, it will be hard to distinguish between the layers. As such, the recommendation is that you simply discard the bottom 3rd of the container.
Reducing the Terra Sigillata
The liquid that is siphoned off consists of the finest particles of clay suspended in water. However, the mixture is too thin to work at its best.
Some potters do use it without reducing it. Most, however, reduce it somehow. The goal of reduction is to get the specific gravity in the range of 1.15 and 1.18. Ideally, the specific gravity of a reduced ball clay should be 1.15. The specific gravity of terra sig from other clays can be up to 1.18.
Some Ways to Reduce Terra Sigillata
I have two ways of reducing my terra sigillata, depending on how much time I have.
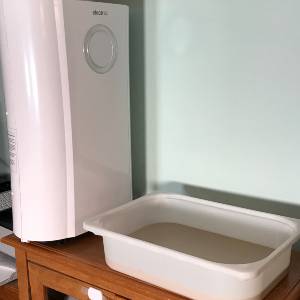
- If I am not in a rush, I pour the mix into a shallow dish, so that there is a large surface area. Then, I leave the dish in a warm room with a dehumidifier on. Reducing the terra sig this way takes several days and can take up to a week depending on the weather.
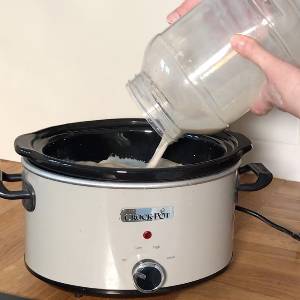
- The other technique that I use is to pour the terra sigillata into my old crockpot. I then leave it on the low heat setting throughout the day. The heat is quite gentle, so the clay doesn’t burn onto the pot. It takes around 10 hours to reduce the liquid to around 1.15 sg.
I would only recommend doing this on a crockpot that you don’t want to use for cooking. Whilst it won’t burn onto your pot, the clay will crust up a little around the top edge of the liquid. You can remove this easily afterward by soaking it in water.
Once you have your mix at the right specific gravity, it is time to congratulate yourself. You have just made terra sigillata.
Here is my step-by-step video on how to make terra sigillata check out my YouTube channel.
Other Ways to Reduce Terra Sigillata:
- Putting your mixture in a pan and simmering it on low heat for a few hours.
- Leaving the mixture in a shallow dish or container without a lid on for a few weeks. At room temperature, the water content will slowly decrease. The rate depends on temperature and humidity levels.
If you’re leaving the terra sigillata to reduce naturally over a long period, you don’t need to check it often.
However, if you are using one of the faster methods, you should check the specific gravity regularly. For example, if you are simmering on a stove or heating in a crockpot. Although the crockpot method does take quite a while, you don’t want it to reduce past its optimal consistency.
Once you have reached the right specific gravity, you can decant the terra sigillata into a sealable container.
Important Point -Temperature Affects Specific Gravity
It’s important to bear in mind that the specific gravity of fluid goes down as the temperature goes up (source). The reason for this is that usually, liquids expand when they heat up. As they expand they also become less dense.
This matters if you are reducing your terra sigillata by heating it. You need to let it cool before you get a true specific gravity reading. For example, terra sigillata may have a specific gravity of 1.10 when hot. But once it has cooled you may get a reading of 1.14 or 1.15.
This is important to factor in. Otherwise, you may reduce the terra sig too much and end up with a liquid that is too thick. Thick terra sigillata is more likely to crack when it dries or is fired.
If you overshoot and reduce it too much, you can add a little water to reconstitute the terra sigillata.
Once You have Made the Terra Sigillata, How Long Does it Keep?
Like most things in pottery, different potters have different opinions about how long terra sigillata will keep.
Some potters, will make a batch and keep it in storage in its liquid state for long periods of time. Sometimes years! When it is not being used, the clay particles will settle to the bottom of the container.
Therefore, you will need to shake or stir it to break up the clumps. It might even be a good idea to put it through a screen to break up any stubborn clumps.
However, other potters report that terra sigillata stops being effective over time. And also that it becomes blackened and can smell moldy.
If that is the case, then it is possible to dry it out completely and store it in its dry solid form. When you need to use it, you simply mix it with water to the right consistency.
The advantage of doing this is that it keeps indefinitely and you are saving on storage space.
You can dry it out by simply leaving it in the open air in an open container and letting it dry slowly. After all, it is essentially just a refined slip.
Or, you can speed it up by putting it in a metal bowl and drying it out in the kiln. Vince Pitelka recommends leaving the mixture in a metal bowl in the kiln overnight. He points out that if you set the elements low and leave the kiln door open it becomes bone dry overnight.
Leaving a kiln unattended does raise safety questions, but many potters do leave kilns candling overnight. And once it is bone dry it can be stored until you need it.
Final Thoughts
There are so many documented approaches on how to make terra sigillata, that it can feel a bit overwhelming. I have tried to distill down the best aspects of each approach. In doing so, I’ve given you an overview of how I make terra sigillata. I’m fairly methodical, so this approach may not suit everyone. If so, then take the bits that appeal and adapt them to suit you. Either way, I hope you found it helpful.


