Your cart is currently empty!
How to Make a Bellied Slab Mug by Hand
Published:
Last Updated:
Affiliate Disclaimer
As an affiliate, we may earn a commission from qualifying purchases. We get commissions for purchases made through links on this website from Amazon and other third parties.
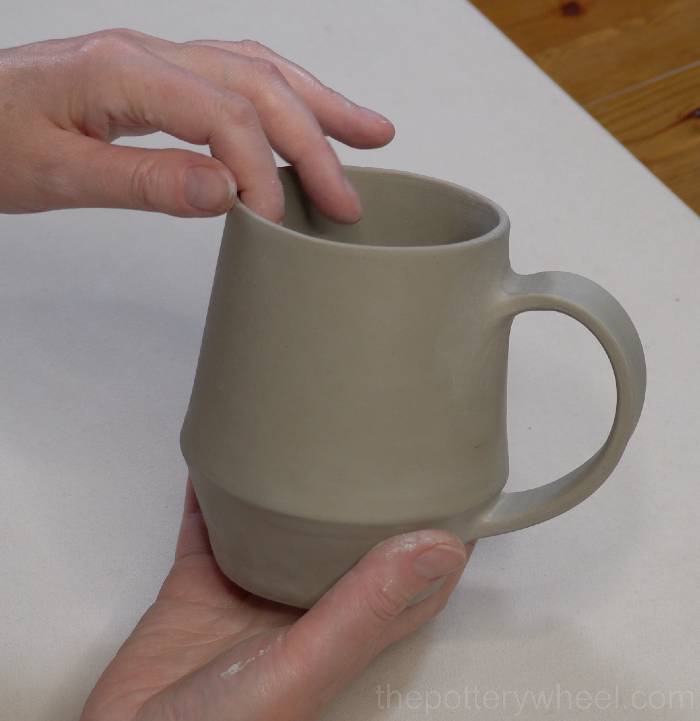
This is a step by step guide on how to make a bellied slab mug using a slab pottery template.
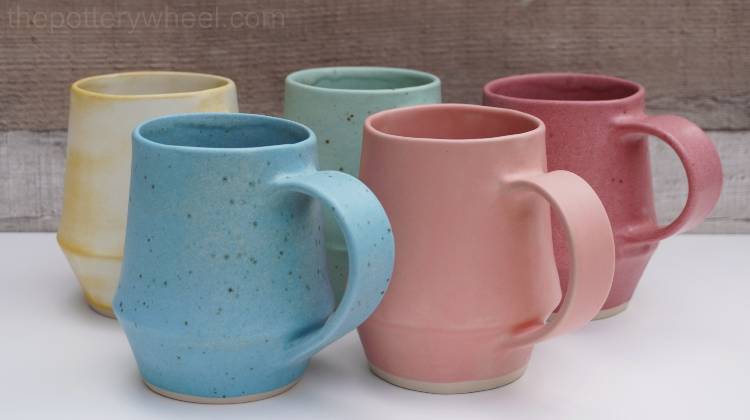
You can decorate this mug in lots of different ways. Here I am making a mug with a smooth surface and also a textured surface too.
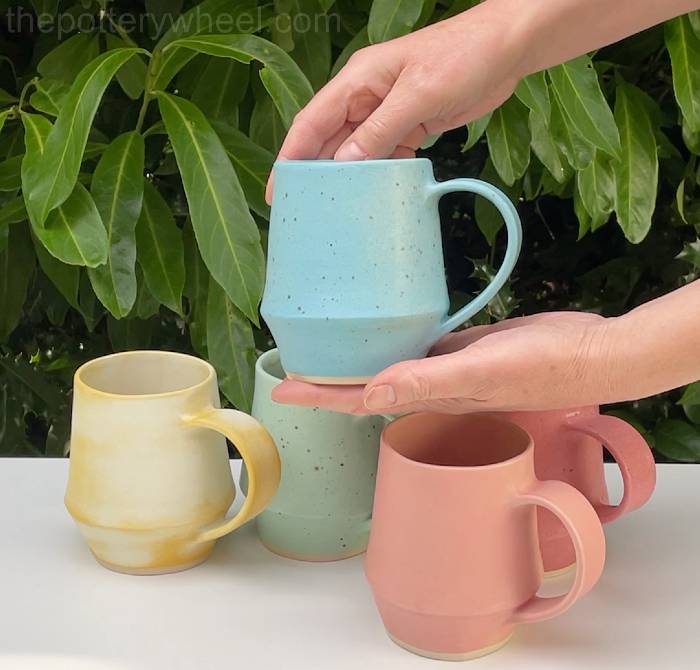
This is what the mugs look like when they have been glazed.
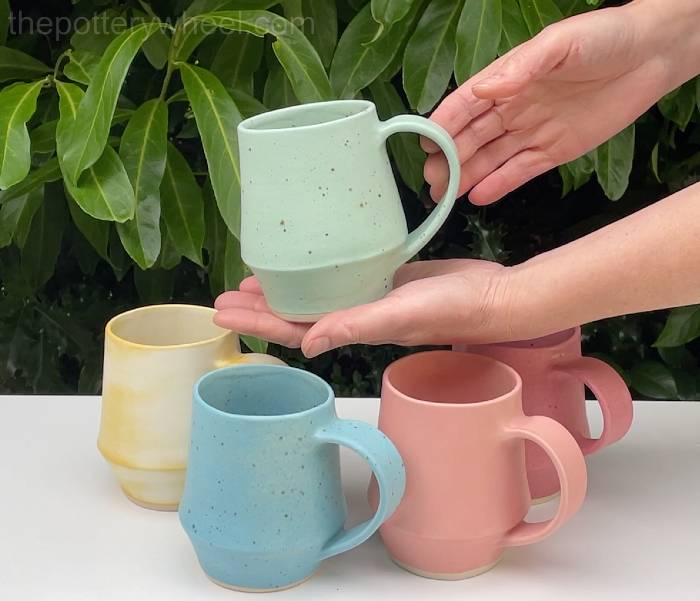
If you’d like to make this mug, you can download a printable copy of the template from my Etsy store here:
Get the Template Here
You can get a copy of this template (and my other slab pottery templates) from my Etsy store here
You will need:
- Clay
- Wide rolling pin
- Roller thickness guides for clay
- Platter tool
- Rubber rib tool
- Clay knife
- Flexible chopping board
- Clay scoring tool
- Banding wheel
- Wooden bat
- Wooden modeling tools
- Chamois leather
- Serrated rib tool
- Stylus tool
Making a Bellied Slab Mug
Once you have downloaded your template these are the steps you need to take.
Step 1: Preparing the Template
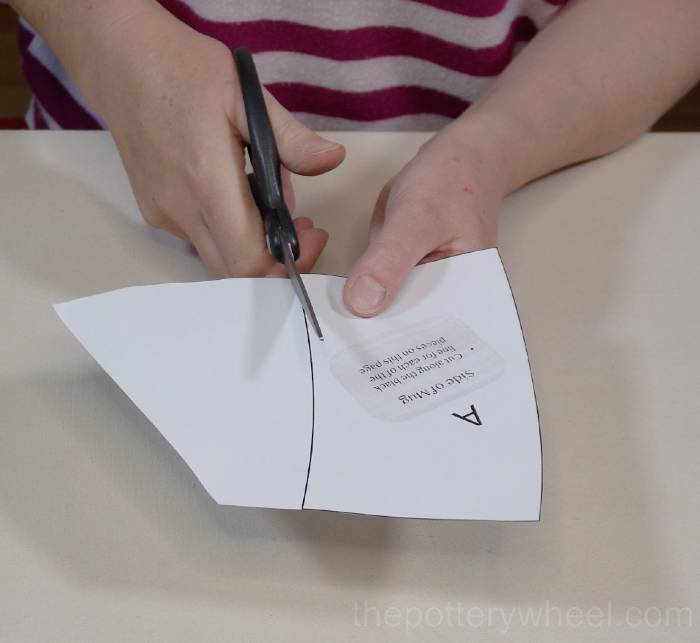
Print off the template and cut out each of the pieces. Template A and B need to be taped together to create one large arc shaped template. This is the template that you use to make the upper portion of the mug.
Step 2: Rolling Out a Slab of Clay
Roll a large slab of clay using a wide rolling pin and roller guides. Roller guides are the wooden sticks on either side of the clay. They help you roll a slab that is a particular thickness, and keep the slab an even thickness too.
I use 3mm wide roller guides, although you can make your slabs thicker than this if you prefer.
You can read more about how to roll an even slab of clay here.
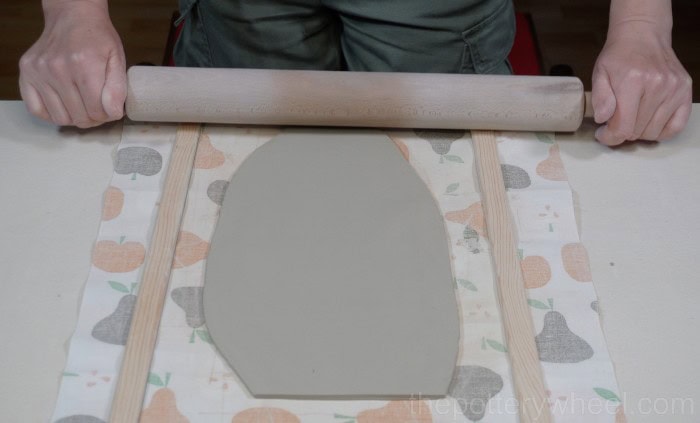
Once you have rolled the slab of clay, run a pottery rib over both sides of the slab. This removes unwanted texture on the clay from the fabric you are rolling on. It also aligns the clay particles and strengthens the slab.
I’m using a wide platter tool to smooth the clay, but you can use a regular rubber pottery rib too.
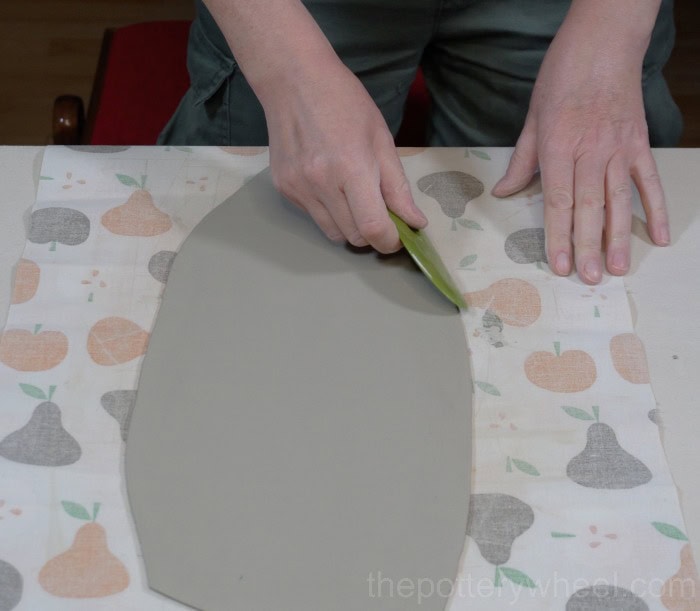
Step 3: Using the Bellied Slab Mug Template
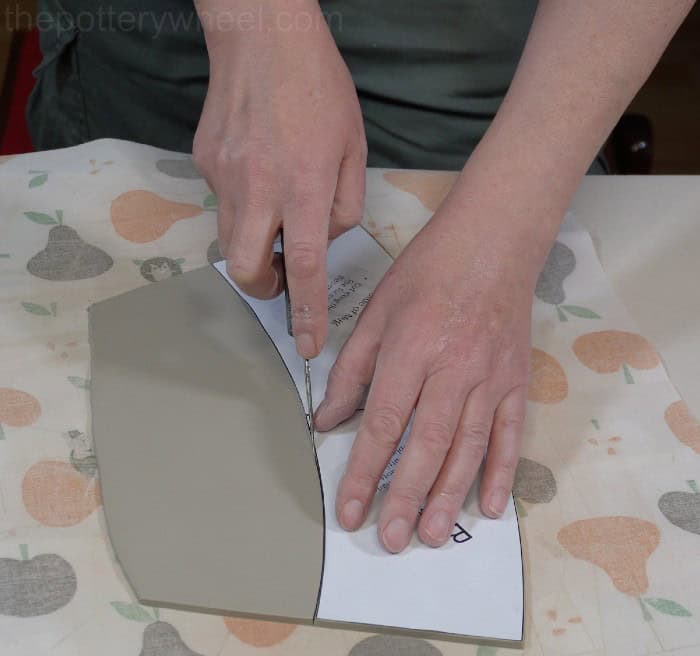
Once the slab is prepared, put the paper template in position on the slab. Cut around the template carefully using a clay knife. Peel away the paper template once you have cut around it.
Any scraps of clay can be put to one side. If they are big enough, you can use them to cut out other piece of the template. If they aren’t large enough, then you will be able to wedge them up and reuse them another time.
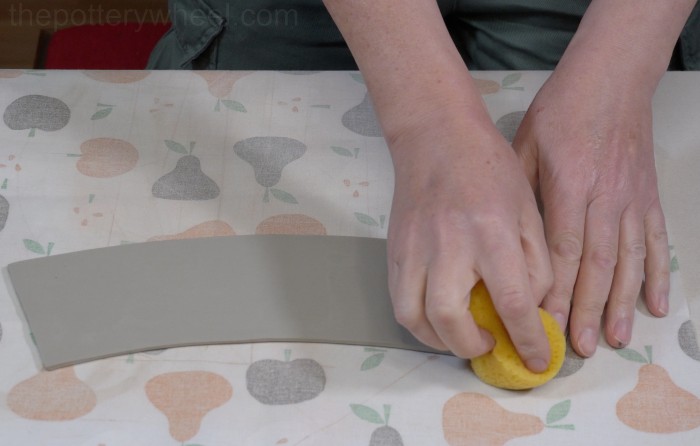
I run a damp sponge over the shorter curved edge of the clay slab. The shorter edge is going to be the rim of the mug. It’s easier to soften this edge off when the slab is still flat. I run the sponge over one side, then I turn the slab over and repeat the process on the other side.
Step 4: Letting the Slabs Firm Up
At this point the clay slab will be too soft to work with. You need to put it to one side to let the clay firm up. The slab needs to be soft enough to bend without cracking, but not so soft that it flops about when you pick it up.
I find the best way to firm slabs up is to put them on a piece of paper and place them on a wooden board. Then I lower another wooden board on top of the slabs. The top board keeps the clay from warping when it begins to dry out. You can read more about how to keep clay slabs flat as they are drying here.
Check the slabs regularly to make sure that they aren’t drying out too much. If you find the slab has become too stiff, you can put it on a damp cloth and let it reabsorb a bit of moisture again.
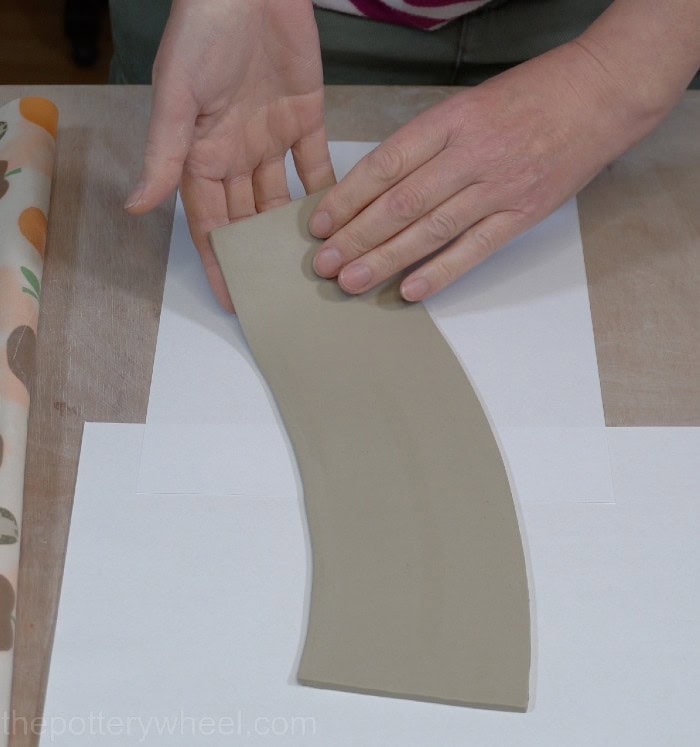
Step 5: Beveling the Edges of the Clay Slab
Once the clay is firm enough to handle, you need to prepare the slab to be shaped.
I start by beveling the short ends of the slab. Beveling means cutting the clay at an angle. If you cut the clay at an angle then you can overlap the two tapered sides when you join the clay. I bevel both edges at about a 45 degree angle.
I bevel one side, turn the slab over and bevel the other side. It’s very important to turn the slab over before you bevel the other end. If you don’t turn the slab over, you will end up with two beveled edges that don’t over lap with one another.
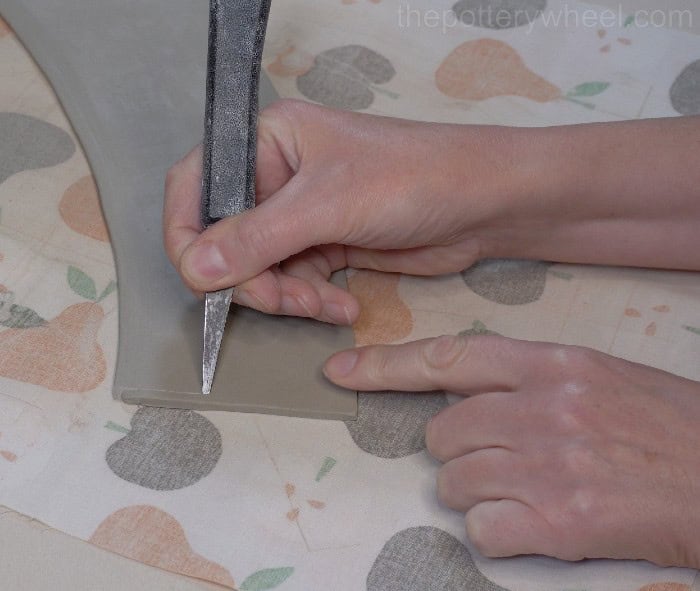
It’s also a good idea to bevel the long edge of the clay slab too. The longest edge of this slab is the one that will join onto the bottom section of the mug. If you bevel the long edge at about 30 degrees, this will make it easier to join the two slabs of clay.
You don’t need to take too much off the long edge. Just take a sliver off so that the edge sits flat against your work top when you curve the clay round into a cone shape.
Step 6: Score and Slip the Edges
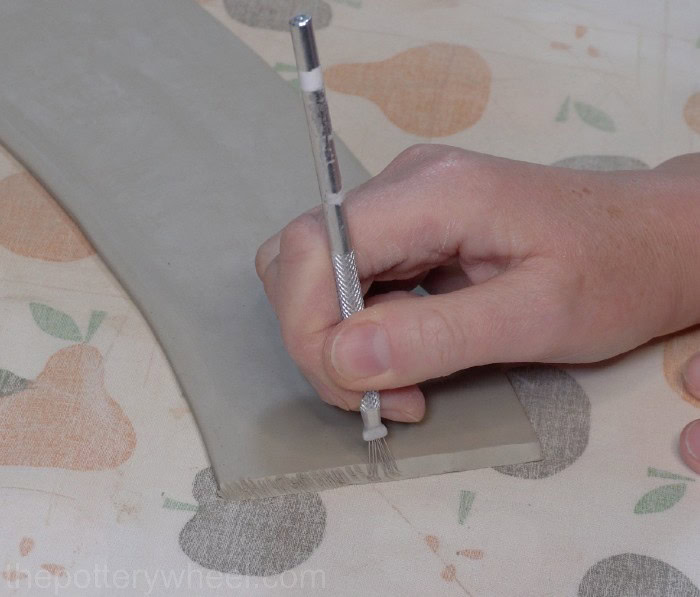
To create a firm join in the clay, you need to use a technique called ‘score and slip’. First of all, you score into the clay surface using a clay scoring tool like the one in the picture below.
If you don’t have a clay scoring tool, you can use something like a regular kitchen fork.
Scratch into both beveled surfaces to create a rough texture.
Lift the slab up and curve it into the shape that you want the mug to be. This doesn’t have to be a perfect shape at the moment. It just needs to curve round so that the two beveled edges are almost touching.
Tip It’s helpful to use a banding wheel with a wooden bat on top when you are slab building. This will allow you to rotate the clay slab without having to handle it too much.
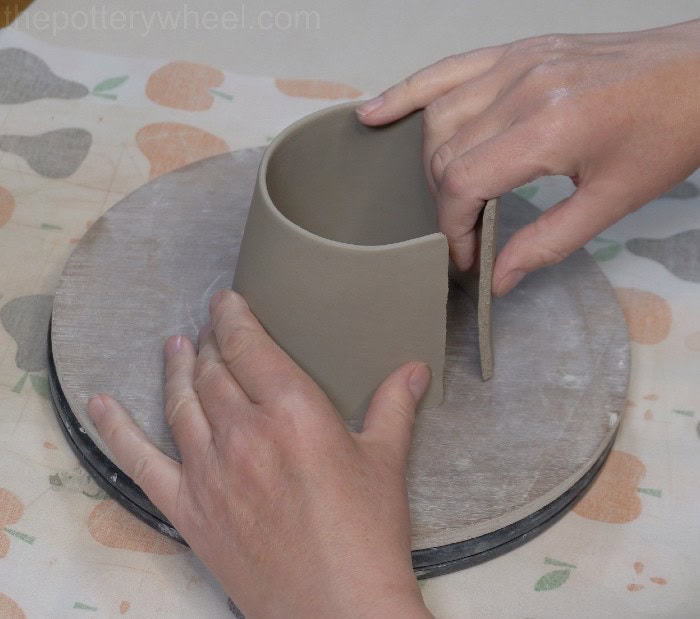
Apply some clay slip to each of the scored edges.
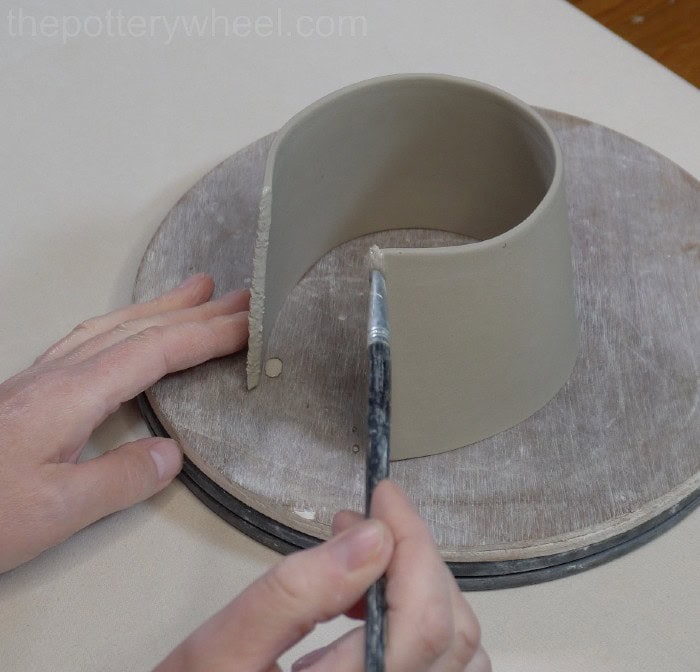
Step 7: Joining the Clay Slab
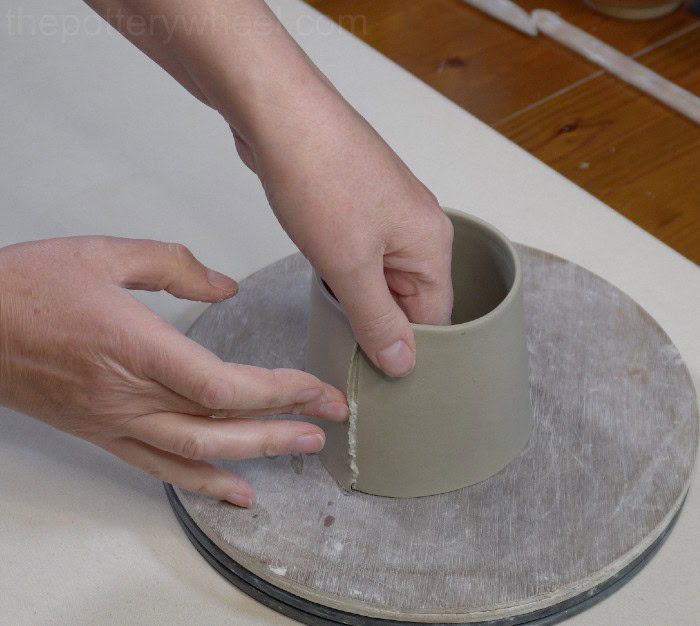
Press the two edges together. Use one hand to support the clay on the inside and use your other free hand to press the seam together. Some slip will squeeze out from between the two ends. You can just wipe that away with your finger.
You can also compress the join together using a soft rubber rib. Run the rib over the seam until the two edges have blended in together completely.
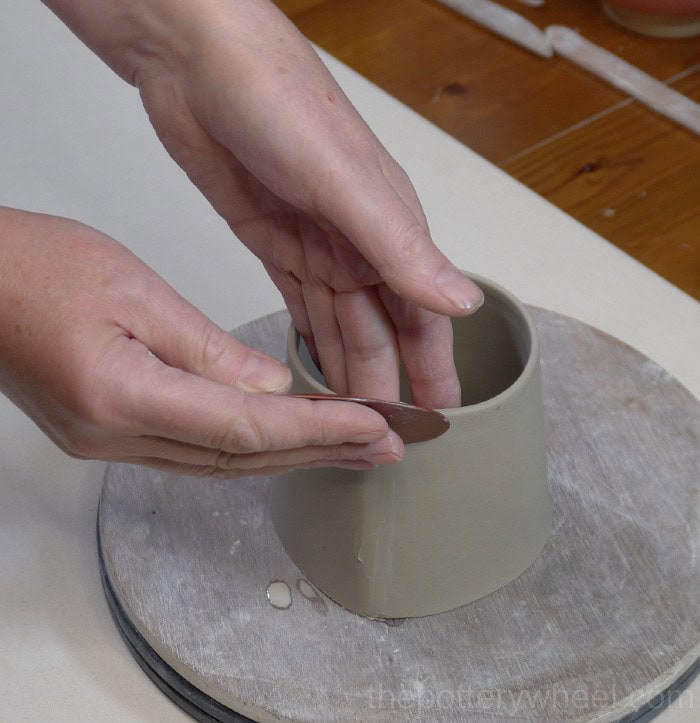
Using a wooden modeling tool, blend the surface of the seam on the inside of the mug too. Modeling tools can leave marks in the clay. If you don’t like the look of those marks, you can smooth them away with a long tool like the platter tool I used earlier. If you don’t have a long tool, you can use the back of a regular dessert spoon.
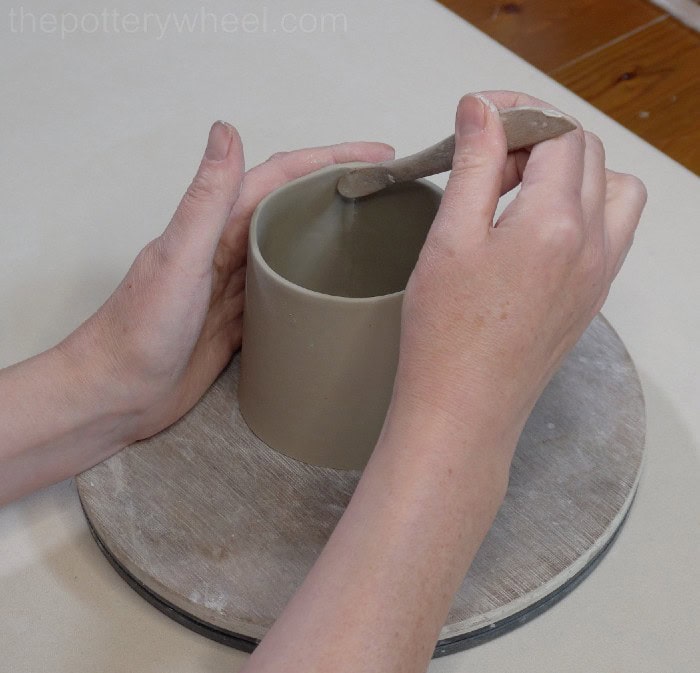
Once the seam is blended together, I put the bottom edge of the mug on top of a smooth inverted plastic bowl. This ensures that the base of the slab stays nice and round. You can also slide an old circular plastic container into the top rim of the mug to keep that round too.
Put this to one side and allow the seam to bond together firmly.
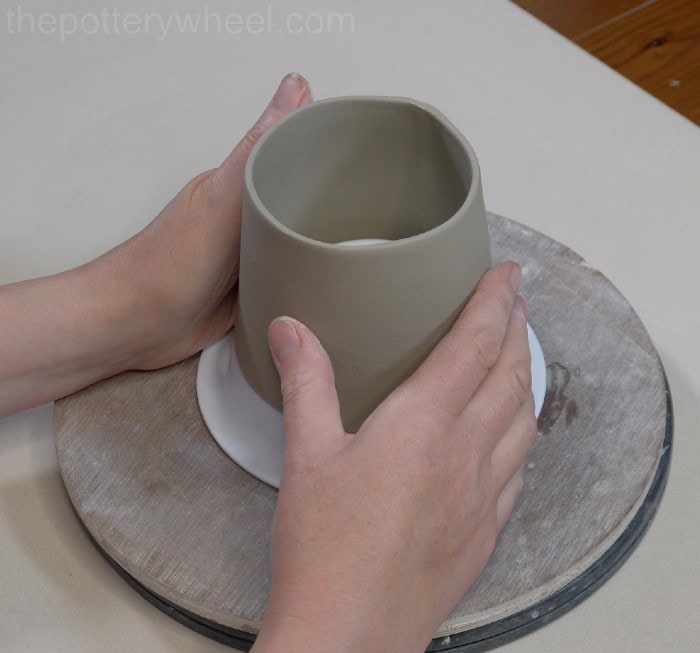
Step 8: Making the Lower Portion of the Bellied Slab Mug
While the upper portion of the mug is setting up, I make the bottom portion of the mug. I start by cutting out a slab of clay using template C, which is for the bottom half of the mug.
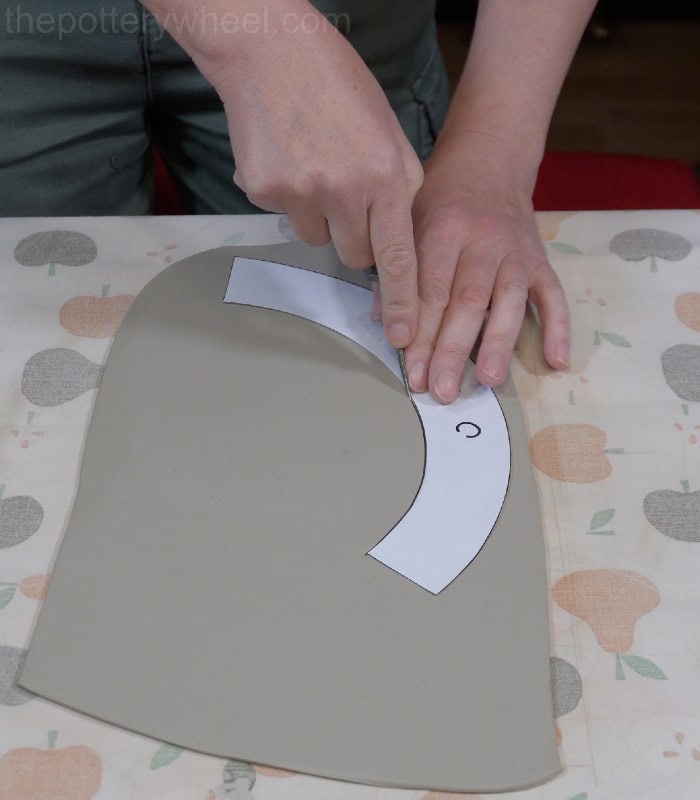
Once I’ve cut out this part of the mug, I repeat the process of beveling the two short edges.
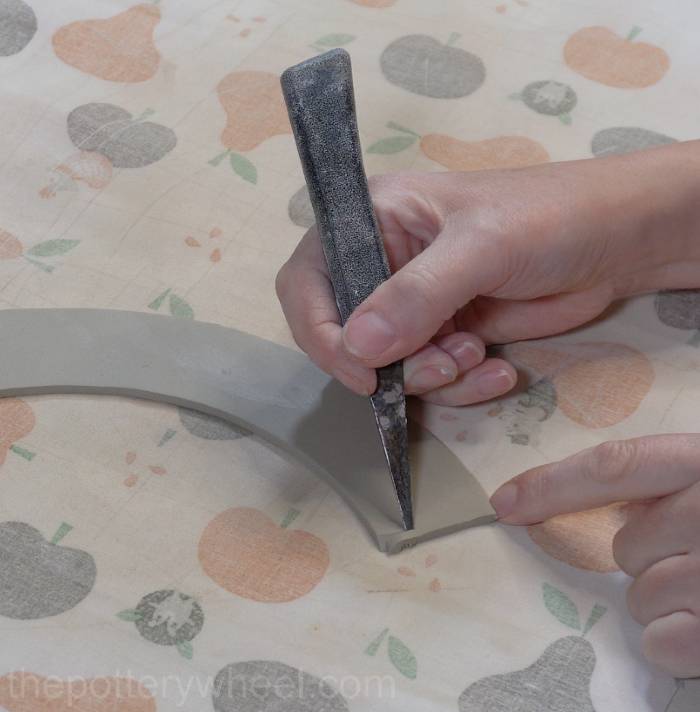
In addition to beveling the two short edges, I also put a bit of a bevel on the wider length of the curved shape. This longer part of the clay slab is going to line up with the bottom part of the upper portion. They will fit together better if you bevel both edges a bit.
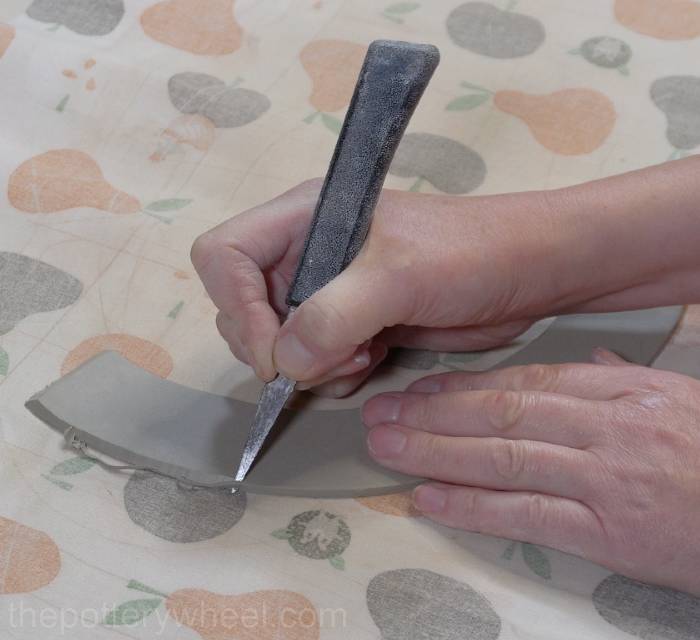
I score into the surface of the two short beveled edges and then line them up with one another. I apply some slip and blend the seam together in the same way that I did the upper portion of the mug.
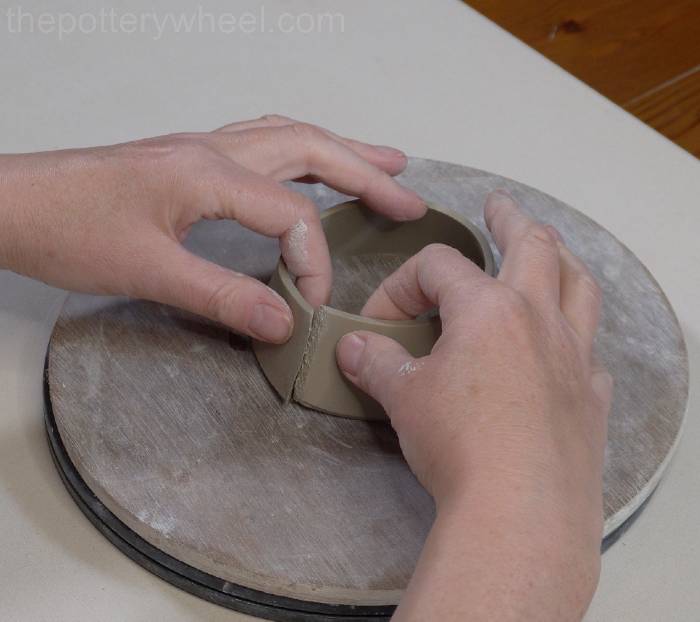
Step 9: Making the Base of the Bellied Slab Mug
I use the round part of the template to cut out a circular slab of clay that will form the base of the mug. The circle of clay is a couple of milimeters wider than the bottom of the mug. This gives you a bit of extra clay to blend into the base of the mug.
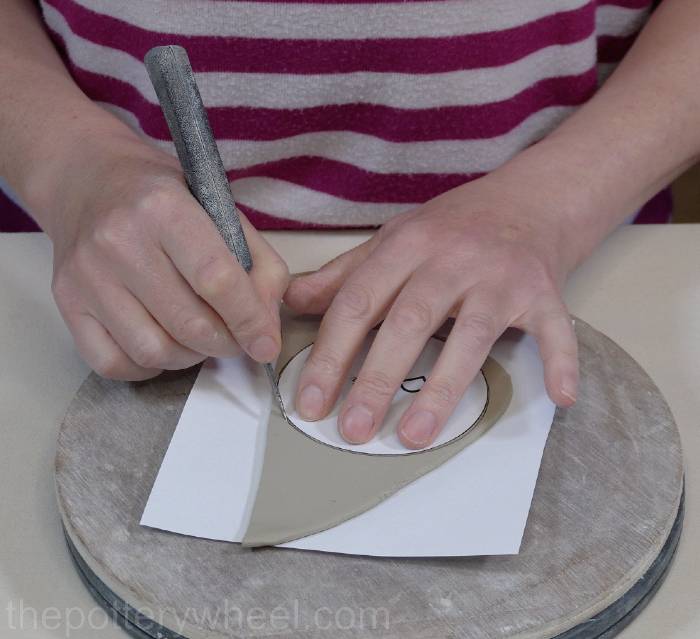
I score the edge of the circular slab and the bottom rim of the lower portion of the mug.
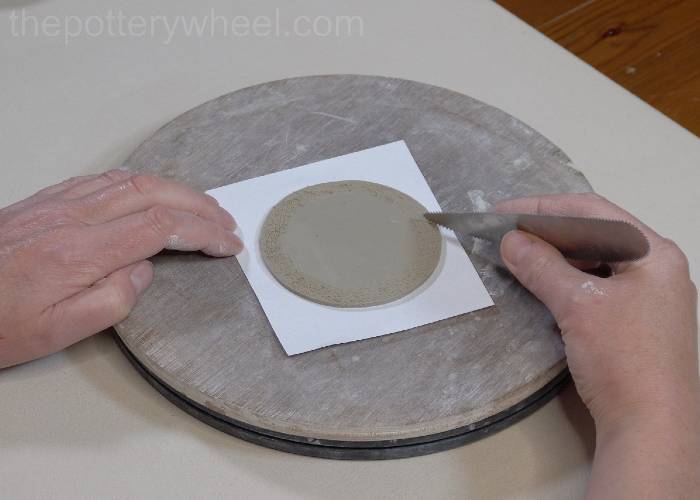
Apply a generous amount of slip to both scored surfaces.
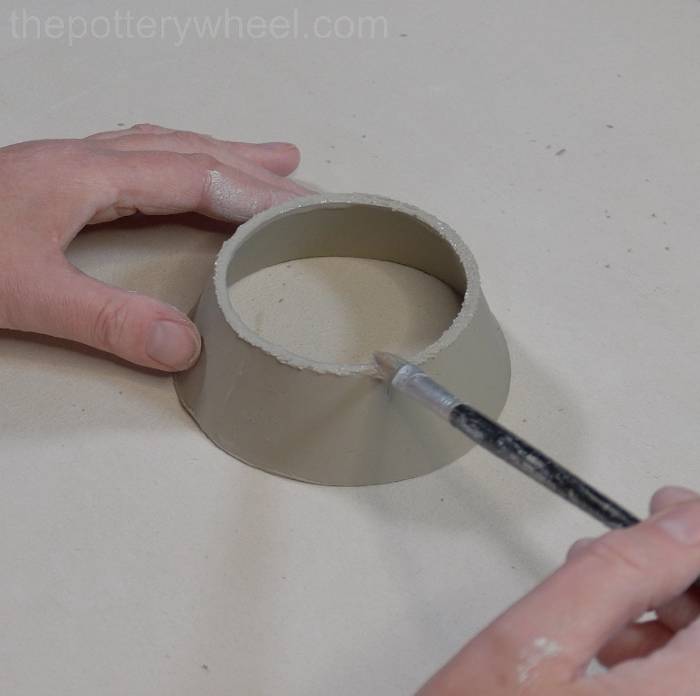
Lower the bottom half of the mug onto the circular slab base. Before the two surfaces bond together, you can slide the bottom portion of the mug about on the base until you are happy that it’s positioned centrally.
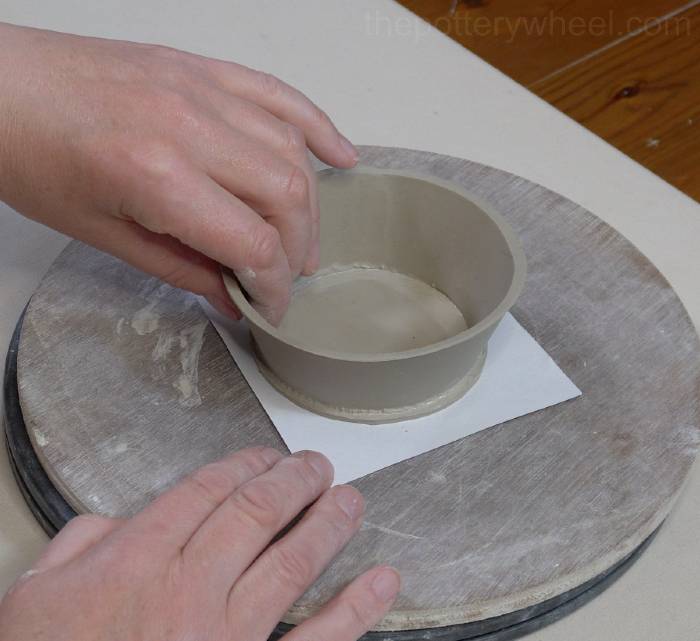
Step 10: Fixing the Base of The Bellied Slab Mug
To make sure that the base is firmly attached, I add a coil of clay to the inside surface of the join. Firstly, I roll out a thin coil of soft clay. You can read more about how to roll a coil of clay here.
I then dangle the coil into the base of the mug and press it gently into the corner where the two slabs meet.
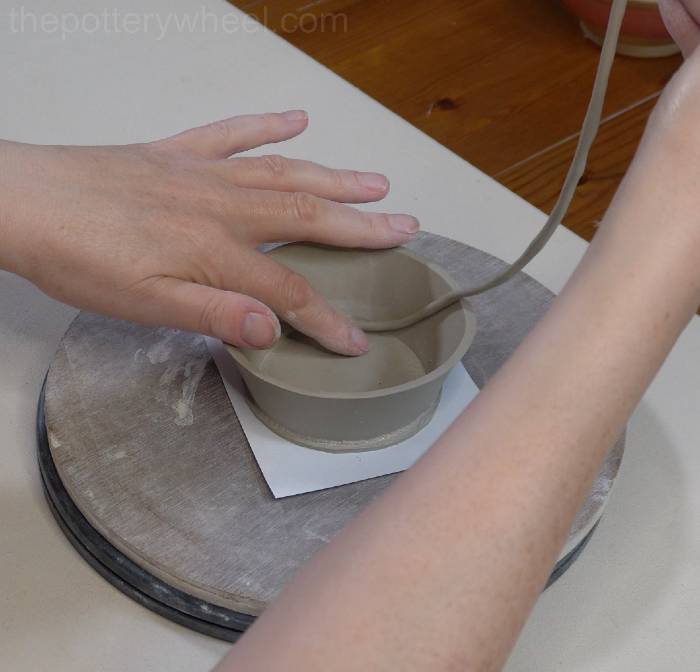
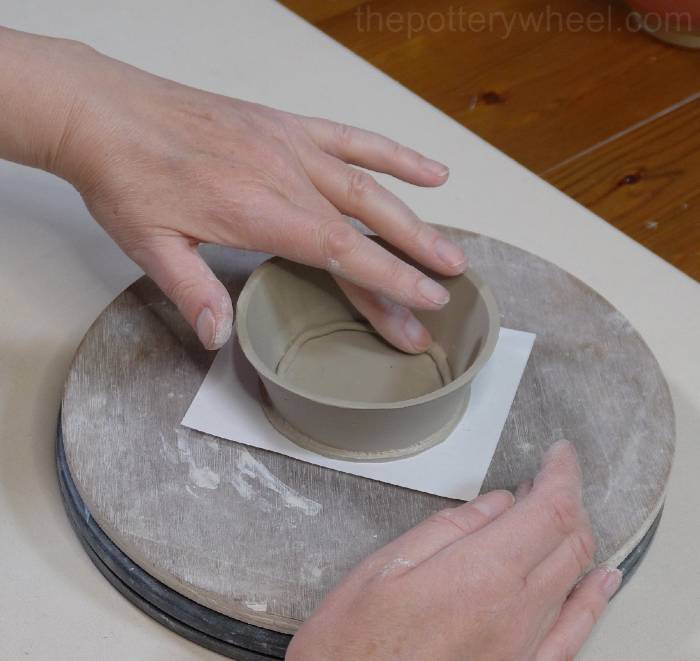
Once the coil is in position, I use a wooden tool to blend it in to create a smooth surface. You can use the tips of your fingers to smooth the surface too, and then wipe it down with a damp chamois leather. Chamois leather is useful when you are making pottery, as it’s soft and smooth and will get rid of marks left behind by fingers and tools.
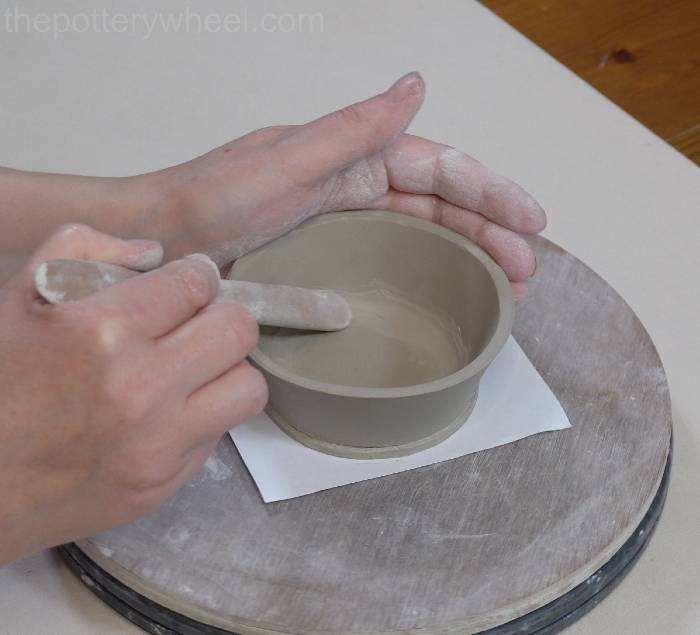
When the inside surface is smooth, I check the outside of the mug base. Sometimes I will trim a bit of the extra clay off the circular base. I make sure to have at least 1mm excess all the way around so that I can blend this in.
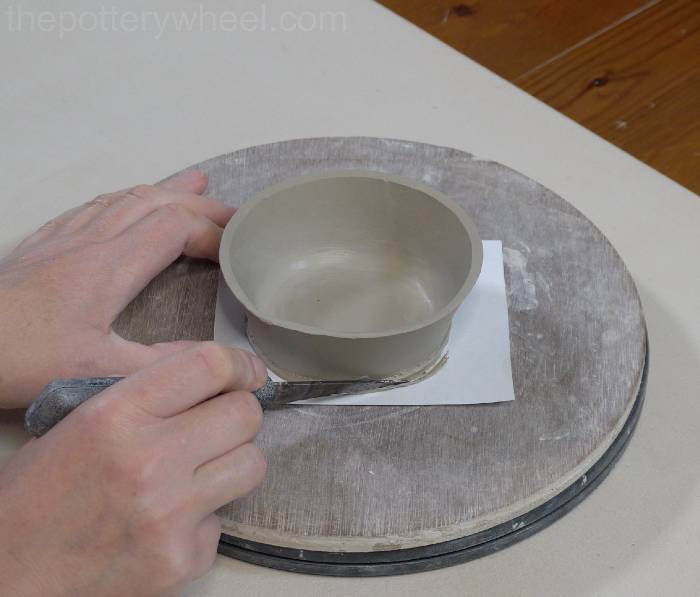
I use a wooden tool to begin blending the base circle onto the bottom portion of the mug.
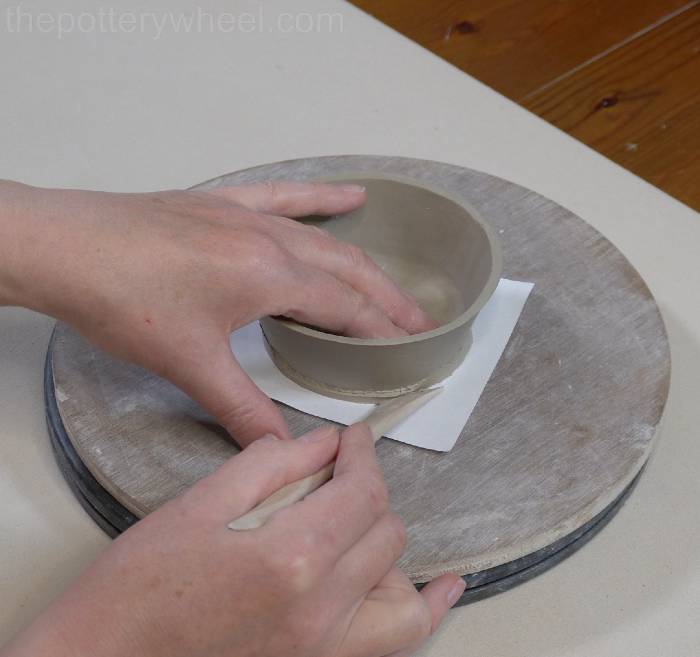
When I have blended all the way around, I turn the bottom portion of the mug over and tidy up the edge where the circular base has been joined. I tidy up the bottom edge using a wooden tool.
You can scrape away excess clay and make a nice flush join with a wooden tool that has a straight edge at one end. Alternatively, you can use an old bank card.
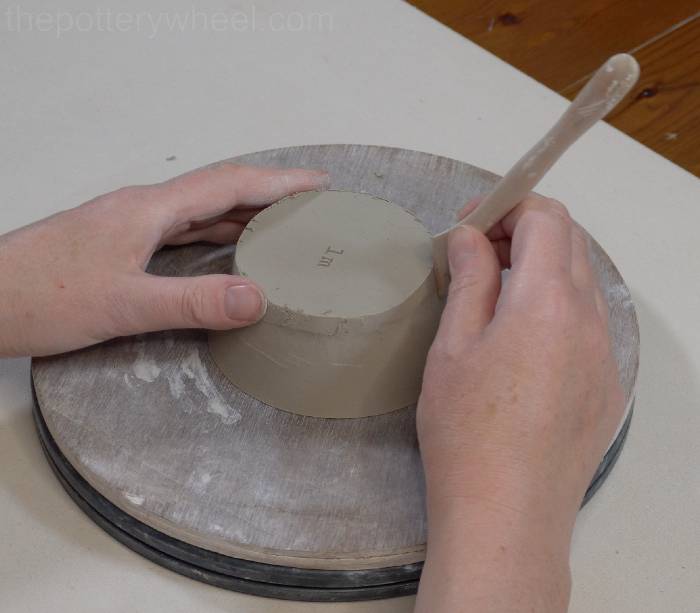
I smooth the clay over with a rubber rib.
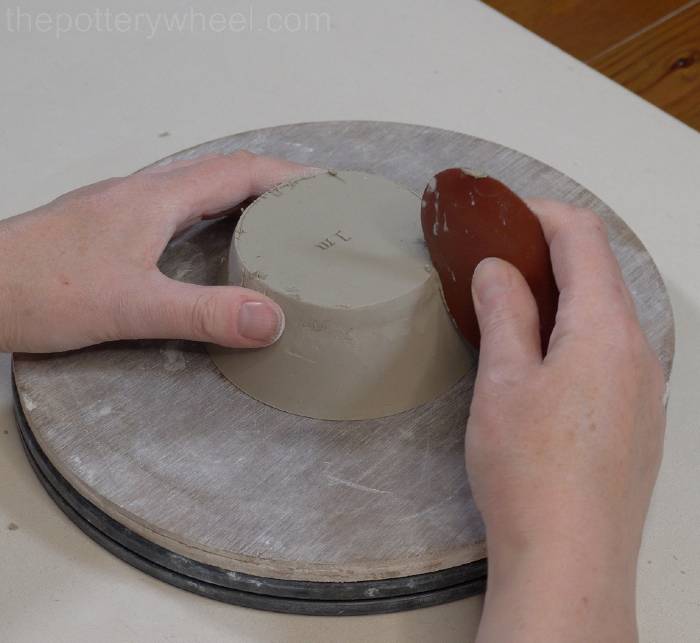
Then I tidy up the bottom edge of the mug with my clay knife and wipe it down with a damp chamois leather.
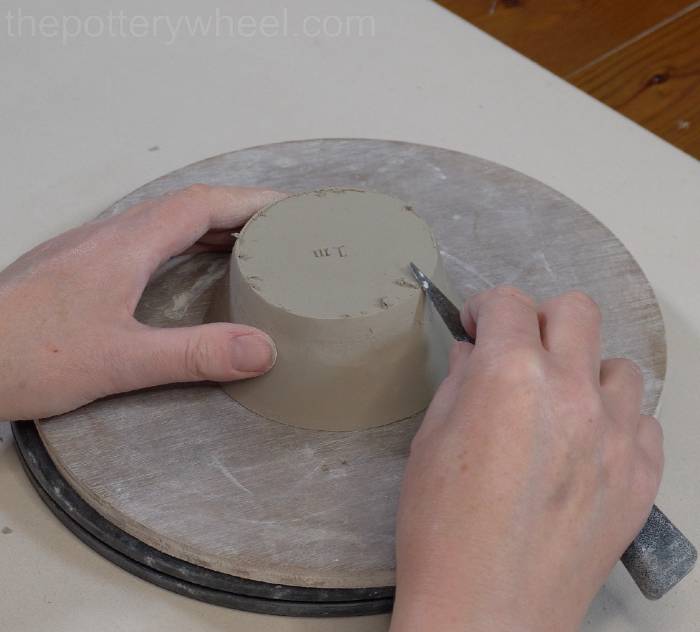
Step 11: Joining the Top and Bottom Portions of the Bellied Slab Mug
I score into the top edge of the lower portion of the mug.
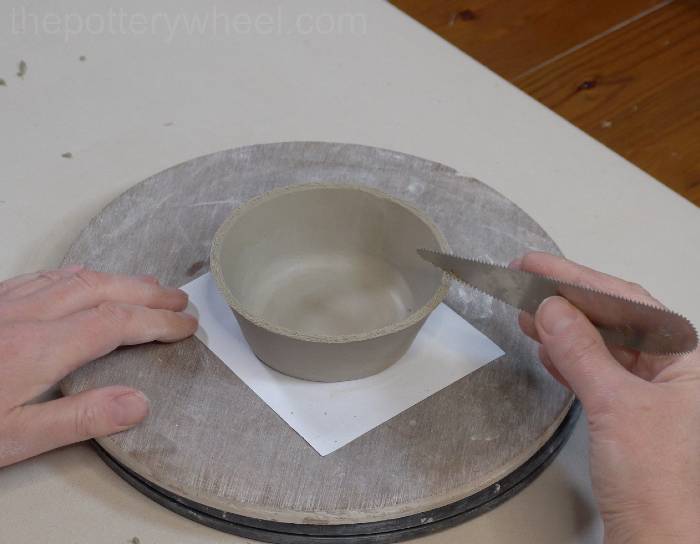
Then I score into the bottom edge of the top portion. In these pictures I’m using a serated rib tool.
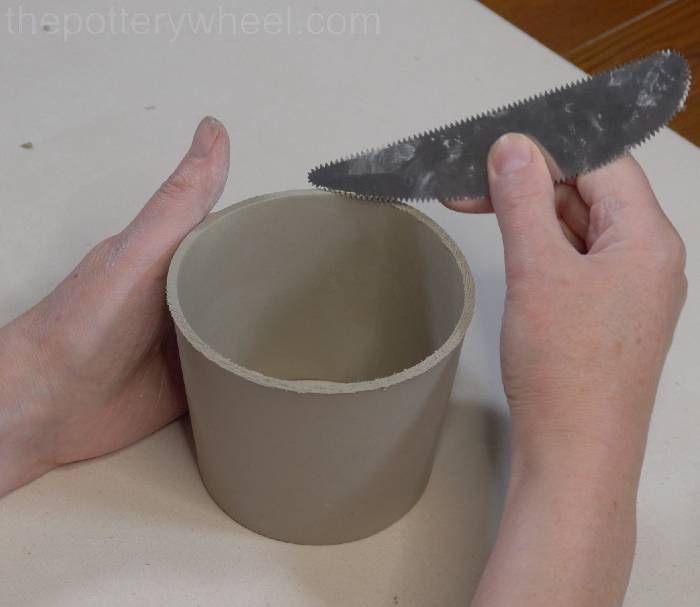
Once I have applied slip to both scored edges, I lower the top portion of the mug carefully onto the bottom portion of the mug.
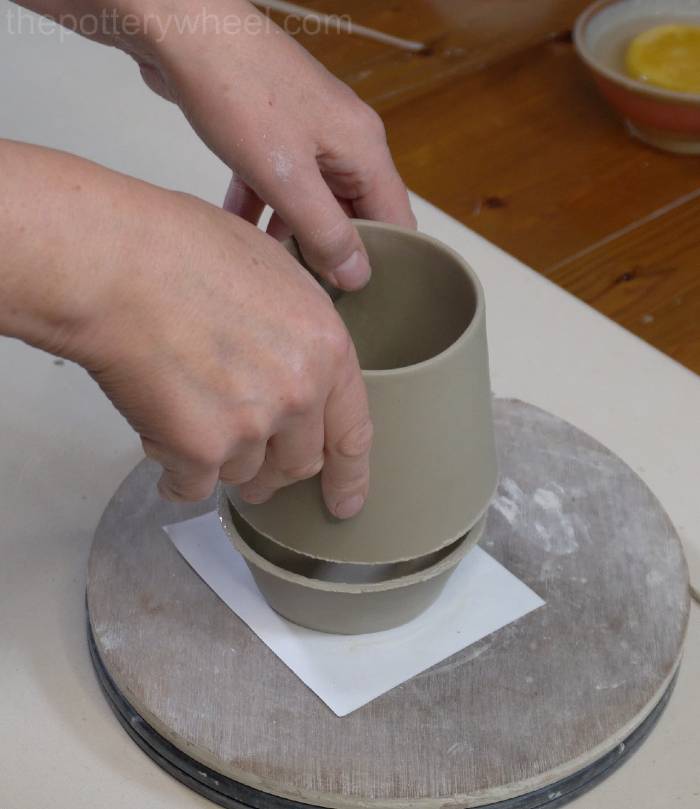
Make sure that the two edges are lined up with one another, and then begin to blend the outside edge of the two surfaces together.
I put my hand on the inside surface of the join to support it, and use the fingers of my other hand to begin the blending process. Blending this seam between the top and bottom portions of the mug takes a little patience.
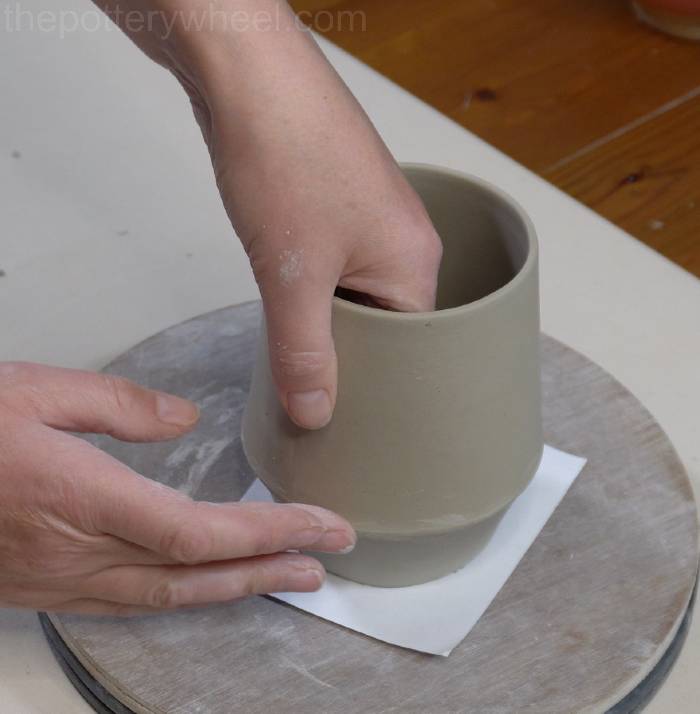
Once I have blended in the outside surface of the join, I use a wooden tool to begin blending in the inside surface of the join. I carefully work my way around the inside join.
Remember to support the outside of the mug as you do this to avoid distorting the shape of the mug to much. And also to avoid separating the seam on the outside too.
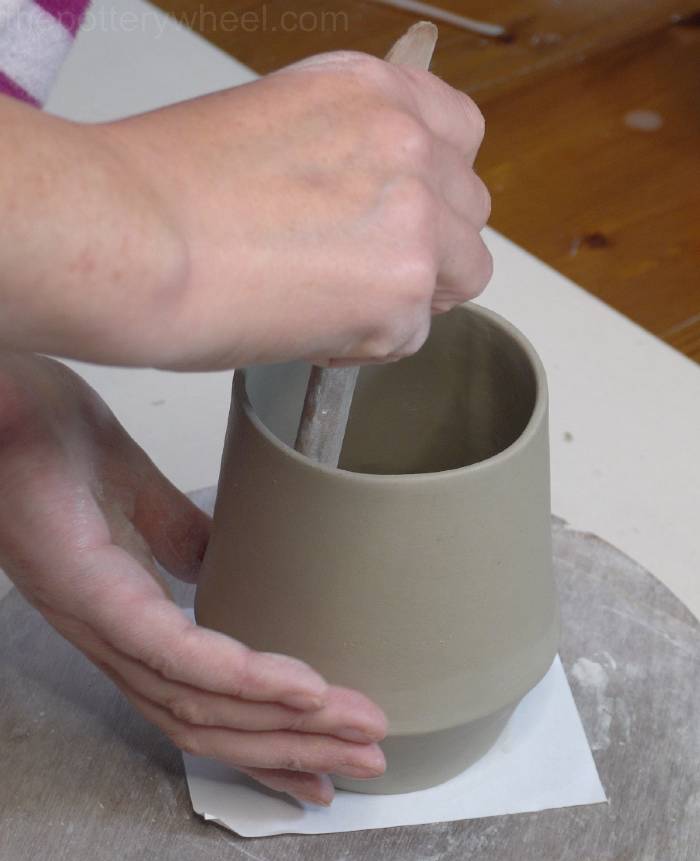
Even if you are careful blending the inside seam, you may find that the outside seam opens up a little while you are doing this. This isn’t anything to worry about. Just blend the outside seam together again to make sure that the join is secure.
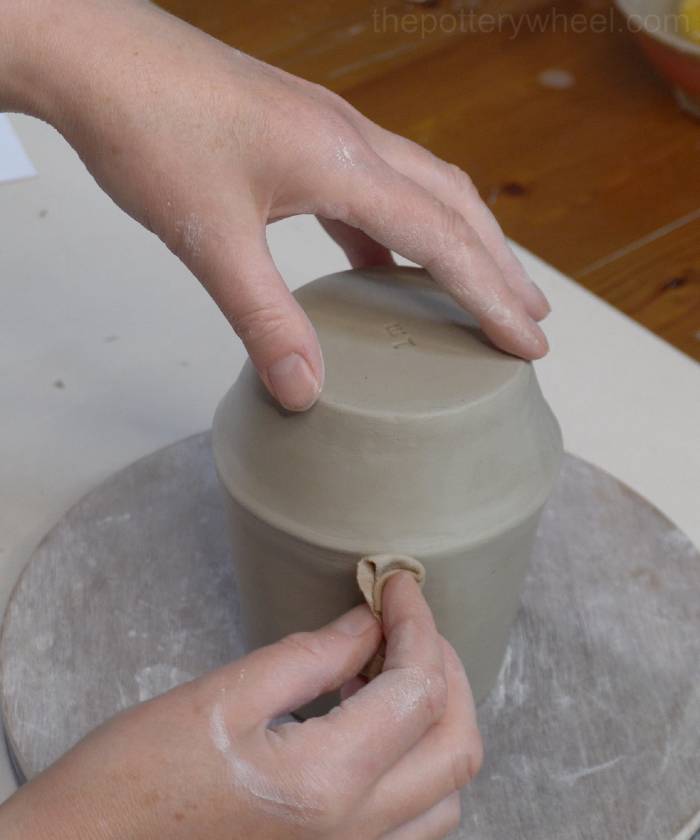
Step 12: Making a Handle For the Bellied Slab Mug
Roll out a smaller slab of clay. When I’m making slab handles I often use 5 mm roller guides. A slightly thicker handle can feel more comfortable on larger mugs that are heavier when they are full of tea or coffee.
You can use the handle template, which is template D to cut out the handle shape.
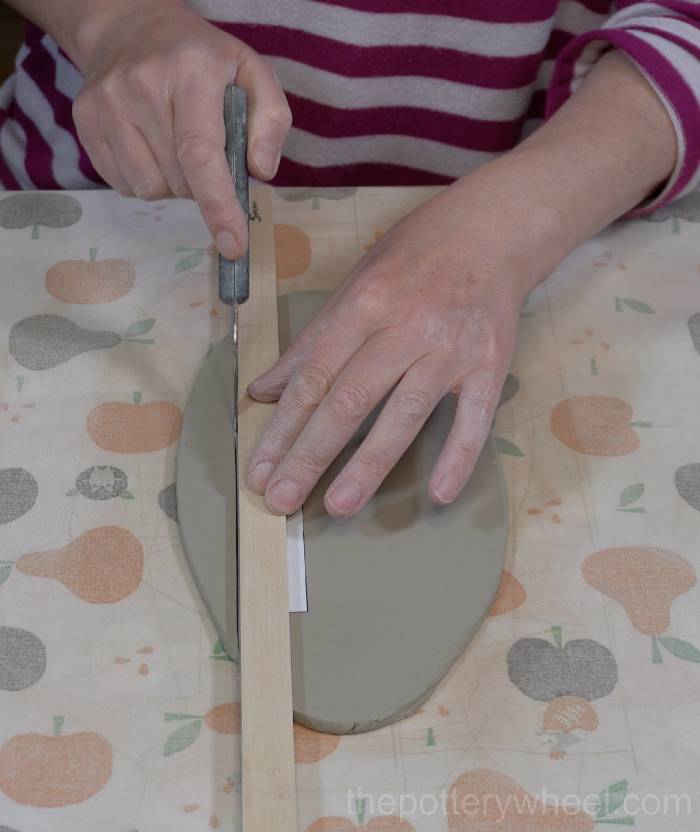
The handle template is quite long. This is so that you can trim the handle to the length that you want it to be.
You can attach a shorter handle to the top portion of the mug. Or the handle can extend from the top portion of the mug to the lower portion. You can compare the difference between the two handle lengths in the pictures below.
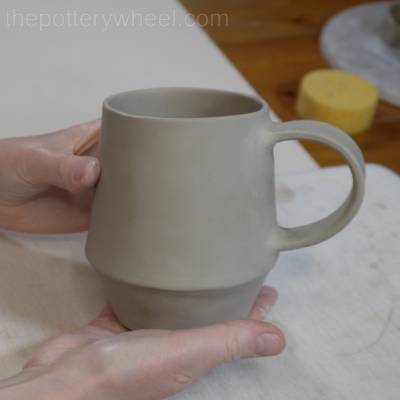
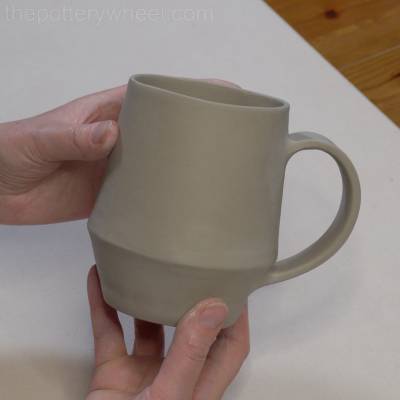
Once I have cut the handle out with the template, I use a damp sponge to soften and smooth off each of the four edges.
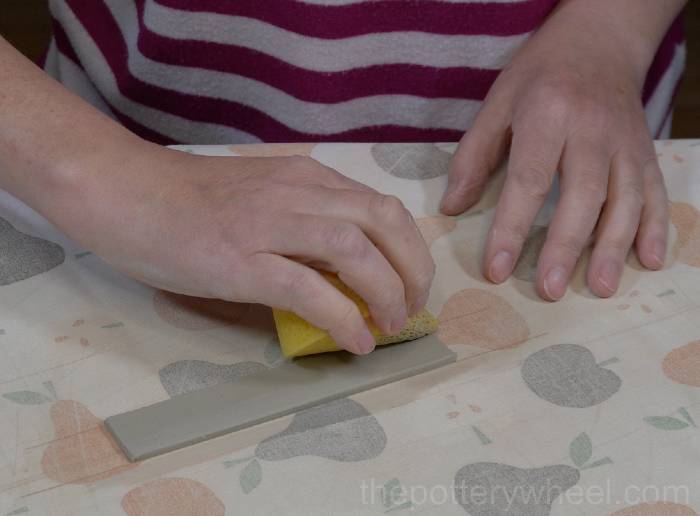
The I curve the handle into shape and leave it to one side so that the clay can become soft leather hard.
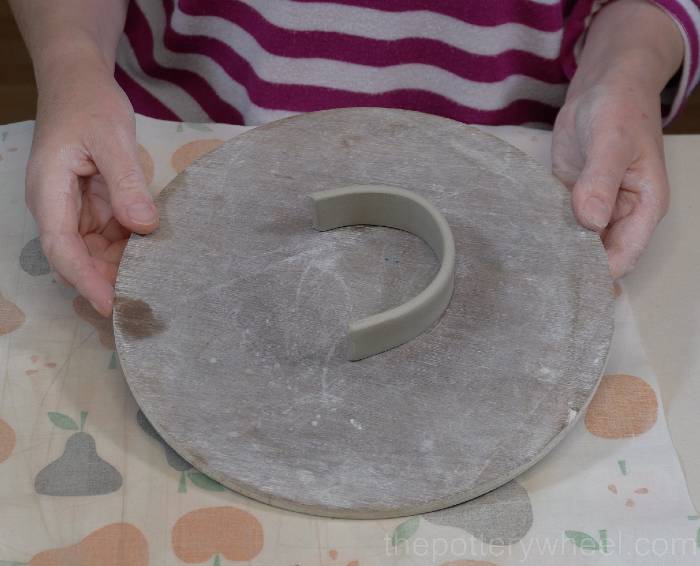
Step 13: Trimming The Handle
Once the handle has firmed up, I trim it to length.
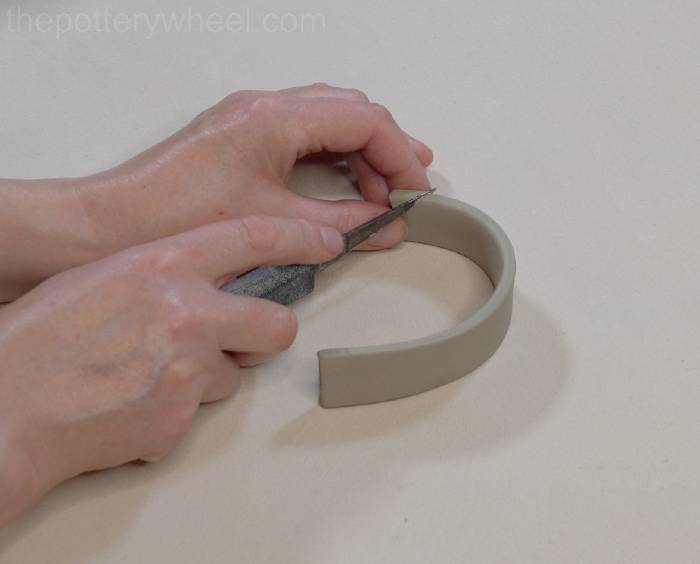
In addition to trimming to length, I also cut the handle so that there is a slight concave shape on both ends. This will allow it to fit neatly around the curve of the mug.
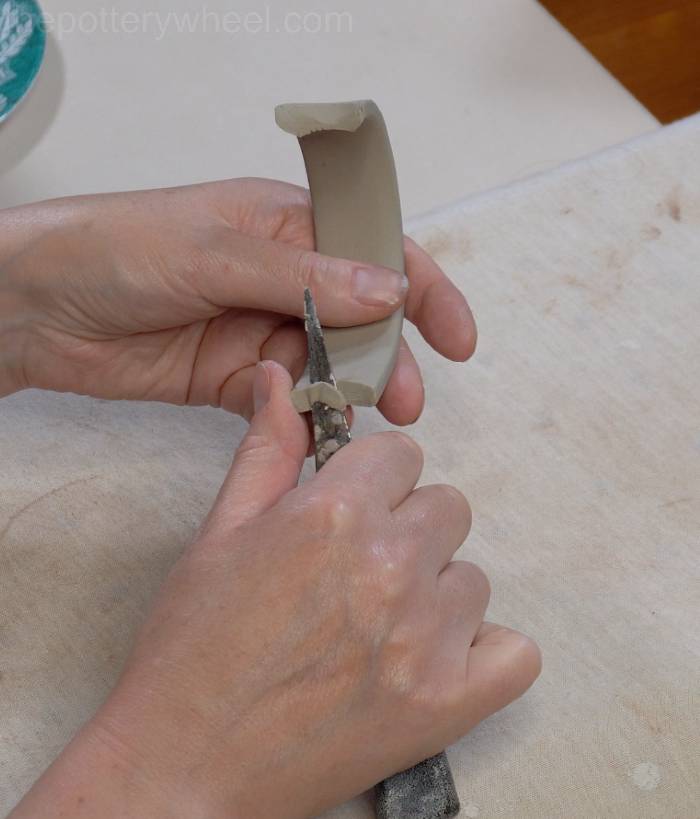
I place the handle against the mug and line it up into position. When I’m happy with the position, I mark on the mug where I want the handle to be attached. I make small marks on the side of the mug with my clay knife.
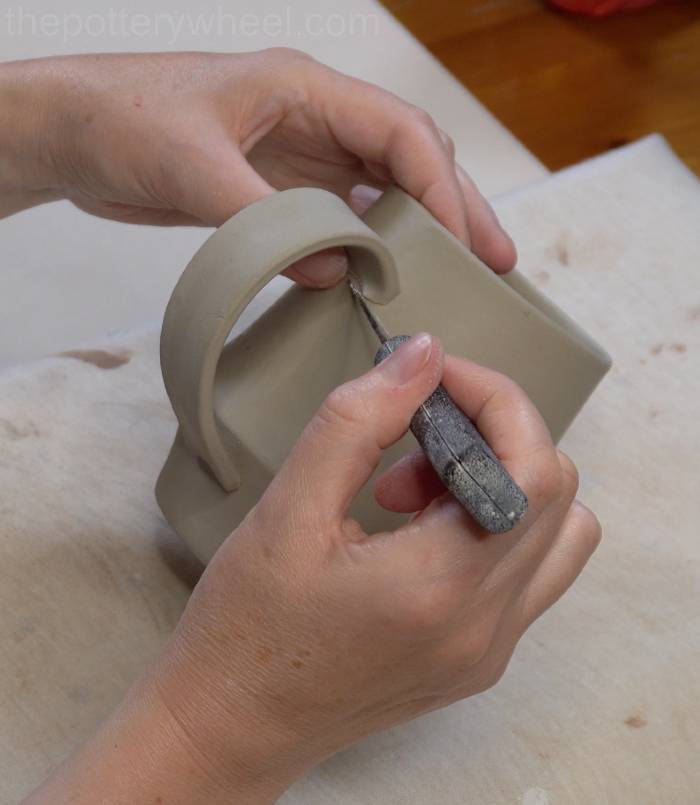
Step 14: Attaching The Handle
Using my serrated rib tool, I score into the surface of the mug where the handle will be attached. Also, I score each of the ends of the handle too.
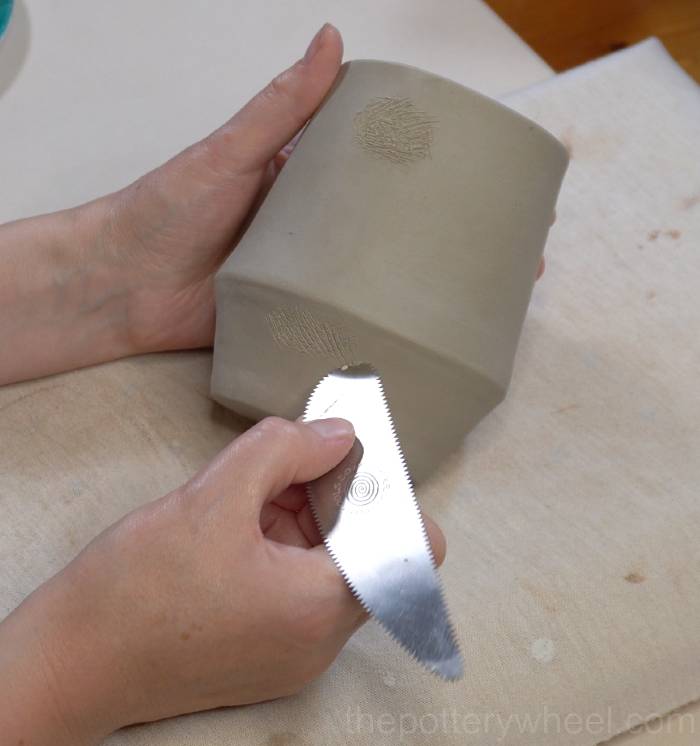
I apply clay slip to the scored surfaces on the mug and also on the handle.
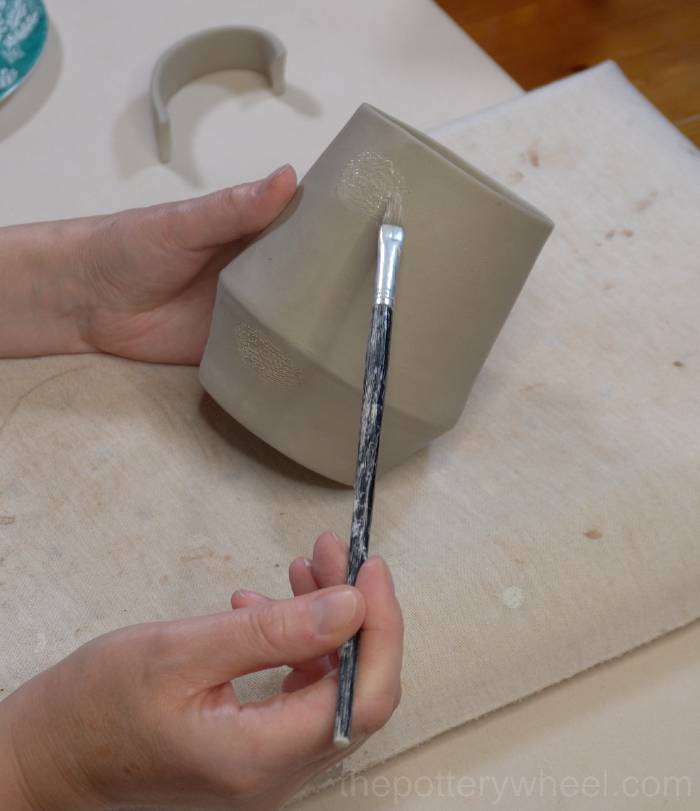
Then I press the handle in place on the side of the mug. Be sure to support the inside of the mug with your other hand. This will prevent you from distorting the shape of the mug as you are pressing the handle into position.
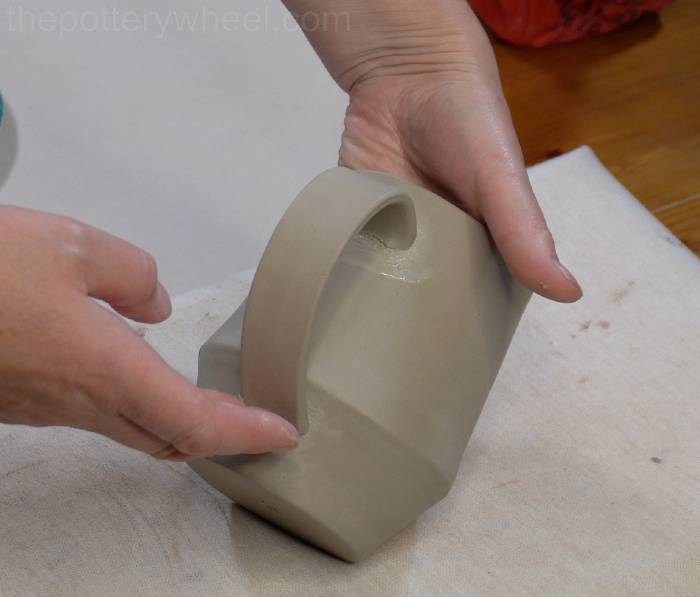
To ensure that the handle is firmly attached, I wrap a small coil of clay around the join. Then using a fine wooden tool, I blend the coil into the join.
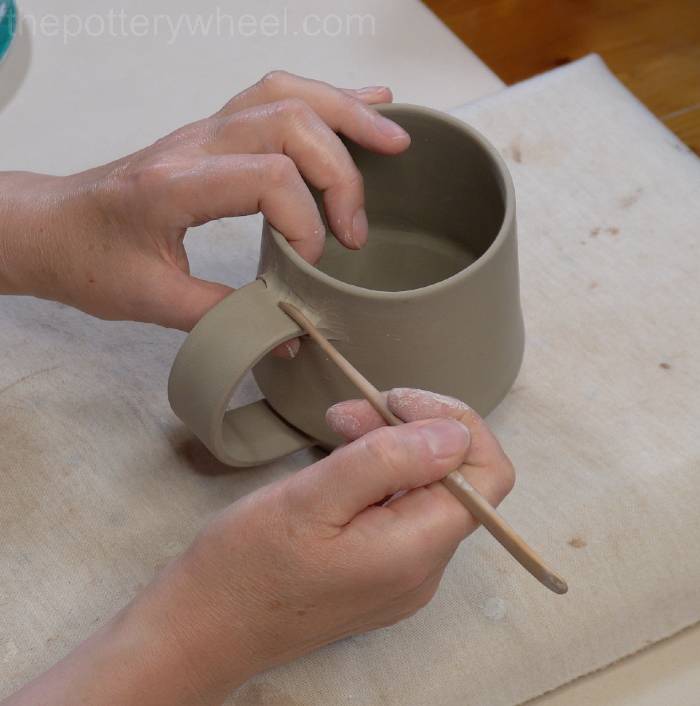
Any marks left behind my the wooden tool can be wiped away by with a damp chamois leather.
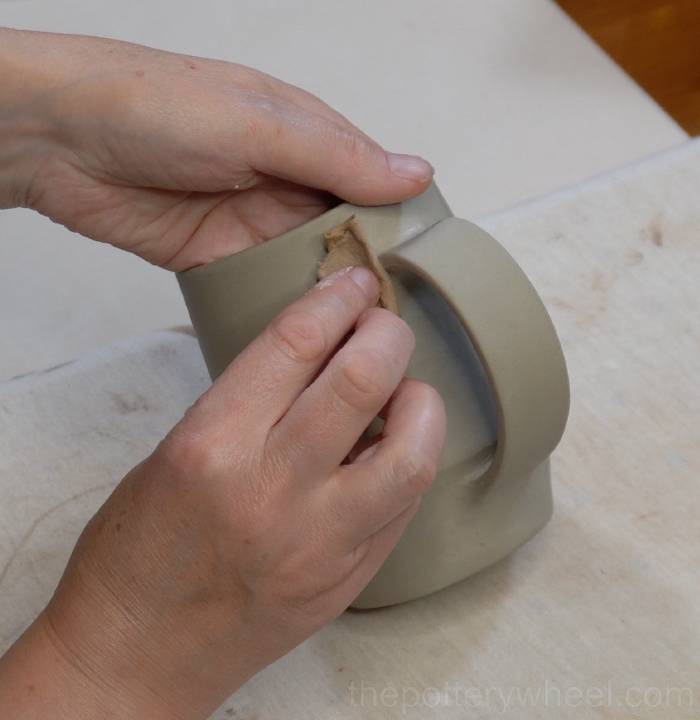
Once the handle is securely attached, the mug is ready to be dried and then fired.
You can decorate these mug in whatever way you choose. Because they have large flat surfaces, you can paint on them with underglaze, or you can decorate using pottery glaze is in the picture below.
Making a Textured Bellied Slab Mug
It’s nice to add texture to this mug. I like to add texture to the top portion of the mug. There are lots of ways to add texture to clay. One of my favorite ways is to use a texture roller. This texture roller is by MKM tools.
I roll the texturizer along the slab of clay carefully following the curve of the clay slab.
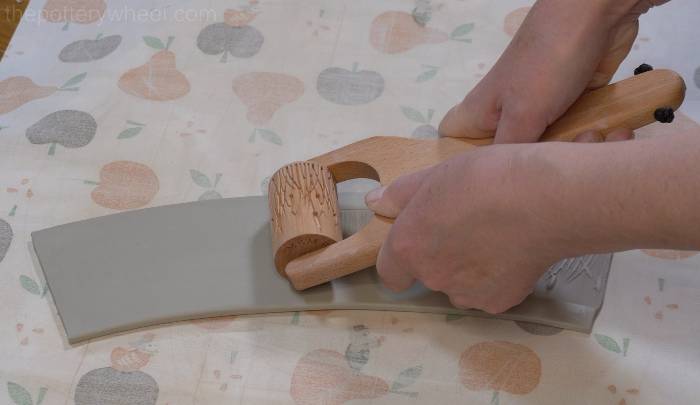
Once you have added texture, it’s a good idea to check whether the clay slab is still the same size as the template. Using the texture roller will stretch the clay quite a bit. So, to make sure that the slab is the right size, I trim the excess of both ends.
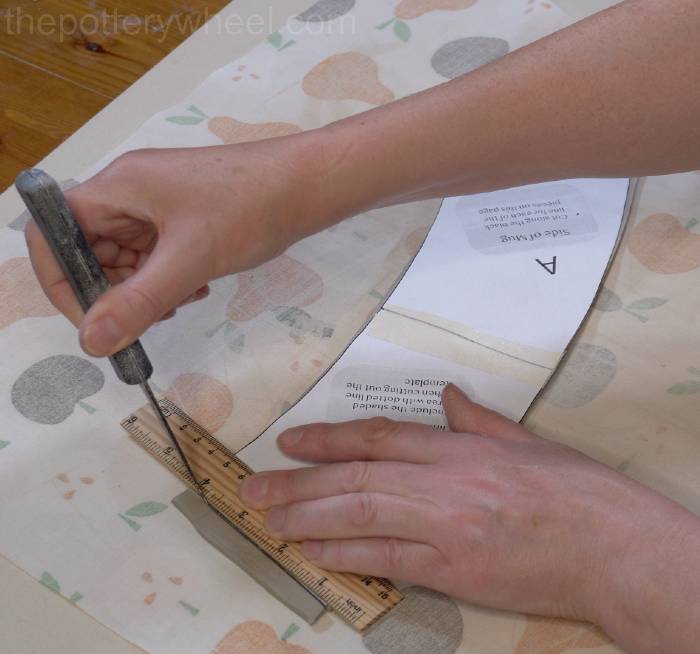
The process of assembling the slab mug is the same as outlined above. The only difference is that you need to be a bit careful when you are handling the slab so that you don’t damage the texture on the clay.
When you are blending the join of the seam together, you will lose a bit of the texture design. However, I tend to position the handle over the point at which the seams join, so you don’t notice the break in the texture.
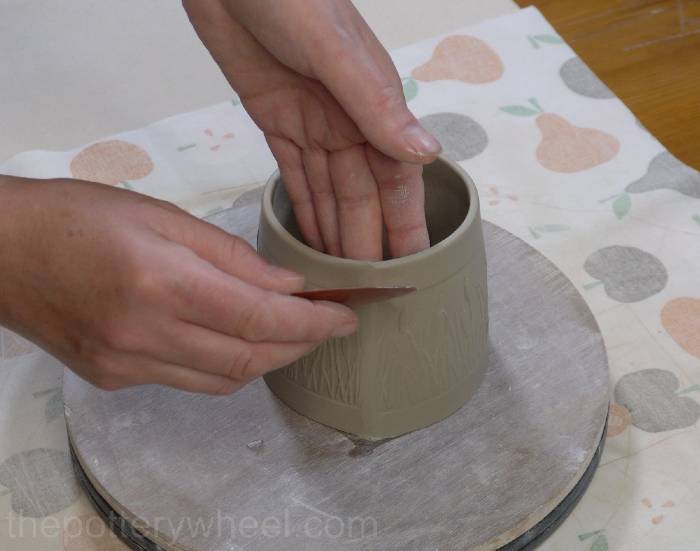
Adding a Handle to the Textured Slab Mug
Also, when I am attaching the handle, I’m careful to avoid messing with the texture design too much. Inevitably some the texture gets lost when I’m blending in the coil around the handle. However, I find that once the join has been wiped down with a damp chamois leather, the point where the handle meets the textured clay is not too noticeable.
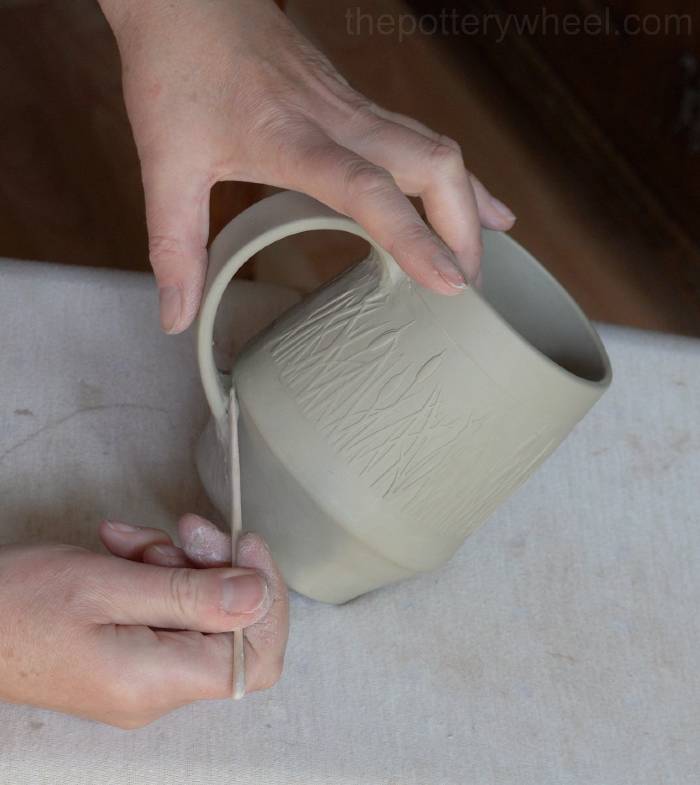
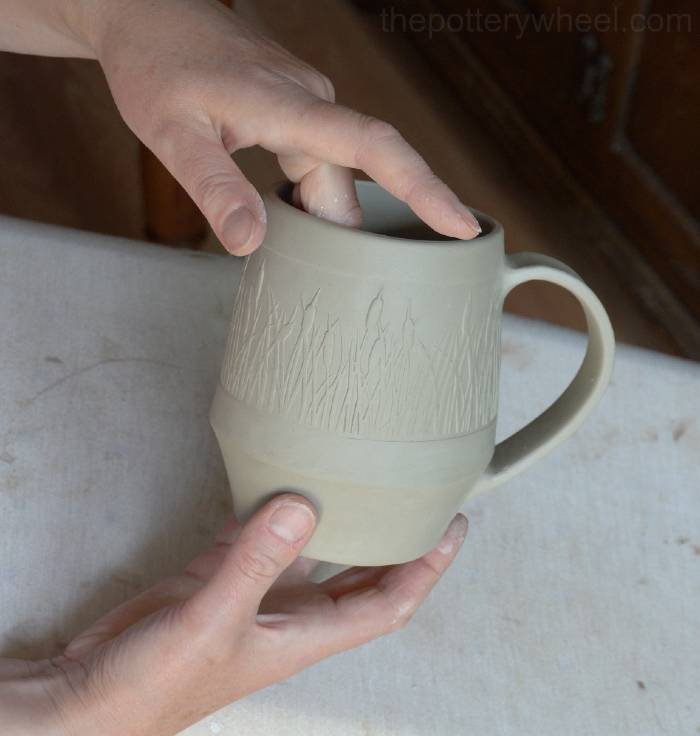
Once the handle is added, the textured bellied slab mug is ready to be dried, fired and then glazed.
Textured pottery looks good when it is glazed with celadon glaze. This is a semi-opaque glaze that pools in the texture on the clay. The pooling effect highlights the texture on the clay surface.
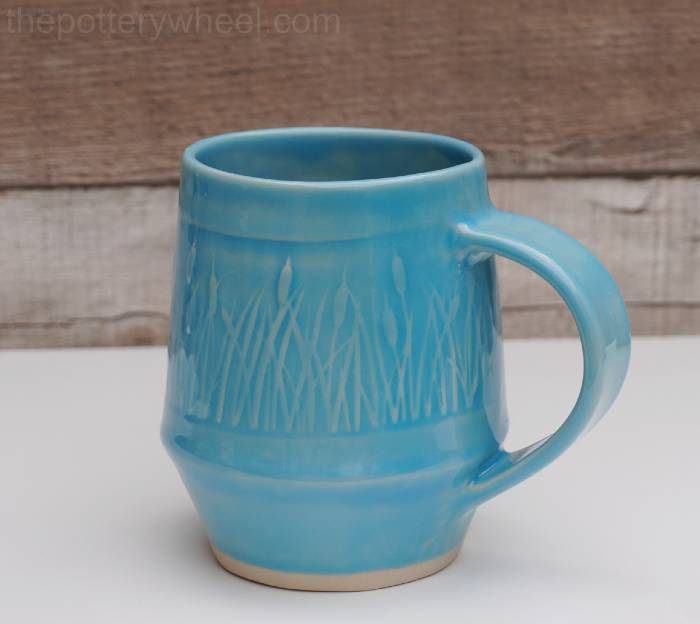
If you would like to make these bellied slab mugs, you can get the template here at my Etsy store.

Get the Template Here
You can get a copy of this template (and my other slab pottery templates) from my Etsy store here


Leave a Reply