Your cart is currently empty!
How Long do Kiln Elements Last? – How Many Firings?
Published:
Last Updated:

Affiliate Disclaimer
As an affiliate, we may earn a commission from qualifying purchases. We get commissions for purchases made through links on this website from Amazon and other third parties.
One of the inevitable costs of owning a kiln is changing the elements now and then. But how long do kiln elements last? And how much will it cost each time you need to change them? These are good questions if you’re trying to work out how much it’s going to cost to maintain your kiln.
The higher the temperature you fire at the quicker the elements need replacing. Kiln elements will last between 100-200 firings. This assumes you are bisque firing half the time and glaze firing at cone 6 the rest of the time. Certain types of kiln elements will last longer than others.
There is a big difference between 100 and 200 hundred firings. And you may be wondering why some elements last longer than others. But before we look at the factors that affect element life, let’s look at why elements need to be replaced.

Why do Elements Need to be Replaced?
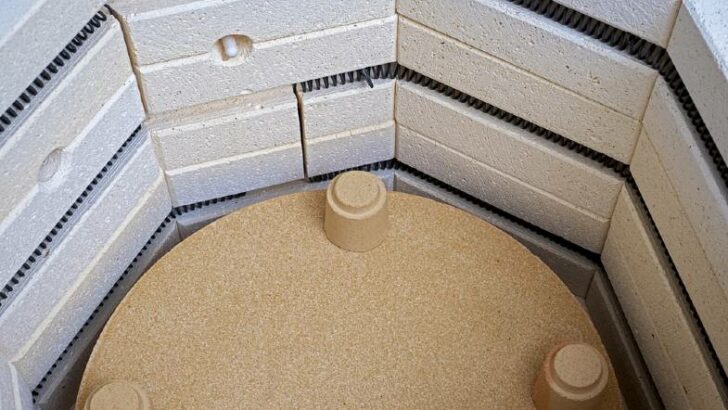
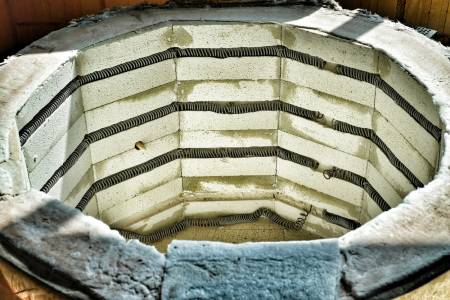
Elements are made of coiled metal, and they heat up as an electric current passes through them.
Most kiln elements are made of a blend of chromium, aluminum, and iron. These are known as Kanthal A-1 elements and they are the most common elements used in pottery kilns.
When the elements of a kiln heat up to around 1832F (1000C) a couple of things happen. Firstly, they become soft and bendy, like cooked pasta. Secondly, the aluminum on the surface of the element begins to oxidize. (source)
The oxidization of aluminum is a process of corrosion. When aluminum becomes corroded in this way, a white chalky coating forms on the element. This is sometimes called grain growth.
This white powdery surface on your elements is a good thing. The oxidized layer provides a protective shell around the element. The layer is dense and prevents the metal underneath from further oxidization.
Ideally, this initial oxidized layer has an even thickness and is well bonded to the underlying metal element. One way to achieve this is to fire your kiln when it is empty when the elements are new.
When pottery is fired in a kiln, it gives off gases and chemicals. This can cause the initial protective oxidized layer on the elements to form unevenly.
If you fire the kiln when it’s empty, the layer is more likely to form evenly. This is a little like seasoning the elements before you start firing pottery in the kiln.

Kiln Elements and Corrosion
Seasoning your elements in this way will give them some protection. Nevertheless, over time as the kiln is used for firing clay, the elements will continue to corrode.
The reason for this corrosion is that as the elements heat up and cool down, they expand and contract. The oxidized layer and the metal underneath expand and contract at different rates. As a result, the oxidized layer will get tiny cracks.
Where cracks form, oxygen gets in and makes contact with the underlying metal, which then oxidizes. This additional oxidization fills in the gap with more powdery crust that forms on the surface of the element.
As the crusty surface on the element gets bulkier, two things happen:
- Firstly, the coil gets longer, this is why elements can bulge out of their groves on the kiln with age.
- Secondly, the distance between the coils reduces as the coils get bigger. Because the coils are getting closer together, they start to heat up more. This speeds up the process of corrosion because the elements are getting hotter as the kiln fires.
As the corrosion continues, the amount of resistance in the elements increases. As such the kiln becomes less efficient at firing pottery. Eventually, the elements need to be replaced.
There are a few factors that affect how quickly the elements of your kiln corrode and need replacing.
So, let’s take a look at those now, and consider the ways you can extend the life of your elements.
How Long Do Kiln Elements Last? – Factors to Consider
Here are some things that will have an impact on how often you will need to change your elements.
How Do You Fire Your Kiln?
The hotter the elements get, the quicker the oxidization process becomes. So, firing at higher temperatures will cause your elements to corrode, and ultimately fail, quicker.
Elements start to oxidize at around 1832F (1000C). Bisque and earthenware firing normally takes place around this temperature range. So, when you are bisque firing or firing at earthenware temperatures, your elements will suffer from some corrosion.
However, at these lower temperatures, the amount of oxidization is minimal. As a result, it takes a long time for the elements to become significantly corroded.
Firing Temperature
As such, if you are bisque firing or firing earthenware, you can expect the elements to last longer. The average number of firings a set of elements can survive is 100-200.
So, when firing mainly at lower temperatures, you are likely to get 200 firings or more. As a result, if you are firing your kiln twice a week, you can expect the kiln elements to last around 2 years. Sometimes longer if you are lucky.
However, once you start firing at higher temperatures, the elements corrode more quickly. So, if you are firing at cone 6, which is around 2266F (1241C), your elements will need replacing sooner. It’s likely that your elements will last for around 100 firings if you regularly fire at cone 6.
Likewise firing at temperatures above cone 6 will reduce the life expectancy of your elements further. For example, if you fire at cone 10, it’s likely that you will get about 50 firings from your elements.
Firing Schedule
In addition to the temperature you fire at, your firing schedule will make a difference. For example, if you’re holding your kiln at high temperatures, this will also cause the elements to corrode more quickly. Some glazes, for example, crystalline glazes and oil spot glazes benefit from being soaked for longer periods of time. This reduces the life of the element considerably.
What Type of Elements Are You Using?
Most kilns use Kanthal A-1 elements. However, there are other types of kiln elements that are designed to survive higher temperatures better.
An example of this is APM elements. These are elements made from a special sintered alloy (source). They are made from the same ingredients as Kanthan A-1 elements. The difference is in how they are made.
APM elements are made from metals that have been extruded, grounded up, melted, and then extruded again. (source)
Because of the way that they are produced APM elements can withstand higher temperatures before melting. They can also cope with long firing ramps and extended periods where the kiln is held at a high temperature.
For this reason, APM elements are often recommended if you regularly fire at cone 10 (2377F / 1303C). Or if you are firing using specialist glazes like crystalline glazes that need to be held at high temperatures.
Other potters use elements with a heavier gauge. Elements sit in grooves in the side of the kiln called channels. If the channels in your kiln are large enough, they can be used to support elements with a wider diameter.
When elements heat up, they start to lie down flatter. When this happens the distance between the coils lessens. As such the coils heat up more and corrosion increases. Thicker elements are stronger and are less likely to sag and flatten when they are hot. As a result, they have a longer life expectancy.
How Powerful is Your Kiln?
How long kiln elements last also depends on how powerful your kiln is. When a kiln draws less power, it can struggle to climb up to the necessary temperature. Because it’s struggling it will take longer to reach temperature.
With a less powerful kiln, the temperature will usually increase at a steady pace up to around 2012F (1100C). Then after this point, the temperature increase will slow down.
This is because the kiln is working less efficiently at higher temperatures. Consequently, the kiln struggles to move up through the last final section of the temperature ramp. As a result, the kiln elements will spend longer at higher temperatures.
By contrast, if a kiln has more power then it will heat up more quickly. So, the elements will spent less time at higher temperatures as the kiln creeps up to its target.
For this reason, it’s sometimes recommended that you buy a kiln that has a maximum temperature higher than you really need. If you have a kiln that is always being fired to its maximum temperature, the elements will be put under strain.
Let’s say you want to fire regularly to cone 6 or 2266F/1241C. If that’s the case, it’d be better to get a kiln that can fire to cone 10 or 2377F / 1303C. Cone 10 kilns have more power than cone 6 kilns. That way, your kiln will fire to cone 6 without slowing down at higher temperatures.
How to Tell if Kiln Elements Need Replacing
Here are a few ways to tell if your kiln elements need replacing:
1) Visual Checks
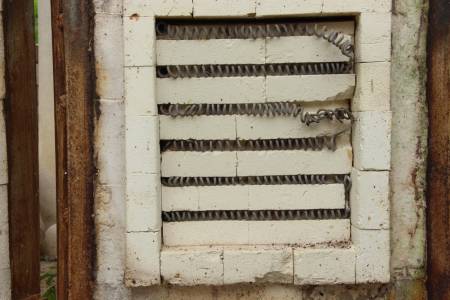
When elements are starting to reach the end of their appearance will change. They will start to sag, lean over and lie down. So, a regular visual inspection will help identify their condition.
If your elements start to sag, you can secure them back in place with element pins. This will prolong their life a little. However, ultimately once, they start to bulge out of their channels, it’s time to think about replacing them.

2) How Long Your Firing Takes
Your firing schedule starts to take longer. One sign that elements are working less efficiently is that it takes longer to reach your target temperature.
Whilst this is a helpful indicator it is not foolproof. If your kiln is controlled by a digital controller, the computer will adjust the firing cycle automatically.
If your elements are taking longer to heat up, the digital controller compensates by leaving the elements on for longer.
When the elements have ramped up to a particular temperature, the controller turns the power to the elements off for a while. This is designed to control the speed at which the temperature increases.
During firing the elements will cycle through being on and off as the controller adjusts the temperature of the kiln. This works like a thermostat.
If the elements start to work less well, the digital controller will compensate by leaving the elements on for longer. And having less time when they are switched off.
The result of this is that the elements are put under more strain. However, the overall length of the firing schedule may not increase much.
It is only when elements are in a very poor condition that the firing schedule becomes noticeably longer.
3) Checking Resistance
Using an ohmmeter. An ohm is a measure of electrical resistance. And an ohmmeter is a piece of equipment that will help you read the level of resistance in an element. The element manufacturer should indicate what level of resistance is right for a particular element.
How to Make Your Kiln Elements Last Longer
Here are some ways to boost how long your elements will last:
- The first time you fire your kiln with new elements, remember to fire an empty kiln. This will seal, or ‘season’ the elements with an even well-bonded layer of oxidized aluminum.
- Regularly vacuum your kiln and kiln elements between firings. This will remove dust and small bits of clay that have settled on the elements.
Debris can cause elements to corrode faster. Carefully vacuuming the elements by using a nozzle with a soft brush on the end can help. - Ventilate your kiln well. The fumes and gases from clay and glaze that are emitted during firing have a corrosive effect on elements. A specially fitted ventilation system on your kiln draws corrosive gases out of the kiln during firing.
However, ventilation systems are not cheap. If you are not able to fit a ventilation system, you can leave the plug out of the top peephole during firing.
I leave the top bung out of my kiln until it has reached 1112F (600C) to allow for ventilation. Other potters will leave the lid on the kiln cracked a fraction during the first half of the firing schedule.
- Some potters apply a coating of a substance called ITC to their kiln and kiln elements. ITC is a reflective coating that is designed to improve kiln efficiency.
It is also intended to protect surfaces, including elements from wear and corrosion. I personally haven’t used ITC on my kiln, and I’ve read mixed reports about its effectiveness on electric kilns. However, some potters swear by it, so it may be worth considering.
Final Thoughts
The answer to the question, ‘how long do kiln elements last’ depends on a few factors. Probably the most important factor is the temperature that you are firing your kiln at. If you are using your kiln to bisque fire or you are firing at earthenware temperatures, your elements will last longer. However, if you’re firing at temperatures of cone 6 or more, there are ways to make your elements last longer. I hope this article has given you some ideas about how to prolong the life of your kiln elements.


