Your cart is currently empty!
Making a Heart-Shaped Slab Mug
Published:
Last Updated:

Affiliate Disclaimer
As an affiliate, we may earn a commission from qualifying purchases. We get commissions for purchases made through links on this website from Amazon and other third parties.
This heart-shaped slab mug design looks lovely and is super simple to make. I make them with a printable slab pottery template. You can get a copy of the template from my online store here:

Get The Template Here
You can get a copy of this template (and my other slab pottery templates) from my online shop here…
Table of Contents
show
You Will Need
Here are a few things you might need to make this heart shaped mug:
- Clay
- A wide rolling pin
- Fabric to roll the clay on
- Roller guides
- Clay knife
- Flexible chopping board
- Platter tool
- Rubber pottery rib
- Clay scoring tool
- Serrated rib tool
- Wooden modelling tool
- Chamois leather
- Banding wheel
- Wooden pottery bat
The Steps to Making the Heart-Shaped Slab Pottery Mug
Here is a simple step-by-step guide to making the heart-shaped mug.
Step 1 – Rolling a Clay Slab
I roll a clay slab using 3mm roller guides. The roller guides are the wooden sticks on either side of the clay slab. They help you to roll an even slab and also make sure the clay is of the right thickness.
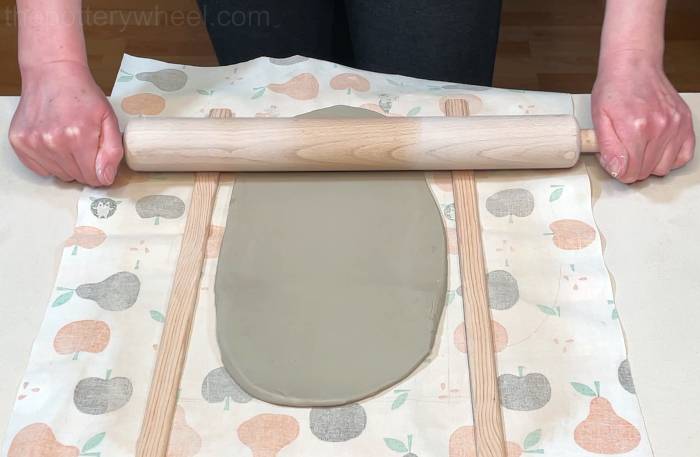
Rolling a clay slab is simple, but if you are new to slab pottery, there are a few tips that will make the process much easier. You can read my guide on rolling clay slabs here to get an overview of these pointers.
Step 2 – Cutting Out the Pieces of the Heart-Shaped Slab Pottery Mug
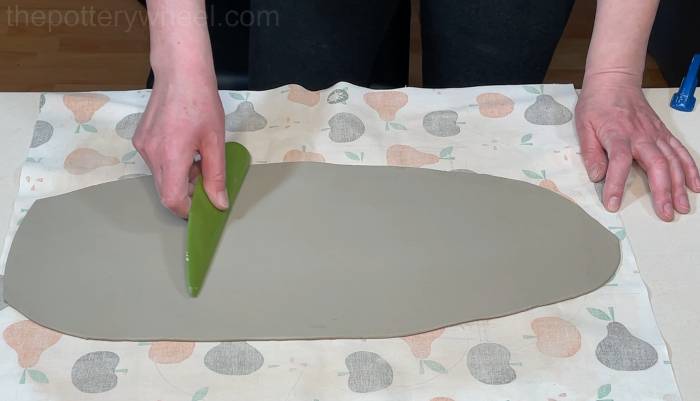
After I’ve rolled the slab, I run a pottery rib over both sides of the slab. I like to use a platter tool to do this. This gets rid of any fabric texture that has been left behind on the surface of the slab. It also helps to align the clay particles and prevent the clay from warping as it dries and is fired. You can read more about how to stop clay from warping as it dries here.
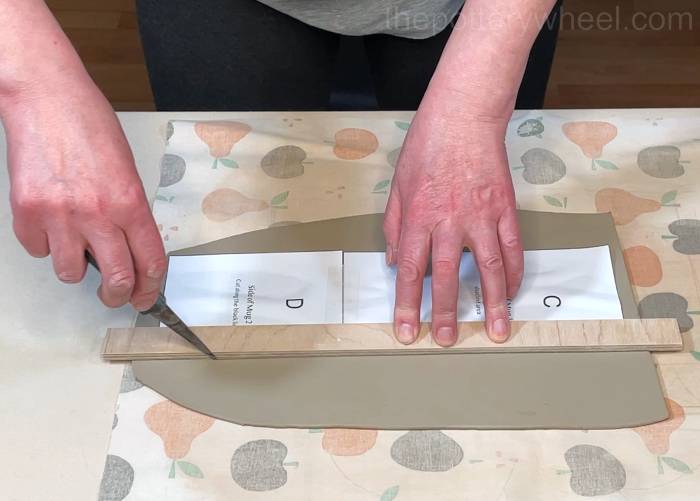
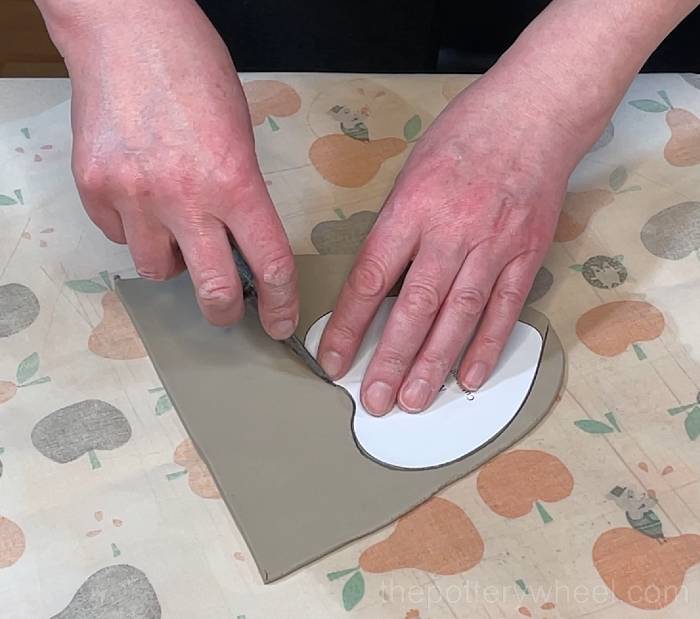
The slab pottery heart-shaped mug is made from a printable template. The first thing that I do is I cut out each of the pieces of the template. Some of the pieces need to be stuck together. For example, the side of the mug is made up from templates C and D, which have been cut out and joined.
I put the template I joined on the clay slab and cut around it using my clay knife. The scraps of clay can be put to one side and either used for smaller parts of the template or wedged and reused.
Moving the Slabs Around
The clay is very soft at the moment, so the slab needs to be put to one side for a while to firm up. If you pick the slab up by the edges to lift it, the clay will stretch and pull the slab out of shape.
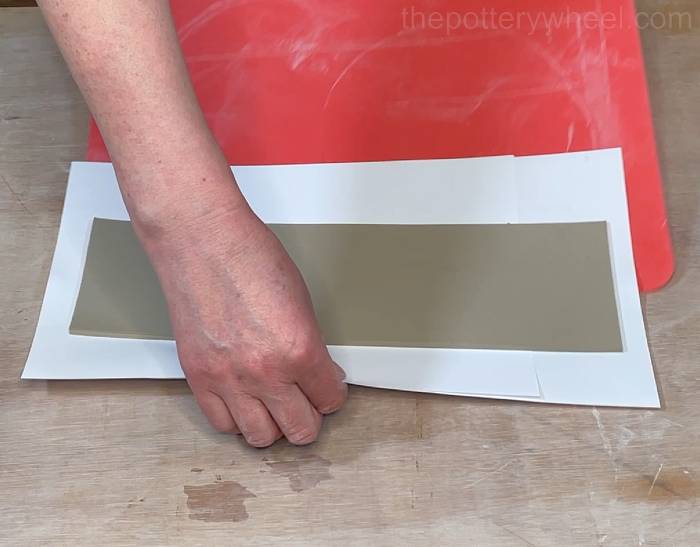
To lift the slab, I put some paper on top of the slab. Then I put a flexible chopping board on top of the paper and flip the whole thing over. Next, I slide the clay slab, on the paper, off the chopping board onto a sheet of plywood, which I use as a drying board.
I don’t want the slabs to dry out too much, so I keep an eye on them. Ideally, the clay needs to be firm enough to pick up but soft enough to bend without cracking.
Cutting out the Base and the Handle
I cut out the heart-shaped base of the mug using one of the larger off-cuts of clay slab that I rolled out earlier. The template for the base is template A.
The base of the mug also needs to be put to one side to firm up too.
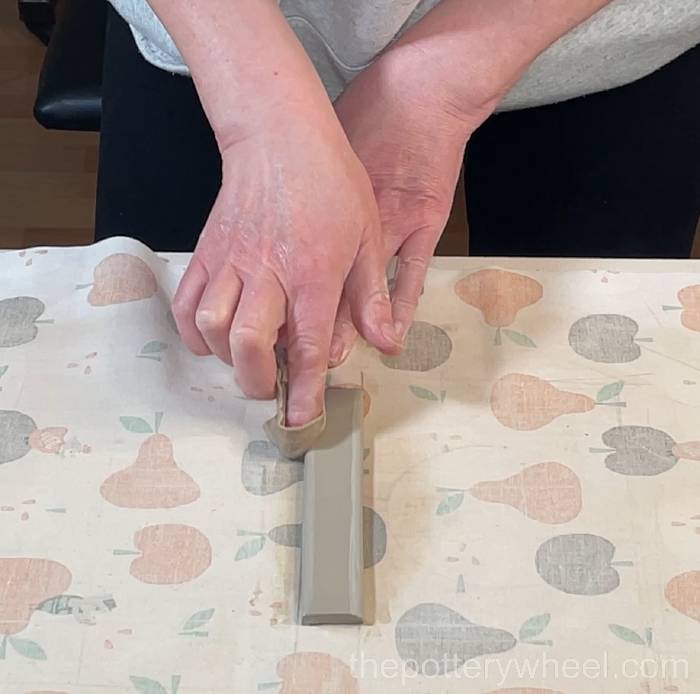
Finally, I cut out the handle for the mug. I roll a strip of clay using 6mm roller guides, as I like the handle to be slightly thicker than the sides and base of the mug.

Then I cut around template E, which is the template for the handle. I deliberately make this handle a bit longer than you will need it to be.
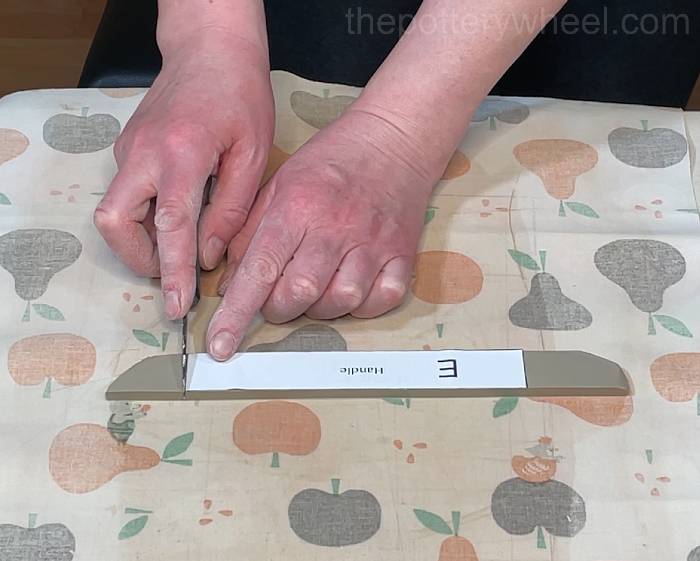
Making it longer allows you to choose your handle length. You can trim it to a length that feels comfortable to you when you attach the handle later.
I’m going to shape the handle later, and I don’t want the clay to dry out too much. So, it’s a good idea to wrap the clay handle in a small piece of plastic bag or keep it covered.
Step 3 – Assembling the Side of the Heart-Shaped Slab Mug
When I’m making mugs using slabs, I leave the clay until it is firm enough to pick up without stretching or flopping about. But it needs to be flexible enough to bend without cracking.
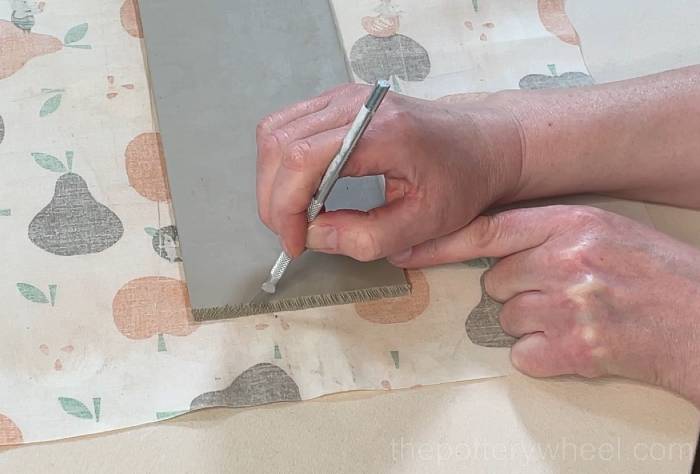
Bevelling the Clay Slab
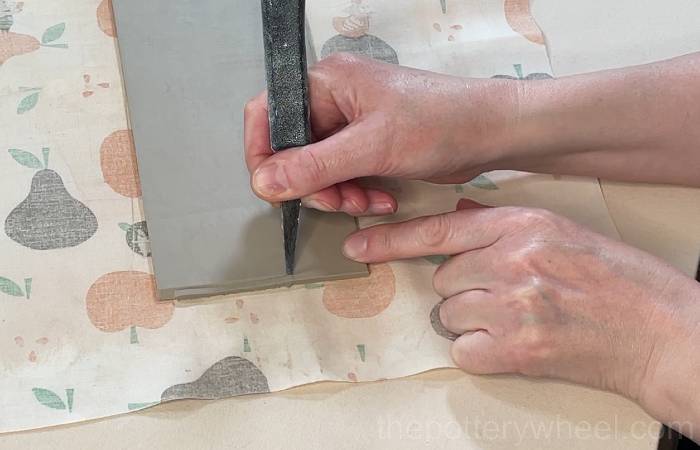
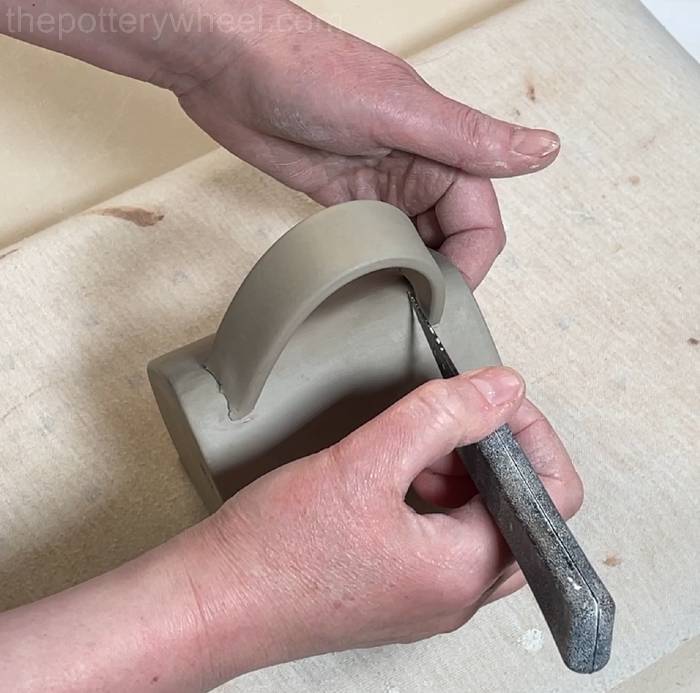
I take the slab that was made using templates C and D, and I bevel both of the short ends. Bevelling means cutting the edge of the clay at an angle. This helps you overlap the two ends of the slab and making a smooth finish when you are joining them (source).
To bevel the clay, I hold my clay knife at a 45-degree angle and I draw it down the edge of the clay.
When the edge of the clay has been bevelled it will look something like this:
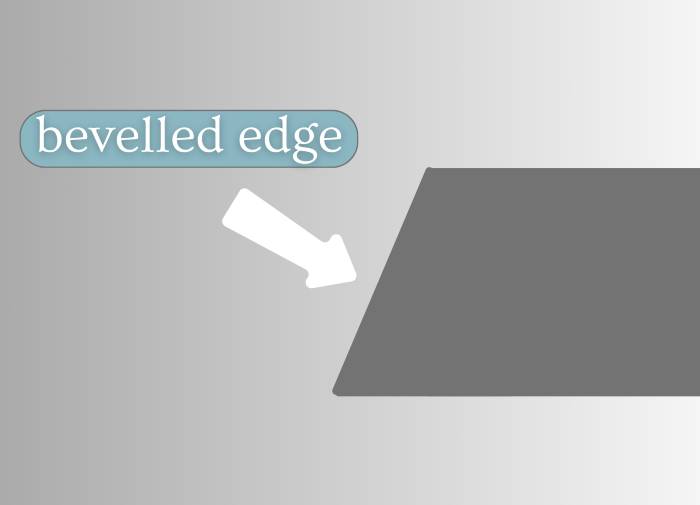
I bevel both short ends.
IMPORTANT – Remember to turn the slab over before you bevel the second short end. If you don’t turn the slab over, the two bevelled edges won’t overlap.
Scoring the Bevelled Edges
Once I have bevelled both short ends, I score into them using my clay scoring tool. This creates a rough texture in the clay, which will help you join the two ends together.
Smoothing The Rim of the Mug
It’s easier to smooth the rim of the mug while the clay slab is still flat. I run a damp piece of chamois leather over one of the long edges of the clay slab.
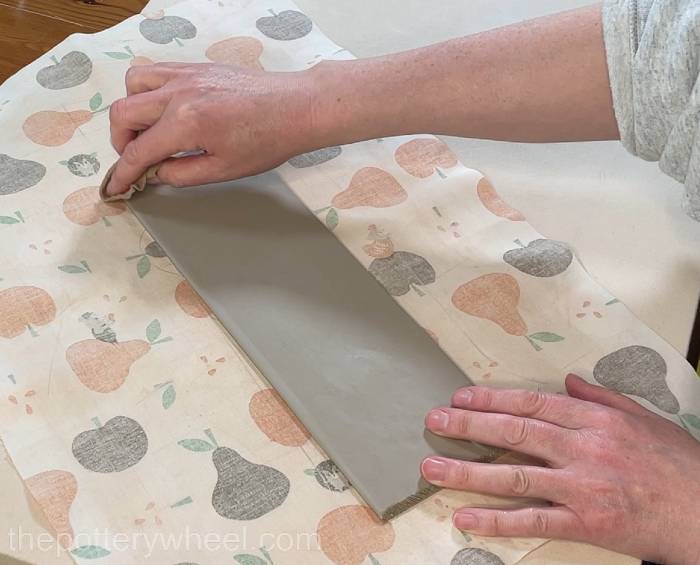
Then I turn the slab over and smooth the other side of the same edge. This will form the smooth, rounded rim of the mug.
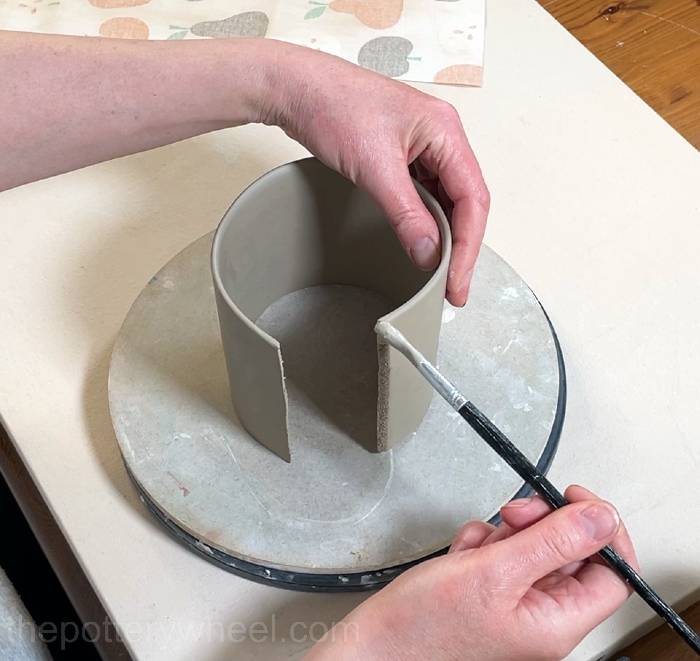
Joining the Scored Ends
When both ends have been scored, I lift the slab up and curve it into a circle, without yet pressing the ends together.
I place the curved slab onto a wooden bat on a banding wheel. The banding wheel makes it easy to turn the slab around while I’m working on it.
I apply some clay slip to both of the scored edges. Clay slip is simply clay that has been dissolved in water to make a liquid clay that works like a glue. You can read more about how to make clay slip in my guide here.
Then I press the two edges together with my fingers to create a bond.

Once the two edges are stuck together, I use a soft rubber pottery rib to smooth the join. I run the rubber rib up the outside of the joint and wipe away any slip that squeezes out from between the two edges.
Usually, I run the rib over the join a few times to make sure the two edges are firmly attached.
I then use a wooden modelling tool to blend the join together on the inside surface of the mug.

The wooden tool will leave some marks in the clay, so I run a rib over the inside join to smooth out the inner surface too.
Sometimes, a little bump will form on the rim of the mug where the two edges of the clay join. This is because the clay has been a little compressed when you are joining the edges.
I use my clay knife to remove this little bump of clay, and then smooth that section of the edge using my damp chamois leather.
Step 4 – Shaping the Sides of the Heart-Shaped Slab Mug
There is another piece to the template, which is template B. This template does not need to be cut out. Instead, I use it as a guide for shaping the side of the mug into a heart shape.
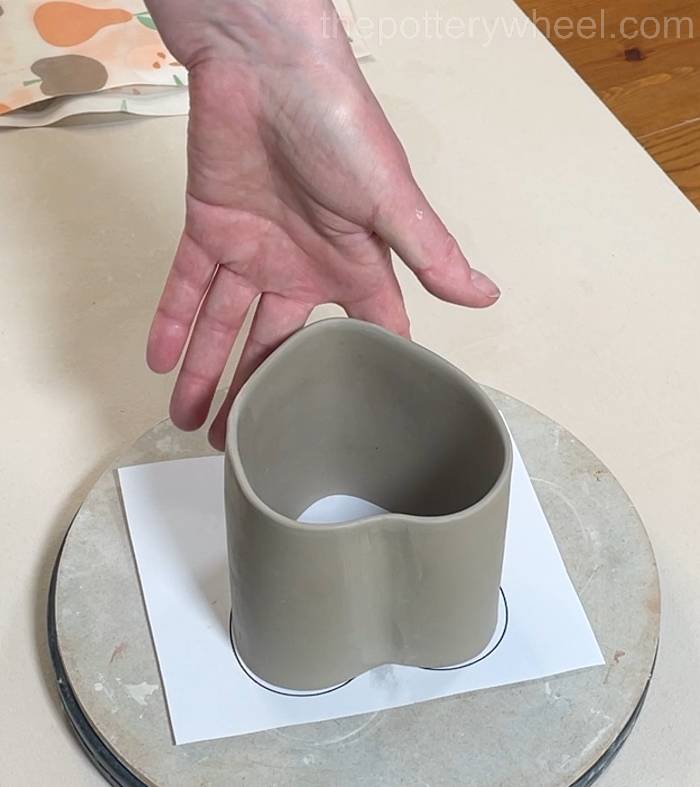
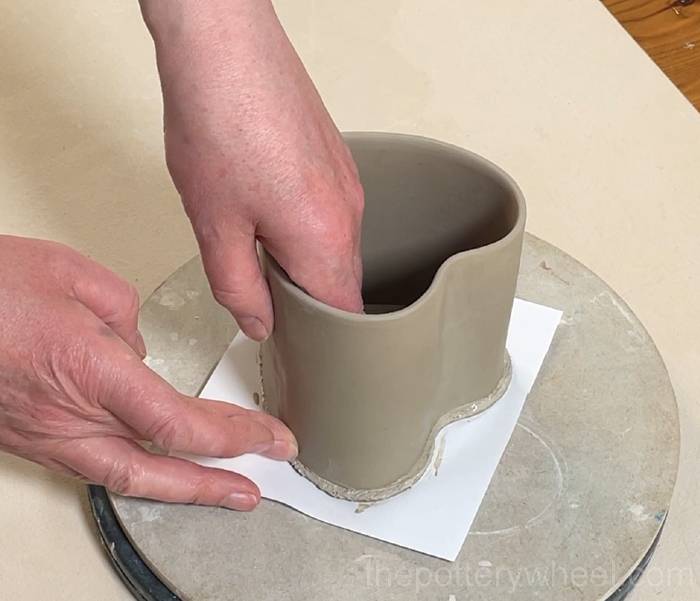
I put template B onto my wooden bat and lower the side of the mug over the top of the template.
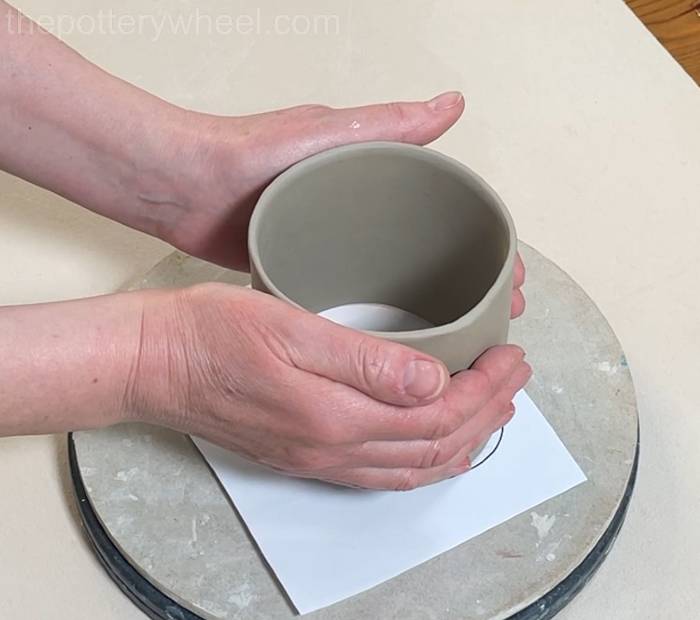
Then, looking down on top of the mug as it sits on the template, I squeeze the sides of the mug so that they match the heart shape on template B.
The size of template B is designed to be just a little bit larger than the base of the mug. The clay slab will sit just inside the line of template B. This means that you can still see the line of template B as you continue to shape the base of the mug.
I find the easiest way to do this is to shape the clay slab cylinder into a round-edged triangle. Then I work on the part of the slab that will form the shape between the two round top curves of the heart shape.
This is the part of the heart shape that I mean:
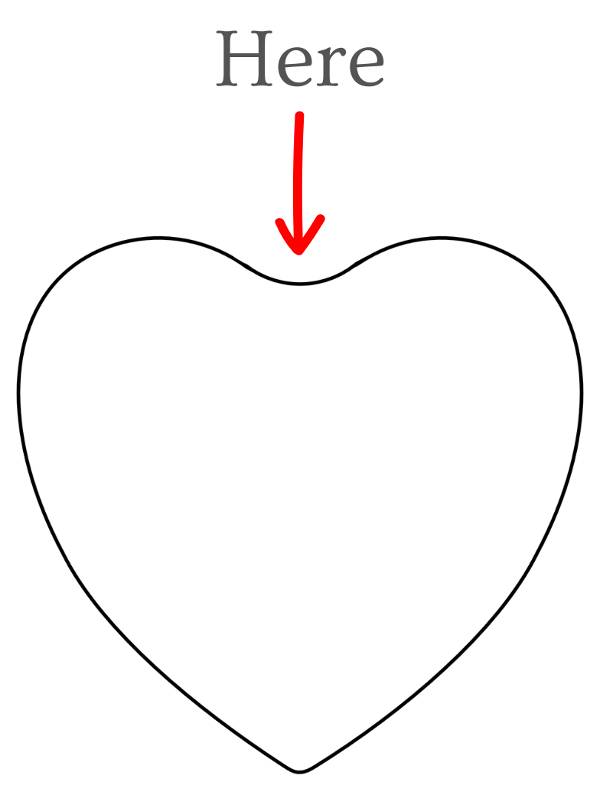
I find that if I make this shape first, then I can follow the rest of the heart shape more easily.
Tips for Bending The Clay
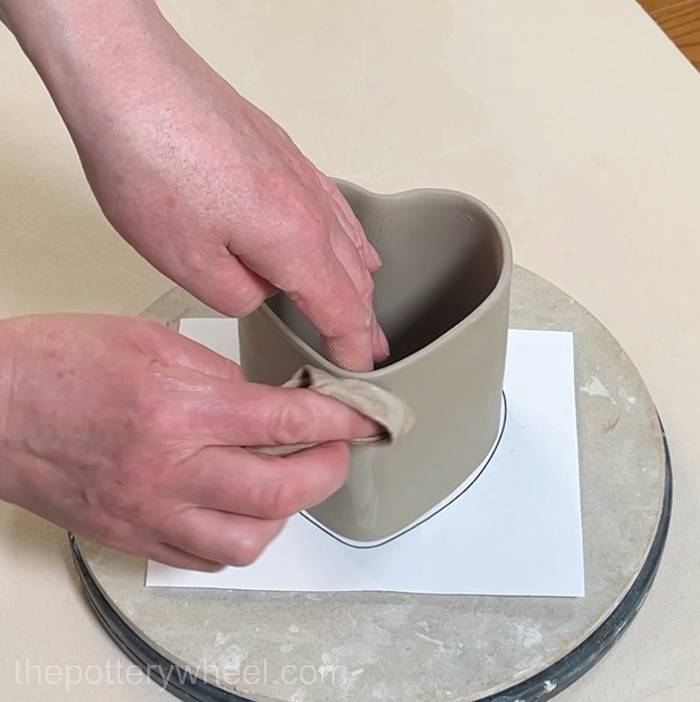
To create this little dip in the clay, I put my middle finger and pointer finger (forefinger) on my left hand into a V-shape.
I put my V-shaped fingers on the inside of the clay cylinder. Then I wrap my damp chamois leather around the forefinger on my right hand. I press the clay gently into the gap between the fingers on my left hand to make a soft fold in the clay.
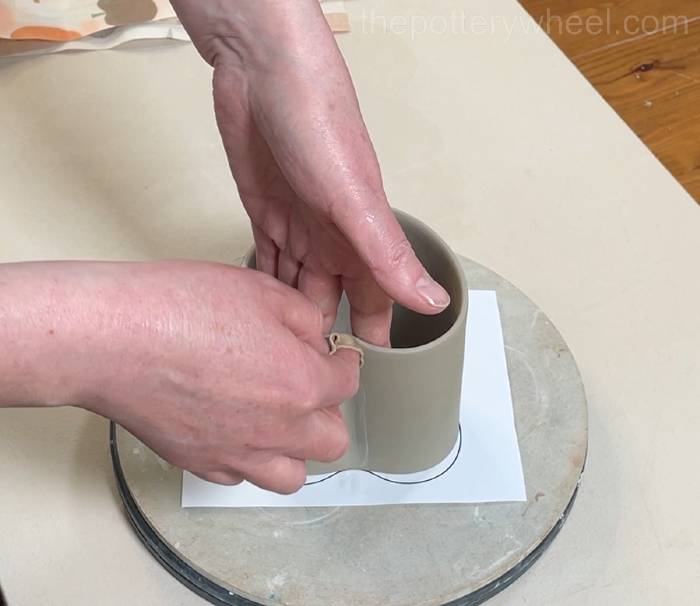
It’s best to do this gradually. If you press the clay too hard and force the shape too quickly, the clay on the inside surface of the cylinder might crack.
After I’ve made this part of the heart-shape, I start to shape the rest of the clay cylinder so that it follows the curve of template B.
I use the same method to make the point at the bottom of the heart. I put my fingers on the left hand into a V-shape, and put them on the outside surface of the clay cylinder.
Then I run the damp chamois leather up on the inside surface of the clay. This presses the clay into the V on the supporting hand and creates a point at the base of the heart.
Tidying Up Any Surface Cracks
Even if you shape the clay gently, you might find that there are some small cracks in the surface of the clay.
I rub these fine cracks with the damp chamois leather and get rid of them as soon as they appear.
If you leave these cracks in the surface, they can open up more when the clay is drying or being fired.
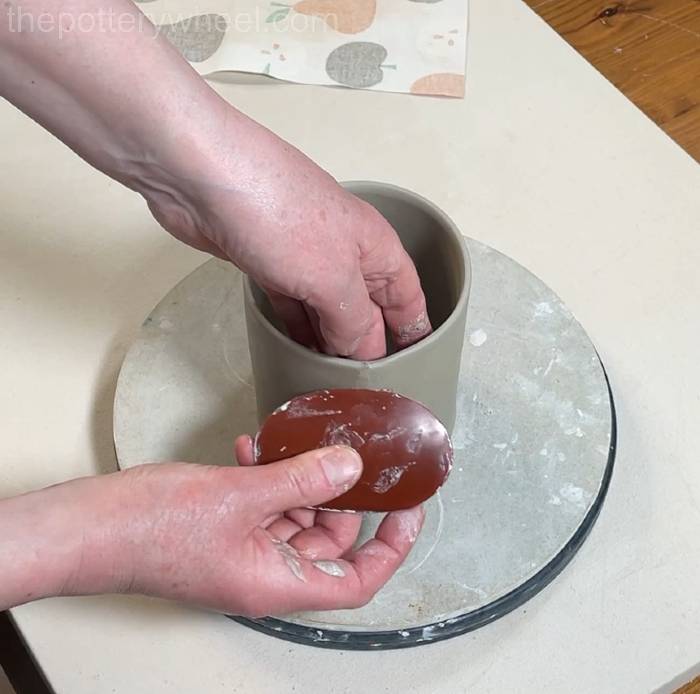
Step 5 – Attaching the Base to the Heart-Shaped Slab Mug
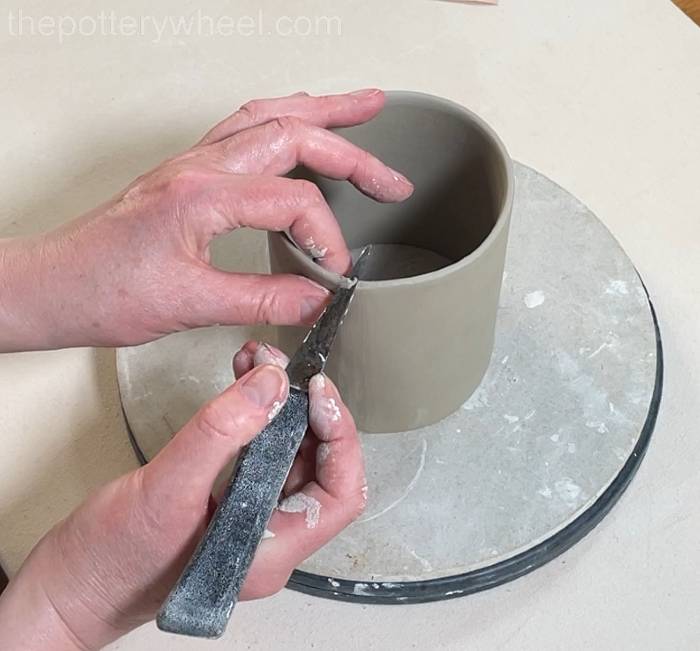
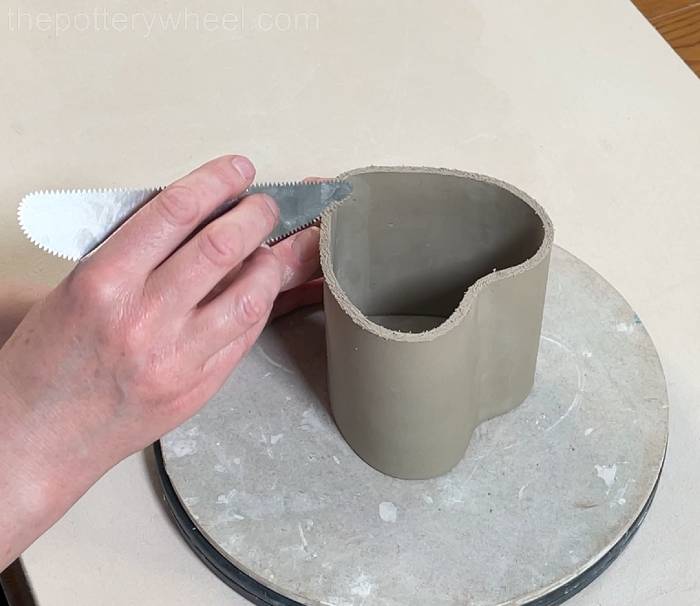
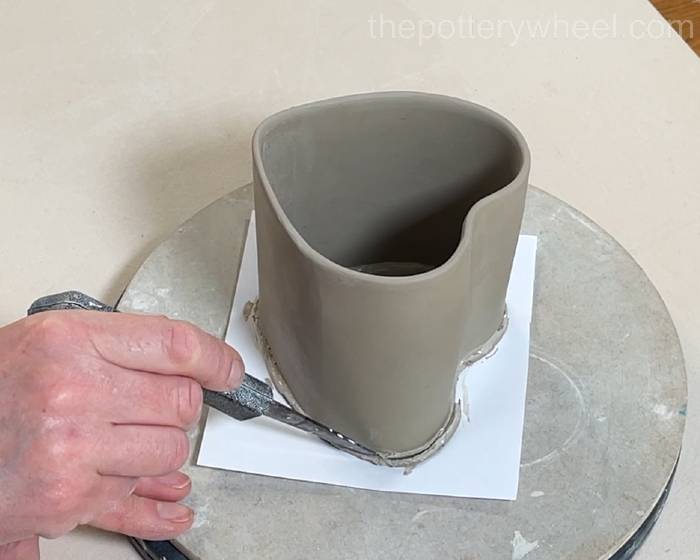
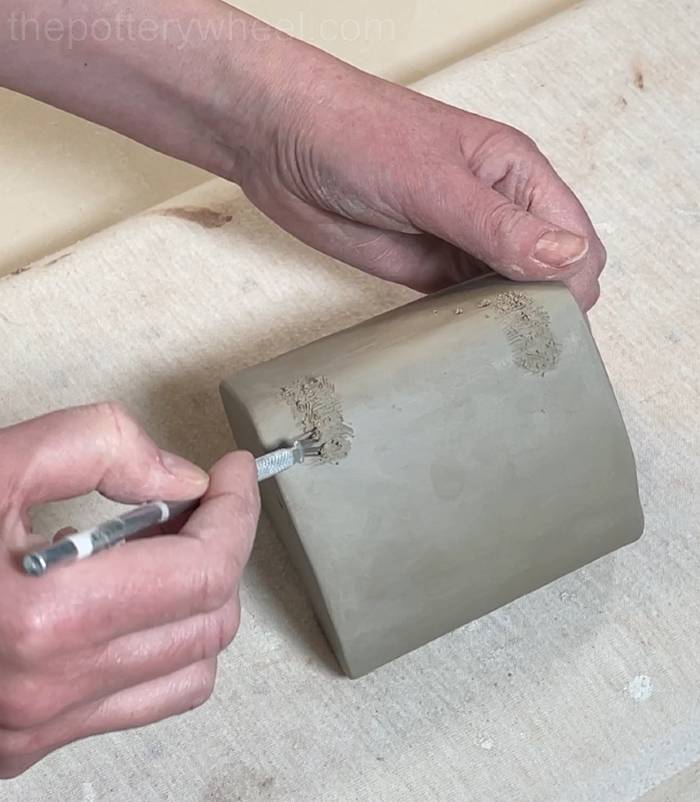
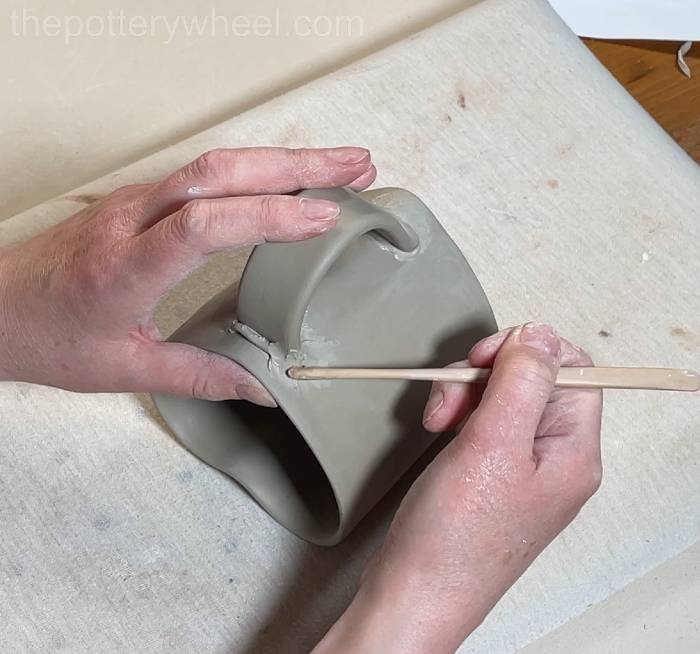
I turn the sides of the mug over, so that the mug is resting on its rim on the wooden bat. Then I score into the bottom edge of the mug. You can use a clay scoring tool or even a kitchen fork if you want to.
In this picture, I’m scoring into the bottom edge with my serrated rib tool.
Next, I score around the heart-shaped base of the mug, which I cut out earlier.

I apply slip to both scored surfaces, and then lower the sides of the mug onto the base.
You can wiggle the sides of the mug around a bit to get it into exactly the right position before pressing it into place.
The base of the mug is a little bit bigger than the bottom edge of the mug. This gives you a bit of wiggle room to make sure that the base and sides are lined up well. It also gives you a bit of extra clay to blend onto the bottom edge of the mug to make a nice, strong join.
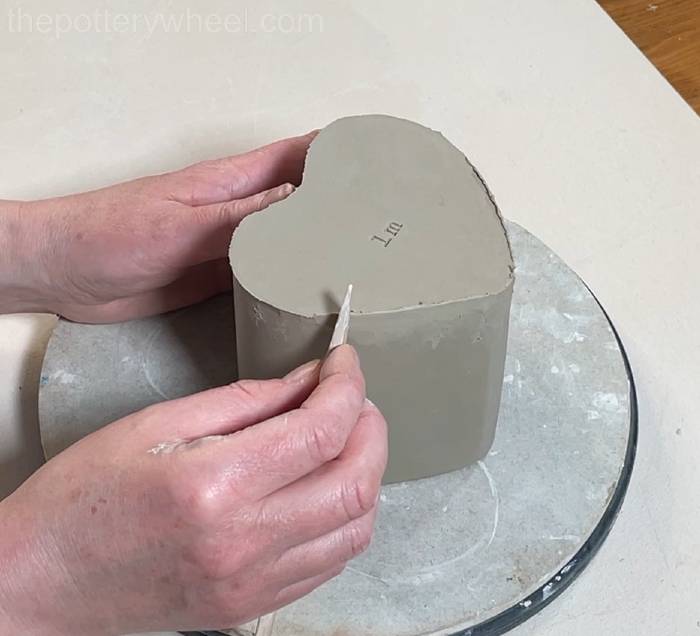
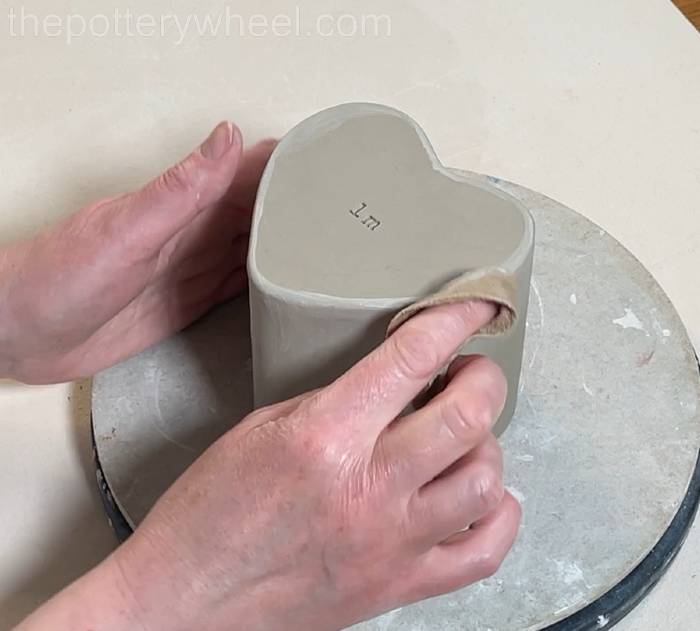
Before I blend the base of the mug on, I use a clay knife to cut away a little bit of the extra clay on the base. I aim to have around 1mm of extra clay on the base around the bottom edge of the mug.
Blending The Base Onto The Mug
I use a wooden tool to blend the excess clay of the base onto the bottom edge of the mug.
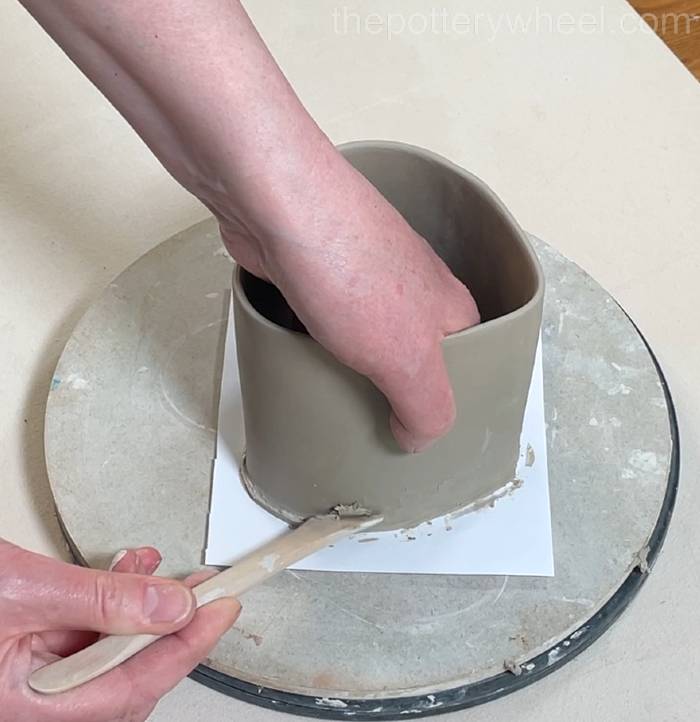
Once it’s blended in, I turn the mug over and rest it on its rim.
Then I use the flat edge of the wooden tool to scrape away as much rough texture on the clay as I can.
Finally, I use my damp chamois leather to smooth the clay and remove any marks left behind by the wooden tool.
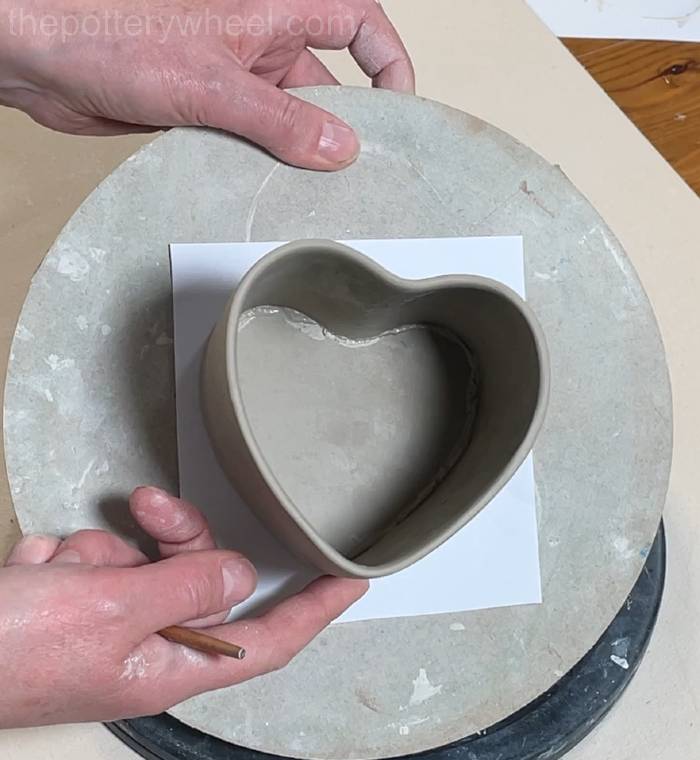
When the join is smooth on the outside, I turn the mug the right way up. The join on the inside surface of the mug still looks a bit rough, like this:
Sometimes when I’m slab building, I will add a thin coil of clay to inside joins to make them as secure as I can. However, with this particular design, I don’t tend to add a coil. Mainly because it’s a bit fiddly to get the coil smooth in the angles of the heart shape.
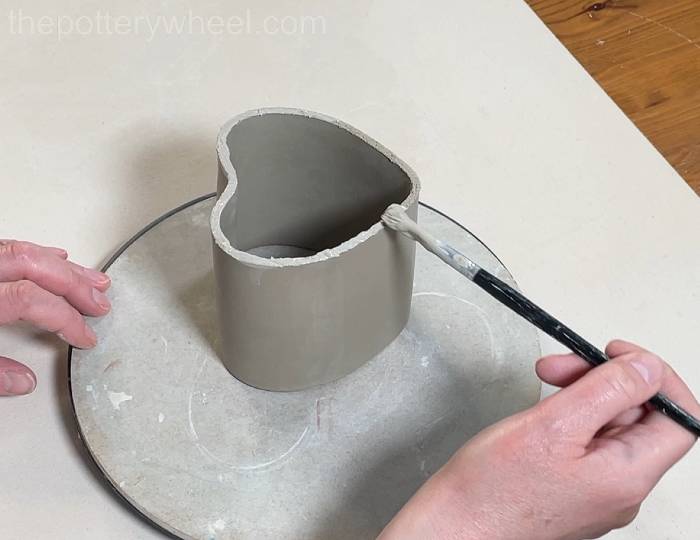
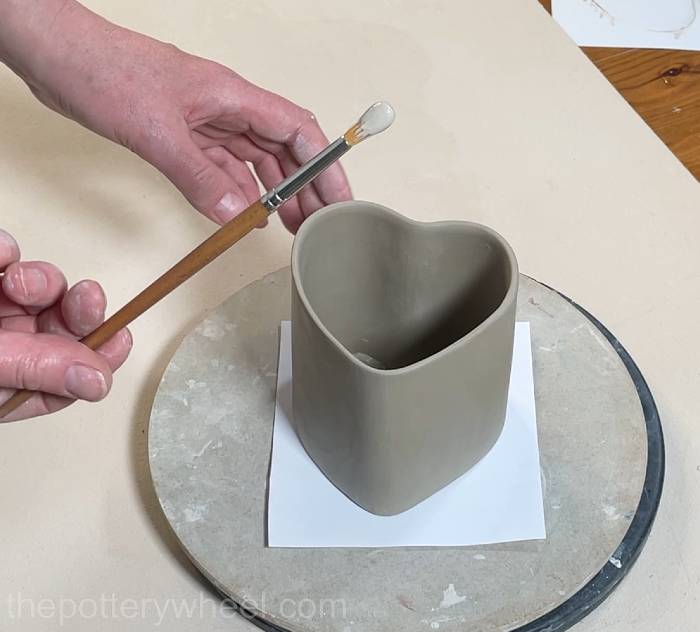
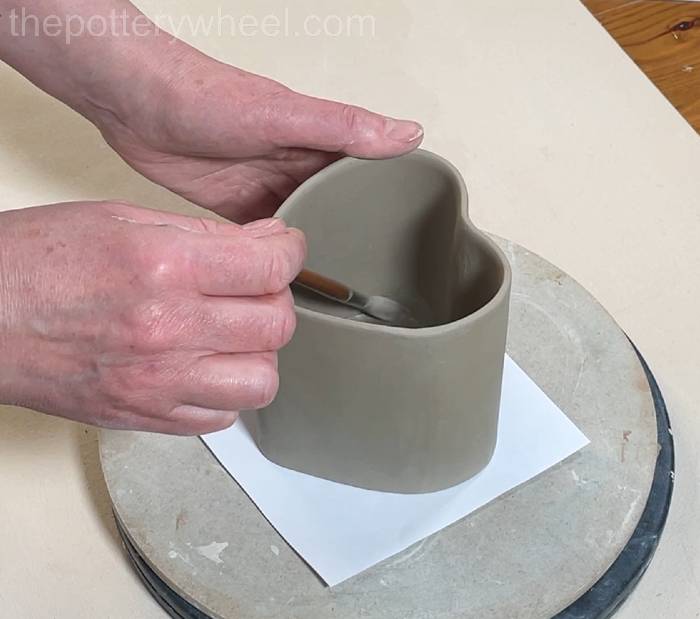
Instead, I load a soft brush with a bit of clay slip and smooth the inside surface of the join with the clay slip.
When I brush gently at the join with the clay slip on the brush, I blend the inside join and tidy up the surface on the inside too.
Step 6 – Preparing the Handle
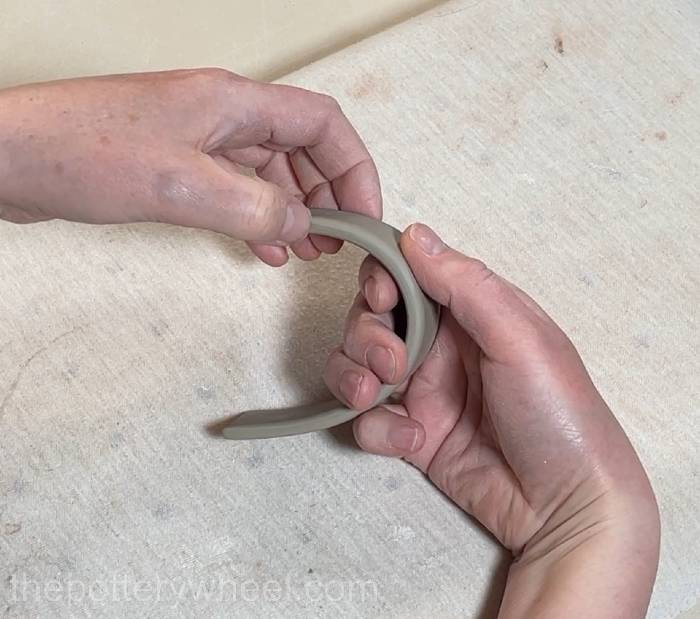
I smooth each edge of the handle down with my chamois leather and curve the handle into the shape I want it to be.
Then I leave the handle to firm up until it is soft leather hard. Waiting until the clay is firm makes attaching it to the mug a lot easier.
Step 7 – Adding the Handle to the Heart-Shaped Slab Pottery Mug
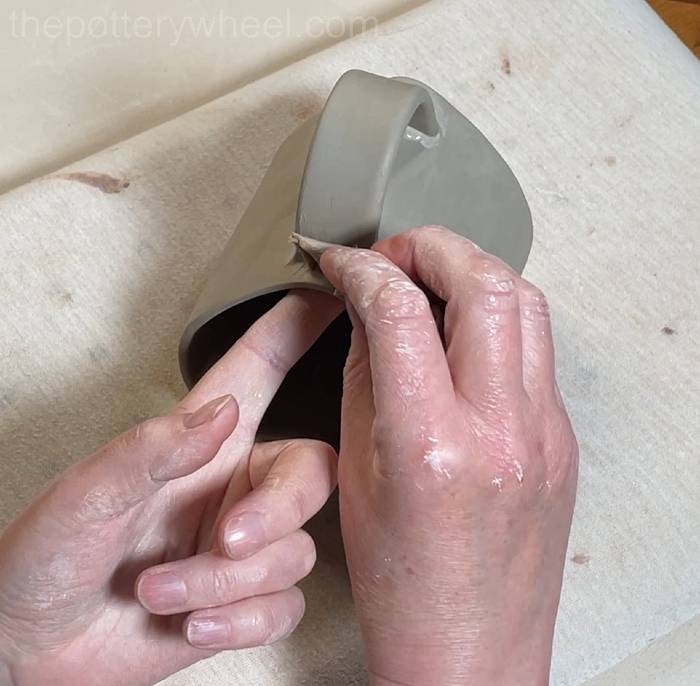
When the clay handle is firm, I hold it in my hand, as if I’m holding the handle on a mug. I make a mark on the mug with my thumbnail to indicate where I want to trim the handle.
As I mentioned earlier, the handle template is longer than you need it to be, but this allows you to choose what length you want the handle of the mug to be.
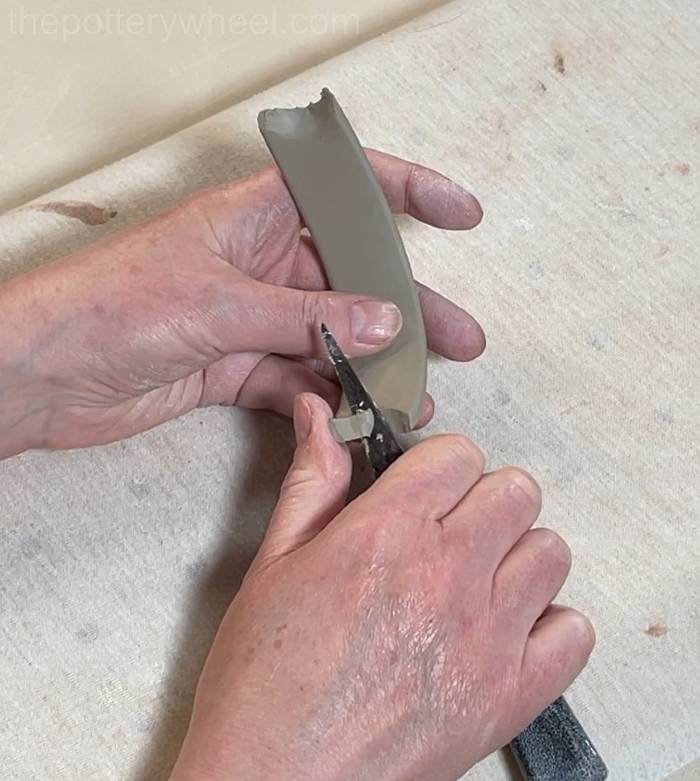
I then cut the handle to length with my clay knife.
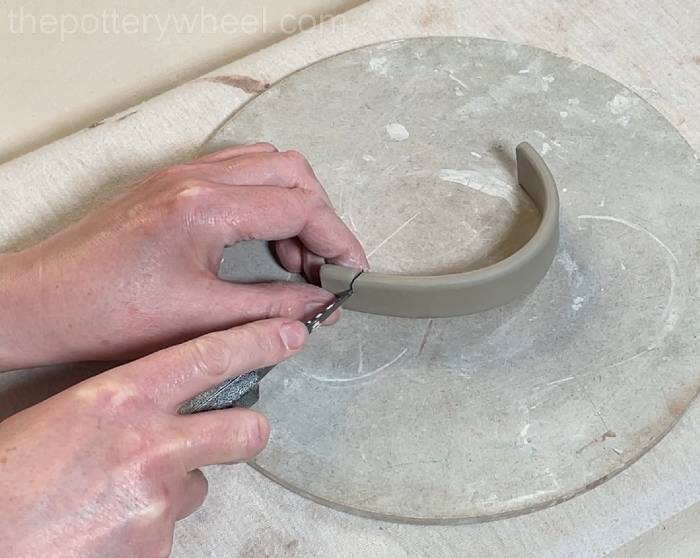
Once I know that the handle is the right length, I shape the two ends so that they will fit around the curved edge of the mug.
I then hold the handle up against the bottom point of the heart-shaped mug. I adjust the position so that I’m happy with where the handle sits. Then I make a mark with my clay knife where I want the handle to be attached.
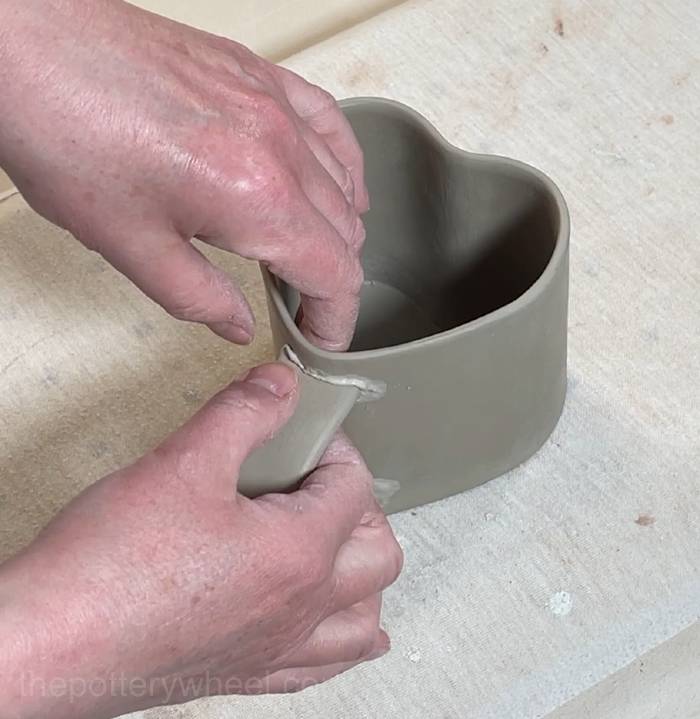
Next, I remove the handle and score into the side of the mug, and also onto the two ends of the handle.
I apply slip to each of the scored surfaces and then press the handle into place. I put one hand on the inside of the mug to support it and press the handle on with my other hand on the outside.
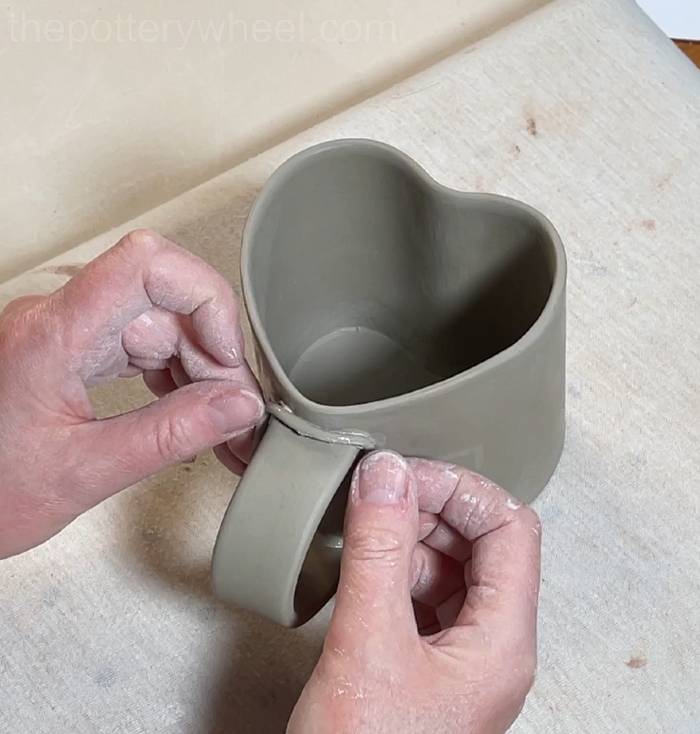
Securing the Handle in Position
One way to make sure that your handles are firmly attached is to add a clay coil around the two points at which the handle and mug are joined.
I roll a thin coil of clay and wrap it around the handle join.
Next, I press the coil into the join with my fine wooden tool and blend the coil onto the handle and the mug. I blend the coil all the way around the handle.
The wooden tool will leave a bit of a rough texture in the clay. However, you can smooth this over easily using your damp chamois leather.
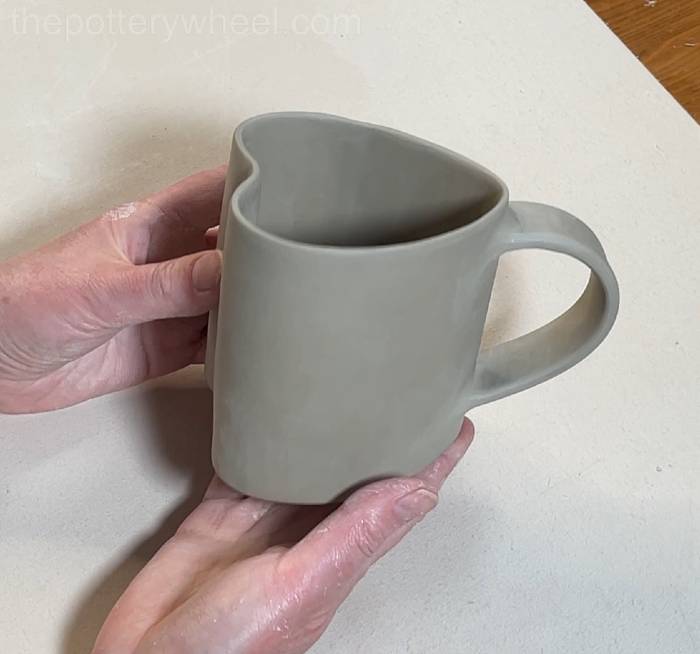
Once I have repeated this process with both ends of the handle, check that I’m still happy with the heart shape of the mug.
I tweak the shape a little before I leave it to firm up. But once I’m satisfied with the shape of the mug, I leave it to dry slowly before it is fired and glazed.
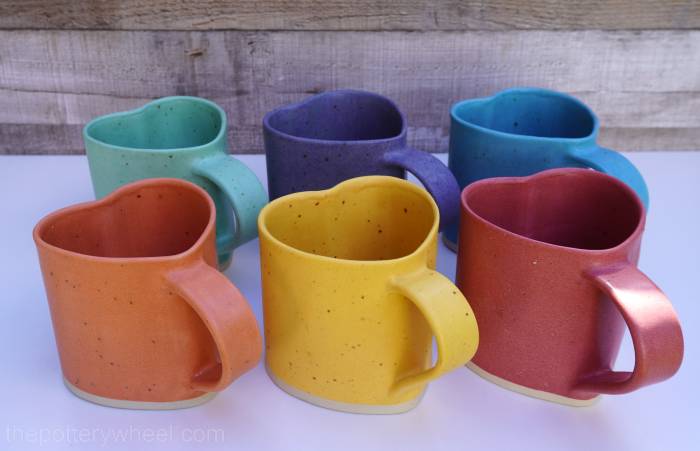
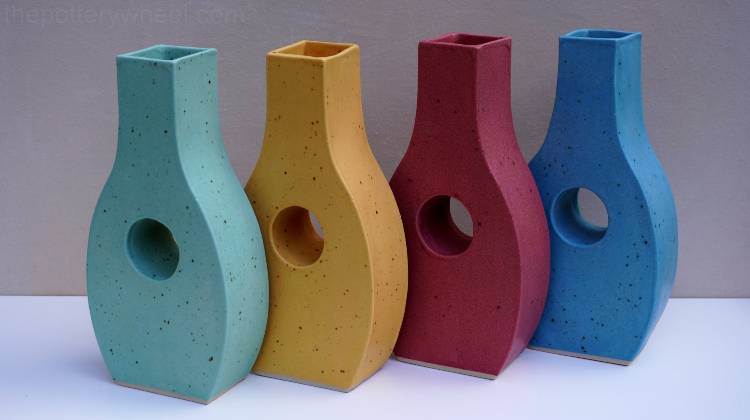
And here are some finished heart-shaped slab mugs, that have been fired and glazed.
Visit my online store
Get The Template Here
You can get a copy of this template (and my other slab pottery templates) from my online shop here…

Leave a Reply