Your cart is currently empty!
Making A Slab Pottery Teapot – A Step-By-Step Guide
Published:
Last Updated:
Affiliate Disclaimer
As an affiliate, we may earn a commission from qualifying purchases. We get commissions for purchases made through links on this website from Amazon and other third parties.
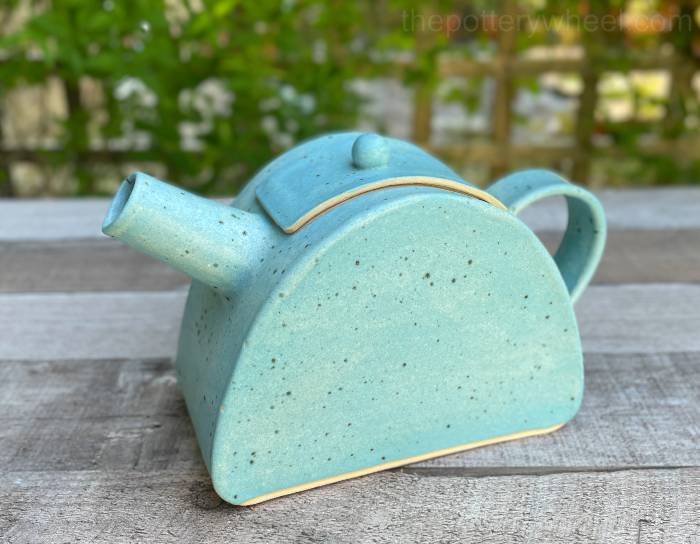
I made this slab pottery teapot, using a template that I designed. If you’d like to follow along with the instructions, you can get a copy of the template at my Etsy store here.
Alternatively, you can design your template and use this article’s slabbing techniques. There will be a section later about creating your own template. You can jump to that section now if you would like.
But first, let’s get into how I made this particular teapot.
Table of Contents
show
Making A Slab Pottery Teapot Using a Template
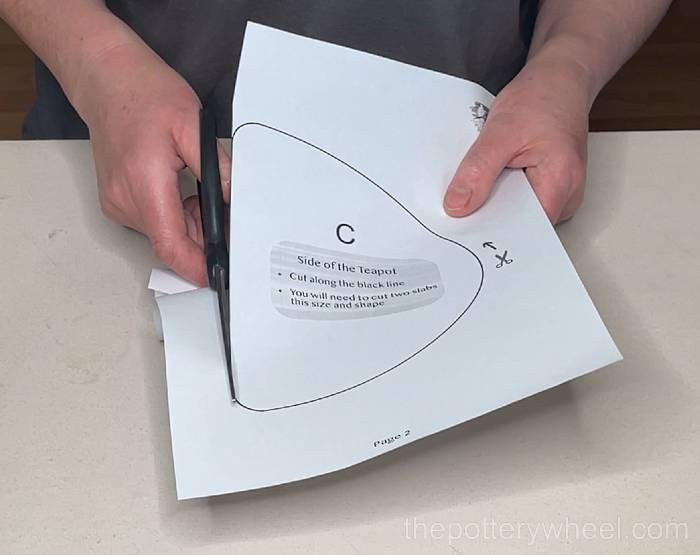
This is what the template looks like once it has been printed off on A4 (Letter size) paper.

You can use a paper template, or you can copy the shapes onto craft foam. The benefit of craft foam is that it doesn’t absorb water. This means that you can use it as many times as you want.
Paper templates can be used 2 or maybe 3 times. After that, they start to get a bit tatty and start to lose their shape.
Preparing the Slab Pottery Template
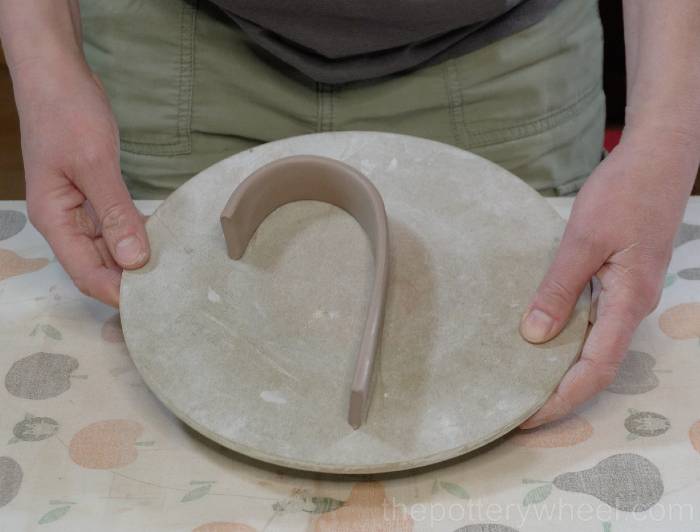
I cut each section of the template out.
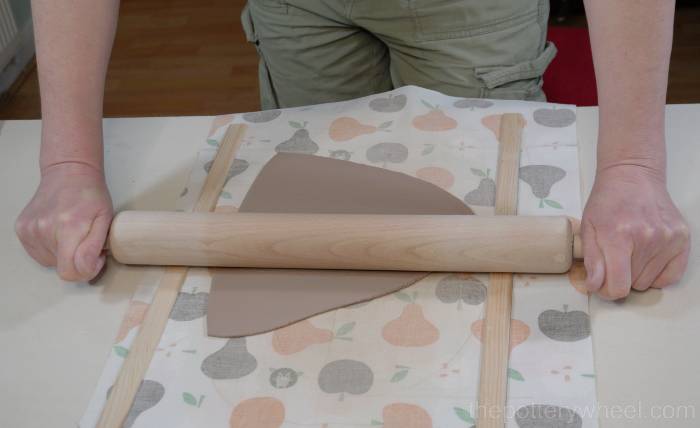
Rolling a Slab
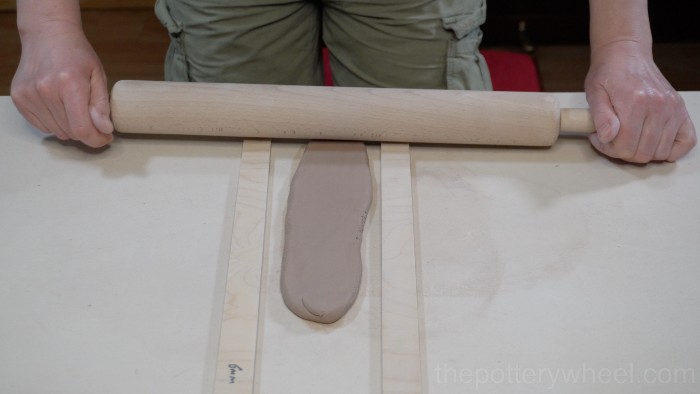
The first thing to do is to roll a slab of clay. I take a section of clay and flatten it a little with the heel of my hand. This makes it easier to start rolling. You can read more about how to make a slab of clay here.
I always use roller guides when I’m rolling slabs. These are strips of wood that I put on either side of the clay. They help me to roll the slab evenly. Roller guides also ensure that you are rolling your slab to a particular thickness.
Roller Guide Thickness
When I’m making this slab pottery teapot, I use 3mm roller guides. 3mm is about 1/8th of an inch. I like the slabs to be quite thin so that the teapot isn’t too heavy. But if you prefer to use thicker slabs that’s fine too.
You can buy pottery roller guides in some pottery stores, or on Amazon. Alternatively, you can pick up some strips of wood at a local hardware store and cut them to length. I prefer to buy mine from the hardware store. You get better value for money and you can make them whatever length you want them to be.
There is a section below with links to the equipment you need to make this slab pottery teapot. You can jump to that section here.
Another tip when you are rolling thinner slabs of clay is to roll them onto a piece of fabric. You can use a sheet of duck canvas. Canvas is quite thick and doesn’t wrinkle up when you are rolling. I prefer to use a cotton-backed vinyl tablecloth because it doesn’t absorb much water from the clay.
Rolling on a movable sheet of fabric means you can flip the clay over easily without stretching it. To flip the clay slab, put another piece of fabric on top of the clay. Then slide your hand underneath the whole thing, and flip it over.
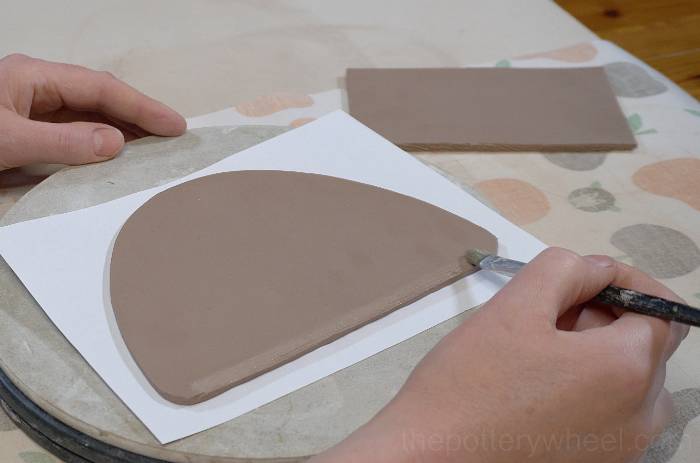
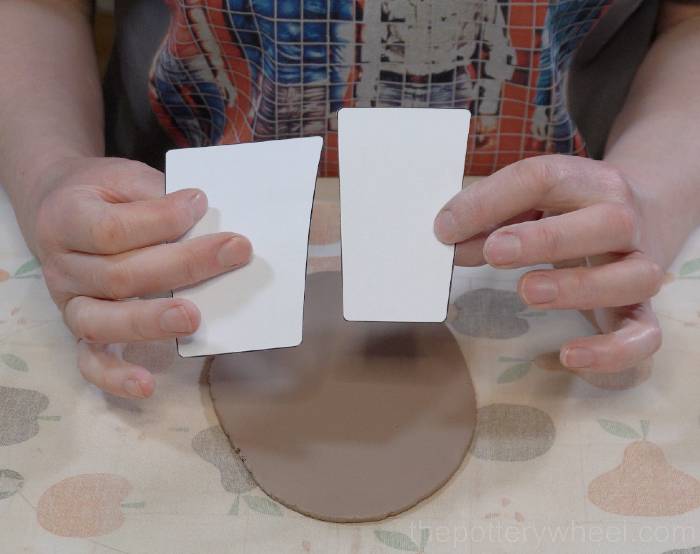
Cutting Out Clay Slabs Using the Template
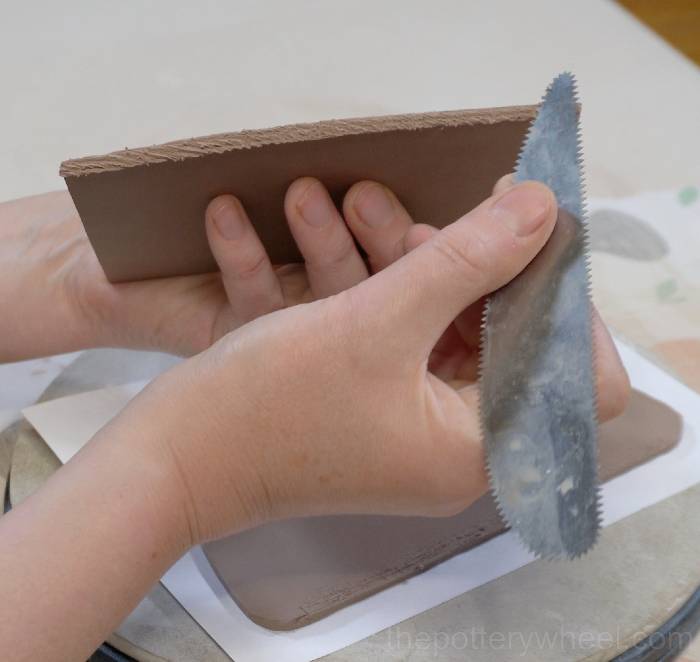
Once you have rolled the clay slab run a rib tool over both sides. This will get rid of any texture on the clay surface and help align the clay particles.
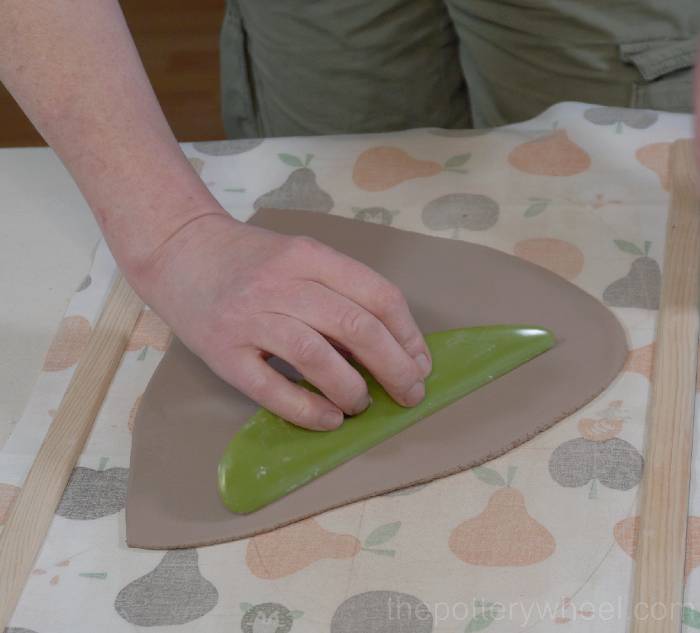
The first parts of the slab pottery teapot that I cut out are the crescent-shaped sides and the base.
I need two slabs of the same shape and size to make up the sides of the teapot.
Then I cut out the oblong-shaped base. I use a clay knife to cut the slabs out.
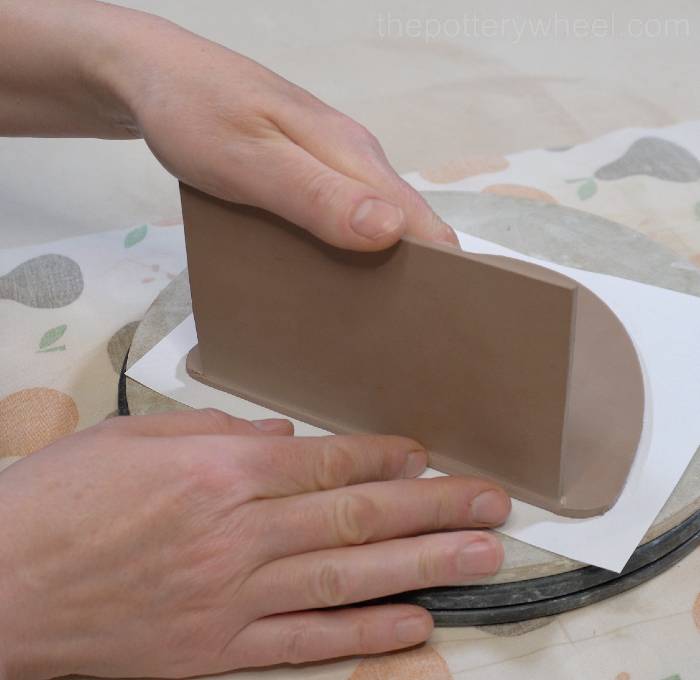
Each of these pieces needs to be flat when they are joined together. At the moment, the clay is very soft and fresh, so the slabs need to be left to stiffen up.
When slabs dry and stiffen the clay can warp and curl. To avoid this I put them on a piece of paper and transfer them onto a sheet of plywood. I then lower another piece of plywood on top of the slabs to sandwich them flat.
The plywood won’t squash the clay, but it will stop the slabs from curling as they become leather hard.
Making The Top of the Slab Pottery Teapot
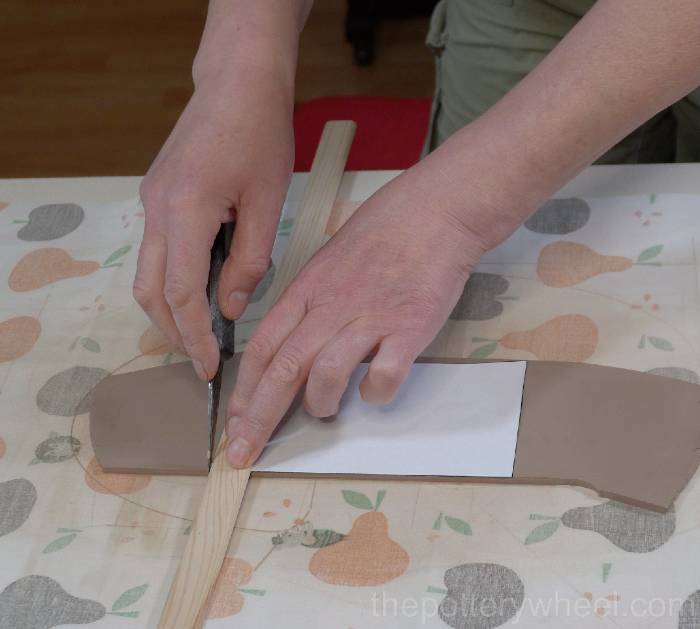
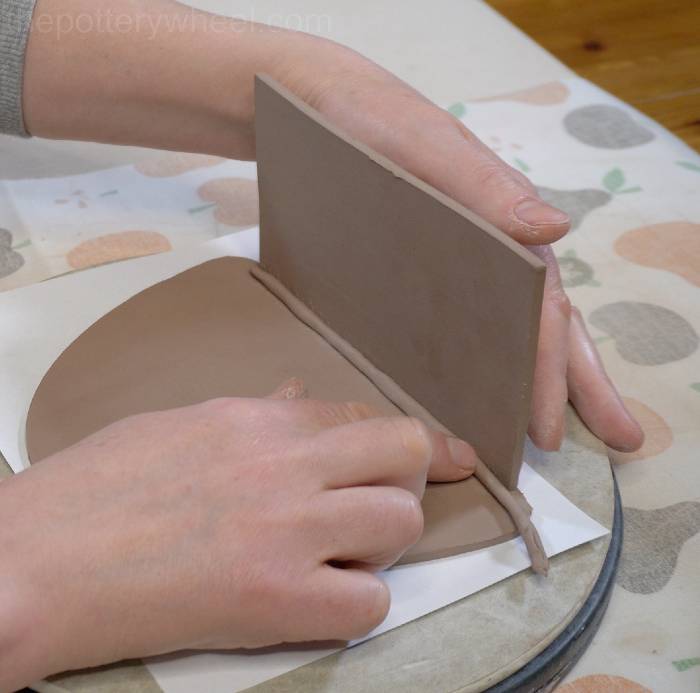
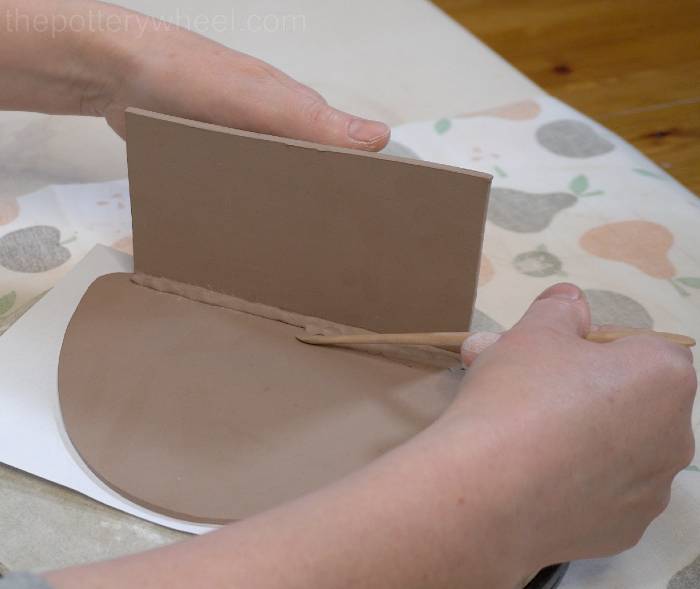
I cut out the long slab of clay that will go all the way around the top of the teapot. I’ll call this the ‘Top Strip’.
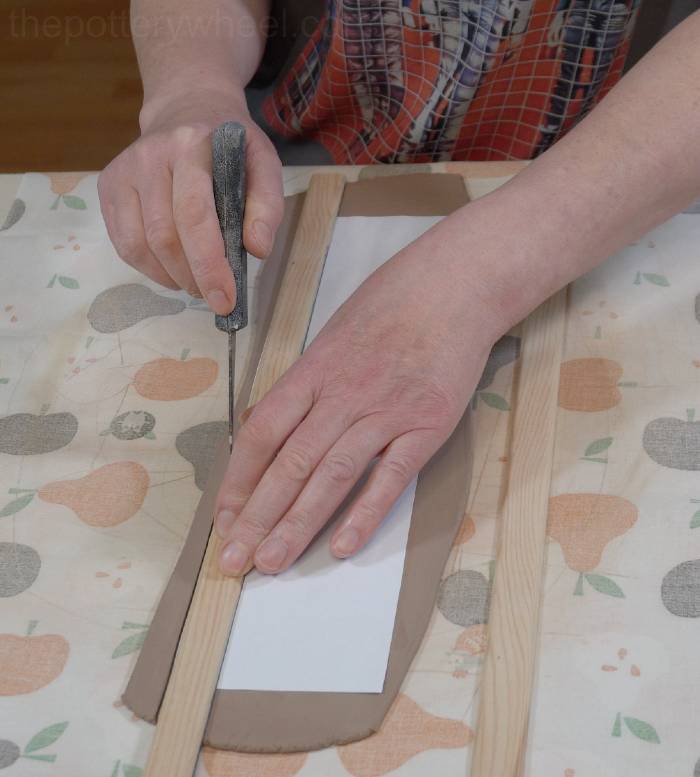
Because the ‘top strip’ curves around the teapot, I don’t want it to be flat when it becomes leather hard. Instead, I lift the clay slab onto its side. Then I curve it into the shape that I want it to be when it’s attached to the other slabs.
I then leave it to become soft leather hard and begin working on the other parts of the teapot.
Soft leather hard clay, is clay that is firm enough to be handled without losing its shape easily. But it still has enough moisture that it can be bent, cut, and shaped a little without breaking. You can read more about leather hard clay here.
Making the Spout for the Slab Pottery Teapot
I make the spout now to give it time to firm up before attaching it later.
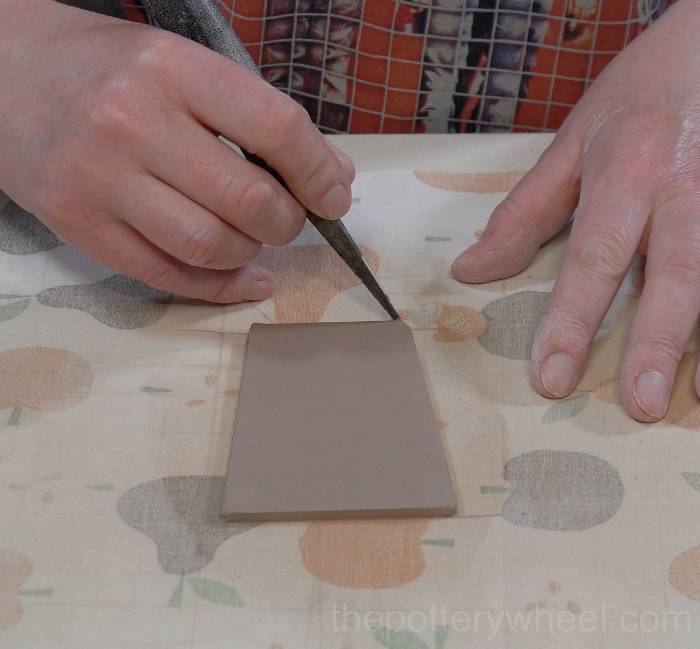
I cut the spout out using a small slightly conical-shaped template. The spout is formed by curving the slab around and joining the edges. To make a good joint, it’s a good idea to bevel the edges where the clay will join.
I bevel the edges by holding my clay knife at a 45-degree angle. Then I draw it along the edge of the clay.
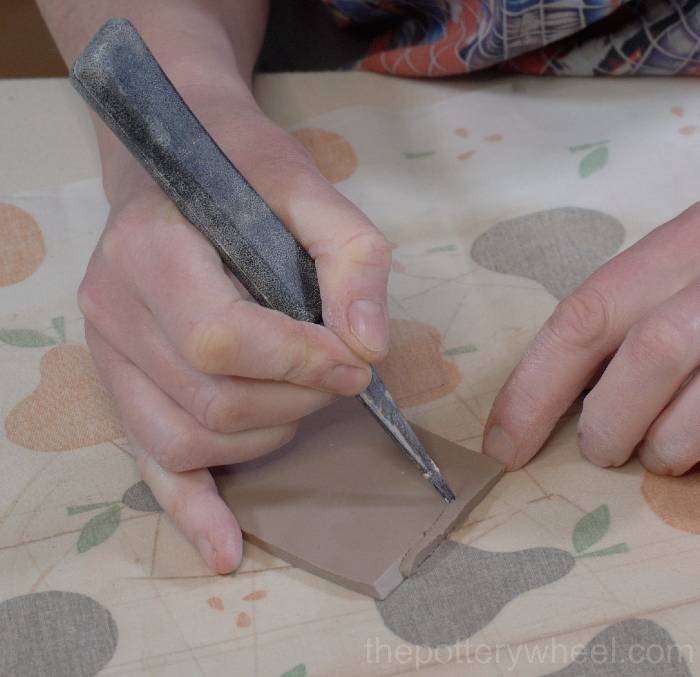
When beveling the edge it’s important to remember to turn the slab over before you bevel the second edge. That way, when you curve the clay around the two beveled edges will fit together and make a flush join.
I score the edges and then curve the clay around to make the spout shape. Before I join the edges I put a bit of slip onto the scored area. Then I press them together and then blend the join in.
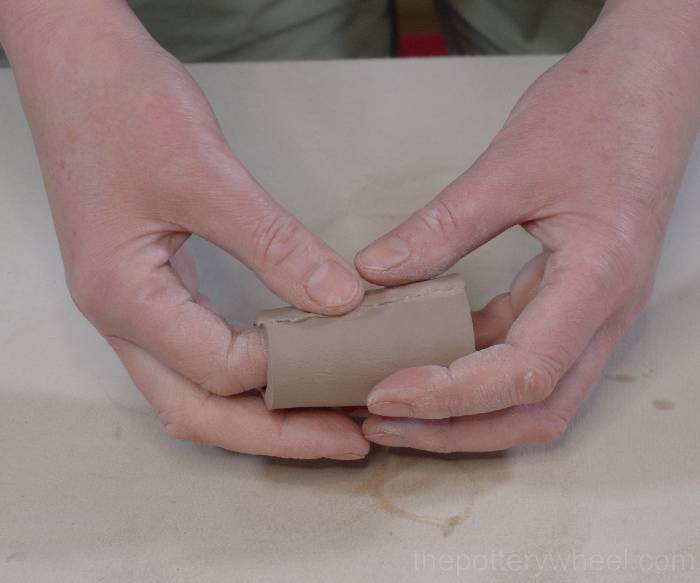
Once the spout is joined, I pinch and shape one side of the tip of the spout. This will help the tea to pour well and without drips later on.

I wrap the spout in a small piece of plastic and leave it to firm up. The spout is quite small and will dry out quickly. As a result, it’s best to keep it covered to avoid it drying out too much.
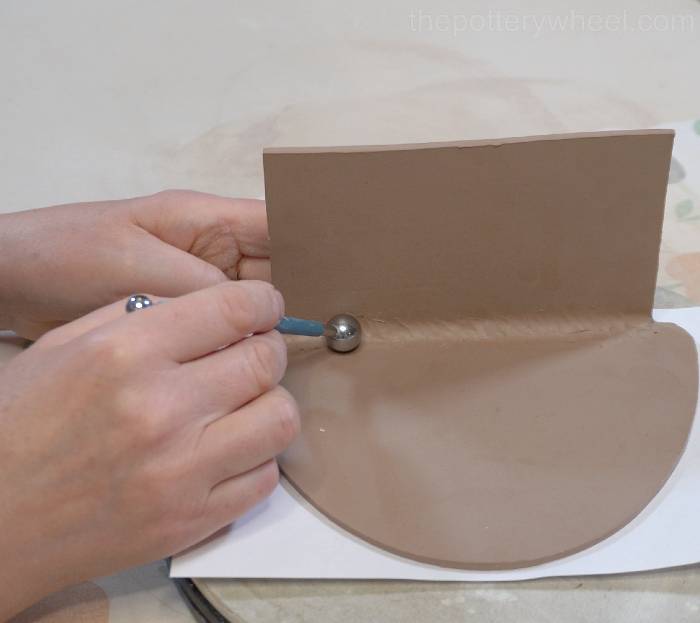
Joining the Clay Slabs
I start by attaching the base slab to one of the side slabs. Firstly, I put the base slab in place and make a small mark on the side slab. This shows me where to attach the base slab to the side slab.
Then I score into the clay on the side of the slab and along the long edge of the base.
I then apply moisture to the scored areas. You can use different liquids to join the clay. Some options are to use water, clay slip, or vinegar. I often use magic water as it creates a strong bond. This is how I make magic water.
When both scored surfaces have been wetted, I align them together. I then gently press the two sides so that they bond.
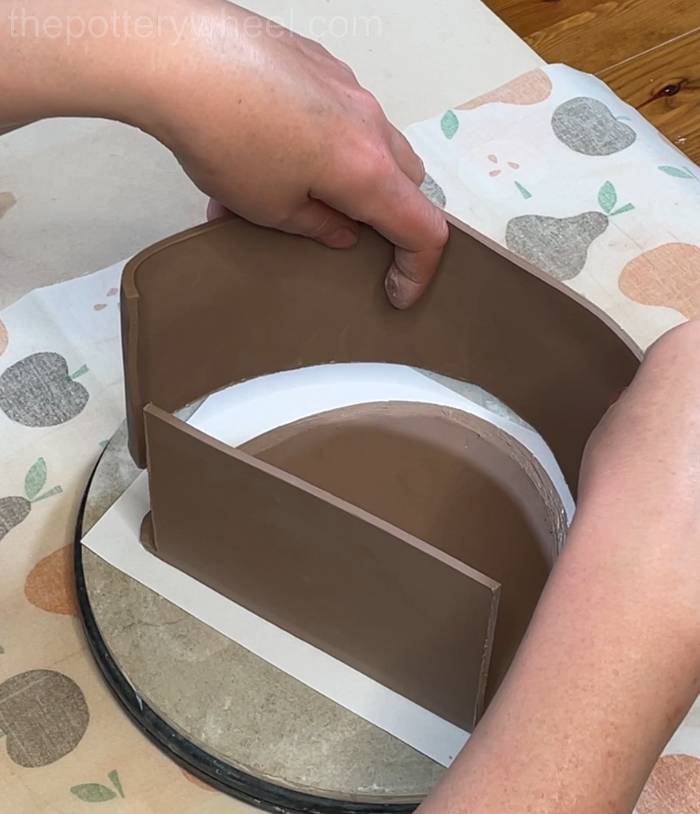
Although the bond is quite firm straight away, you might want to prop the base up. You can use an old cardboard box or something similar. It will help stop the side from falling over before it’s firmly attached.
I blend the outside join on the base to smooth the clay and reinforce the join.
Adding a Clay Coil to Strengthen the Join
I make a small coil of clay long enough to fit along the inside surface of the join. Then I score into the surface of the clay on the inside where the clay slabs join. I apply some magic water.
Gently press the coil into the join, remembering to use your free hand to support the outside of the clay.
Use a combination of tools and your finger to blend the coil into the joint so that it is smooth. I usually start off using a wooden tool to blend the clay.
Then I use a stylus tool to smooth the joined surface.
I finish off the blending process using a damp chamois leather to get rid of any marks made by the tools or your fingers.
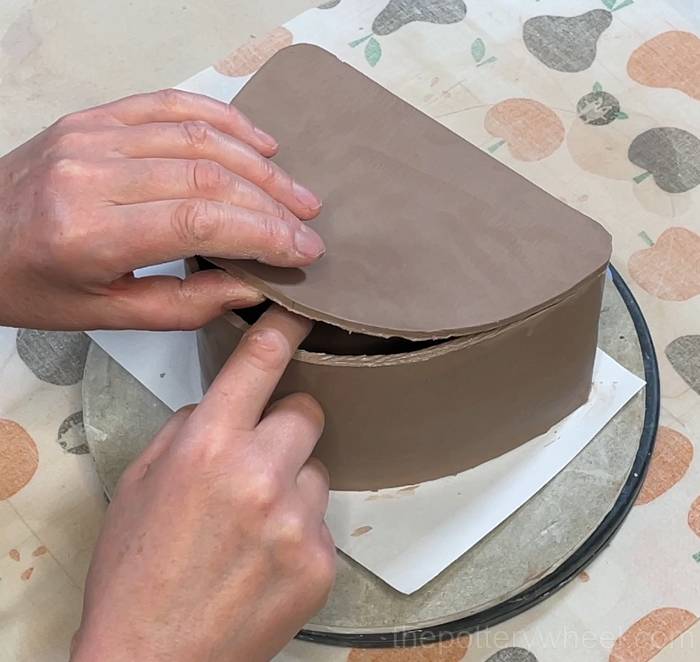
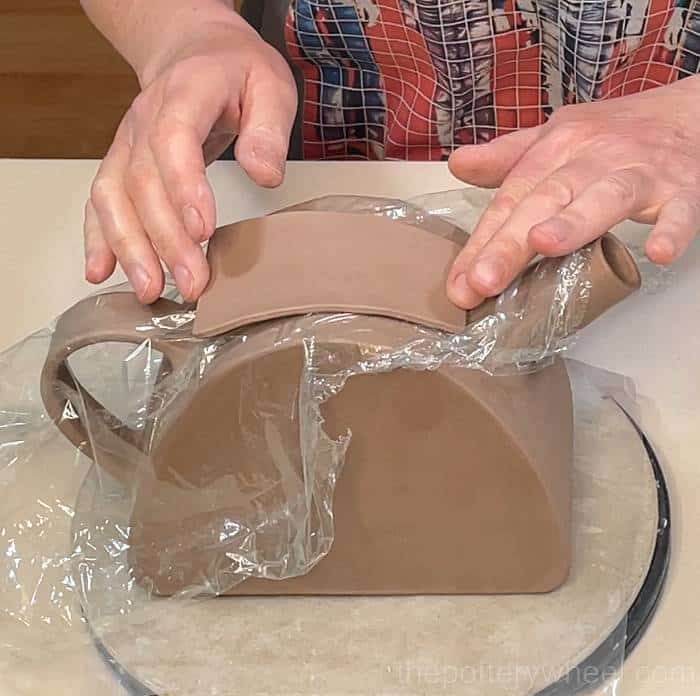
Adding the Top of The Teapot
Next, I add the curved top strip of the slab pottery teapot. I slip and score both edges where the top strip will join the side, and then gently lower the long curved strip of clay onto the side. By now the long top strip should be firm enough to handle.
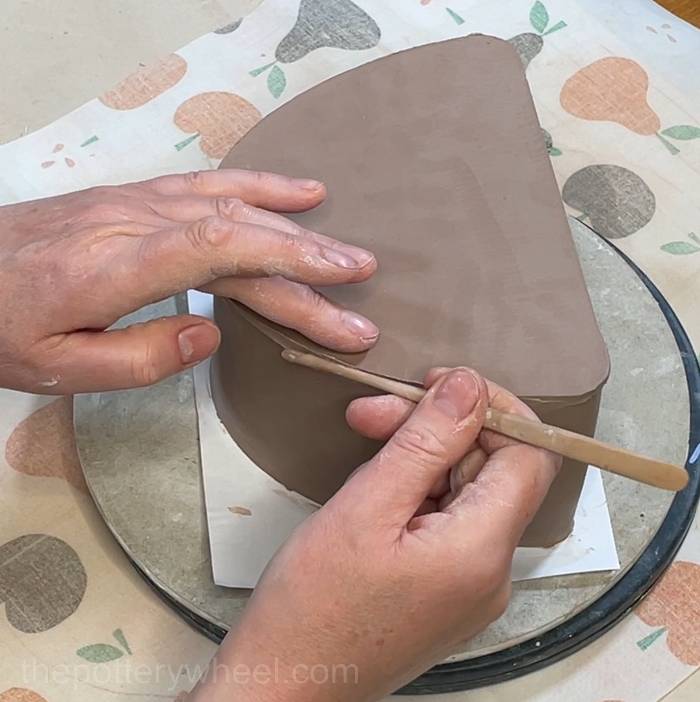
Once the top strip is in place, I press it firmly to bond the two scored surfaces. I begin by blending the outside join where the top meets the side.
Then I add a long thin coil to the inside surface of the join and blend it in, as it did before when I joined the base and the side.
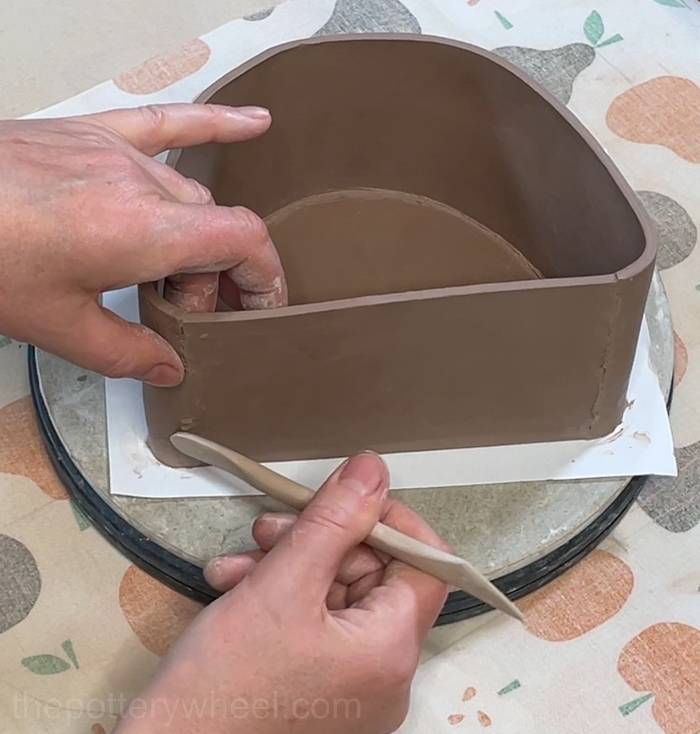
Adding the Second of the Slab Pottery Teapot
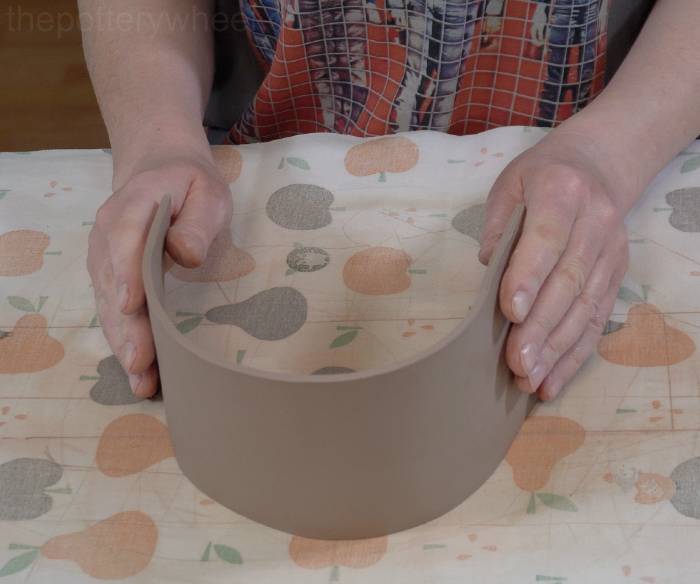
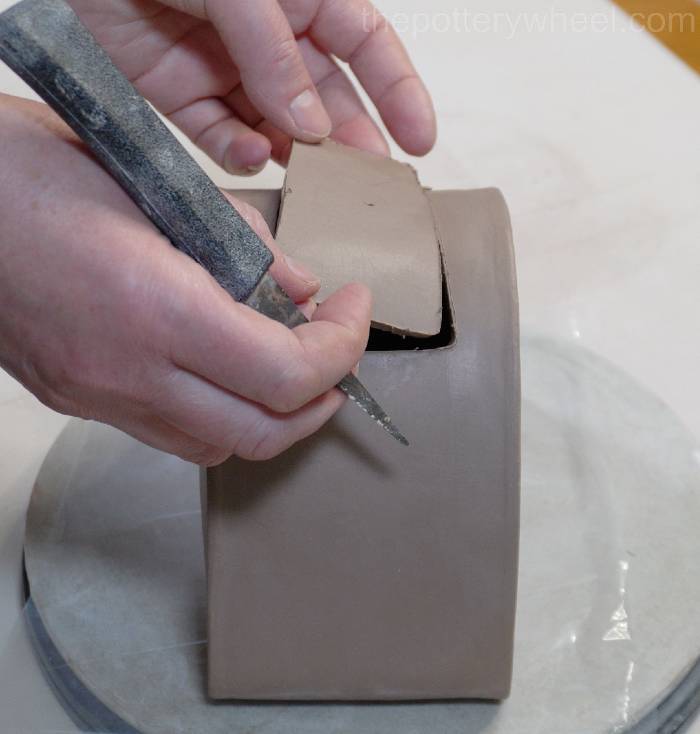
The last part of making the main body of the teapot is to add the final side to the piece. Again, I slip and score the edges that are to be joined and then gently lower the second side slab into place.
Because the body of the teapot is now sealed, you won’t be able to add a strengthening coil to the inside join of the last side slab. So, it’s important to blend the join well to make sure that it’s a strong bond.
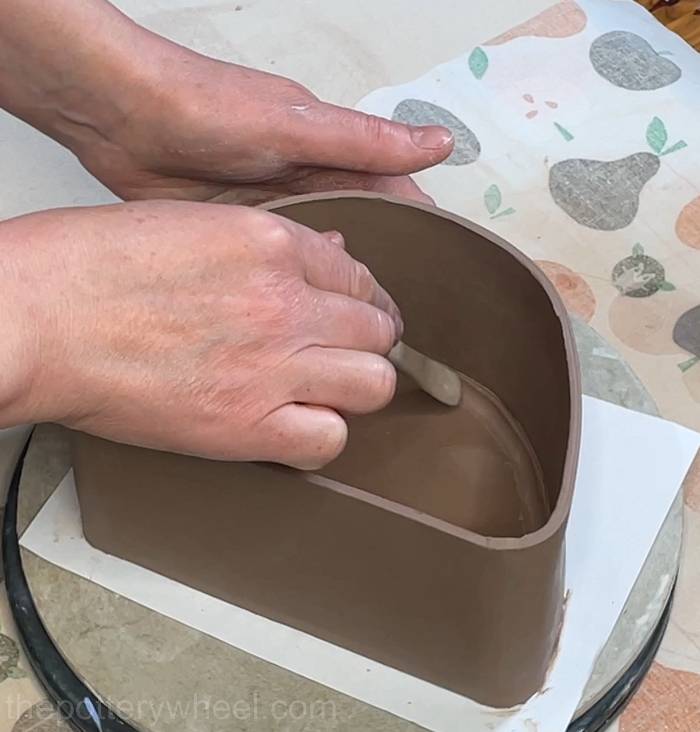
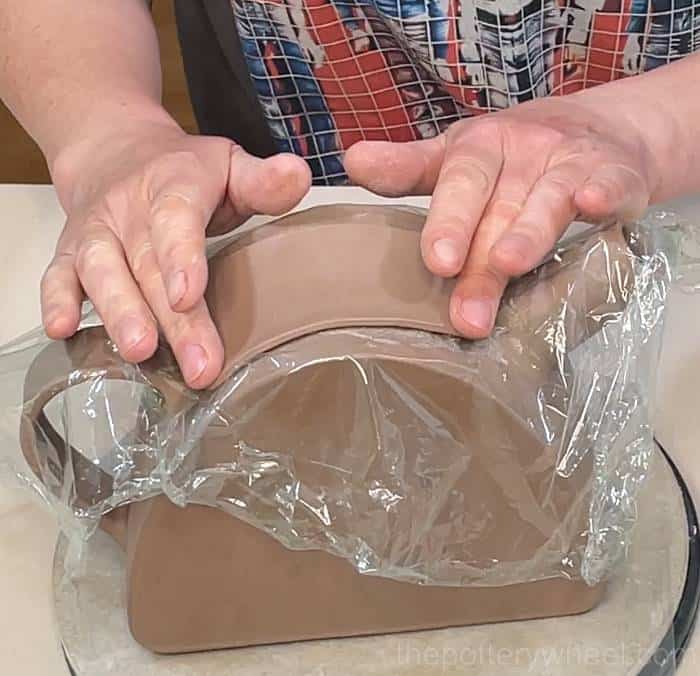
Once the second side is attached, I carefully lift the teapot onto its base and use a chamois leather to smooth off the edges.
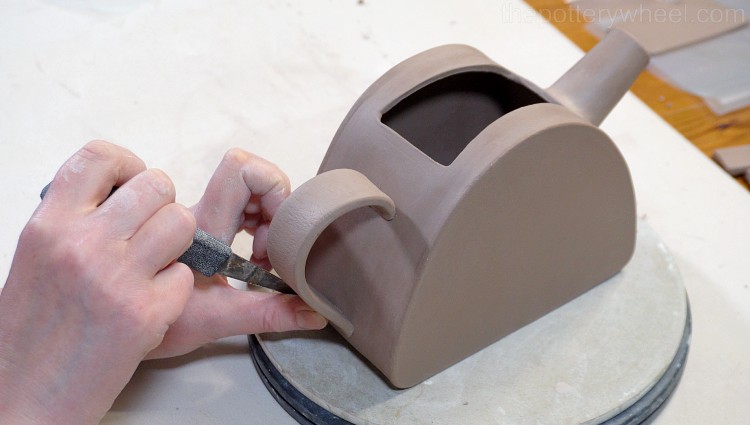
Making a Handle for the Slab Teapot
There are lots of ways to make handles for pots. You can pull handles, use an extruder, or roll a handle from a clay coil. Because this teapot is a slab teapot, I like to make the handle from a slab too, I feel it matches the overall style of the teapot.
But you can use a different handle design if you like.
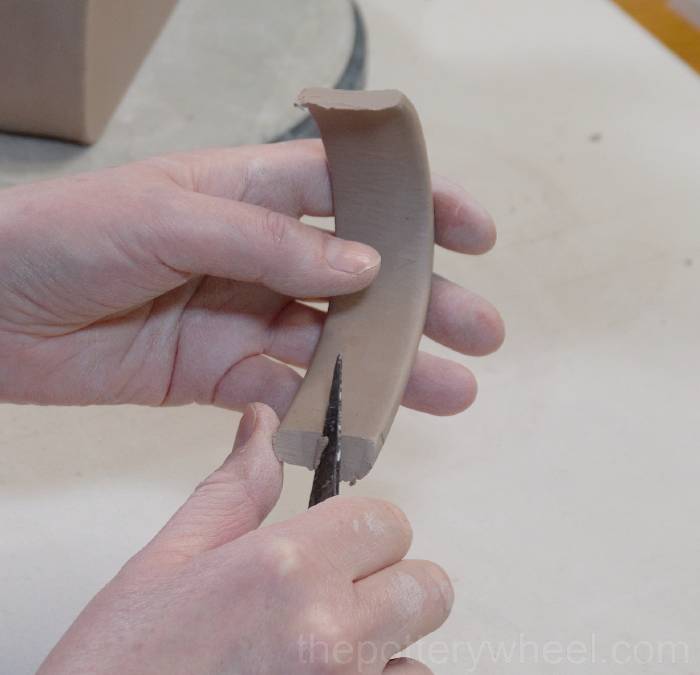
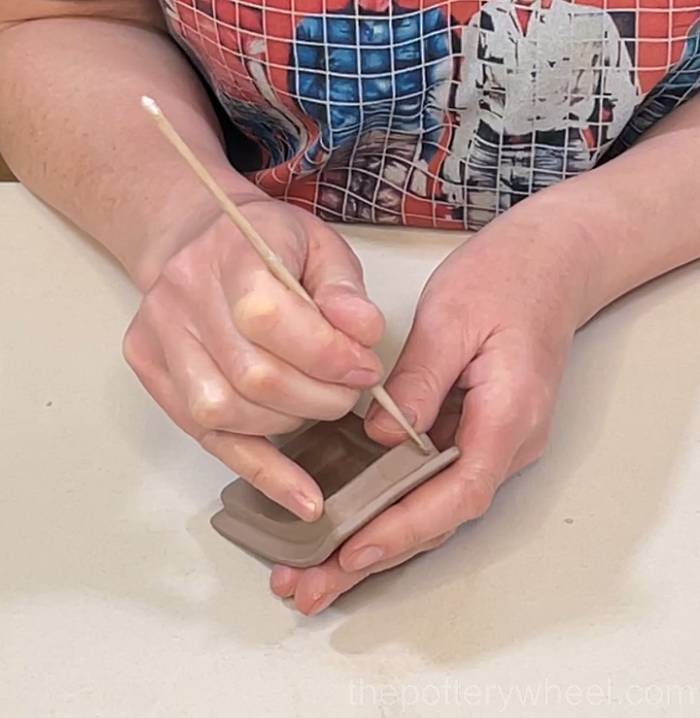
To make a slab handle, I roll out a long strip of clay. I make the slab for the handle 6mm thick, which is a bit thicker than the rest of the teapot. A slightly thicker handle will be more comfortable to hold than a thin one when the teapot is heavy with tea.
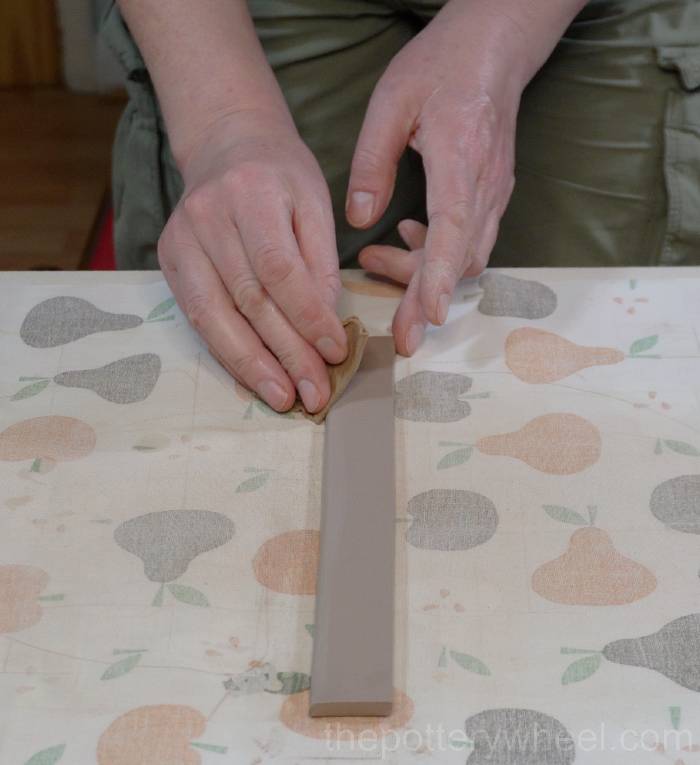
I use a straight edge to cut a strip of clay from the slab. The strip is about 1 inch wide. I smooth off the edges of the handle with a damp chamois leather.
I then curve the handle round into the shape I want it to be when attached to the teapot, and let it firm up.
Making the Lid to the Slab Teapot
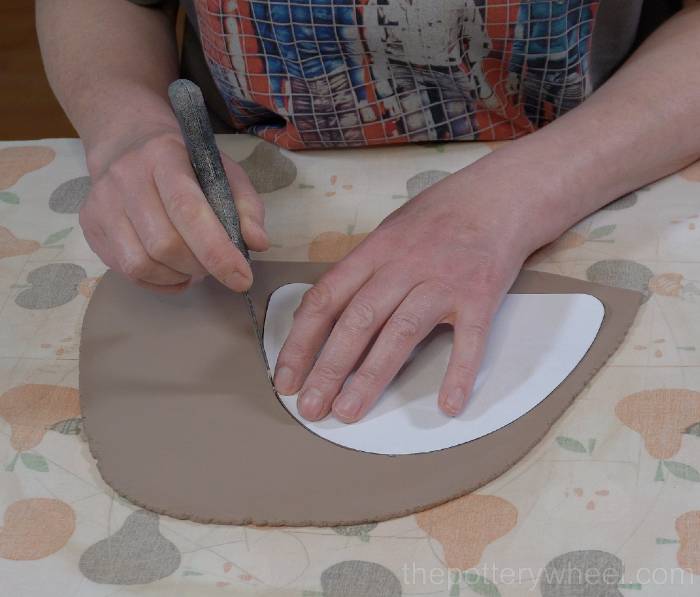
The template for the lid is made of two sections. One of the templates is a bit smaller than the other.
The larger template is for the actual lid itself. The smaller template is for the rim that will go on the underside of the lid. It’s also to use as a guide so you can cut a hole in the top of the teapot that is the right size.
I roll out a 3mm slab and then cut out the lid using the larger of the two lid templates.
When I’ve cut out the lid, I smooth the edges and then set the lid to one side to firm up a little.
While the lid is becoming soft leather hard, I work on the rest of the teapot. The next step is to cut a hole in the top of the body of the teapot where the lid will sit.
Preparing the Slab Teapot for the Lid
I use the smaller piece of the lid template to cut a hole in the top of the teapot. This small piece of template will also be used to make the rim on the underside of the lid, so I know that the lid will fit snuggly into place.
I hold the template in position against the top of the teapot and lightly trace around the template with my clay knife.

Once there is an outline of the lid on the clay I use my clay knife to cut through the clay and open up the lid space. I do this gradually using increasingly deep cuts with the clay knife.
Once the lid has been cut out, I tidy up the edge of the opening, using a combination of my fingers, wooden modeling tools, and a chamois leather.
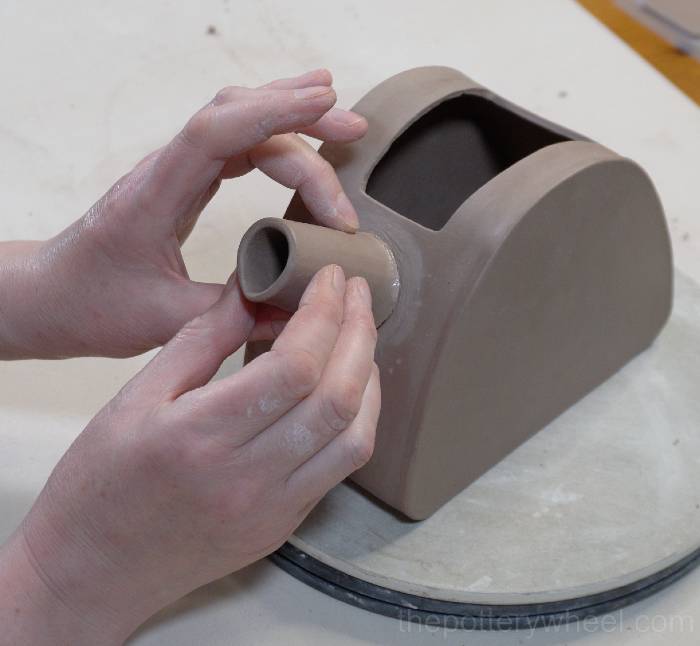
Preparing the Spout
Now that the teapot has an opening in the top I can add the spout. I line the spout up against the slab teapot to see where I want it to be positioned.
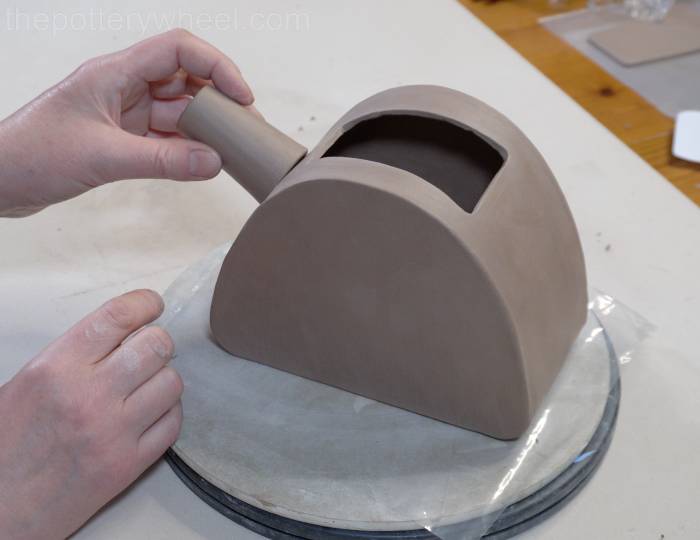
The opening of the teapot needs to be above the highest level that the tea will go to in the teapot. If the opening is too low, tea will spill out of it when the teapot is full.
I trim the wider end of the spout at an angle so that the spout points upwards a little more when it’s attached.
The spout isn’t sitting flush against the side of the teapot yet, so I pinch the clay out a little to flare the base of the spout.
I then hold the spout in position and draw lightly around the spout with my clay knife to mark where it will be attached.
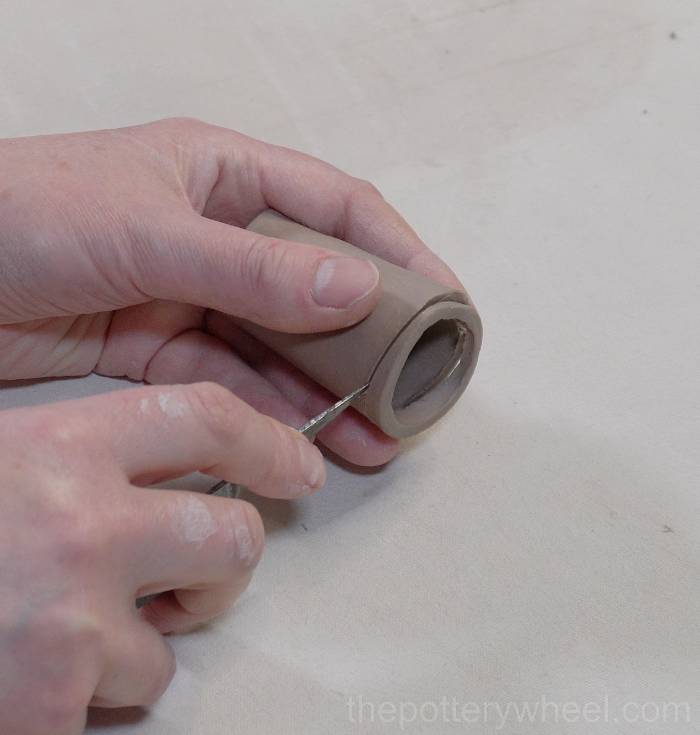
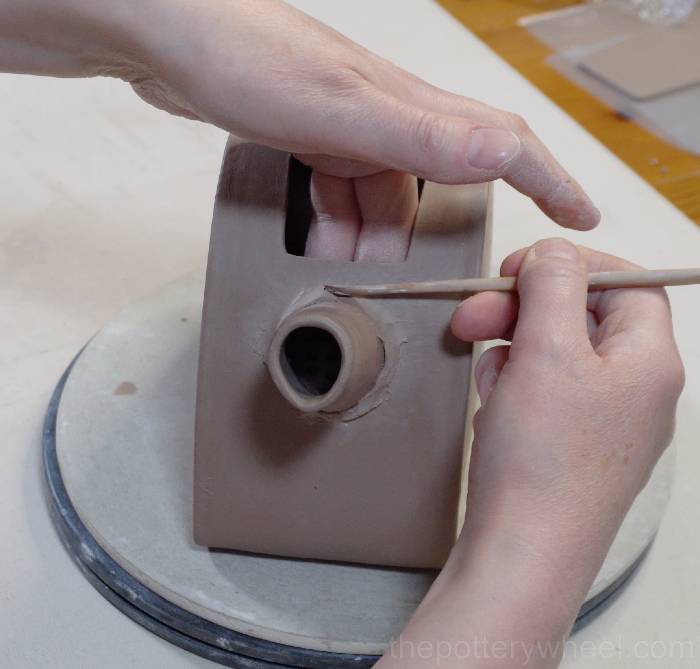
Using a clay hole cutter, I push some holes into the clay to allow the tea to flow out of the teapot and into the spout.

When I have cut the holes in the side I tidy up any small clay spurs that have formed on the inside of the teapot, so that there is nothing sharp on the inside surface.
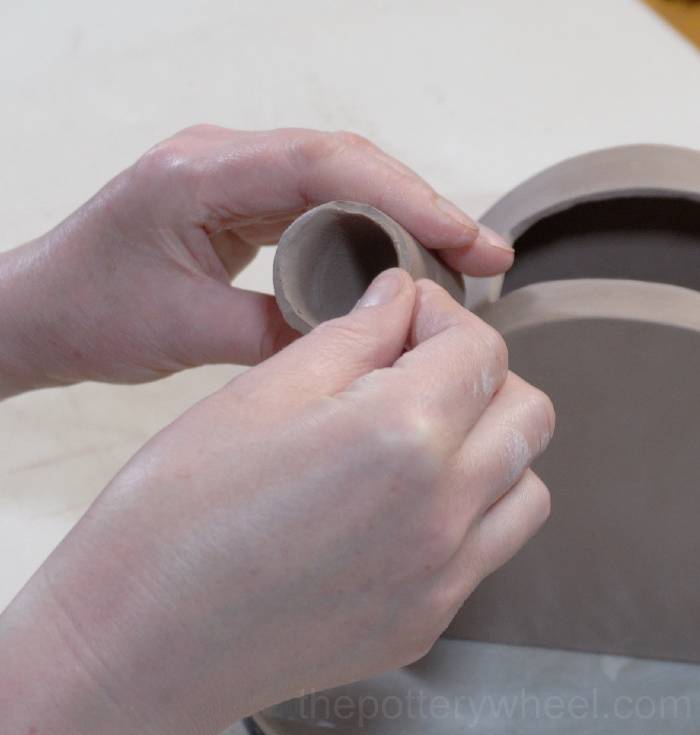
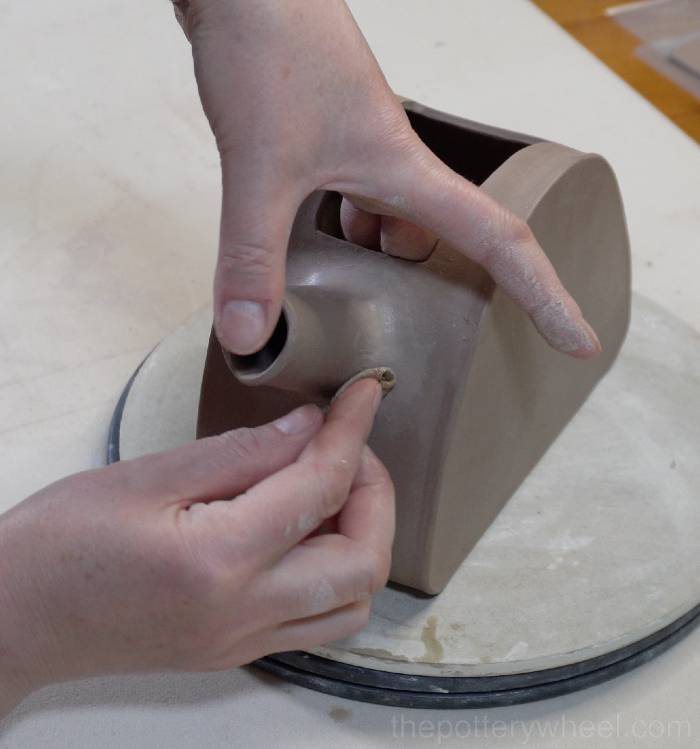
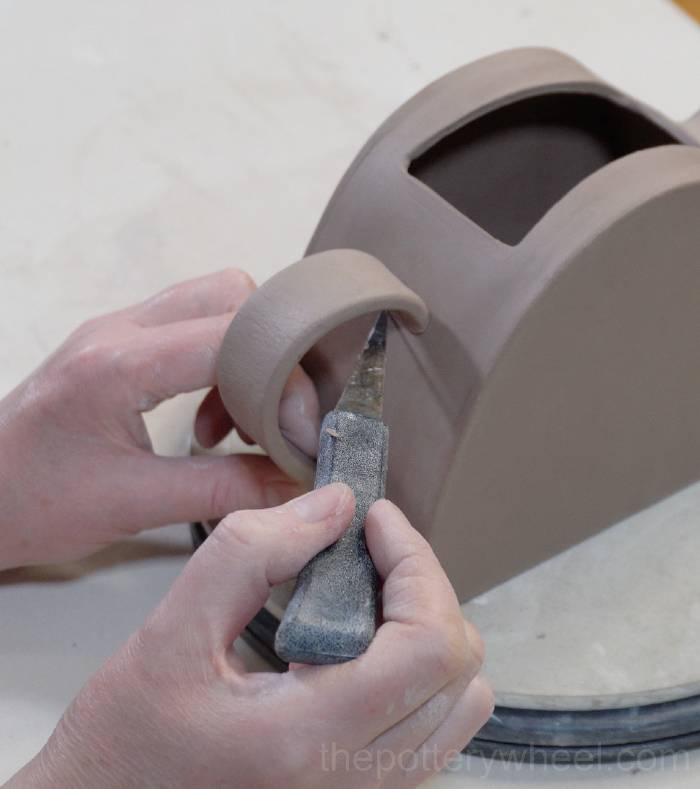
Attaching the Spout to the Slab Teapot
I score into the surface of the slab teapot where the spout will be added and also around the wider end of the spout itself. Then I paint on plenty of magic water to make some clay slip on both surfaces.
I put the spout in position and press it into place, giving it a bit of a wiggle as I push to make sure the two surfaces bond together fully.
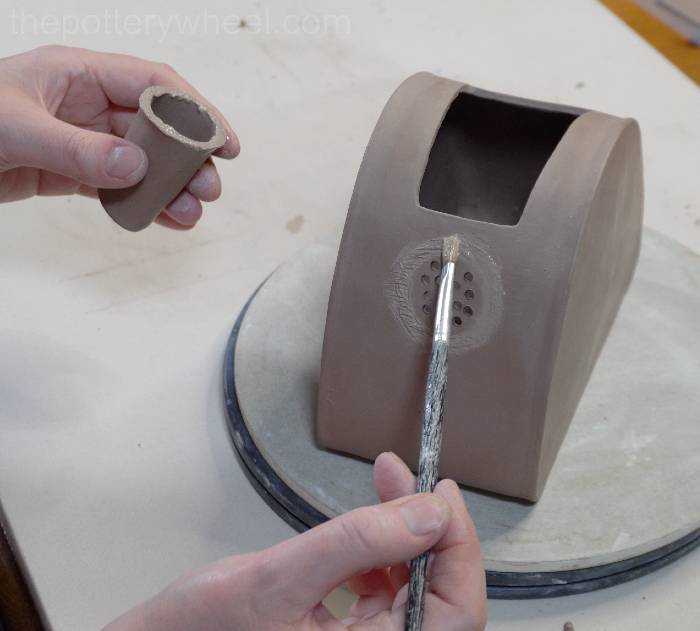
Once the spout is in place, I add a small coil of clay to the join and blend that in to make sure that the two parts of the teapot are securely attached.
Any marks left behind when adding the clay coil can be smoothed away using a damp chamois leather.
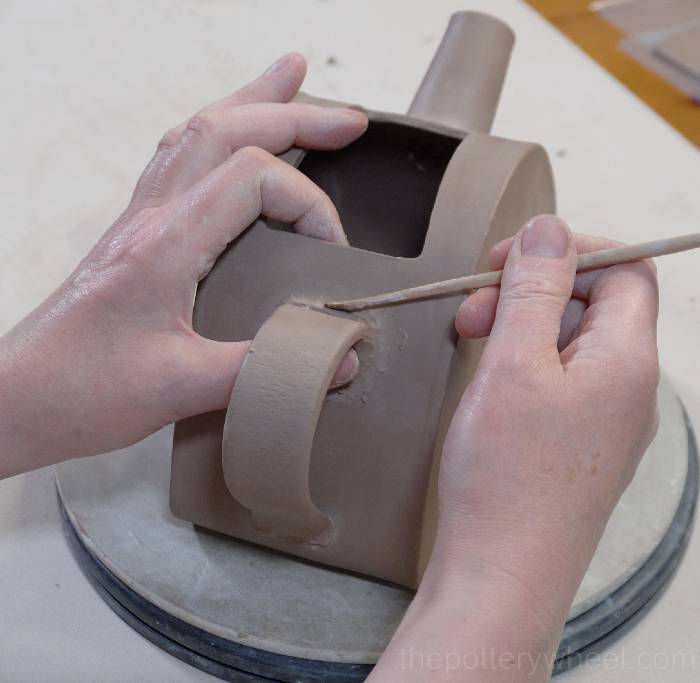
Adding the Handle to the Teapot
When the handle is soft leather hard, I cut it to length, and hold it against the side of the teapot.
I mark where I want the teapot to be attached.
I then slip and score both surfaces and press the handle into position. Once the handle is attached to the teapot, I add a small coil to the top end of the handle. You can add a coil to both ends of the handle, but the top end of the handle takes most of the strain when the teapot is full of tea.
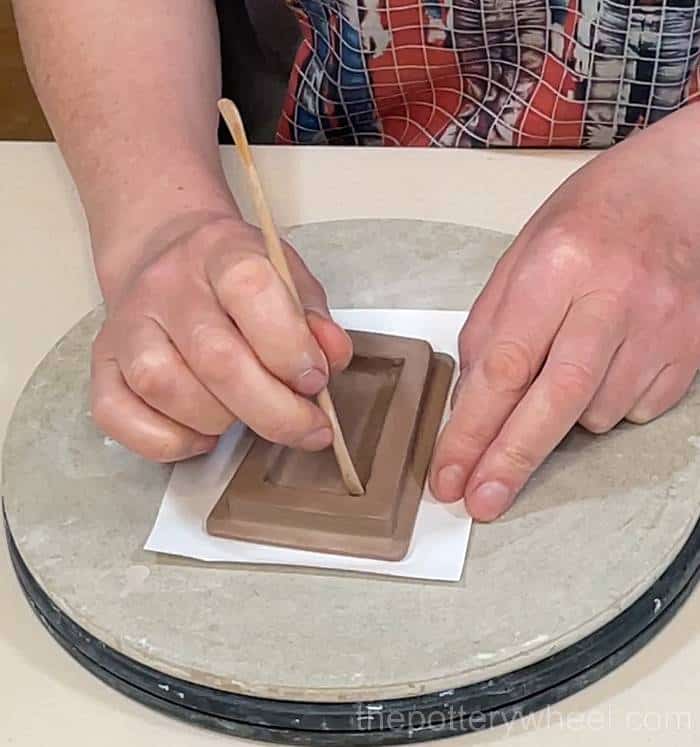
Adding a Rim to the Lid of the Teapot
The rim of the teapot lid is what stops the lid sliding off the teapot when you are pouring. To ensure that the rim keeps the lid in place, I make it out of a slab that is 9mm thick.
I roll a 9mm slab and then use the smaller part of the lid template to make the rim. Remember this is the part of the template that I used to cut a hole in the top of the teapot, so the rim should fit well into the hole when it’s been attached to the lid.
I cut around the template.
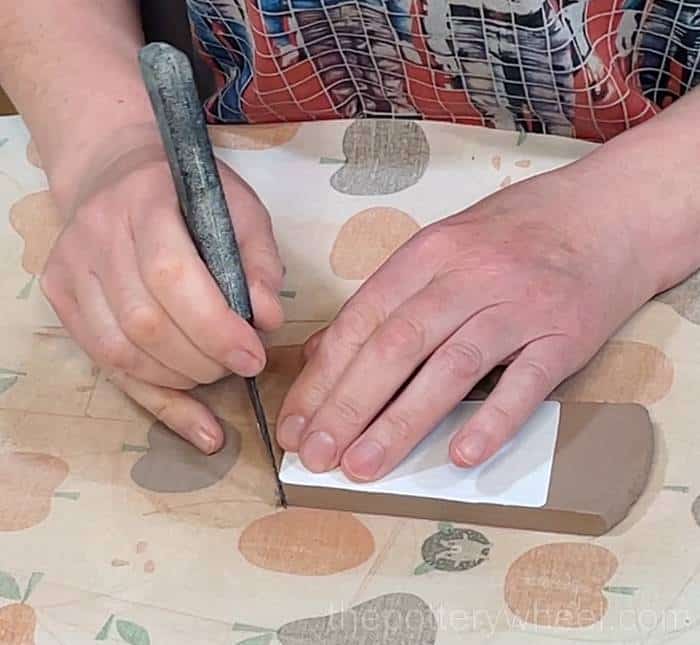
I use a straight edge to cut a section out of the center of the slab to make the rim shape. Then I push the center of the clay slab out leaving the rim behind.
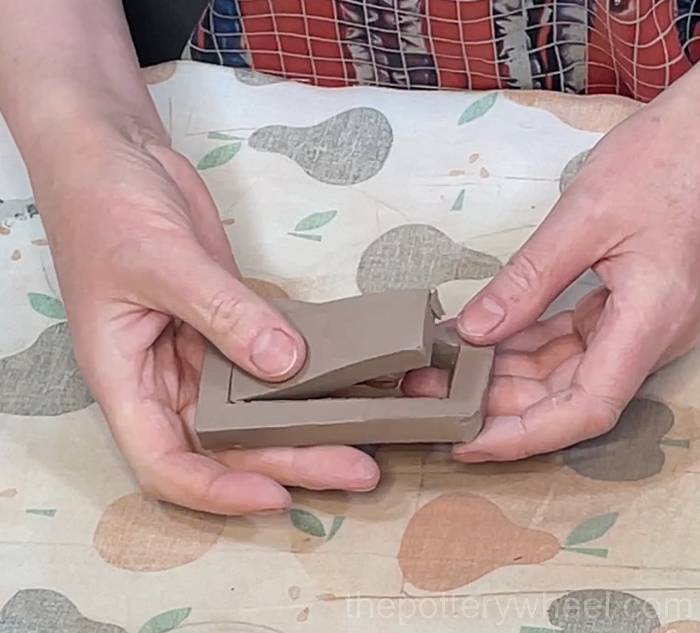
I put the small template onto the underside of the lid I made earlier and draw around the template. Then I slip and score the underside of the lid and rim.
Once both surfaces are prepared, I put the rim in position on the lid and press the two together gently. When they are bonded, I blend the rim onto the lid so the joint is neat and secure.
Fitting the Lid of the Teapot
I curve the lid round a little so that the shape of the lid matches the curve of the teapot.
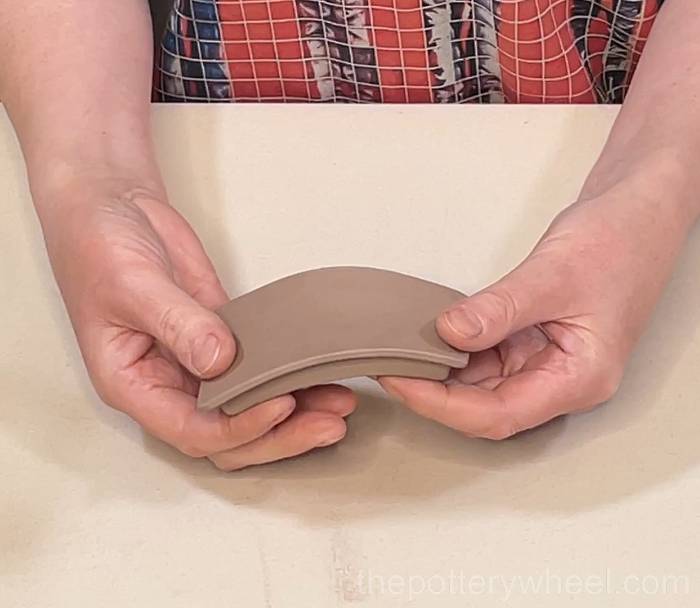
Then I put a piece of cling film over the opening of the teapot. This will stop the lid from getting stuck in the hole when the clay is still moist.
I then check to see if the rim of the lid fits the teapot. Although you’ve used the same template, it’s likely that the rim will need to be trimmed a bit so that it’s a good fit.
This lid isn’t a perfect fit yet, so I remove the lid and trim the rim a bit. Then I try the lid again to see if it matches the top of the teapot better.
Once the rim has been trimmed a little it fits snuggly into the teapot opening. I leave the clingfilm in place while the teapot dries out.
Adding a Knob to the Lid
You can make the knob of the teapot in whatever shape you like. For this slab teapot, I’m going to make a simple ball-shaped knob. I roll a small piece of clay into a circle and flatten one side of the ball with my fingertip so that it sits flush against the lid of the teapot.
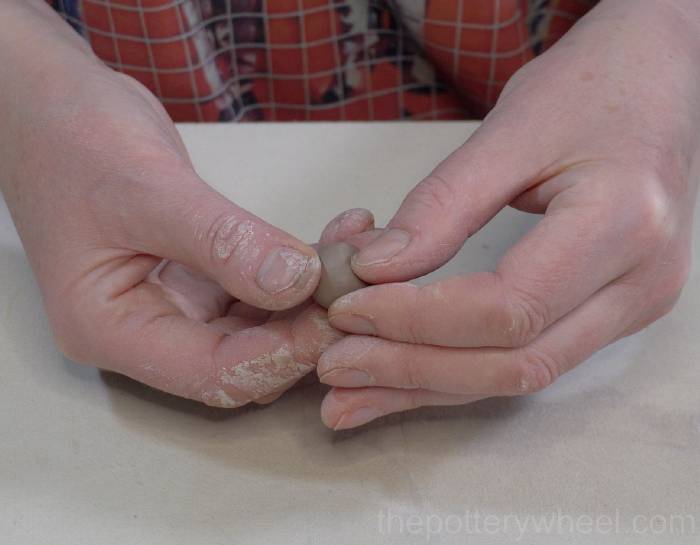
I attach the ball of the clay to the lid using slip and score.
Adding a Hole to the Lid
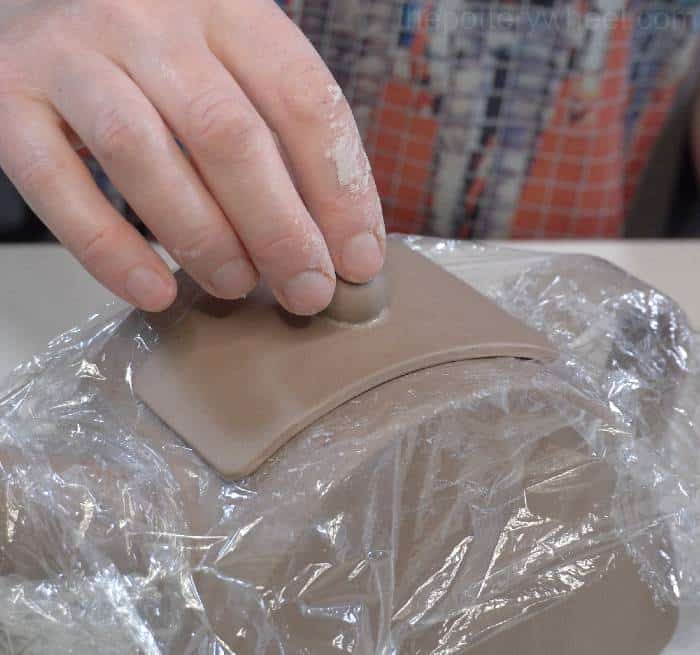
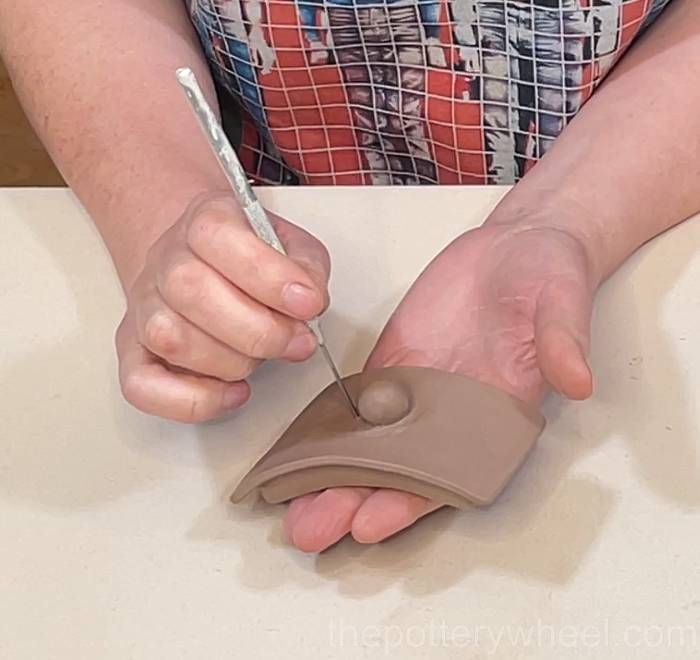
One final step in making the teapot is to add a small hole to the lid. Making a small hole is helpful because it allows air into the teapot as you are pouring tea. The air going into the teapot will replace the tea as it leaves the spout. This helps the tea pour smoothly rather than gurgling as it leaves the teapot (source).
When the clay is still fresh, I remove the lid and use my needle tool to poke a small hole in the lid behind the knob. I wiggle the needle tool around a little to make sure the hole is big enough so that it won’t close up as the clay dries and shrinks when it’s fired.
Drying and Firing the Slab Pottery Teapot
It’s important that the lid is in position as the teapot dries and is fired. If you let them dry separately the lid will shrink in a slightly different shape to the opening on the top of the teapot. As a result, the lid won’t fit anymore.
Top Tip
When clay dries it can curl up and warp. As the lid dries, you might find that the corners of the lid lift up and don’t fit the curve of the teapot perfectly.
One way to stop this from happening is to weigh the lid down a little as it dries. I took an old sock and cut it into strips. Then I sewed down the edge of the strips and filled each strip with dry rice. I then drape the long thin rice bags over the edge of the lid as it’s drying.
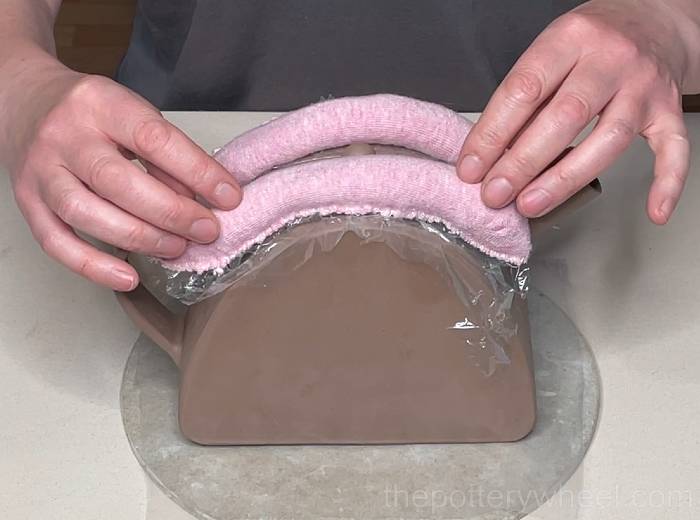
The rice bags are not heavy, but they have enough weight to keep the lid flush against the side of the teapot and prevent them from curling up and losing their shape.
The Final Step in Making Your Slab Teapot
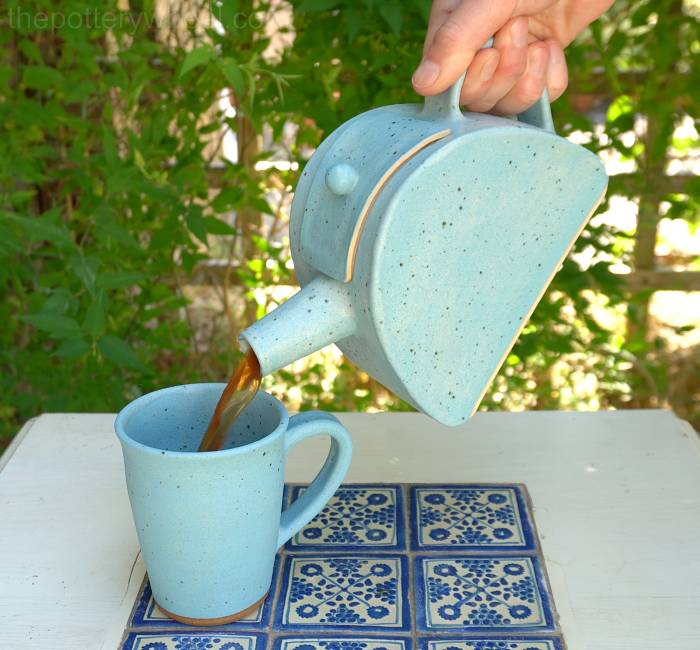
Boil the kettle, make a pot of tea, and enjoy your creation!
Making Your Own Slab Teapot Template
When I’m making a slab template, I normally start by sketching how I want the pottery to look once it’s been made.
I then figure out what slabs I’m going to need to make that shape. It’s a bit like figuring out a jigsaw puzzle.
I draw out the template pieces on paper and will then make a trial piece of pottery to see if the size is right and also to see if the pieces fit together. If the pot isn’t the right size or if the pieces don’t fit together well, I adjust the measurements and try again.
Creating a template that is the right size and shape can take a few practice runs. But once you have made a template with proportions that work, you can use it again and again.
To Make this Slab Pottery Teapot You will need
- Clay
- Roller guides
- A wide rolling pin
- Duck Canvas or Cotton Backed Table Cloth
- Rib Tool
- Clay knife
- Serrated rib tool or clay scoring tool
- Wooden pottery bats
- Flexible chopping board
- Clay hole cutter
- Banding wheel
- Wooden modeling tool
- Stylus tool
- Chamois leather
- Needle tool
Visit The Pottery Wheel Store
Fancy treating yourself to some homemade pottery? Looking for a unique gift? Check out my handmade pottery store…
Final Thoughts
If you are just starting out, and you don’t have many pottery tools, then a lot of the above items can be replaced by things that you will have around your house. For example, you can use an old kitchen fork as a clay soring tool, or a small teaspoon as a modeling tool.
Pottery tools are wonderful to have, but if you don’t have any yet, don’t let that stop you from making a slab pottery teapot. You can buy and collect pottery tools gradually as you go through your pottery journey. You don’t need to buy all of them at once.
4 responses to “Making A Slab Pottery Teapot – A Step-By-Step Guide”
-
I can’t wait to try this!
-
Great! let me know how you get on with it 🙂
-
-
Hi Lesley, I’ve just downloaded your Slab Teapot template and instructions they are so clear and well laid out, I’m really looking forward to making one. cheers Tina Fratta Maldon Victoria Australia.
-
Thank you so much, I hope you love the template
-


Leave a Reply