Your cart is currently empty!
How to Make a Slab Pottery Donut Vase
Published:
Last Updated:

Affiliate Disclaimer
As an affiliate, we may earn a commission from qualifying purchases. We get commissions for purchases made through links on this website from Amazon and other third parties.
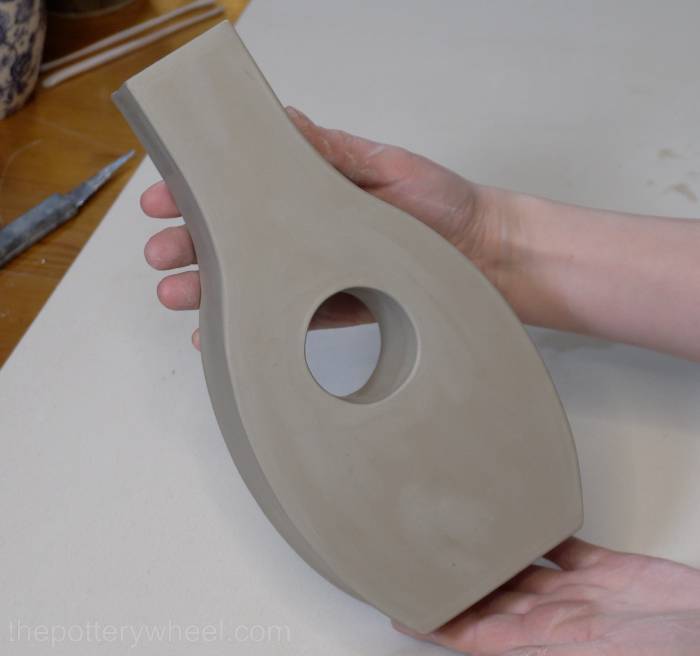
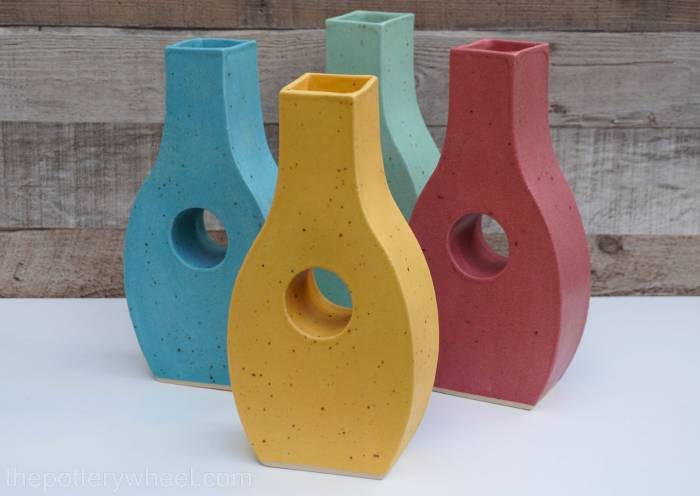
A donut vase is a vase with a hole in the center. You can make them on the potter’s wheel, but you can also build them by hand using the slab pottery technique.
Here is how I make an elegant donut vase, using a printable pottery template. If you like the style of the vase and you would like to make it, you can get a copy of the template here.
Step 1 – Rolling the Slab of Clay
The first step in making the donut vase is to roll a slab of clay. Rolling a clay slab is a simple process, but there are some tricks that can help you make a nice even slab. I’ve written a guide to rolling clay slabs. If you are new to slab pottery, you can check out that guide here.
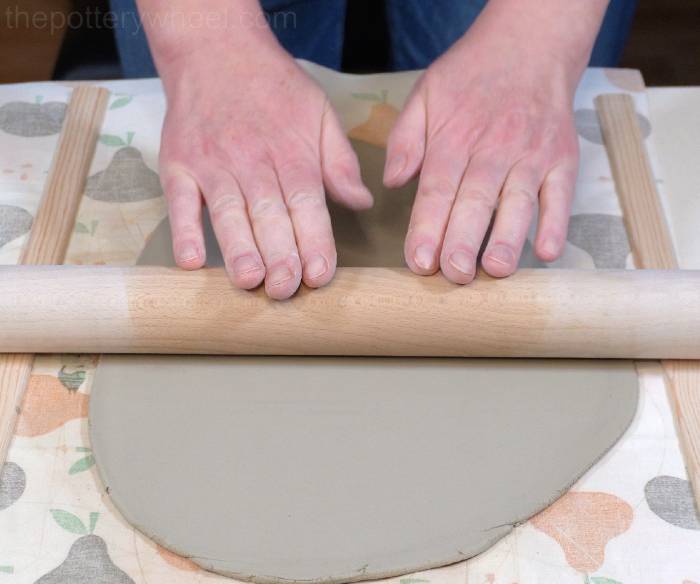
I use 3 mm roller guides to roll the clay out. The roller guides are the wooden sticks on either side of the clay slab. They help to roll the slab out at an even thickness. 3 mm is just a little thinner than 1/8th of an inch.
Once you have rolled out a slab of clay that is large enough for the template, run a large plastic pottery rib over both sides. This helps to get rid of any texture left behind by the rolling pin or work top. It also compresses the clay and helps to align the clay particles.
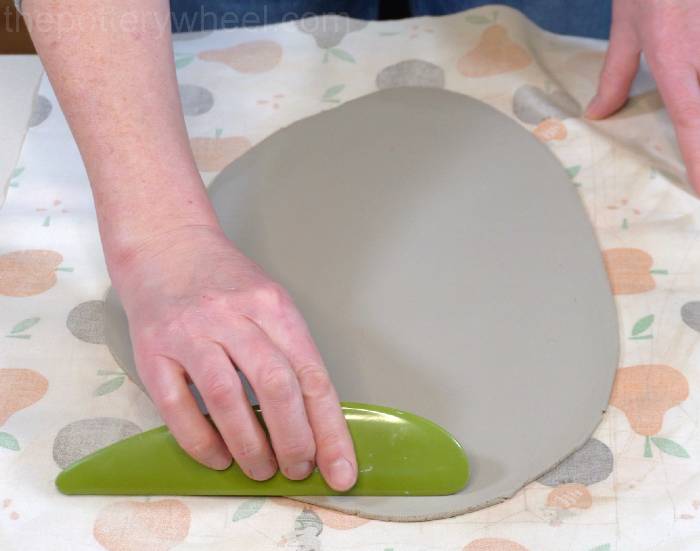
The tool that I’m using in this picture is called a platter tool. I’ll put a list of all the tools you might use to make this donut vase at the end of the article. You can jump to that section now if you’d like to.
Step 2 – Cutting Out the Side of the Donut Vase
This template can be printed onto regular A4 (Letter-sized) paper. Place the largest part of the template on the clay slab. This is the section of the template that makes up with large sides of the vase.
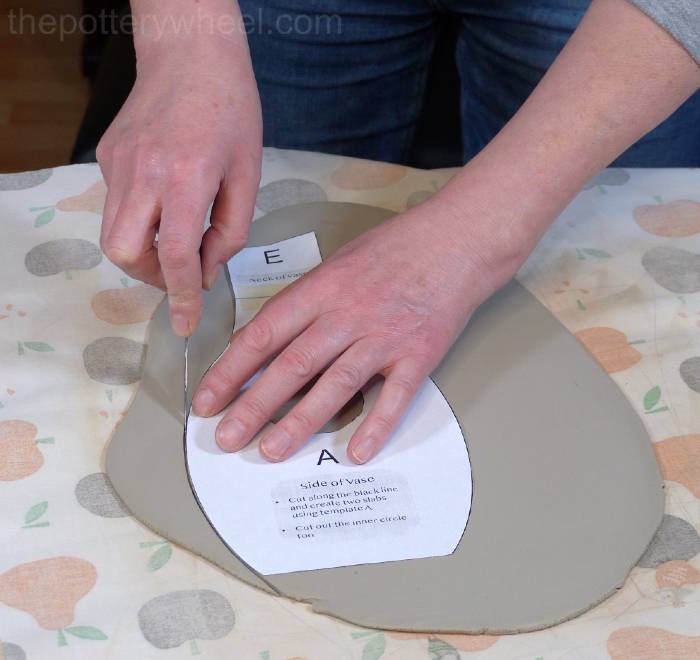
Cut around the template using your clay knife. When I’m cutting along the template I use the fingers on my left hand to steady the knife so that it follows a smooth curve along the side.
Any small offcuts of clay can be kept, wedged, and reused.
Also, cut out the circular shape in the middle of the large template. When you’ve cut around this circle, you will be able to peel the small disc of clay out of the center of the slab easily.
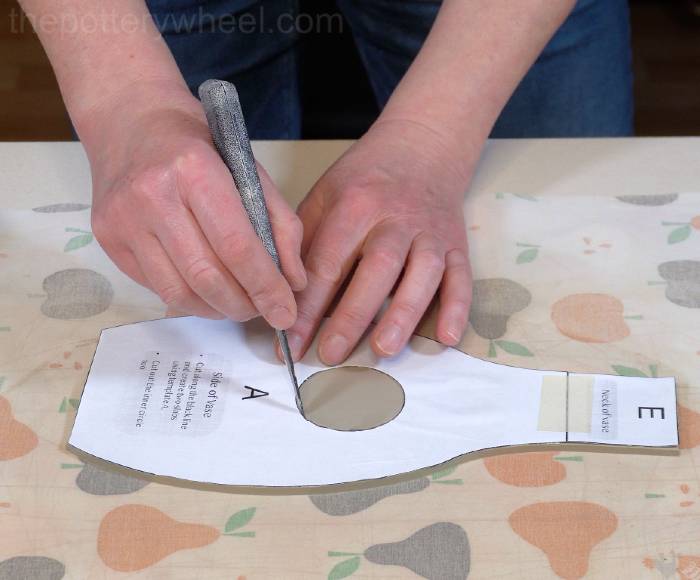
At this point, the clay slab will be too soft to handle. Transfer it onto a wooden drying board to allow it to firm up.
An easy way to move a soft slab is to put a piece of paper on top of it. Then put a flexible chopping board on top of the slab. I then slide my hand under the rolling canvas and flip the whole thing over.
It’s then easy to slide the piece of paper with the clay slab onto the wooden drying board.
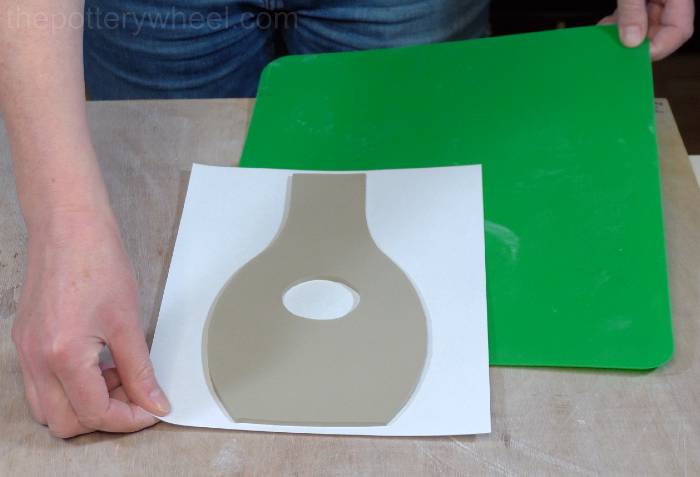
One way to speed up the drying process is to put another sheet of wood on top of the clay slab. This also helps to keep the slab flat as it firms up. Just be careful to check the slab regularly to make sure that it isn’t getting too dry.
Step 3 – Cutting Out the Other Parts of the Vase
The vase is also made up of a few other slabs of clay. Cut out each of these sections and also put them to one side to firm up too.
One of these sections is the base of the vase, which is a small rectangle.
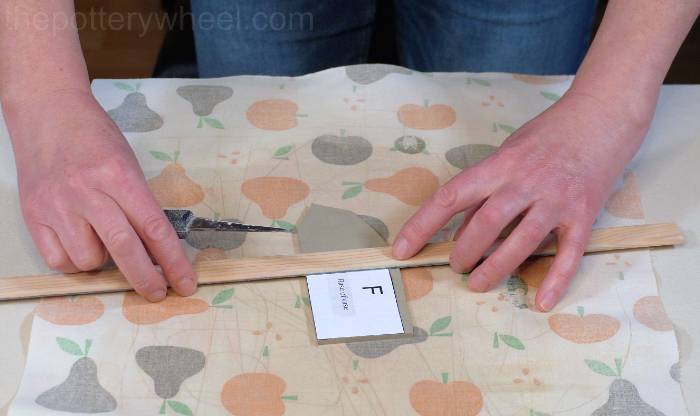
The second part of the vase is a rectangle of clay that is used to make the wall of the hole in the center of the vase.
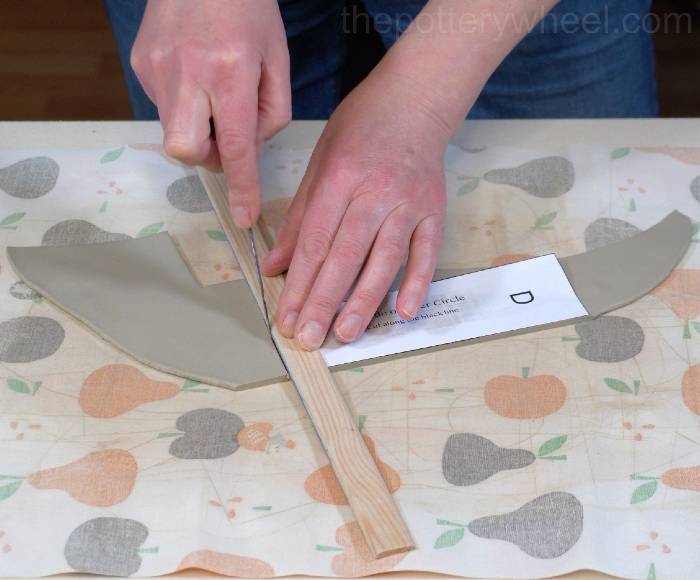
The third part of the vase are the two long strips of clay that go along the edge of the vase. These two long strips join the larger front and back slab.
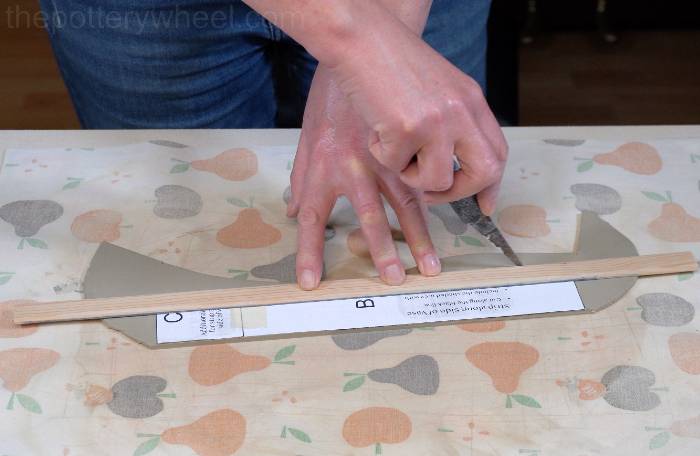
Cut out each of these additional sections and put them on the wooden ware board to firm up a little.
Step 4 – Preparing the Base of the Vase
The first two slabs that I join together are the base of the vase and one of the large sides. To prepare the base of the vase I bevel the two short ends of the rectangular slab.
I bevel these edges because they are going to join at an angle with the two side strips that run up the edge of the vase. Bevelling the edges means that they will fit together well like this…
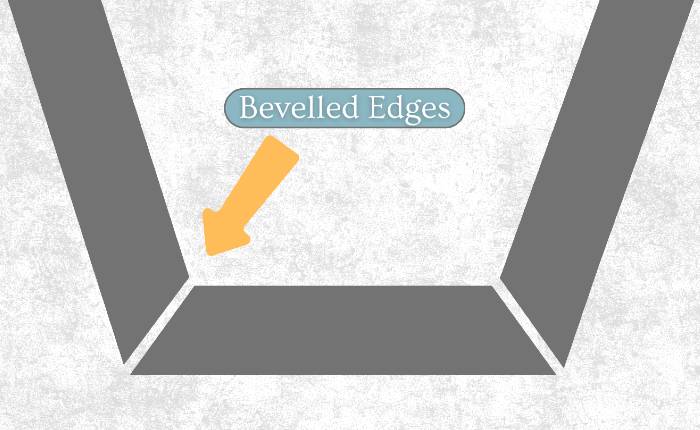
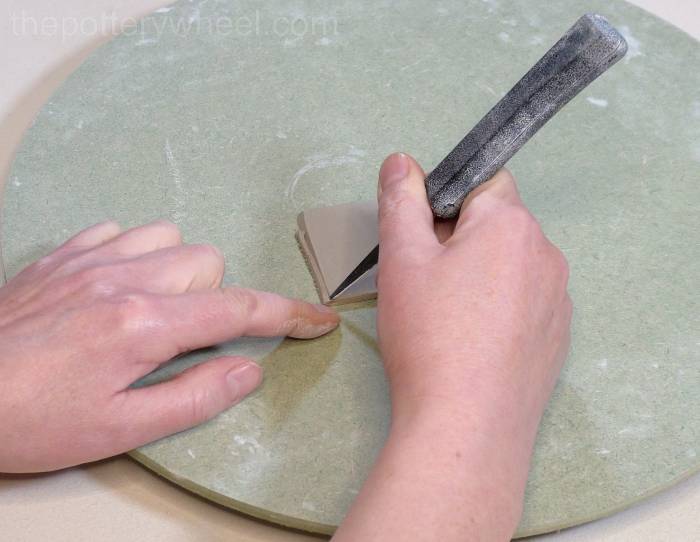
An easy way to bevel clay is to hold your clay knife at an angle on the edge of the clay. Carefully draw the knife down the edge of the clay removing a sliver of clay from the side.
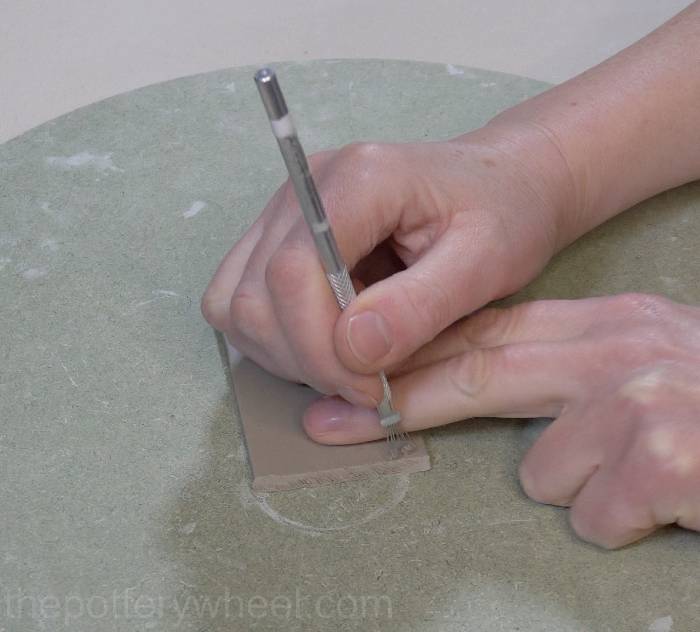
When you have bevelled the two short edges of the base, score into the edge with your clay scoring tool.
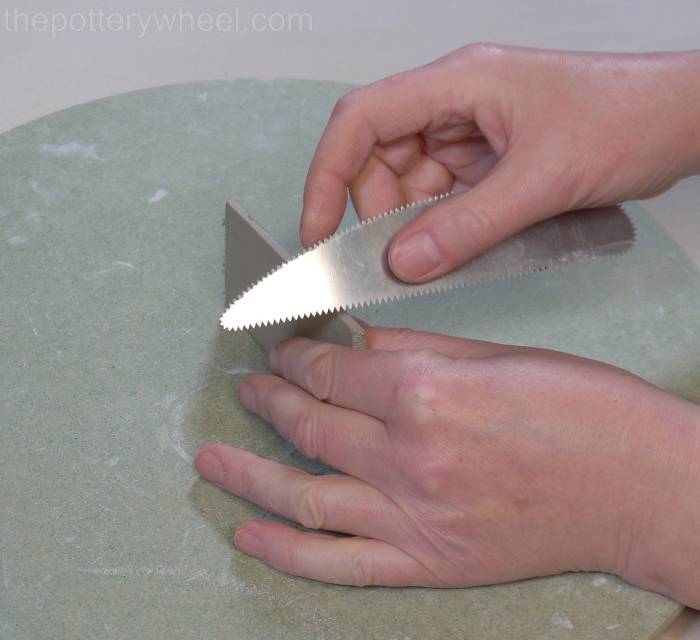
Also score one of the longer edges of the base with a serrated rib tool. If you don’t have a clay scoring tool or a serrated rib, you can use an old kitchen fork.
Scoring the clay helps to create a rough surface so that will key into another clay surface.
Step 5 – Attaching the Base to the Donut Vase
Score the bottom edge of the vase, as the base is going to join the vase at this point.
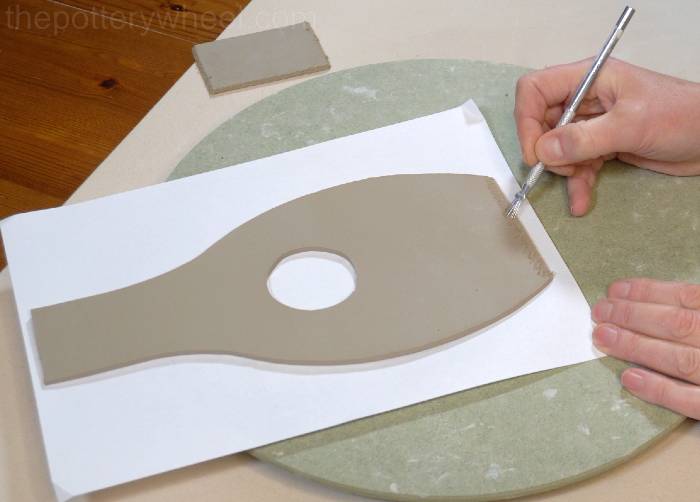
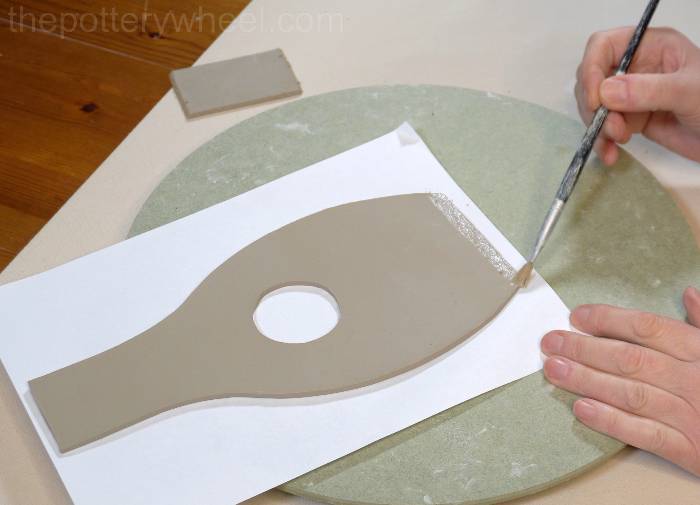
Paint clay slip onto the scored surfaces. Clay slip is a mixture of water and clay. It’s a liquid clay that acts as a glue so that the two scored surfaces will stick together. You can find out more about how to make clay slip here.
Make a small coil of clay and carefully put it into the corner of the join. There is a bit of a knack to making clay coils which you can read about here.
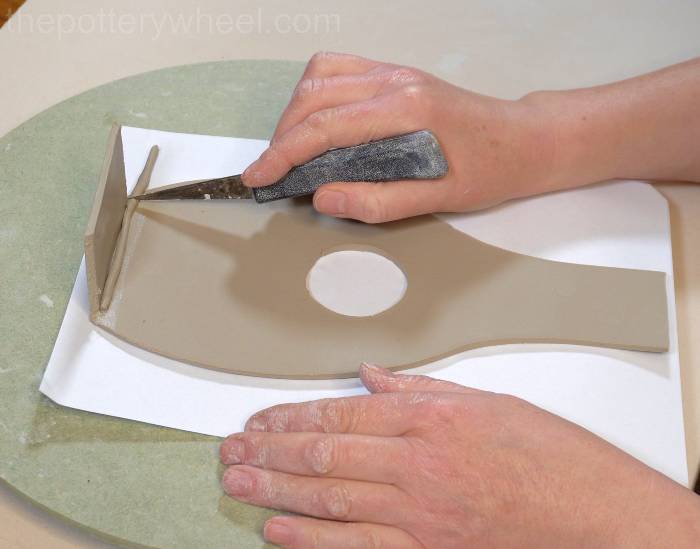
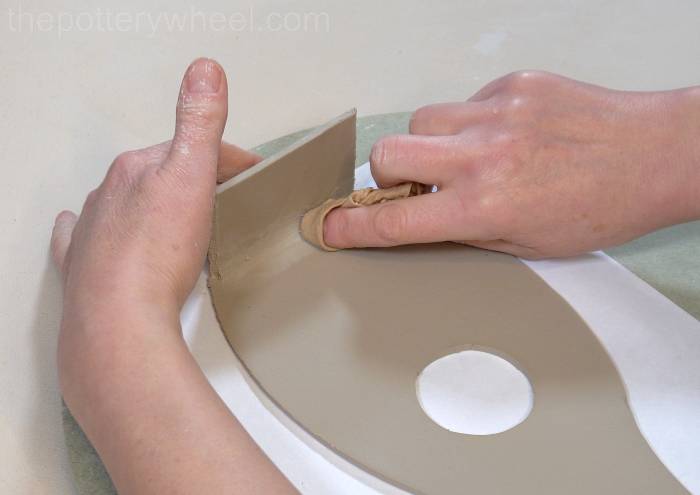
Trim the clay coil to length and then use a small wooden modeling tool to blend it into the join. The clay coil will make sure that the base of the vase is firmly attached to the side of the vase.
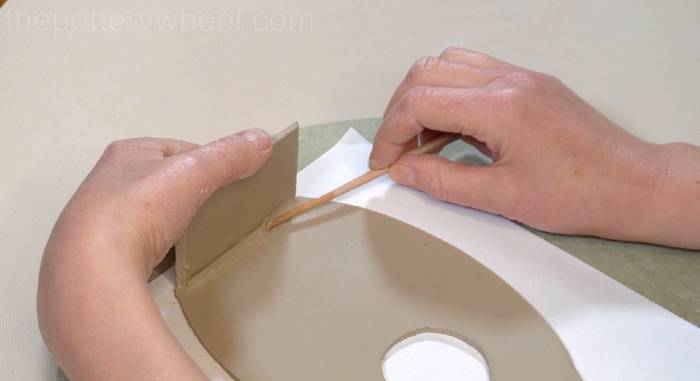
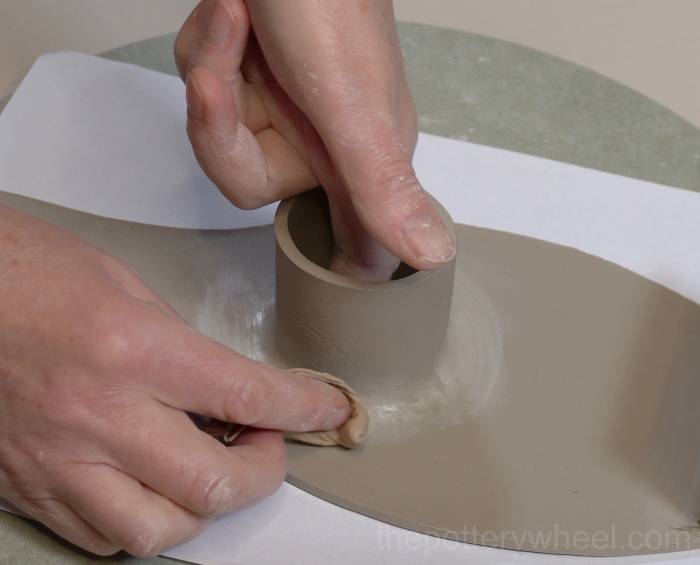
The wooden modeling tool will leave some marks on the clay. So, smooth those out with a small damp piece of chamois leather.
Step 6 – Making the Hole in the Donut
It’s now time to add the ‘hole in the donut’. The first thing to do is make a tube from one of the clay slabs you cut out earlier.
To make the tube, bevel the two short edges of the slab.
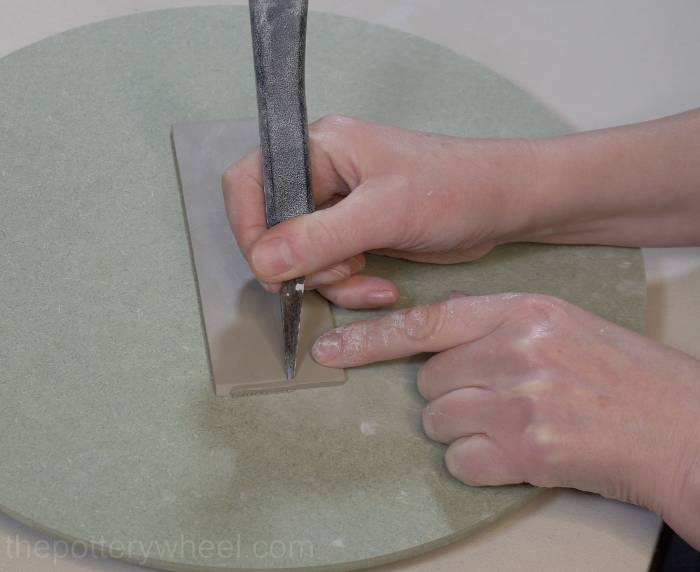
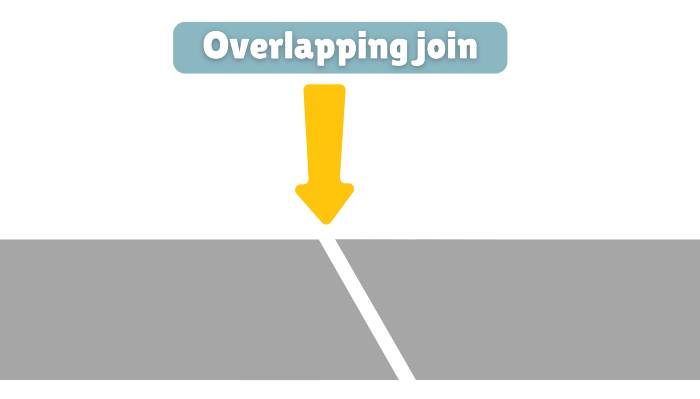
Bevel the edges to create an overlapping join when you curve the clay around into a tube.
Important Tip
After you have bevelled one of the edges, remember to turn the slab over before you bevel the other edge. If you don’t turn the slab over before you bevel the other side, you will end up with two edges that don’t overlap.
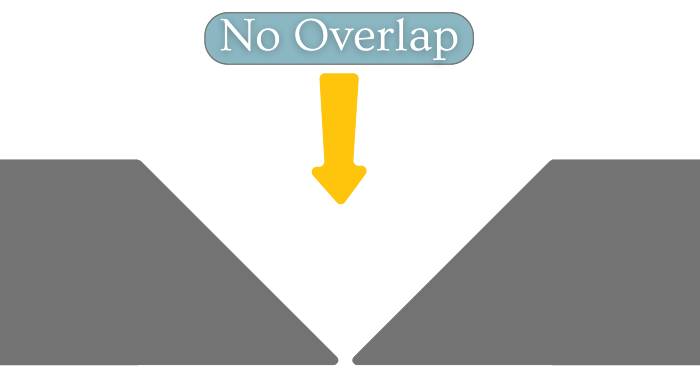
After bevelling both edges, score them with your clay scoring tool. Then curve the slab around into a tube shape and apply slip to both scored edges.
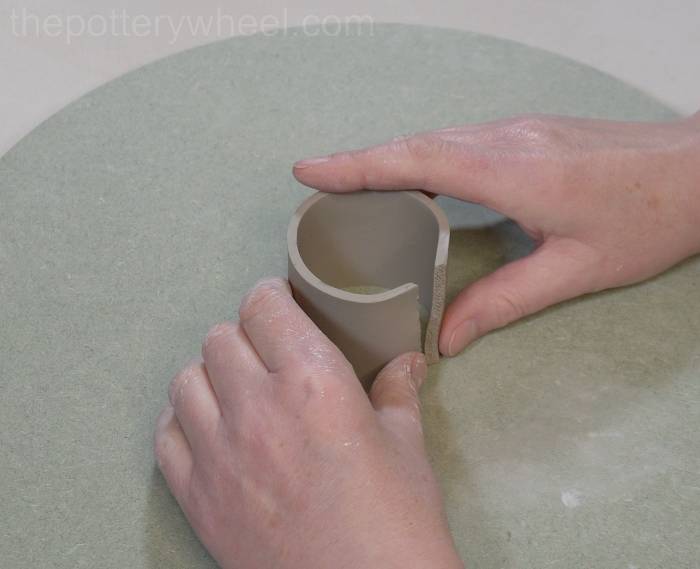
Once you have applied the slip, press the two edges together and join them to create a clay tube.
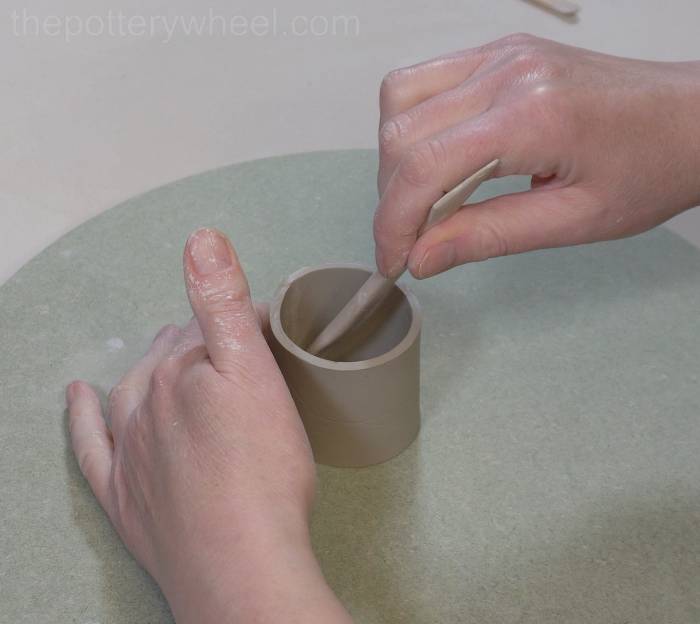
Blend the two edges together to make a smooth surface with a strong join.
Score the edge of the hole on the large slab of clay that will make up the side of the donut vase.
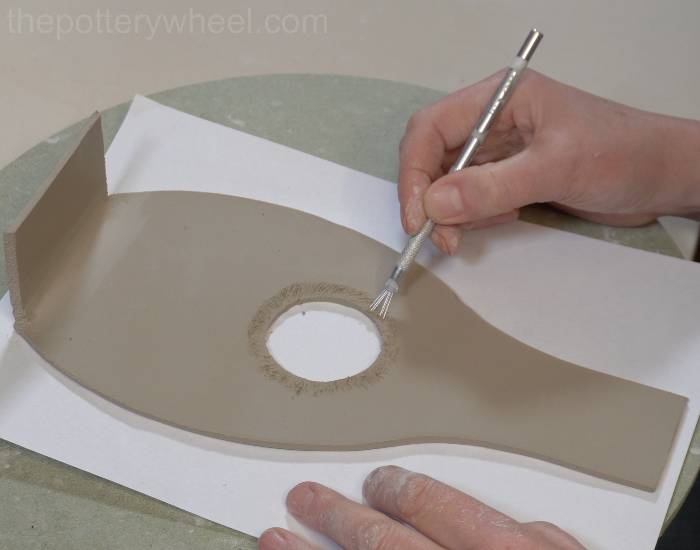
Then score one end of the clay tube that you made a moment ago.
Apply some slip to both scored surfaces, and then press the clay tube into position over the hole in the clay slab.
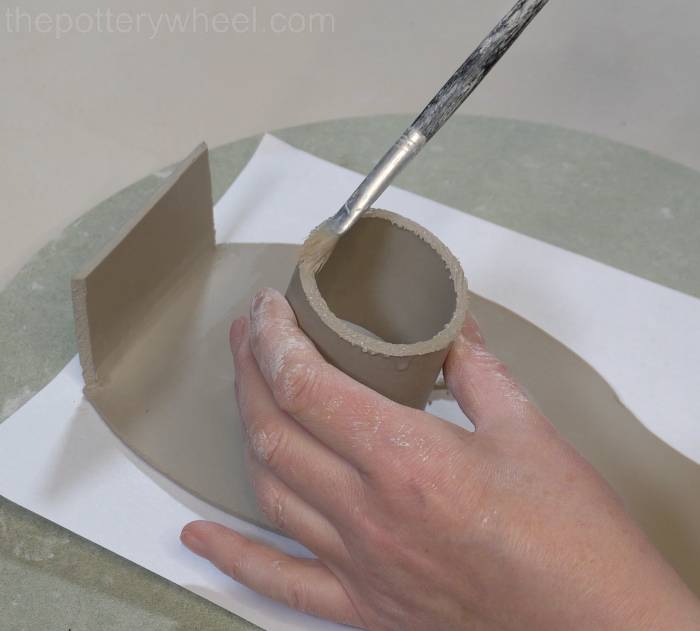
Blend the clay together with your wooden tool to create a smooth surface on the inside of the join.
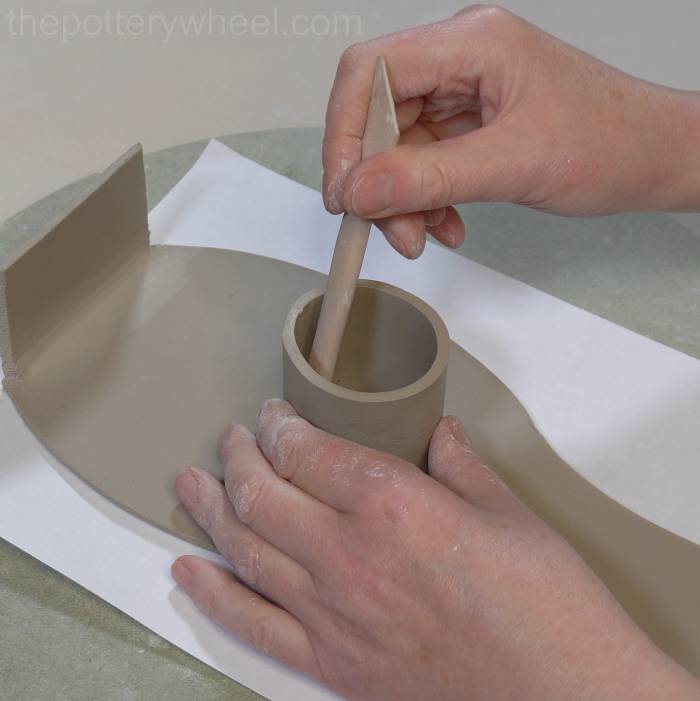
Put a small coil of clay around the join and press it into position.
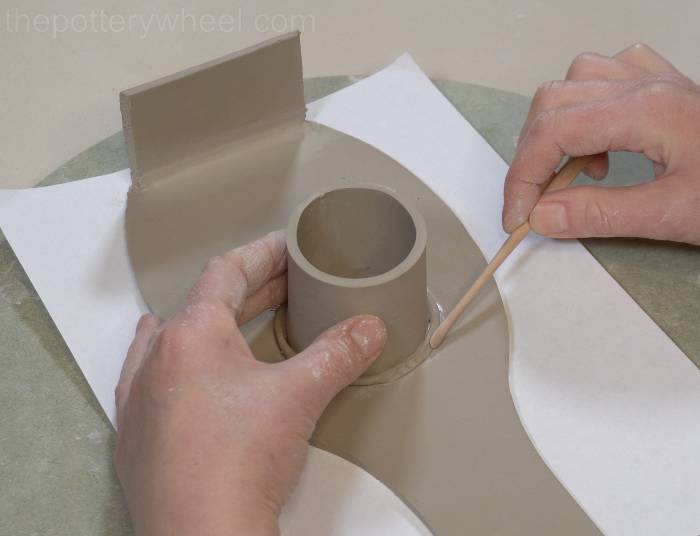
Blend the coil in with your wooden tool.
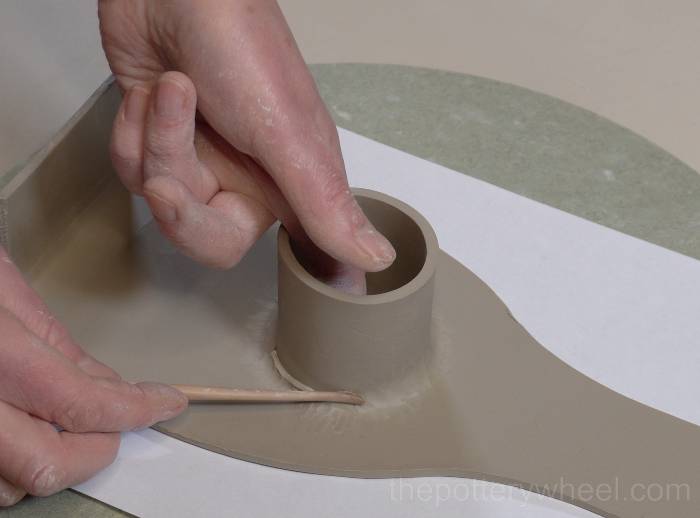
Wipe away any marks left behind by the wooden tool to create a smooth surface at the join.
Step 7 – Attaching the Side Strip to the Donut Vase
Earlier you made two long strips of clay. I call these strips the ‘side strips’, as they make up the two narrow sides of the vase.
Bevel one short end of a ‘side strip’. It’s important to bevel the short end because it’s going to join up with the edge of the base of the vase.
Score the beveled short end, and also one of the long sides of the side strip.
Also, score one of the edges of the side of the vase. Apply some clay slip to each of the scored edges.
Lower the side strip into position so that it starts to form a wall on the vase.
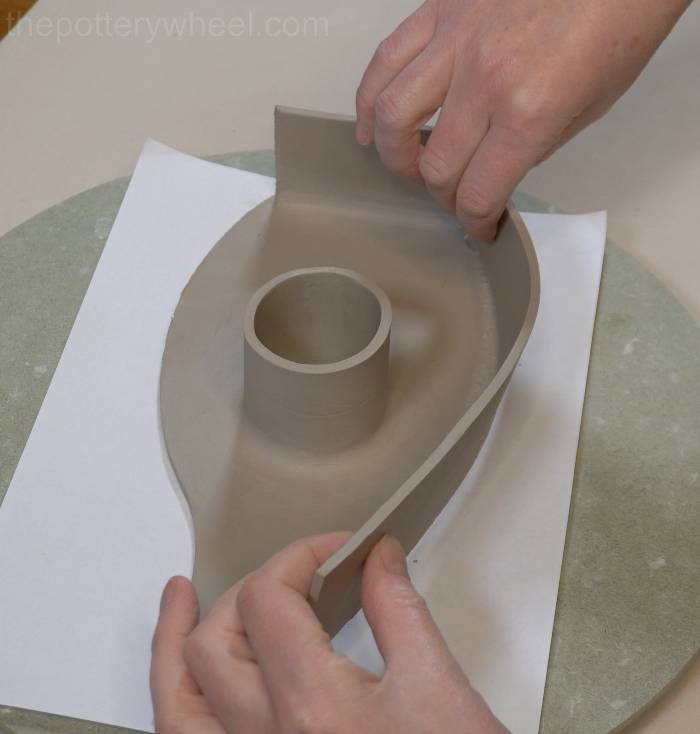
When the side strip is newly in place, you can still wiggle it around a bit to line it up properly and shape the side.
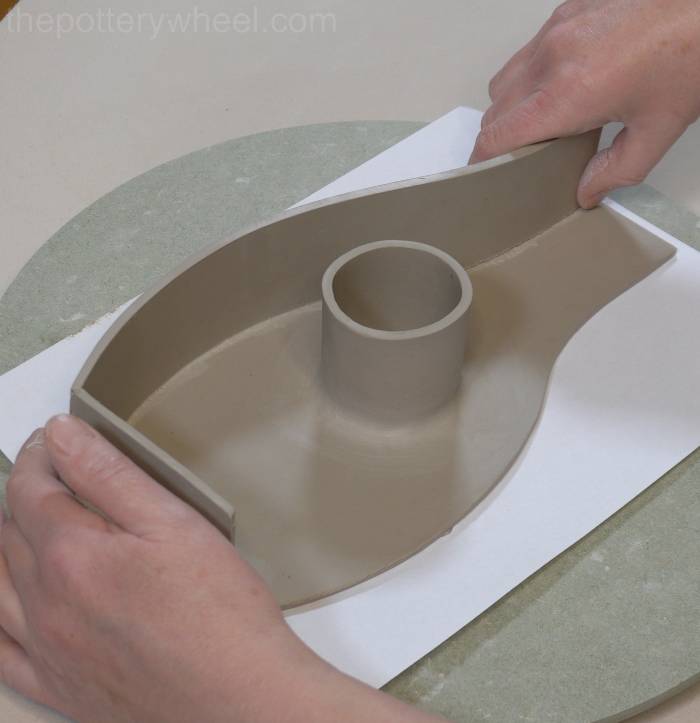
When the side strip is lined up well, press it gently into position. Then place a thin clay coil on the inside join.
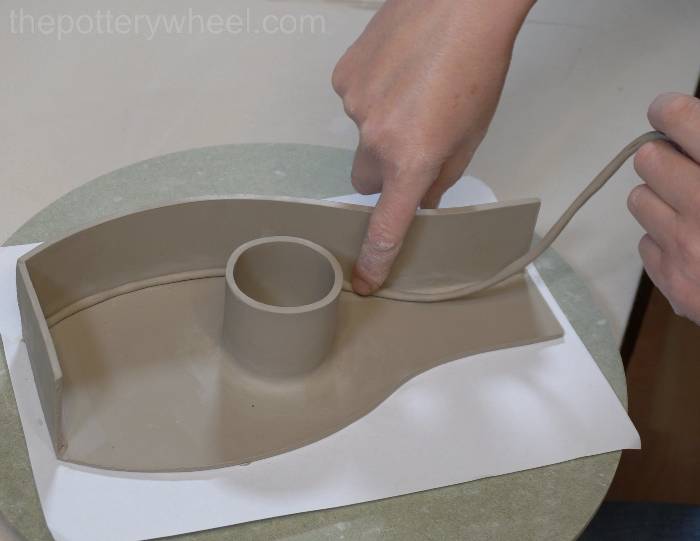
Support the outside surface of the side strip and use a wooden tool to blend the clay coil into the join. Once it is blended in, wipe it down with your chamois leather to tidy up the surface.
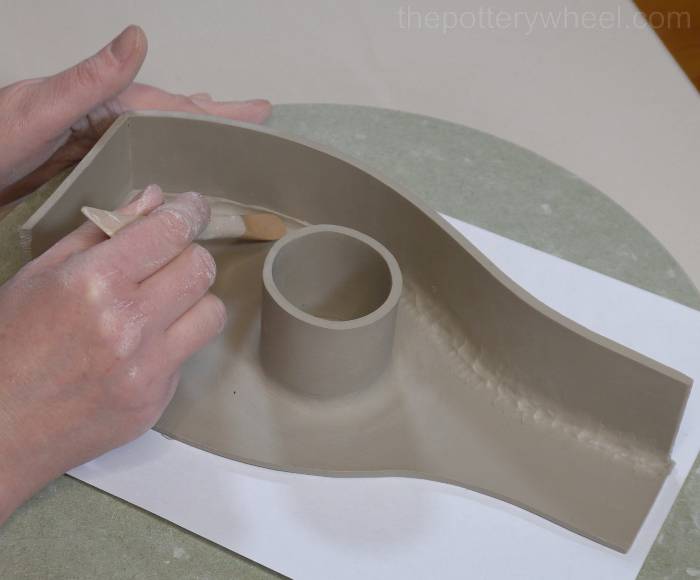
Strengthen the joint between the side strip and the base by adding a small clay coil in the same way.
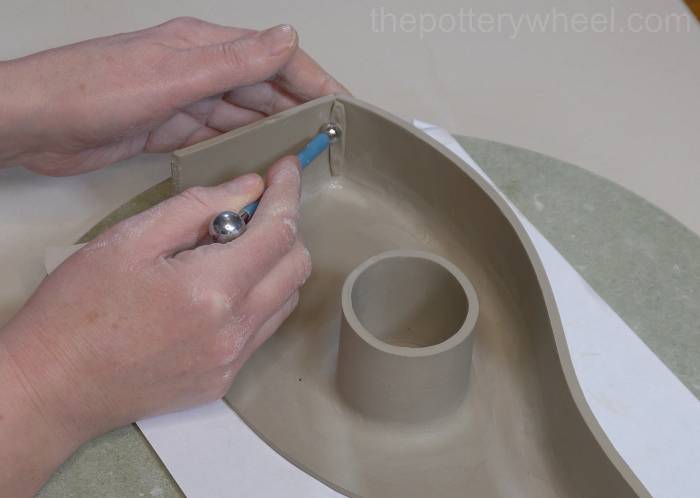
After adding the coils to the inside surface, start to blend the join on the outside surface of the clay too.
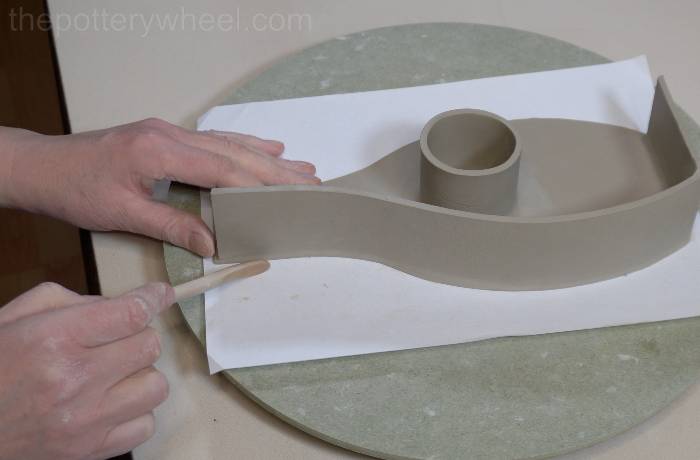
You can come back to blending and tidying the outside surface a little later. So, it doesn’t need to look perfect now. But it’s good to start the blending process at this point to make the join as strong as it can be.
Step 8 – Attaching the Second Side Strip to the Vase
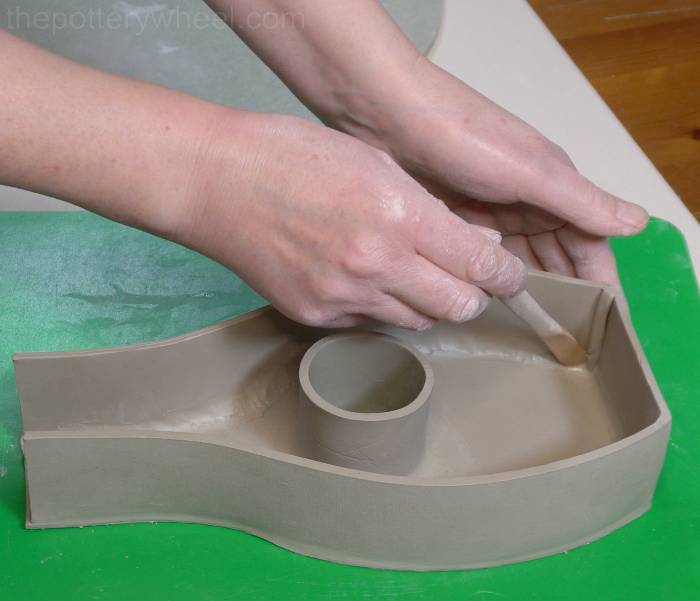
Attach the second side strip to the vase in the same way.
Important Tip
When you are applying the second side strip check that you are scoring the correct side. Bevel one short end, then line the bevelled edge up with the base of the vase. Make a mental note of which long side will be in contact with the large side of the vase. Then score that edge of the side strip.
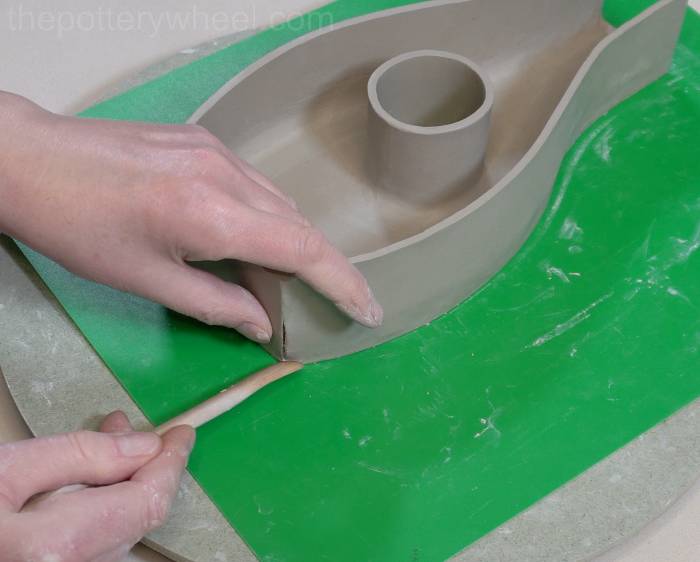
Sometimes when you are adding a clay coil to the inside of the join a gap can open up on the outside of the vase. If this happens, simply blend the gap closed with your finger or a wooden tool.
Step 9 – Adding the Second Side to the Vase
Score each of the upper edges of the vase. I find it easier to use a serrated rib to score the upper edges, but you can use a clay scoring tool too.
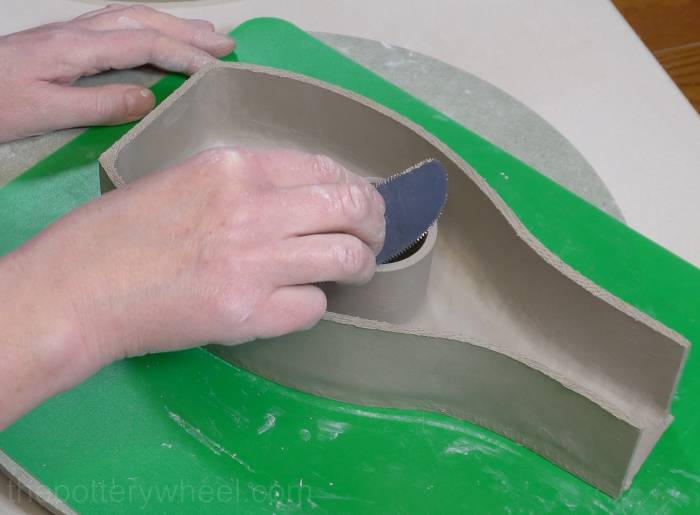
Also, score the edges of the second large side slab. Remember to score around the hole in the center of the slab too.
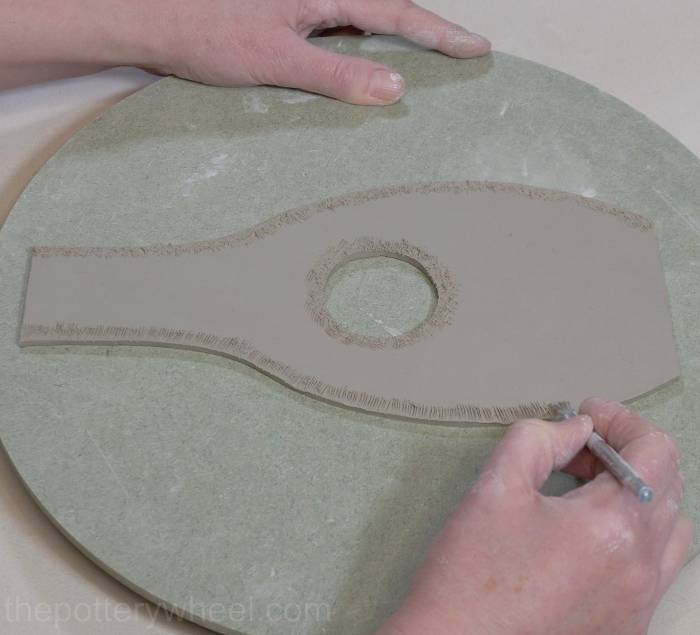
Apply some slip to each of the scored edges, then carefully lower the larger slab into place on top of the vase.
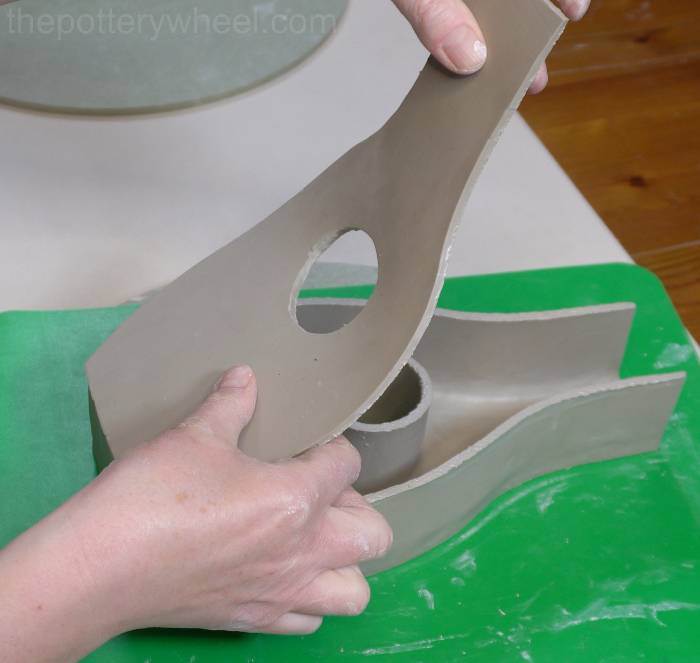
When you initially lower the slab into position, it might not be lined up perfectly. That’s ok. Before you have pressed the slab into place, you can still lift it and reshape the side strip so that they fit together better.
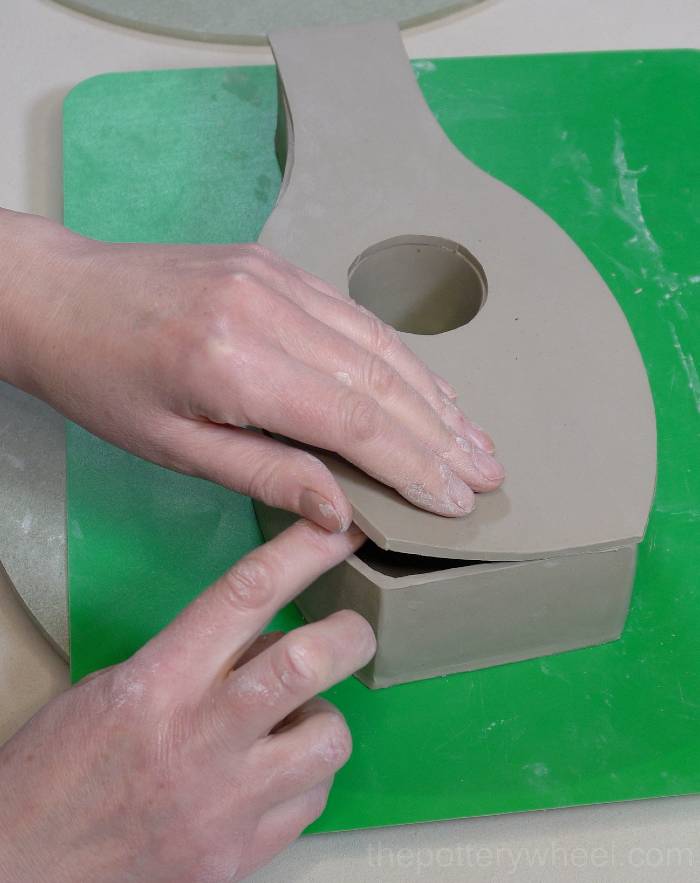
Once the side slab and the side strip are lined up well, you can press them together gently but firmly. Begin to wipe away any excess slip that has squeezed out of the join.
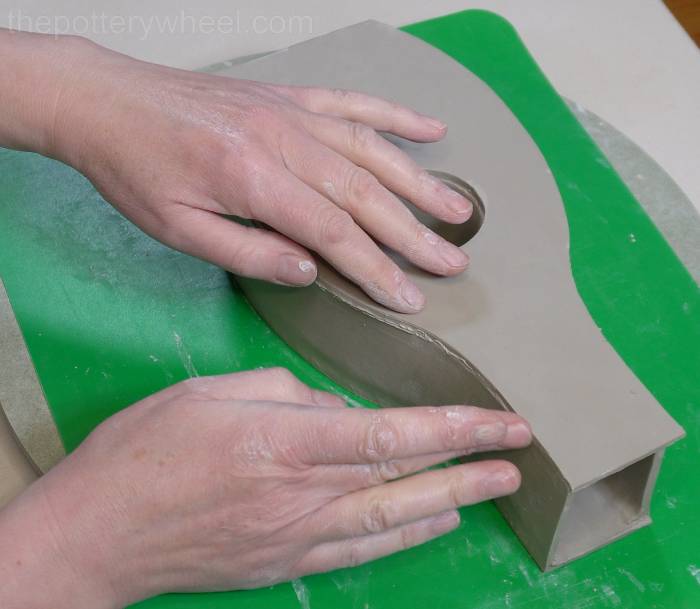
When the join feels relatively bonded together you can begin to blend the two surfaces together on the outside using a wooden tool.
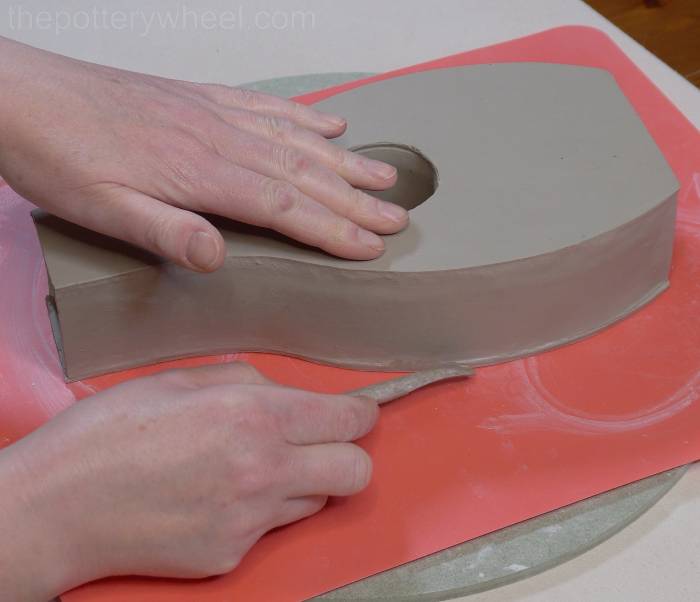
Because you can’t get your hand inside the narrow neck of the donut vase, it’s not possible to add a clay coil to this side of the vase. So, it’s important to press the two slabs together well and blend it carefully on the outside.
Step 10 – Tidying up The Edges of the Donut Vase
Now that the vase is assembled spend some time going over each of the outside joins and making sure that the slabs are blended in together well.
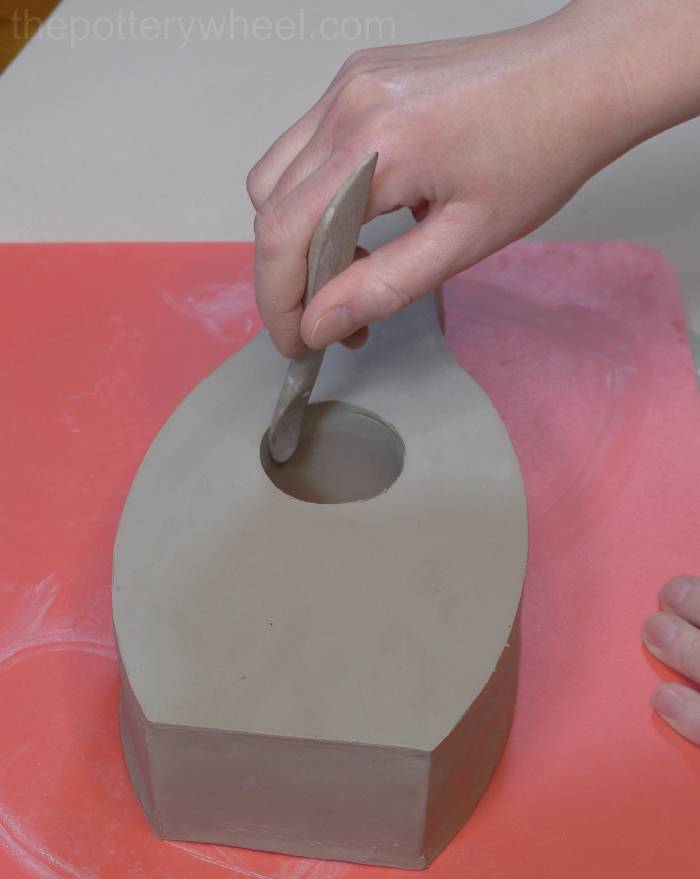
It also helps to go over each of the edges and soften them off to a nice rounded finish with a damp chamois leather.
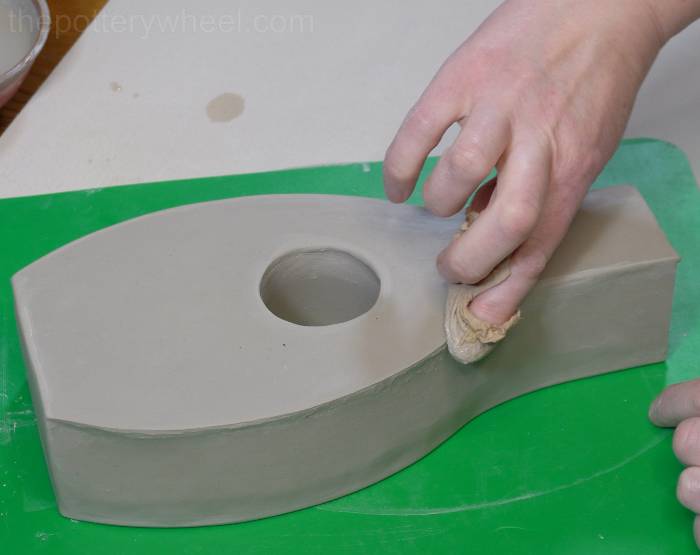
Step 11 – Finishing the Neck of the Vase
You might find that your slabs are not perfectly matched in size. Even when you use a pottery template, it can be hard to get clay slabs to be the perfect size. A clay slab only needs to stretch a millimeter and it won’t be the exact size that you want it to be.
Normally these tiny differences don’t matter. But with a shape like this donut vase, you might notice that the rim of the vase doesn’t align quite perfectly. Or you might find that the edges don’t align 100% perfectly. You might be a millimeter or so out.
Don’t worry if you are just a fraction out on some of the measurements and joins. You can always trim any excess clay off before you blend the slabs together.
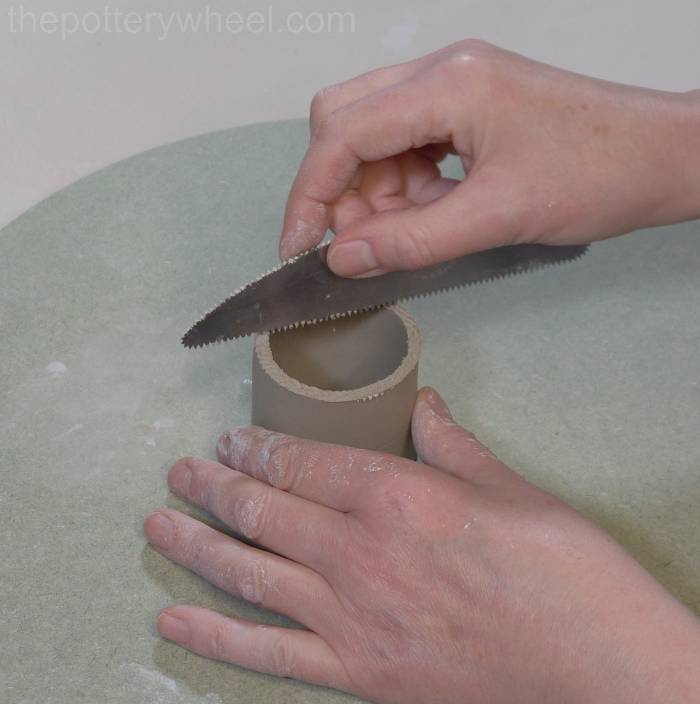
And, if you find that the slabs on the neck are not 100% aligned, you can remove some of the excess clay with a clay shredding tool.
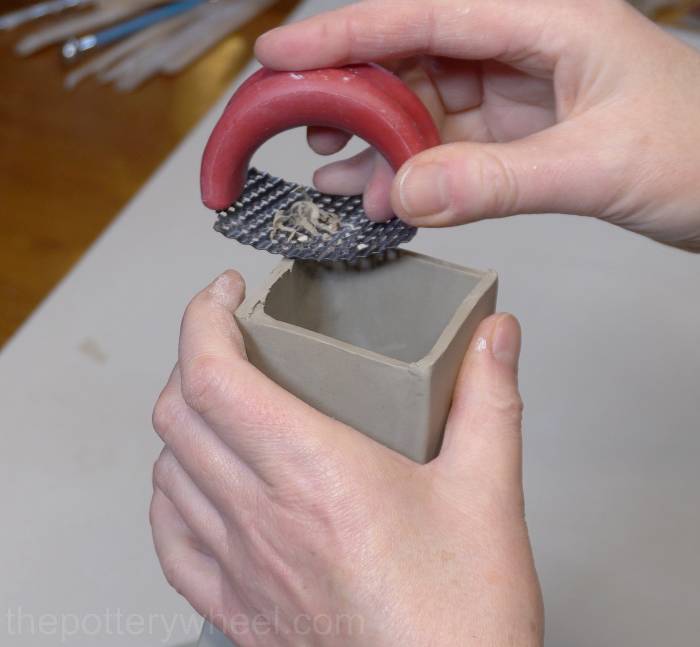
Hold the neck of the vase with one hand then use your clay shredder to remove some of the excess clay around the top edge. Do this carefully, so you don’t remove too much. You just need to shred until each of the clay slabs line up with one another to create a flush finish.
Wipe down the edge of the rim with your chamois leather to create a smooth edge.
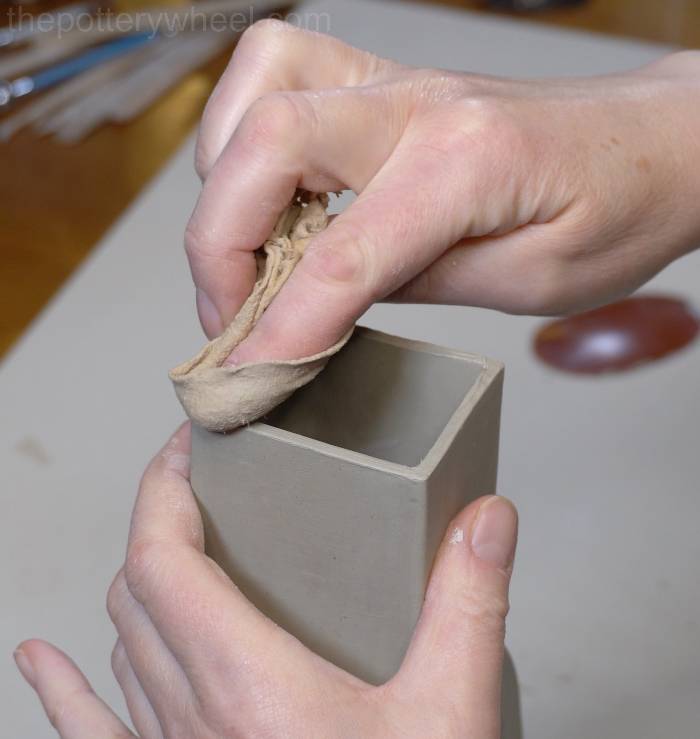
You will also notice that two of the corners on the rim have had a coil added and two have not. This is a small detail, but to make the corners match, and to strengthen the rim, I add a small clay coil to each of the two remaining corners.
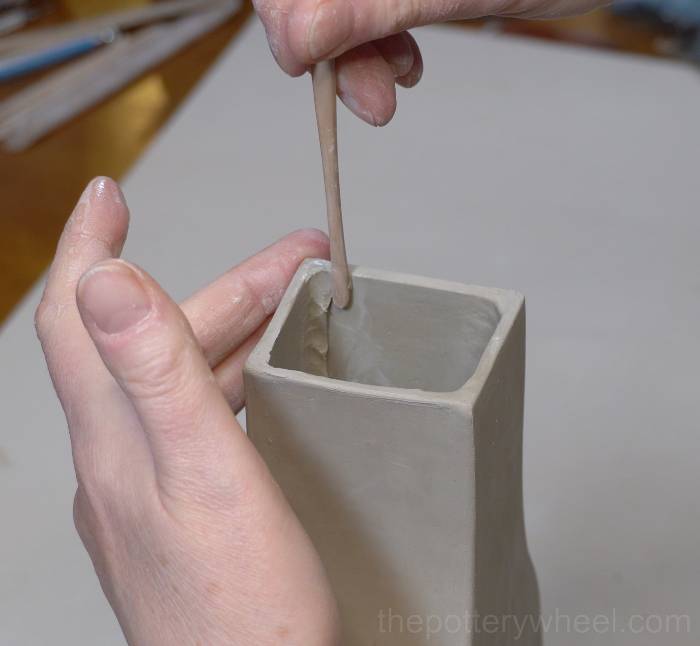
The vase is now ready to be dried and fired. It’s a good idea to cover the vase with a loose piece of plastic and dry it slowly. This will help to prevent the clay slabs from cracking and separating at the join.
Tools for Making the Donut Vase
- Clay
- Roller guides
- Wide rolling pin
- Canvas to roll on
- Platter tool
- Rubber pottery rib
- Clay knife
- Flexible chopping board
- Clay scoring tool
- Serrated pottery rib
- Wooden modeling tools
- Chamois leather
- Wooden pottery bat
- Banding wheel
- Stylus tools
- Clay shredding tool
Glazing the Donut Vase
If you are glazing pottery that has a rim that is wide enough to get your hand in, then you can glaze using a brush. But this vase is too narrow to brush the glaze on. You have a couple of options.
Glazing Option 1
The first option is that you don’t all of the inside surface of the vase. This option is fine when:
- You don’t want to use the vase to hold liquid. Perhaps you plan to use dried flowers, or maybe you don’t plan to use flowers at all.
- You have used a clay that vitrifies when it is fired. This means that the surface will be watertight even if you don’t glaze the inside surface.
Stoneware and porcelain clay become watertight when it’s fired at a high enough temperature. Earthenware clay doesn’t become completely watertight when it is fired and water will still seep through the vase.
Glazing Option 2
The second option is to use a glaze that you can pour into the neck of the vase. Pouring glazes are runnier than brushing glazes.
When you use a runny glaze that is suitable for dipping and pouring, you can pour the glaze in the neck (using a funnel), and then tip the excess out. That way, the whole of the inside surface of the vase will be glazed.
2 responses to “How to Make a Slab Pottery Donut Vase”
-
This is one of the best tutorials that I have read. I have been a potter for 8 years and I admit I have gotten a bit lazy in following the steps! What a great refresher course! The explanations were clear and the pics were instructive. Thanks again.
-
Thanks so much Debbie, I’m so glad it helped 🙂
-



Leave a Reply