Your cart is currently empty!
DIY Propane Kiln Ideas – 4 Easy Ways to Make a Propane Kiln
Published:
Last Updated:

Affiliate Disclaimer
As an affiliate, we may earn a commission from qualifying purchases. We get commissions for purchases made through links on this website from Amazon and other third parties.
Making a DIY propane kiln is a great way to start firing your own pottery. A lot of the time DIY propane kilns are used to glaze fire pottery using the raku technique. But some can also be used to bisque fire pottery. There are lots of different ways to make a DIY propane kiln. This article takes a look at 4 of these techniques and considers the benefits of each.
It’s worth mentioning, that most propane kilns fall into one of two designs. Some have a lid or door that can be lifted or opened. You access these kilns like a cupboard or a cooking pot, by opening the door or lifting the lid. Once the lid is open, you can lift the pottery out of the kiln’s internal chamber.
Other DIY propane kilns have a ‘top hat’ design. With top hat kilns, the whole upper part of the kiln is lifted off. The base of the kiln supports the pottery and remains in place. When the top half is removed, you have very easy access to the pottery.
Most of the ideas below can be adapted to work in either way. Depending on your preference. So, let’s take a look at the first of these DIY propane kiln ideas.
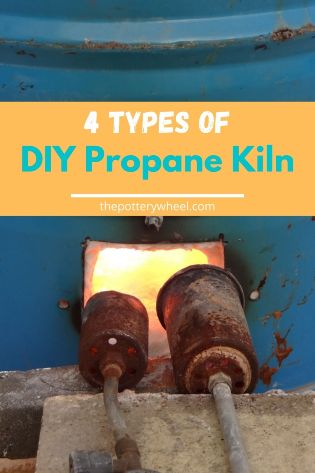
Making a DIY Propane Kiln
A propane kiln can be made from many containers that are made of refractory material. A refractory material is resistant to heat and doesn’t melt or deform at high temperatures.
One such material is steel. The melting temperature of steel is around 2500F (1370C) (source). Most DIY propane kilns are used for quick low-fire pottery firing techniques like raku.
These low fire methods are generally up to temperatures in the 1832F (1000C) range. Which is well within the temperature range of steel.
As such a suitable container for a simple propane kiln is a steel trash can. Here is what you need to know about using a trash can as a DIY kiln.
1) A Trash Can DIY Propane Kiln
Trash cans can be easily adapted to fire pottery. Many of the steel trash cans are made of galvanized steel. This is steel that is coated in zinc to protect the metal from corrosion.
When galvanized steel is heated the zinc creates a toxic fume. These fumes have been found to be hazardous to metal workers who repeatedly inhale the zinc oxide fumes. (source)
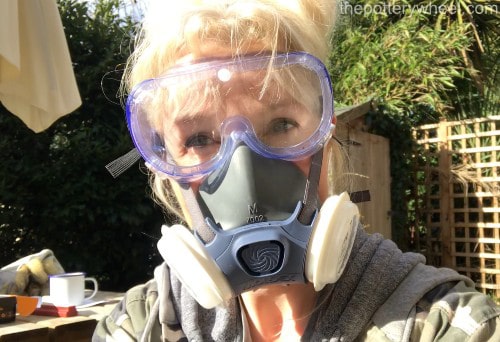
I use a DIY propane kiln that I made from a steel trash can. However, I always fire it outside in the open air and I wear a respirator.
Most of the time trash can propane kilns are used for raku firing. This involves removing the pottery from the kiln using tongs, whilst the pottery is still hot.
There are a couple of ways you can make a propane kiln out of a trash can. The simplest way to do this is to use the lid of the can as the door of the kiln. As such, you are simply heating up the trash can. Then when the kiln has reached the required temperature, you can lift the lid to remove the pots.
Alternatively, you can cut the base off the trash can and use this as a plinth for your pots. The entire top part of the can is then movable and can be lifted like a ‘top hat’ kiln. This is a less simple design, but it does give you better access to the red hot pottery.
Insulating Your Trash Can Kiln
Whichever design you choose, you will need to line the trash can with ceramic fiber. This is an effective insulating material and it’s handy to use for a DIY kiln because it’s easy to cut.
Ceramic fiber is another thing that needs to be handled with care. When you are working with it the fibers crumble and become airborne. If the fibers get under your skin they are irritating. So, it’s important to wear gloves when you work with it.
But also, if you inhale ceramic fiber particles it is a health hazard. Therefore, it’s important to wear a respirator when you work with it. You can buy body soluble ceramic fiber which is less of a hazard.
This is because if you do accidentally inhale some fibers, they will dissolve rather than lingering in your lungs. Body-soluble ceramic fiber is a bit more expensive than standard ceramic fiber. But it is worth the expense.
Adapting the Trash Can
To transform your trash can into a DIY kiln, you can do the following:
Cut a square just above the bottom edge of a 32-gallon steel trash can. The hole needs to sit a couple of inches above the bottom and should be around 4 x 4 inches. Cut a hole of the same size in the lid of the can.
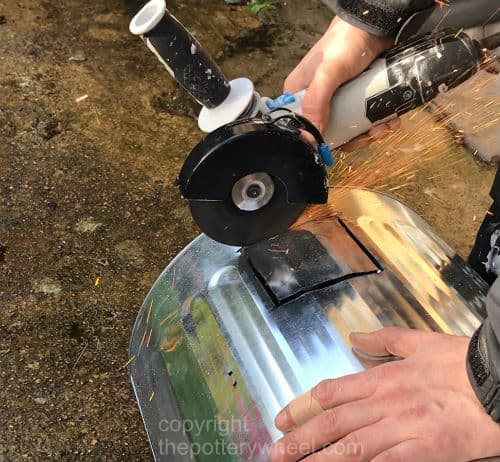
To insulate the kiln, cut out the right-sized pieces of ceramic fiber to cover the walls, base, and lid. These sheets are then attached to the inside surface of the kiln. It helps with insulation to double-line the trash can with two layers of ceramic fiber.
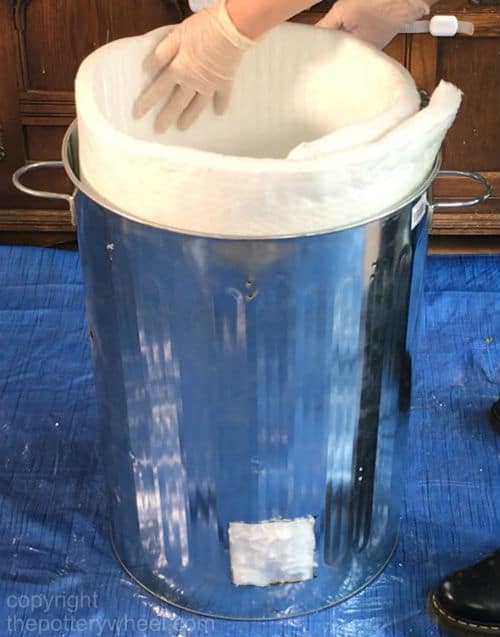
Attach the fiber by firstly drilling some holes in the walls and lid of the kiln. Fix the ceramic fiber to the walls and lid using nichrome wire. Nichrome wire is made of nickel and chromium and it resists heat and oxidation. (source)
The nichrome wire is pressed through the drilled holes and ceramic fiber and then twisted to form a knot. You can protect the ceramic fiber from being crushed by the wire using ceramic buttons. These are just button-shaped discs of bisque-fired clay that you slide onto the nichrome wire.
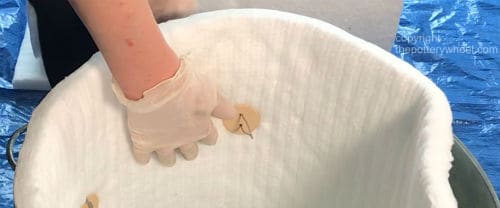
Once attached, you need to cut out the sections of fiber that are covering the burner port and flue. These cut out easily using a craft knife or a Stanley knife.
And that, in a nutshell, is how to transform the trash can into a DIY propane kiln. Here is a short video overview of the process. If you’d like a fuller step-by-step guide on how to do this, check out my YouTube video.
Using the Trash Can Kiln
To heat the kiln, a propane burner torch is positioned at the burner port at the bottom of the kiln. It is best to position the torch an inch or so away from the entrance. This allows air to be drawn into the kiln.
If you put the burner too close, less air gets in. You may find that the kiln struggles to heat up. And it is more likely that a reduction atmosphere will be created in the kiln.
The base of the kiln gets hot, so it’s a good idea to position it on some bricks. Hollow cinder blocks are ideal because they raise the kiln of the ground and provide some airflow underneath.
When I’m using my trash can kiln, I tend to stack bricks up around the side too. This protects the burner flame from any gusts of wind.
You can monitor the temperature in the kiln using a thermocouple. The easiest way to do this is to drill a hole in the side of the kiln, about halfway up. The hole needs to be around half an inch in diameter.
A thermocouple can then be inserted into this when firing. This will enable you to get a reliable temperature reading from an attached pyrometer.
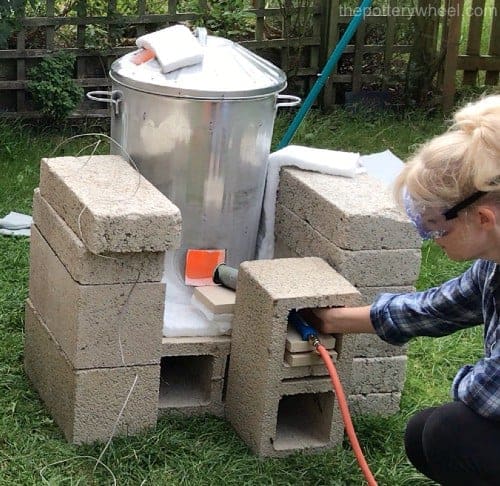
If you are raku firing, once you have reached your target temperature, you can lift the lid of the kiln. Be sure to wear safety gear when you do this. That includes suitable safety goggles, gloves, and a respirator.
You can lift the lid with a pair of raku tongs, and place it on the ground. Then you can lift the hot pottery out using the tongs. Place the pots in your nearby reduction container to burn and then cool.
The Top Hat Trash Can Kiln
It can feel a bit awkward lifting hot pots out of the top of the kiln as described above. You have to angle the tongs in and down into the kiln and it can feel a bit clumsy. As an alternative, you can make a ‘top hat’ style DIY propane kiln.
To do this, you simply turn the trash can upside down. The base of the trash can will then become the top of the kiln. And the top edge of the trash can sits on the ground and forms the base of the kiln.
As with the above description, you need to cut a 4 x 4 inch hole 2 inches above the bottom edge of the kiln. Cut a similar-sized hole in the base of the trash can, which is now the top of the kiln. This functions as a flue.
The trash can needs to be lined with ceramic fiber as described previously.
Using the Top Hat Kiln
This DIY propane kiln is heated in the same way as the previous design. Namely, the propane burner is directed into the burner port at the base of the kiln. The difference is that once you have reached the target temperature, the whole kiln is lifted off. This gives you good access to the hot pottery underneath.
Because the trash can is upside down, its original handles will be at the base. So, when you are making the kiln you will need to weld some more handles on at the top of the kiln. If you weld a handle on either side, you can lift the trash can off. The handles will be extremely hot, so you need to wear heat-resistant gloves.
With this design, it’s helpful to place the kiln on hollow cinder blocks to raise the kiln off the ground. A couple of sheets of ceramic fiber are then put onto the cinder blocks to create the base of the kiln. These sheets also stop the cinder blocks from getting too hot and shattering. (source)
The pots are then positioned on a kiln shelf that is raised on stilts. The flame from the burner is directed underneath the kiln furniture.
2) A Wire Mesh DIY Propane Kiln
With a trash can kiln, you rely on the size and shape of the trash can. The trash can determines the capacity of your kiln. However, there is another way to make a DIY propane kiln that gives you a lot more flexibility.
This method involves building the body of your kiln from metal mesh and lining that mesh with ceramic fiber. One of the most well-known designers of these kilns is Ian Gregory, a British sculptor.
Making a Wire Mesh DIY Propane Kiln
Wire mesh kilns can be made in different shapes and sizes. The simplest design is a box-shaped kiln made out of 5 panels of wire mesh.
The kiln is constructed by first attaching ceramic fiber to 5 panels of wire mesh. The mesh is also known as Weldmesh panels. Panels of 2 x 2 feet are a good size. This will give you a decent-sized kiln, without being too large to heat efficiently.
The ceramic fiber is attached to the panels, using the ceramic buttons and nichrome wire, as described above. It’s important that the ceramic fiber is cut a little larger than the panel.
Oversizing the fiber means that when you join the panels together, the fiber squashes together. This creates a good seal at the edges of the kiln. Double lining the ceramic fiber improves insulation too.
Four of the panels are joined together using strong metal clips. The kiln is positioned on a brick base that is covered with an insulating layer of ceramic fiber. The remaining panel is used as a lid to the kiln.
A hole is cut in the ceramic fiber a couple of inches from the base of the kiln. This acts as the entry point for the propane burner flame. A flue can be created on the top of the kiln but placing the lid a little to one side. This creates a gap in the lid that can be increased or decreased depending on the airflow required.
Different Wire Mesh Designs
Wire mesh can be bought in rolls that are a little more flexible than the panels. The technique described above can be adapted to be used on kilns of different shapes and sizes.
For example, ceramic fiber can be attached to a length of wire mesh. This is then bent round into a cylinder shape, to make a circular kiln.
Circular kilns can be made in two main sections with another section to work as a chimney on top. The burner port is cut into the ceramic fiber on the bottom section. And the pottery is placed on a kiln shelf that is positioned on kiln stilts in the lower section. The flame from the burner is directed under the kiln shelf.
Once the kiln reaches temperature the upper section is lifted away like a top hat kiln. This allows access to the hot pottery in the lower section. The lower section is shorter than the upper section.
3) A Shopping Cart DIY Propane Kiln
Another simple variation of the wire mesh kiln is a DIY propane kiln made from a shopping cart. I know it sounds a bit out there, but a shopping cart really is just a premade mesh container. This can be lined with ceramic fiber in the same way as a homemade wire mesh kiln.
To make a DIY propane kiln out of a shopping cart, firstly strip off any plastic covering on the cart. For example, plastic bumpers on the edges of the cart or handle.
Often there is a section at the back of the cart near the handle made to put your bag in. Or this section may be designed to support an infant seat. You can remove this section to increase the size of the inside of the kiln. The piece of mesh that you remove from the cart, can then be adapted to work as a lid for the kiln. You can do this by attaching the spare mesh panel to the top edge of the cart using nichrome wire.
Alternatively, you can buy an additional panel of steel wire mesh and attach that to form a lid. The inside of the shopping cart is lined with ceramic fiber. The fiber is attached in the same way described above using ceramic buttons and nichrome wire.
Heating the Shopping Cart Kiln
A hole can be cut into the ceramic fiber at the base of the front end of the shopping cart. This can be used as a burner port. You can also cut a section out of the metal bars on the trolley. That way the flame is not burning directly on the wire frame.
An airflow can be established through the kiln by propping the lid of the kiln a little during firing. A small piece of ceramic fiber placed between the top edge and the lid will create an air gap.
Alternatively, you can cut a 4 x 4 inch hole in the ceramic fiber on the lid. This functions as a flue. The size of the flue can be adjusted by partially covering it over with some ceramic fiber during firing.
As with the other wire mesh kiln designs, you can make a small hole in the side of the kiln. This can work as an entry point for a thermocouple, so you can monitor the temperature in the kiln.
The good thing about this DIY propane kiln is that it’s completely mobile. A shopping cart has wheels, so you can roll the kiln with care to where you need it to be. However, if you want to build a kiln that is more static, you might want to consider a brick-built kiln. And that is what we will look at in the next section. So, read on….
4) Brick Built DIY Propane Kiln
Brick built propane kilns work on the same principle as the designs outlined above. Namely the kiln constructed with a burner port on the bottom edge, and a flue on the top. The difference is that the walls are constructed out of refractory brick.
Often the bricks are placed on concrete slabs to protect the ground. Concrete slabs can shatter under extreme heat. So, the slabs need to be protected by a layer or two of ceramic fiber.
The brick walls are then built-up to your preferred dimensions. Bear in mind that a larger kiln will take more propane to heat. Sometimes potters will use two burners directed into the same burner port at once to heat a larger kiln.
Once the bricks are in place, they can be supported using steel corner angles at each of the four edges. The corner angles are held in place with metal braces that wrap around the outside of the kiln.
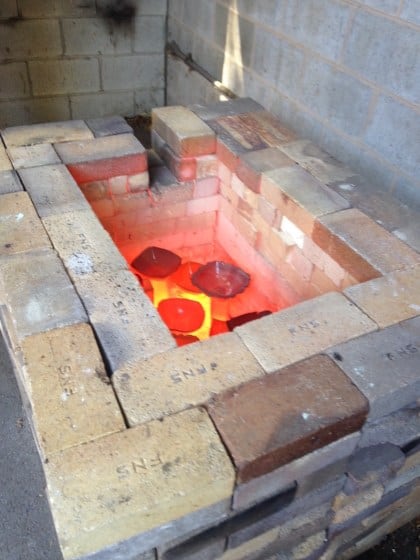
‘More than Just a Raku Pot’.
Insulating the Brick DIY Propane Kiln
Some potters will insulate the inside of the kiln with ceramic fiber. Not only does this protect the brick but it increases how efficiently the kiln heats up too.
The lid of the kiln can be made of different kinds of refractory material. One suggestion is HardieBacker board, which is a cement board. This needs to be protected from the heat using ceramic fiber attached with nichrome wire and ceramic buttons.
Another alternative is to use a wire mesh lid covered with ceramic fiber. Whilst this insulates well, the disadvantage is that it is not weatherproof. Ceramic fiber that is left outside in the wind and rain would become saturated and dirty quickly.
A low maintenance option for a lid is to place a sheet of metal on the top of the kiln. A piece of ceramic fiber would need to be sandwiched between the kiln and the metal lid for insulation.
Final Thoughts
There are lots of different ways to make a DIY propane kiln. In principle, you simply need a refractory container that can be insulated to keep the heat in. Each of the above designs has a few things in common. These common features include a burner port at the base and a flue near the top to create an airflow. The airflow can be controlled by using a damper on the flue. It can also be adjusted by changing how close the propane burner is to the burner port.

