Your cart is currently empty!
How to Make A Slab Pottery Flower Jug Vase
Published:
Last Updated:
Affiliate Disclaimer
As an affiliate, we may earn a commission from qualifying purchases. We get commissions for purchases made through links on this website from Amazon and other third parties.
This is how to make a slab pottery flower jug vase using an easy to follow printable template. You can get a copy of the template here:
Get The Template Here
You can get a copy of this template (and my other slab pottery templates) from my online shop here…
Table of Contents
show
The Steps For Making a Flower Jug Vase
To make this clay pottery project it’s helpful to have some tools. Here is a list of some tools that I use every day. Don’t worry if you can’t get all of them now. You can often improvise with other items that you have around your house to start off with. But if you do want to start your pottery tool collection here is a core list:
You Will Need:
- Clay
- A wide rolling pin
- Fabric to roll the clay on
- Roller guides
- Clay knife
- Flexible chopping board
- Platter tool
- Rubber Pottery rib
- Clay scoring tool
- Serrated rib tool
- Wooden modelling tools
- Chamois leather
- Banding wheel
- Wooden pottery bat
- Craft foam (optional)
Getting Started
The vase is made using slabs of clay, so the first thing that you need to do is to roll a clay slab. If you are new to slab building you can pick up some tips in my guide on how to roll an even slab of clay here.
Rolling The Clay Slab
For this project, I use a wide rolling pin and 3 mm roller guides. Roller guides are the wooden sticks on either side of the clay. They help you roll the clay at an even thickness.
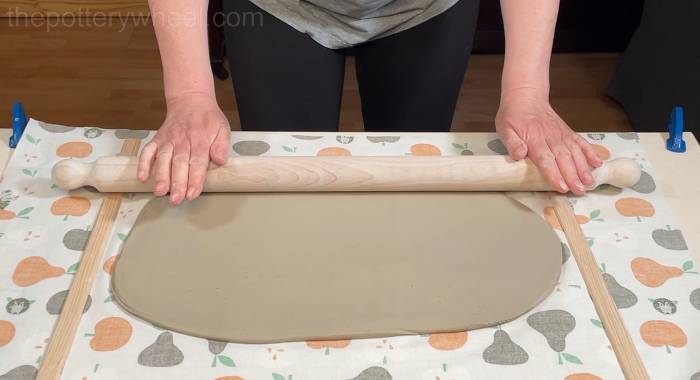
You can buy ready made roller guides for pottery. Like these here. Sometimes I find these ready made ones a little short. But, you can pick up wooden dowl at a hardware store that is 3mm thick. I like to do that because you can cut the dowl the the length that you need it to be.
If you notice any small air bubbles in the clay, it’s a good idea to pierce them and press the air out. When the pot is being fired, if any left over moisture in the clay turns to steam it can enter air pockets in the clay. The expanding steam can cause the pottery to crack as it fires.
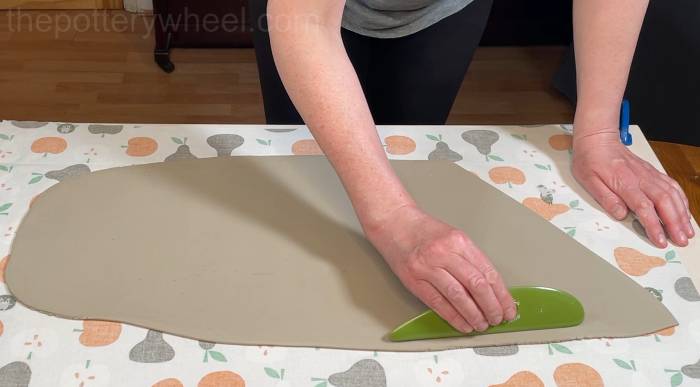
Once I have rolled the clay into a large enough slab, I run a pottery rib over both surfaces. This gets rid of any texture left behind on the surface of the slab. It also helps to align the clay particles. The green tool in the picture below is a platter tool.
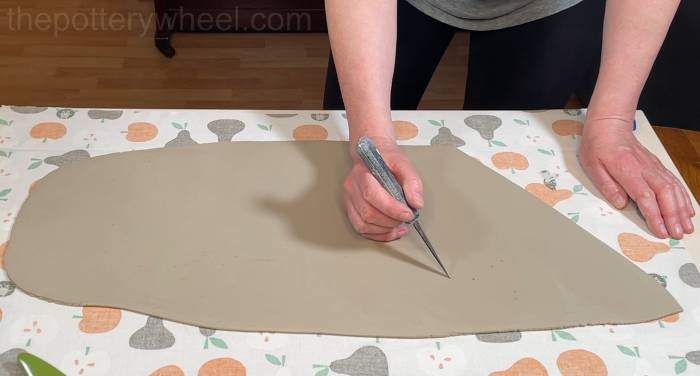
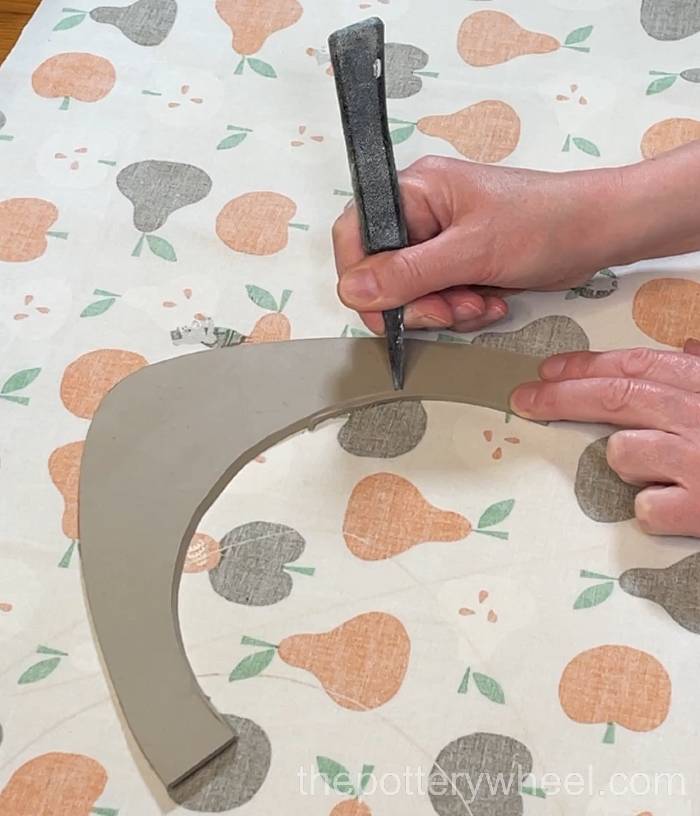
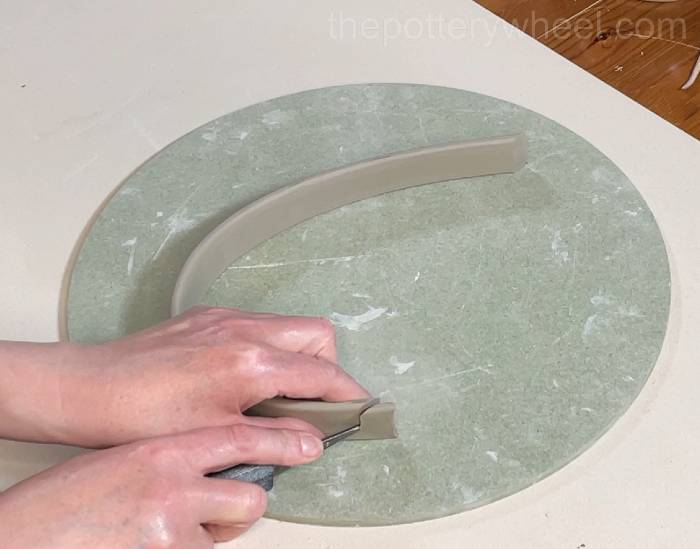
Cutting Out The Pieces Of The Template
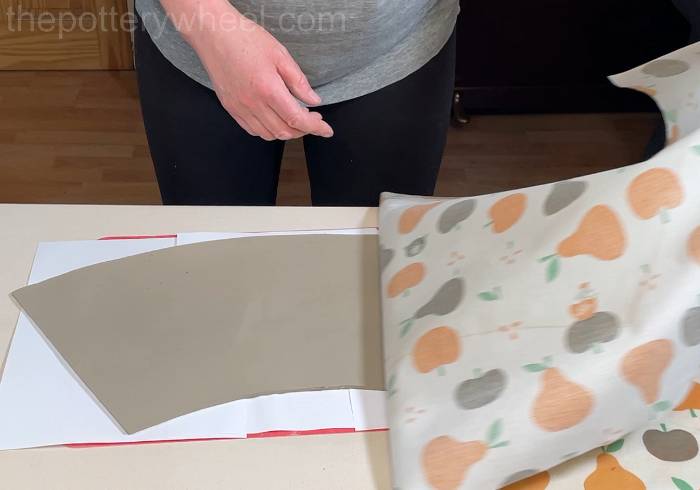
I place the template on the clay slab. This is template A, B and C which have been cut out and stuck together along the edges. By combining the three templates you get one large arc-shaped slab pottery template that will make the lower portion of the flower jug vase.
I cut around the edge of the template with my clay knife. You can keep off cuts of clay slab, and use them for smaller parts of the template. I usually press any tiny scraps together and reuse them.
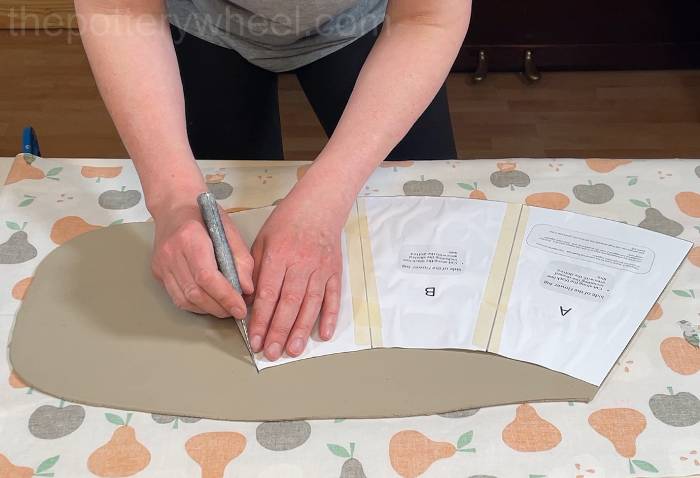
Once I’ve cut around each edge, I peel away the paper template. I find I can use these paper templates two or maybe three times.
However, you can make a template that you can use multiple times. Simply cut out the paper template, and then draw around it onto some craft foam.
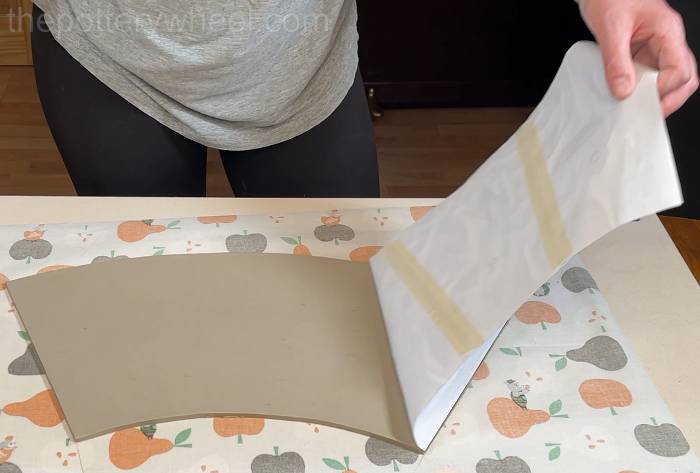
Lifting A Soft Slab Of Clay
At this point the clay is very soft and fresh. It needs to be put to one side to firm up for a while.
Lifting a soft slab can be tricky as you risk stretching the slab. This is how I lift clay slabs that have been cut out using a template.
Firstly, I put some paper on top of the slab.
Secondly, I put a flexible chopping board on top of the paper. I put one hand on top of the chopping board, and the other hand under the rolling canvas. It’s then easy to flip the whole thing over, so that the chopping board is under the slab.

Peel the rolling fabric off the top of the slab. You can then lift the slab easily by sliding your hands under the chopping board.
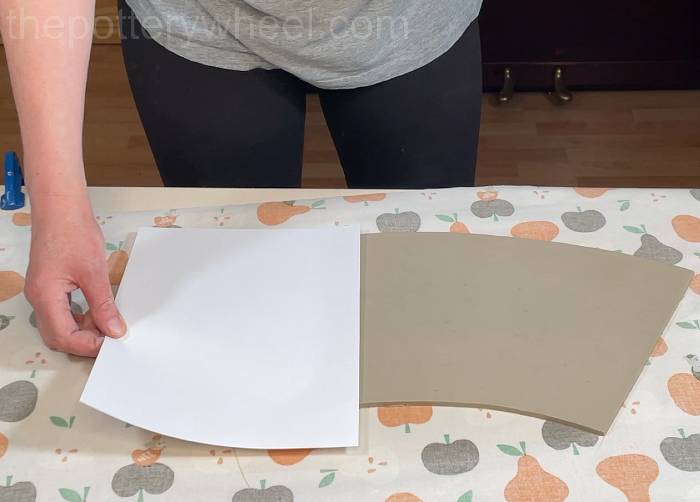
I slide the slab on the paper off the chopping board onto my wooden drying board to let the slab firm up. You can put another wooden board on top of the slab to keep it flat. But it’s important to keep checking the slab to make sure it isn’t becoming too stiff.

Cutting Out The Other Sections of The Flower Jug Vase
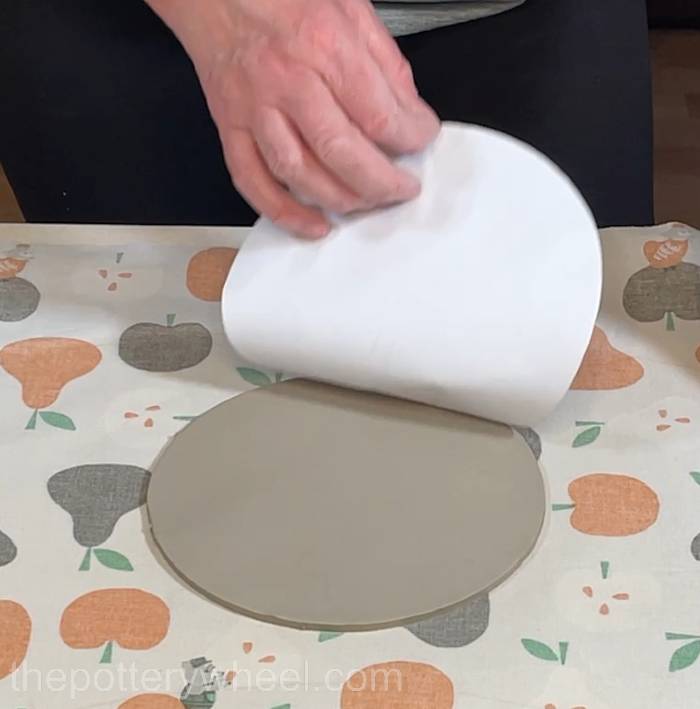
While the large slab is firming up, I cut out the other pieces of the template. This includes the round circular template H, which will form the base of the flower jug vase.
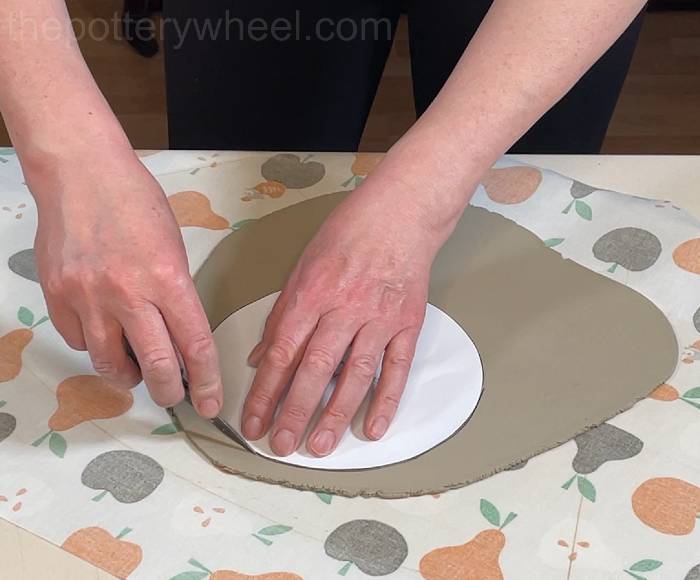
Once I’ve cut around the template and removed the off cuts of clay, I peel the paper template off the slab.
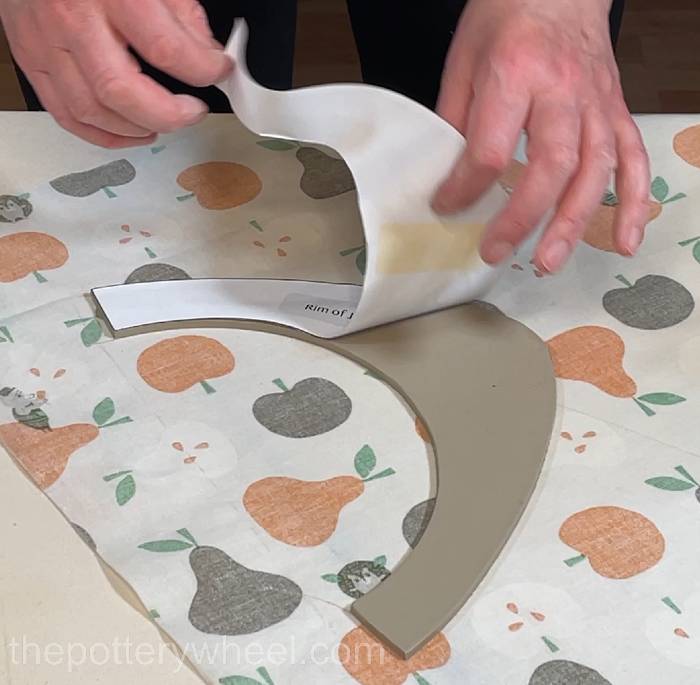
I also cut ouf the slab that will form the rim of the flower jug vase. This template is made from two templates that have been cut out and taped together. These two templates are template D and E.

Again, once the I’ve cut around the template, I peel the paper away and leave the cut slab to one side to firm up.
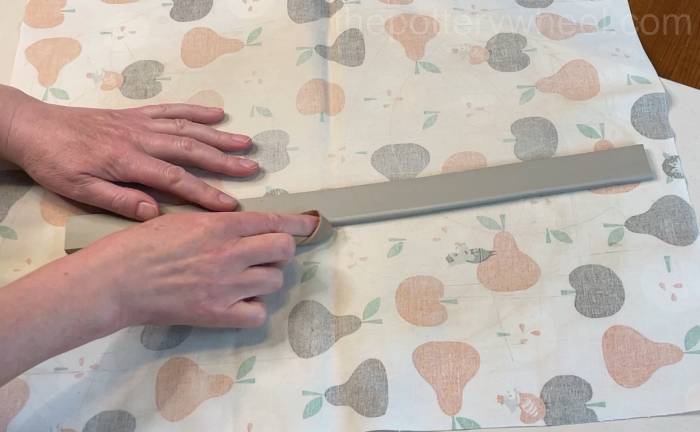
Making The Handle For The Flower Jug Vase
I like to make the handle just a little thicker than the wall of the vase. A slightly thicker handle can be more comfortable to hold and feels stronger to me.
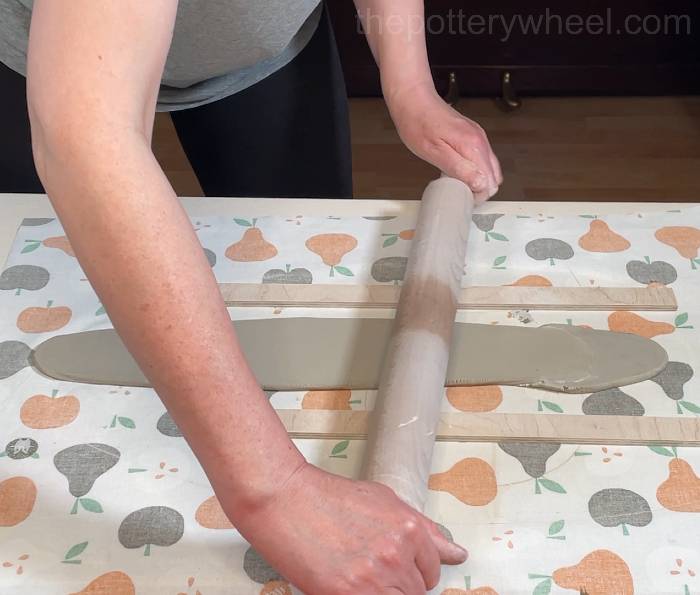
I use 6 mm roller guides to roll out a slab of clay for the handle. You need to make a long thin slab for the handle. I start by squeezing a lump of clay into a sausage shape, and then rolling that out with my rolling pin.
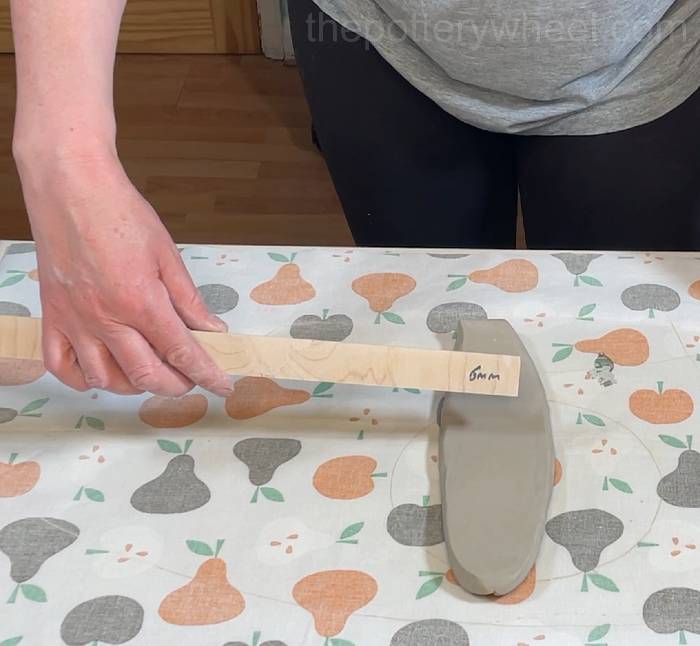
Then I put my roller guides on either side of the clay and roll it to the right length and thickness.
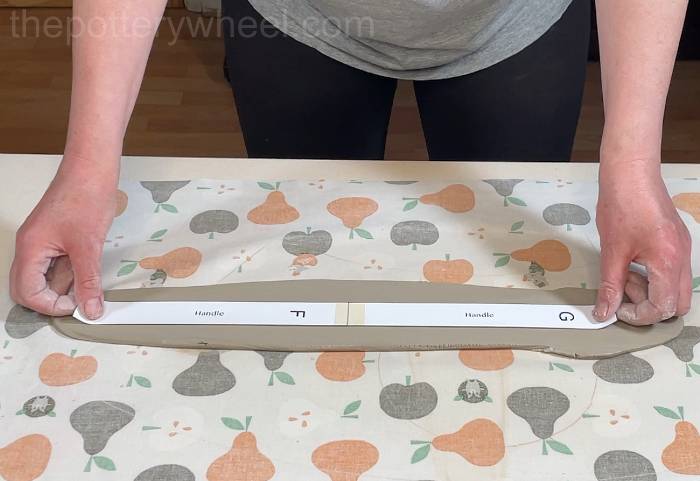
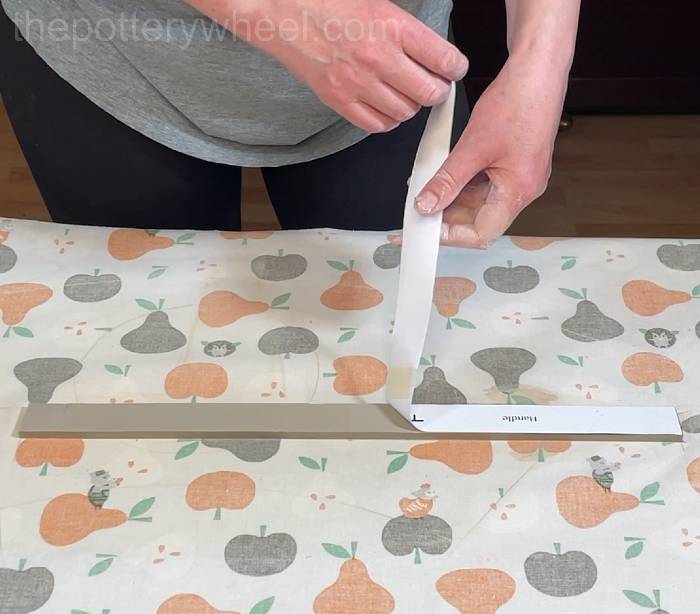
I put the handle template in place. The handle template is made up of templates F and G which have been joined together.
This handle template is quite long, as I think the flower jug vase looks elegant with a longer handle. But if you would like a shorter handle, you can trim it to length.
I cut around the template using a straight edge and my clay knife.
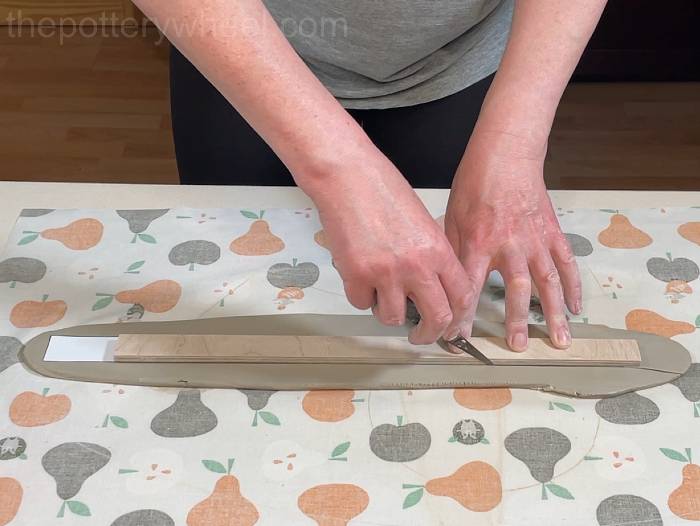
Then, as with the other slabs, I peel away the template. After I’ve cut out the handle I wrap it in a bit of plastic to stop it from drying out too much.
Handles dry quickly, and it will be a while before I’m going to use this one. I leave it wrapped in plastic until I’m ready to add it to the flower jug vase.
Assembling The Body of the Flower Jug Vase
The clay slabs need to be firm enough so that you can pick them up with out losing their shape, but still soft enough to be flexible.
Once they have firmed up to this point, you can start assembling the flower jug vase. I start with the large bottom portion of the vase which is cone-shaped.
Preparing The Slab
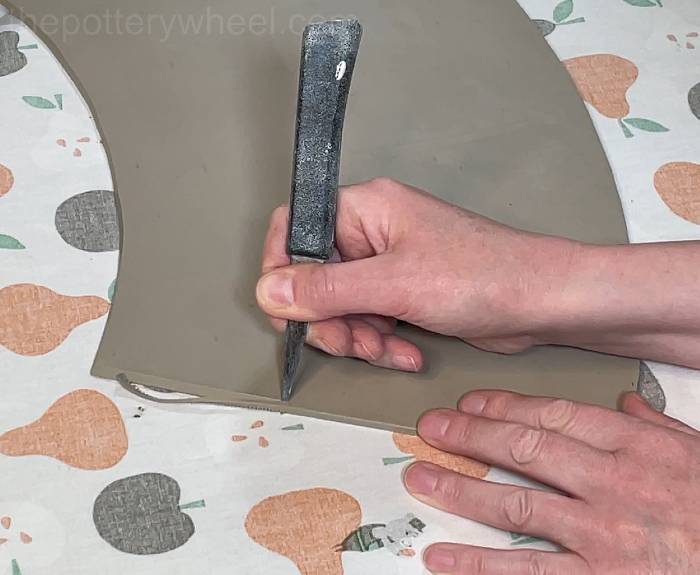
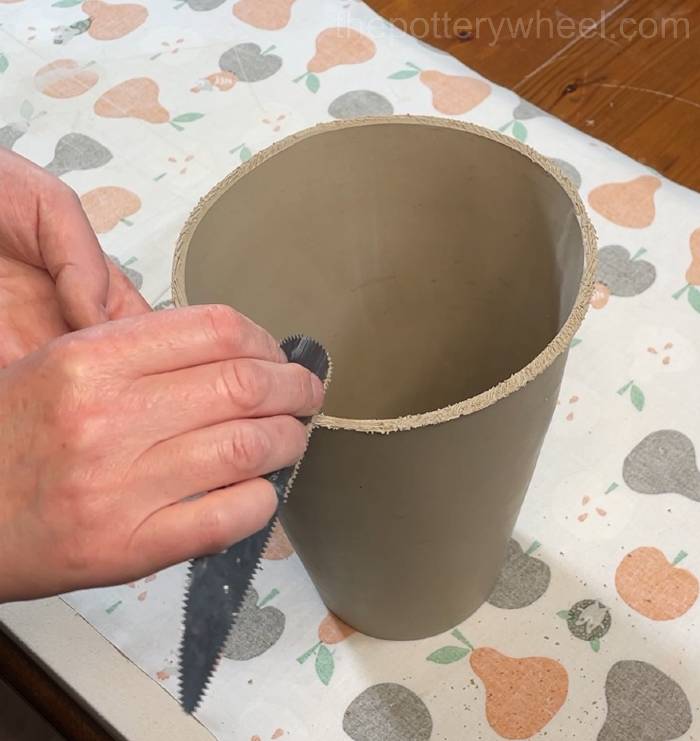
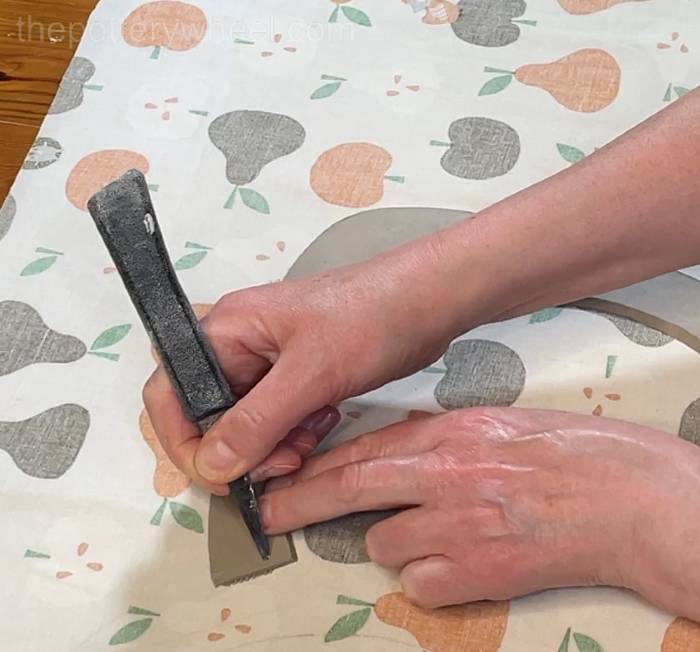
First, I bevel the long curve on the slab. This long curve is the bottom edge of the vase which will sit on the circular base. I bevel this edge so that the edge sits neatly against the base.

To bevel the edge, I hold my clay knife at an angle and draw it carefully along the side of the slab. This will cut away a small triangle of clay at the edge and create an angle on the side of the slab.
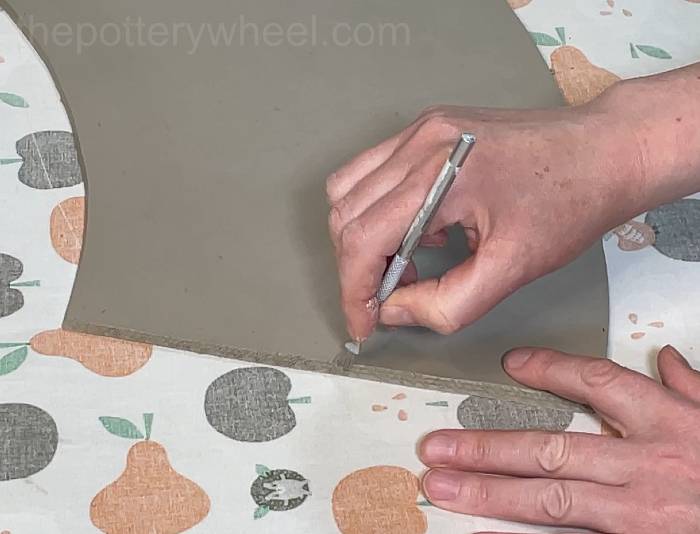
I also bevel both short straight edges of the slab. After I’ve bevelled one short side I turn the slab over and bevel the other short side.
Important
After you bevel one short edge, turn the slab over before you bevel the other short straight edge. If you don’t turn the slab over the two edges won’t overlap when you join them together later.
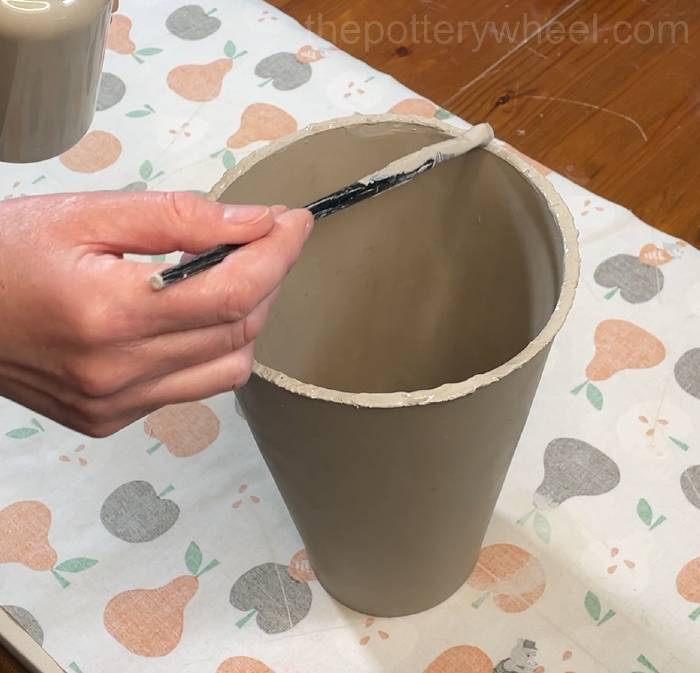
Score into both short straight bevelled edges using a clay scoring tool to create a rough texture. This will allow you to join the clay using slip and score.
Making The Clay Cone
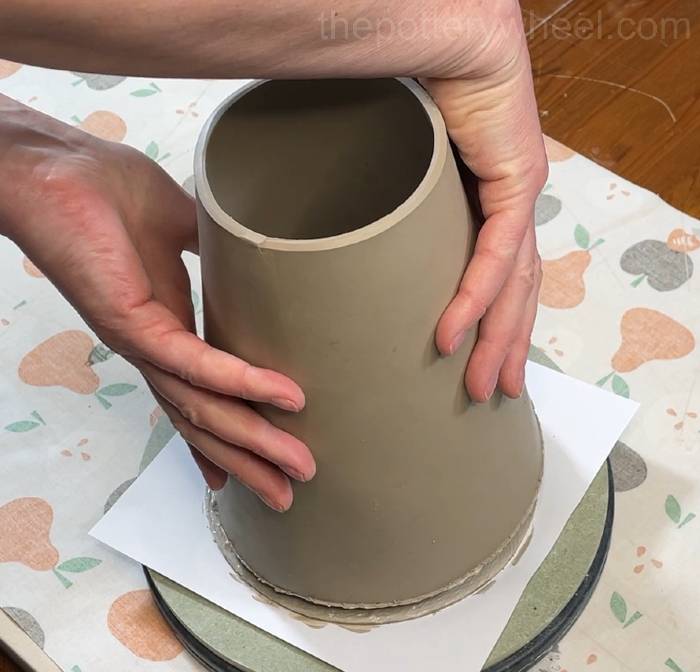
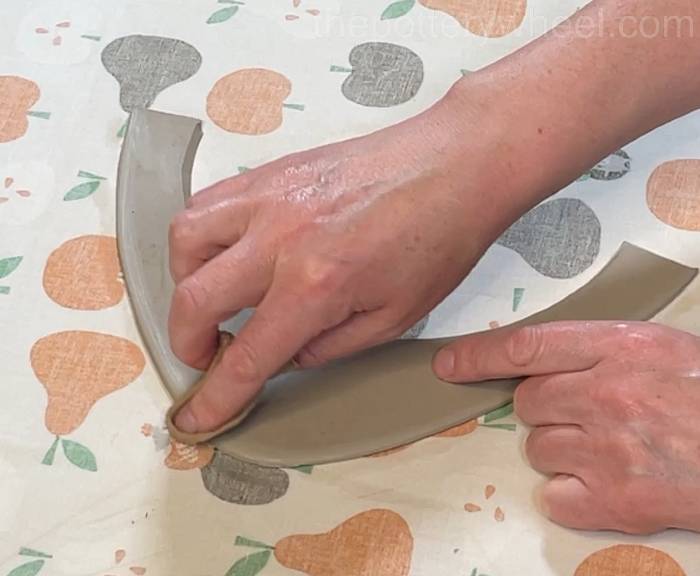
Pick the slab up and curve it around. Make sure that you curve it around so that the bevel on the long curved edge is flat against the worktop.
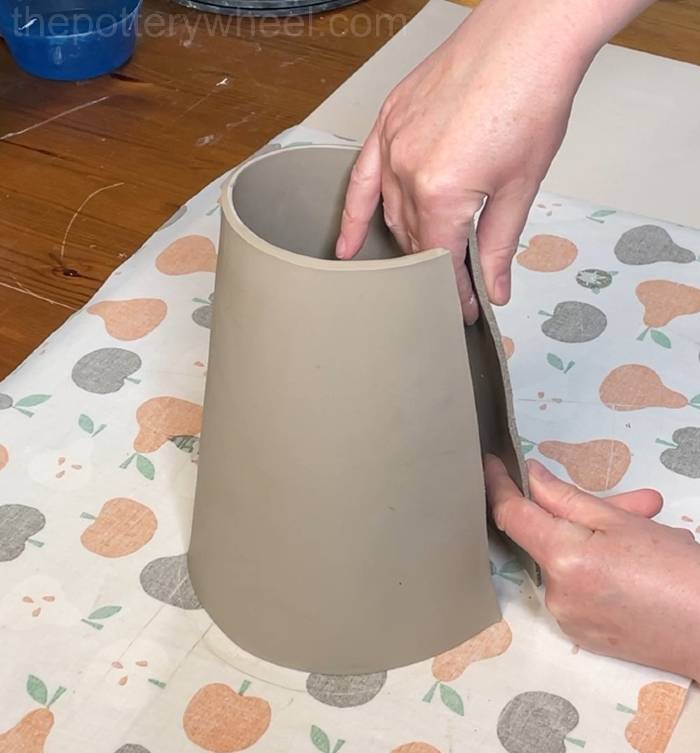
Apply clay slip to both scored straight edges. Clay slip is just dry clay dissolved in water. If you want to make some clay slip, you can check out my guide on how to make slip here.
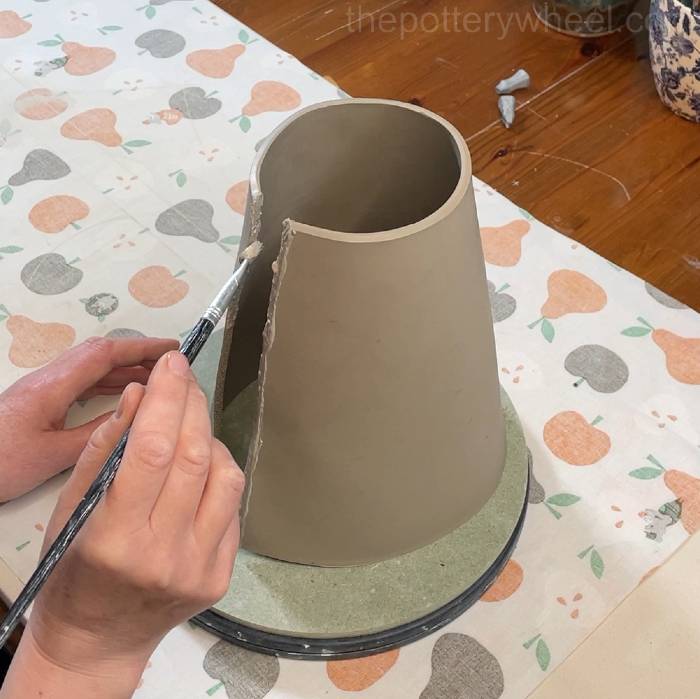
Line the two edges up and press them together to make a firm join. Put one hand on the inside of the clay cone to support the join and use your fingers on the outside to press the seam together.
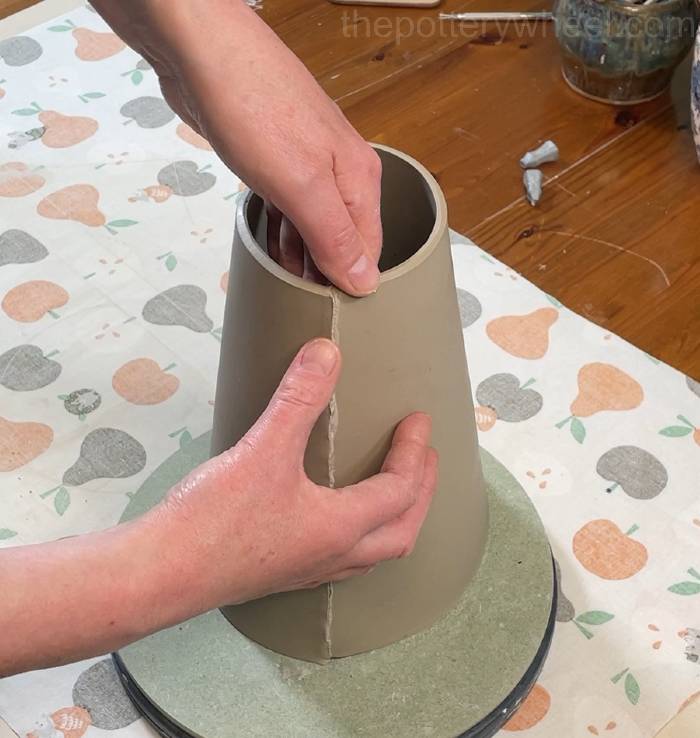
Run a rubber pottery rib down the outside of the join to smooth the clay and compress the join together firmly.
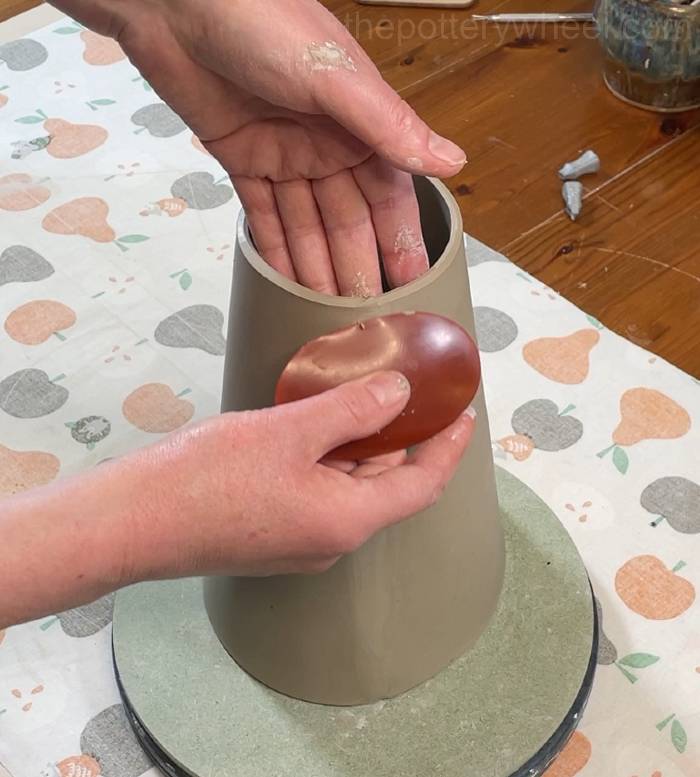
Once the outside surface is smooth, use the back of a wooden modelling tool to blend the join on the inside. The wooden tool will leave a rough texture in the clay. You can get rid of the rough texture by running a rubber pottery rib over the surface until it’s smooth.
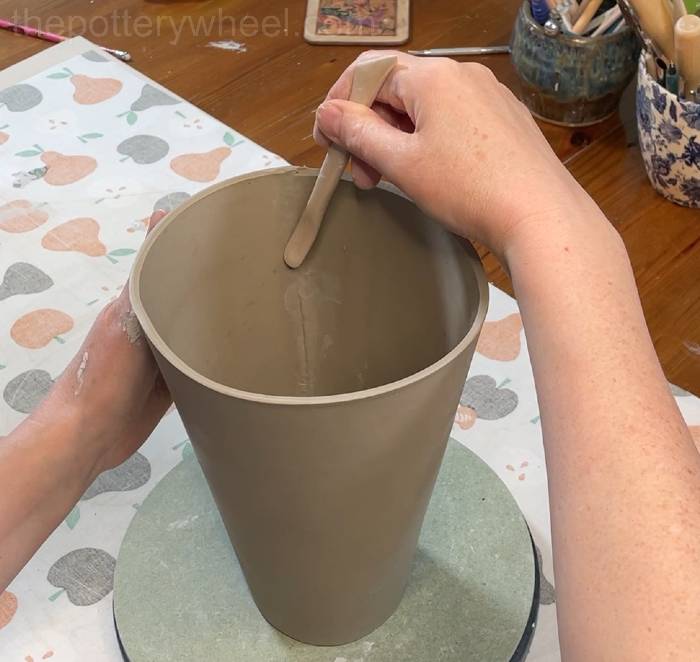
I’m going to put this clay cone to one side for little while to let the join bond together fully.
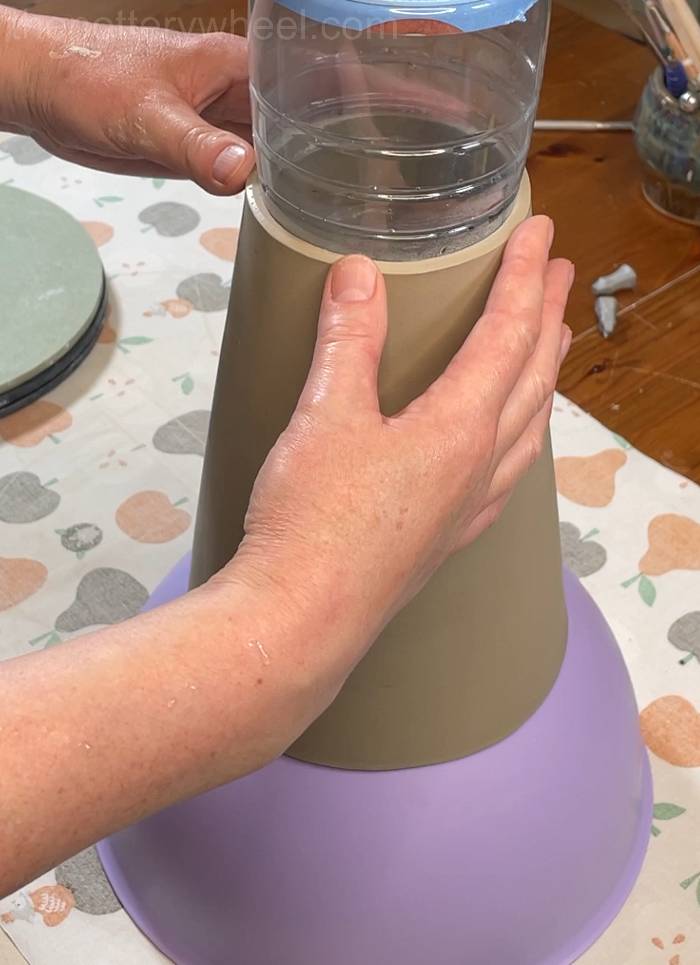
I put the wide end of the cone on an upside down plastic bowl to keep the bottom of the cone round. Also, I put an old plastic container in the top end of the cone to keep that round too.
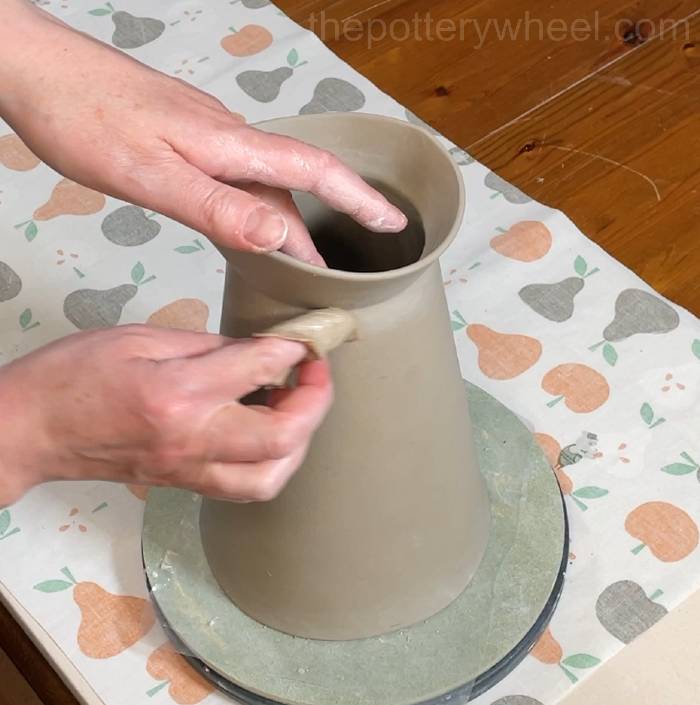
Attaching The Bottom Of The Vase To The Base
Now it’s time to attach the bottom of the flower jug vase to the base. Putting the base of the jug onto a wooden bat on a banding wheel makes this part of the process easier.
Preparing The Clay Surfaces
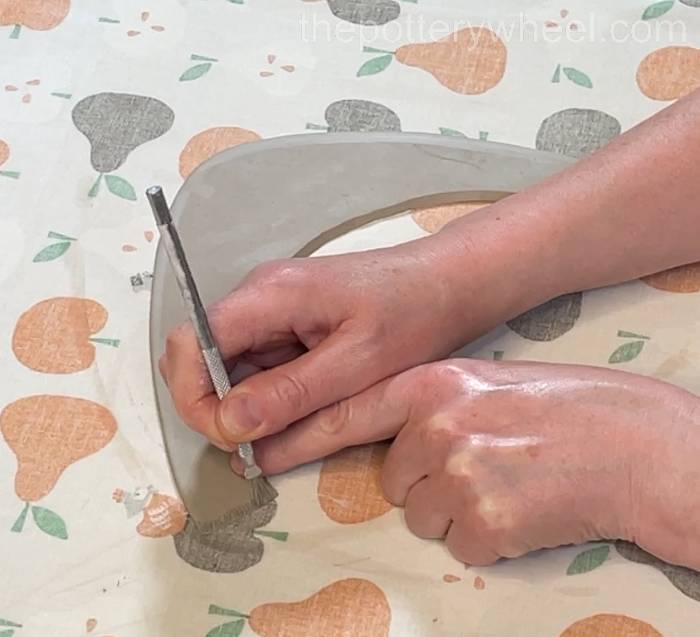
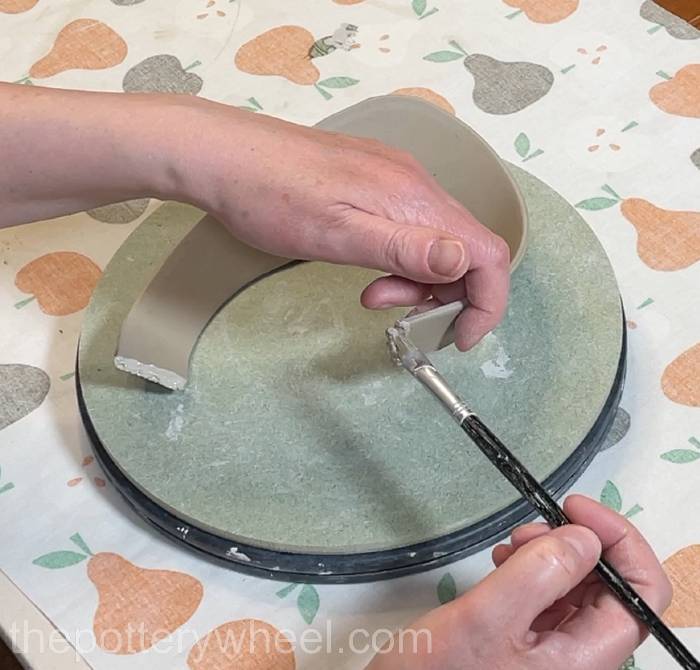
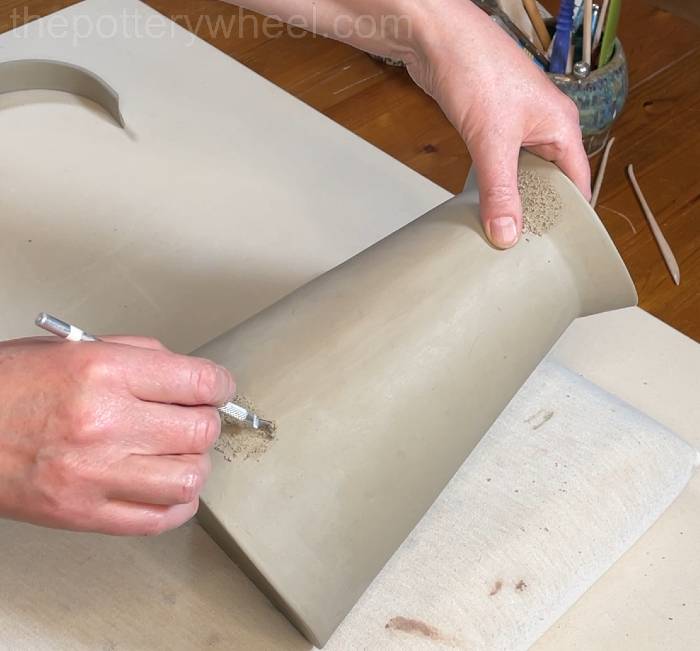
Use a serrated rib tool, clay scoring tool, or an old kitchen fork to score into the clay all around the edge of the circular base.

Score along the bottom edge of the clay cone too.
Apply clay slip to both scored surfaces.
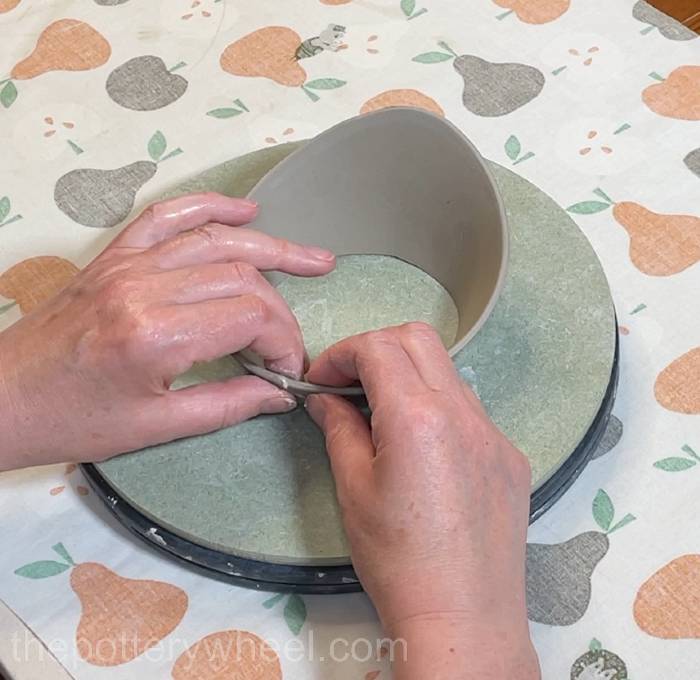
Joining The Bottom Of The Jug Onto The Base
Lower the bottom half of the flower jug vase over the round base. While the clay slip is still wet, you can wiggle the vase around a bit to line it up right in the centre of the base.
The circular base of the jug is intentionally a bit bigger than the bottom edge of the clay cone. This gives you a bit of wiggle room when you are trying to position the clay cone right in the middle of the base.
It also gives you a bit of extra clay to blend onto the bottom edge of the clay cone.
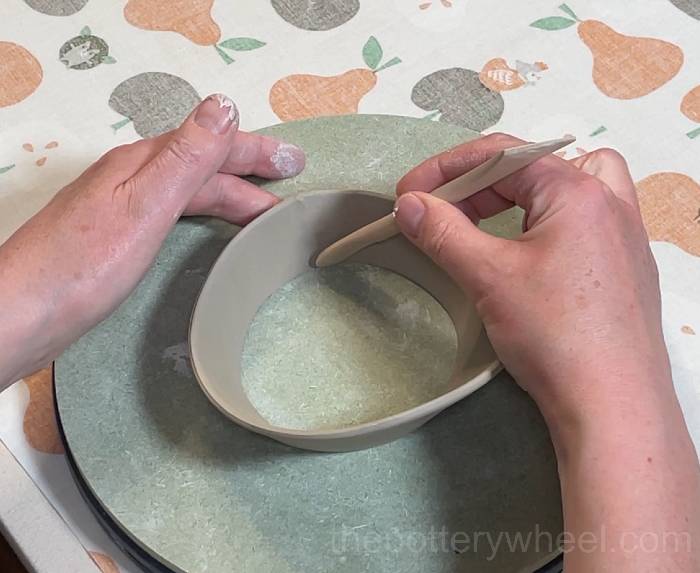
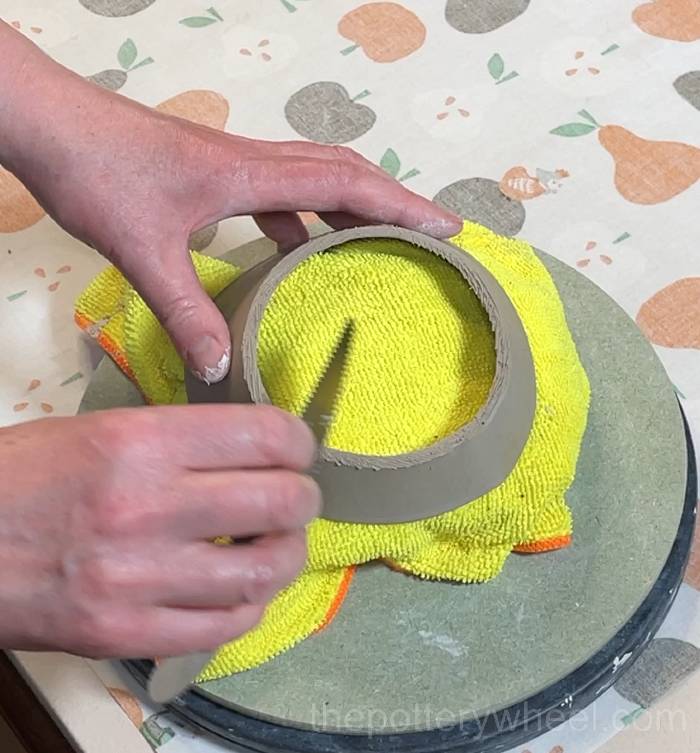
You might find that there is a little bit too much extra clay at a few spots around the bottom edge. Use a clay knife to trim away a little of the extra. But be sure to leave about a millimetre or two around the base so you can attach the base to the bottom edge.

Use the flat edge of a wooden modelling tool to blend the extra clay on the circular base onto the bottom edge of the clay cone. Blend the extra clay all the way around.
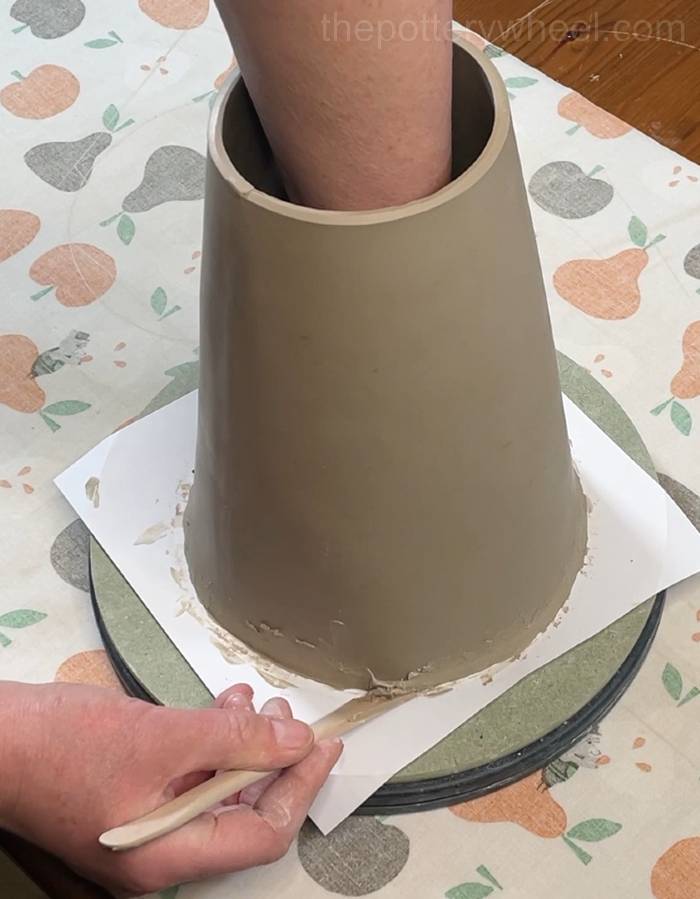
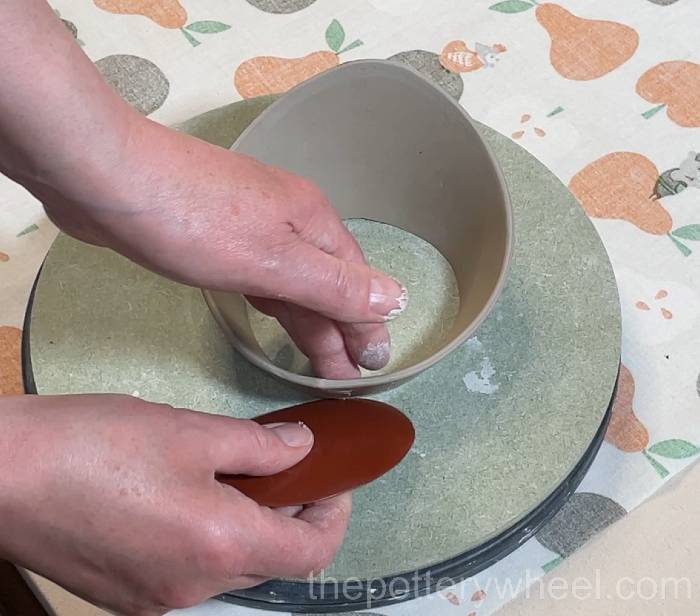
Turn the bottom of the vase upside down and tidy up the bottom edge. I find a good way to do this is to use a wooden tool to scrape some of the excess clay and rough texture off the bottom edge.
I then use a clay knife to cut away a bead of rough clay that might have formed around the bottom edge.
Lastly, I use a damp chamois leather to smooth the surface and soften the bottom edge of the flower jug vase.
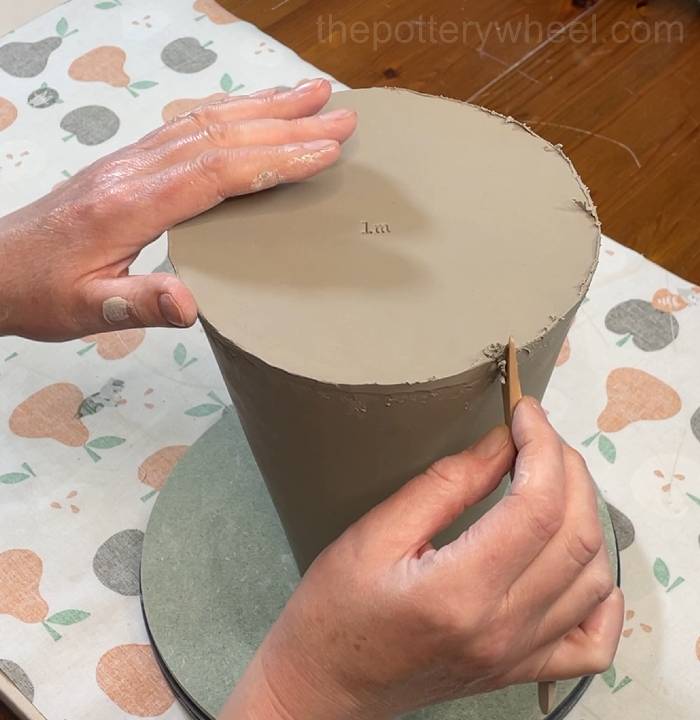
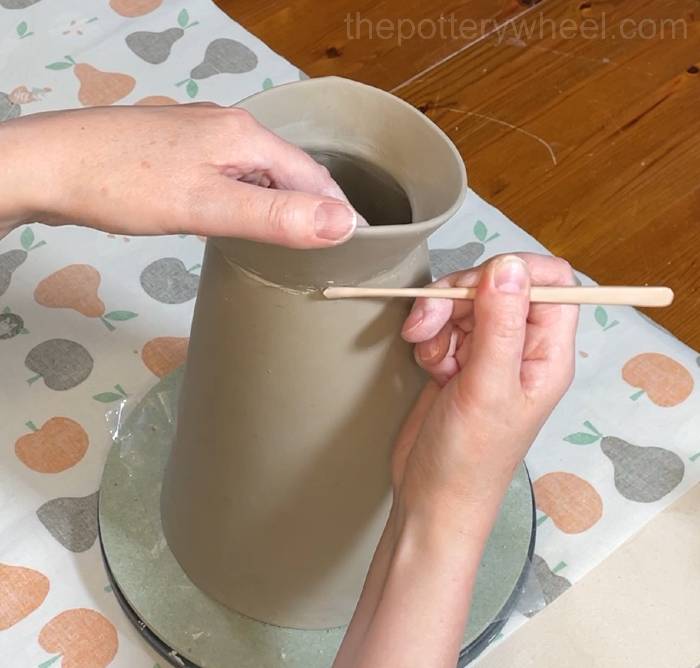
Adding The Rim to the Flower Jug Vase
The next thing to do, is to prepare the rim.
Preparing The Rim
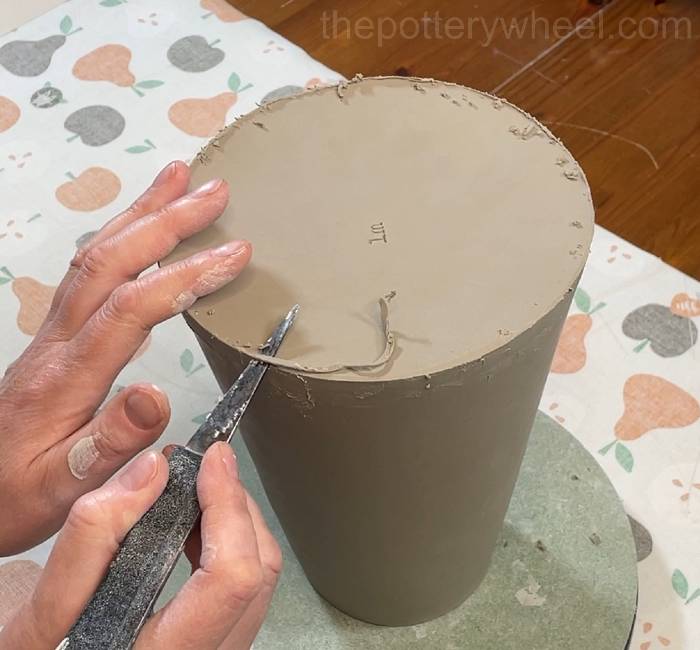
Firstly, I bevel the inside curved edge. This is the edge that will sit on top of the bottom portion of the jug.
Bevel both short ends. Remember to turn the slab over when you have beveled one edge, and before you bevel the second short end.
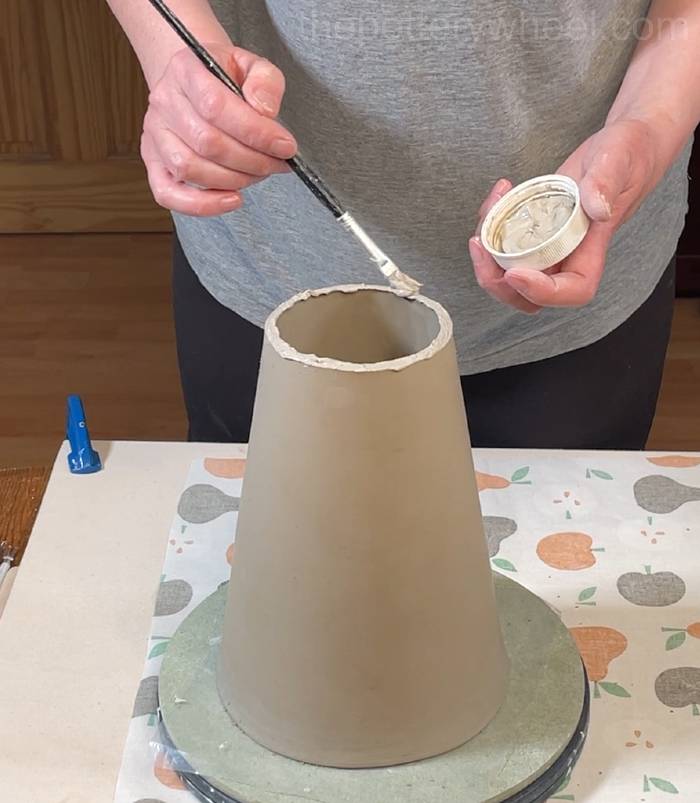
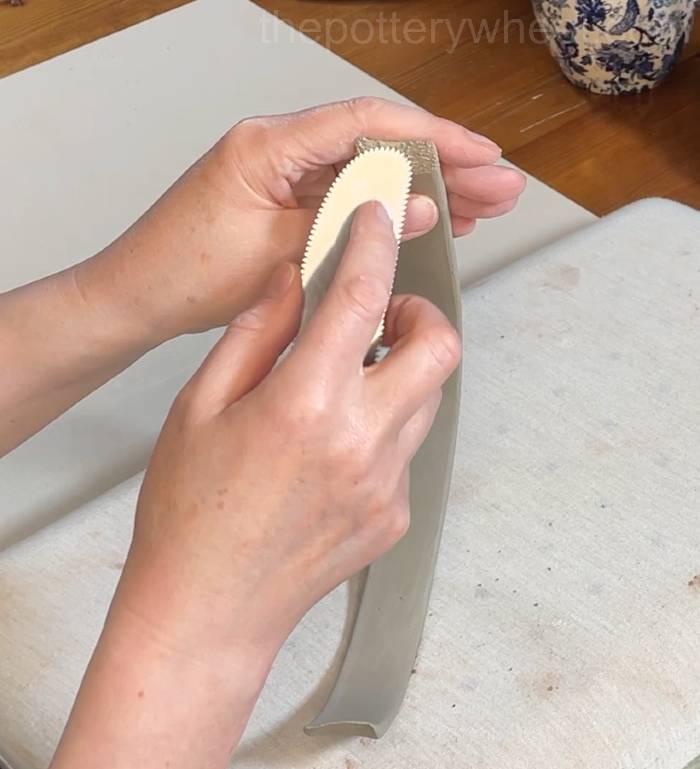
Wipe the larger curved edge with a piece of damp chamois leather on both sides. This will give the curved edge a neat, soft finish.
Score into the two short ends.
Apply some slip to both scored ends.
Press the two short ends together and begin blending them into a smooth join.
Use a wooden modelling tool to blend the join together on the inside of the rim.
Smooth away the marks made by the wooden tool on the inside and the outside of the rim.
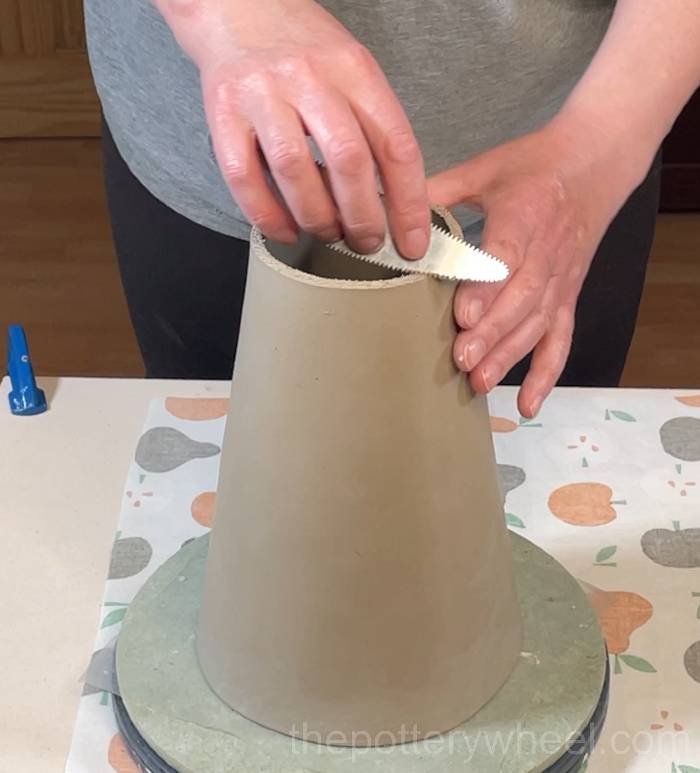
Scrunch up an old rag or cloth and rest the rim on top of the soft cloth. Use a serrated rib tool to score into the bottom edge of the rim.
Score into the top edge of the lower portion of the flower jug vase too.
Apply clay slip to the scored underside of the rim.
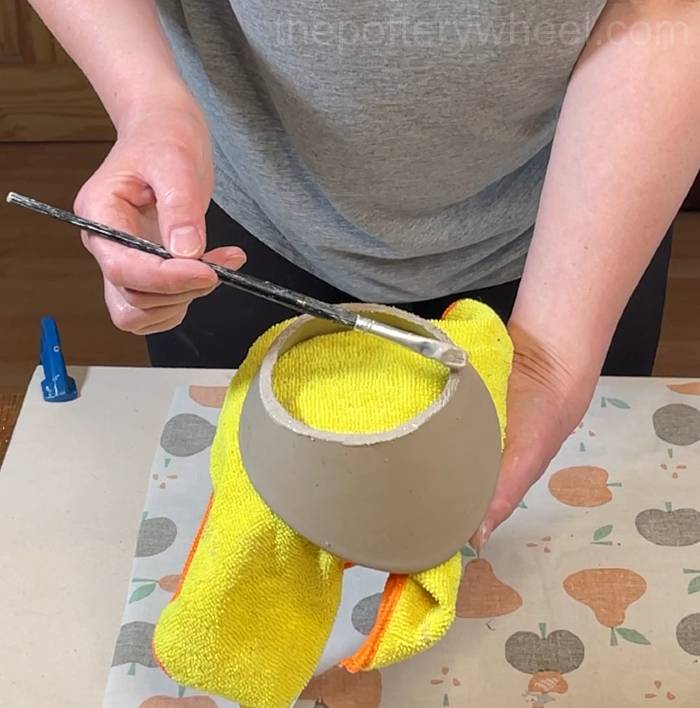
Then apply slip to the scored edge of the bottom portion of the flower jug.
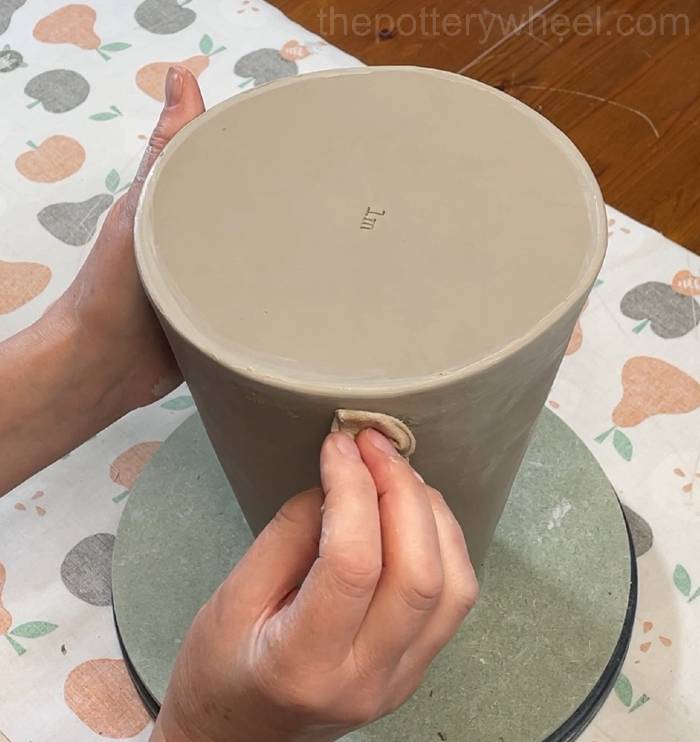
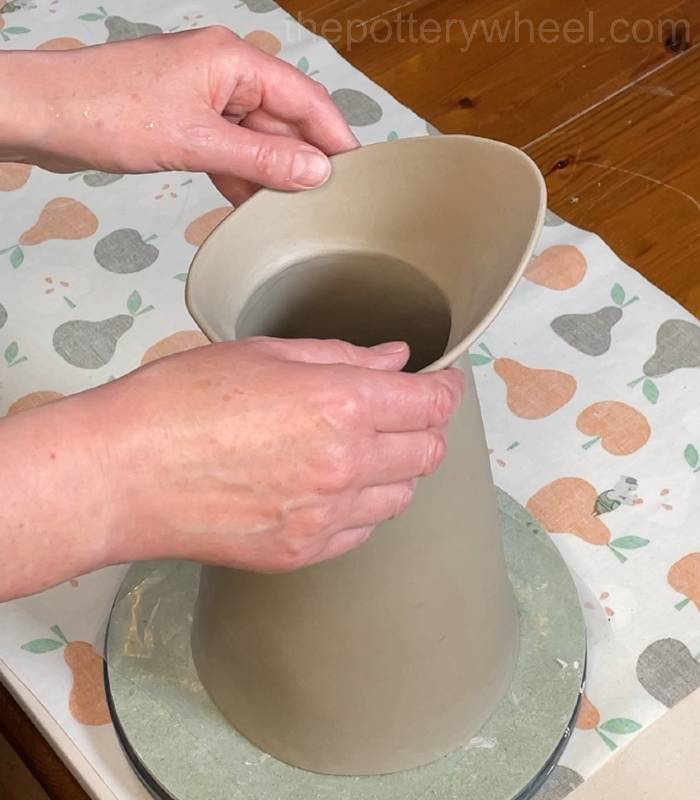
Attaching The Rim
Lower the rim onto the lower portion of the flower jug. I line up the join on the lower portion of the slab jug with the join on the rim. This isn’t 100% necessary, but I put the handle over the join which conceals any wonkiness in the surface around the join.
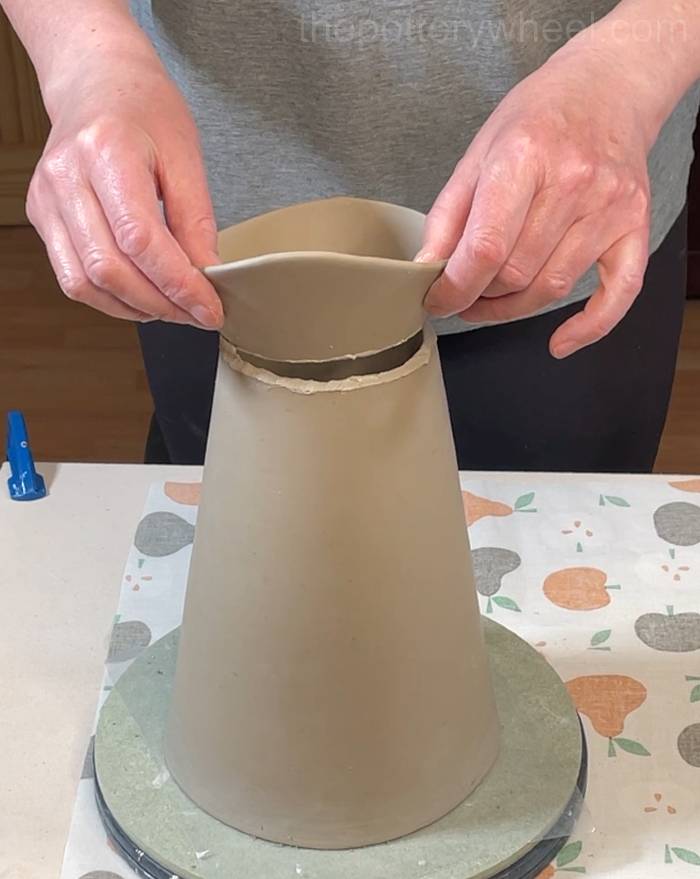
Line the rim up with the lower portion and press the two slipped surfaces together.
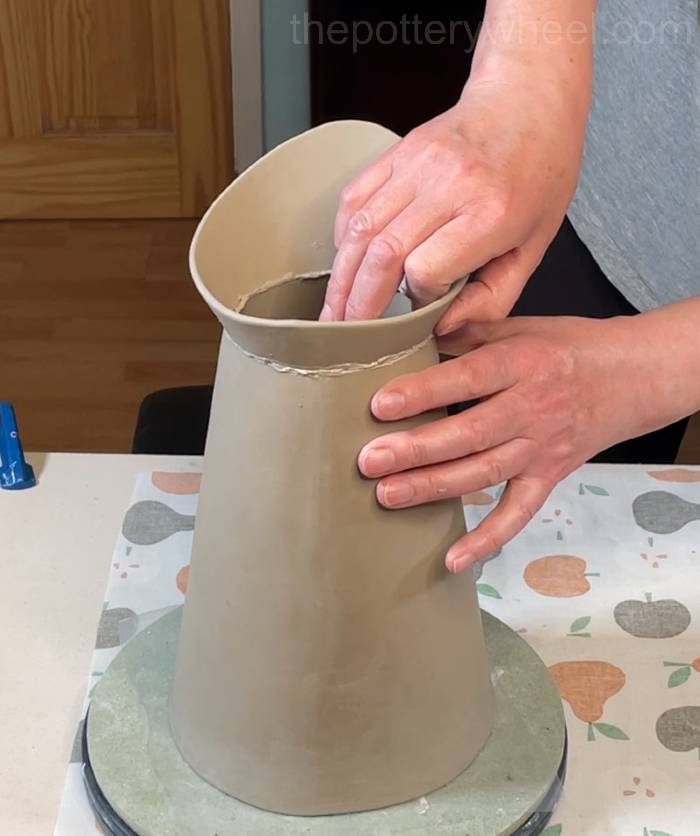
Blend the join in with your finger on the inside surface of the flower jug.
Use a wooden tool to blend the join in some more and make sure that the two edges are securely attached.
Blend the join on the outside using the wooden tool too. It helps if you have a thinner wooden tool like this one.
Wipe the surface of the join on the inside and outside to smooth away any marks left behind by the wooden tool.
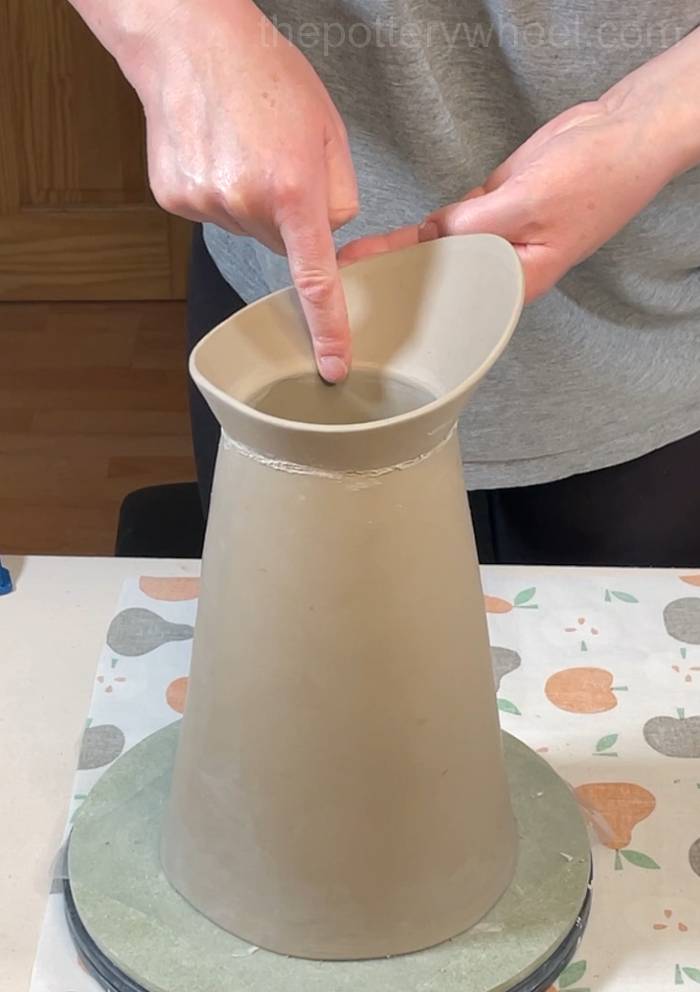
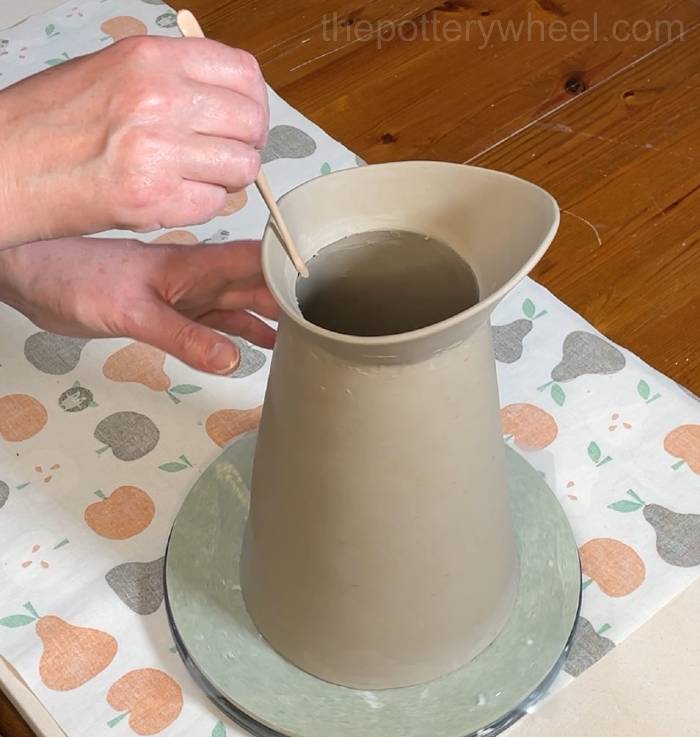
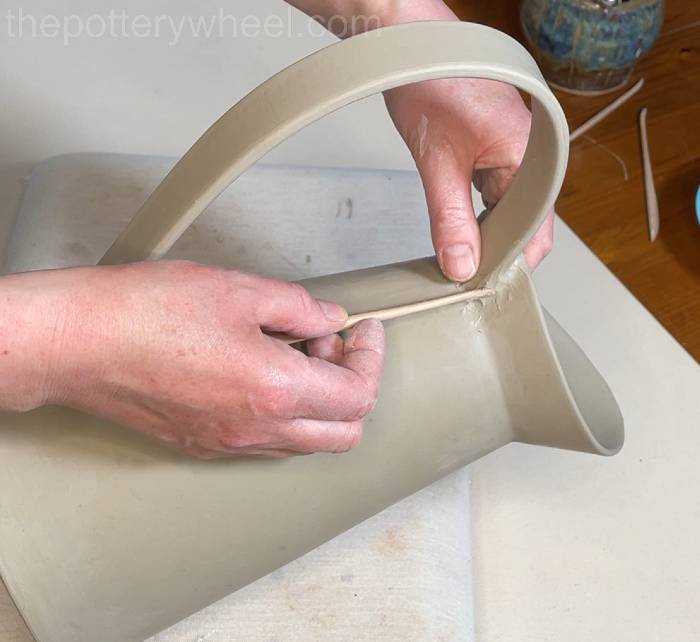
Once the rim is firmly attached, you can shape it a bit. If the rim has become a little dry, you can spray it with water first to soften it off.
Adding A Handle to The Flower Jug Vase
The first thing to do is to prepare the handle
Preparing The Handle
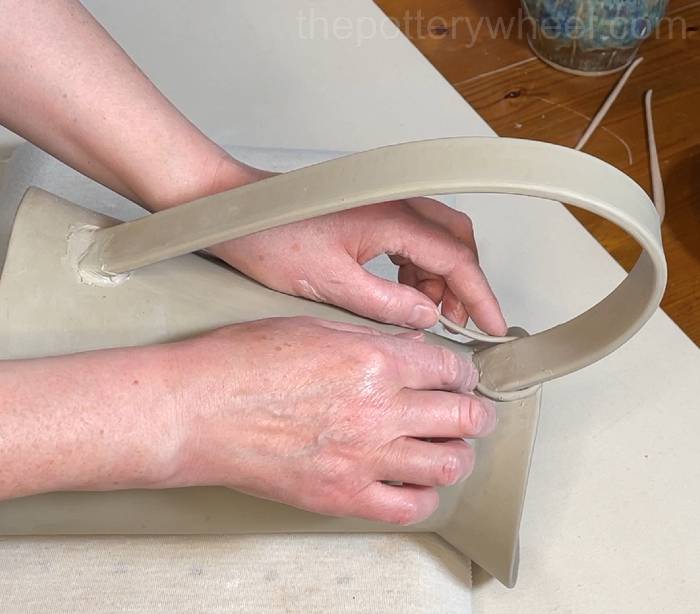
Run a damp piece of chamois leather along each edge of the clay handle that you cut out earlier on. This gives the handle soft edges.
Curve the handle round into to the shape that you want it to be and lift it onto a wooden pottery bat. Leave it on the pottery bat to firm up. I usually leave it until its soft leather hard.
Once it’s leather hard, trim the handle to length. The handle template is quite long, but you can trim it to make it shorter if you prefer. With this template, I tend to trim about a centimeter of each end, but you can trim off more if you like.
Use your clay knife to cut a concave shape into each end of the handle. This will make it easier to attach the handle to the flower jug and make the handle flush against the side.

Score into both trimmed ends of the handle.
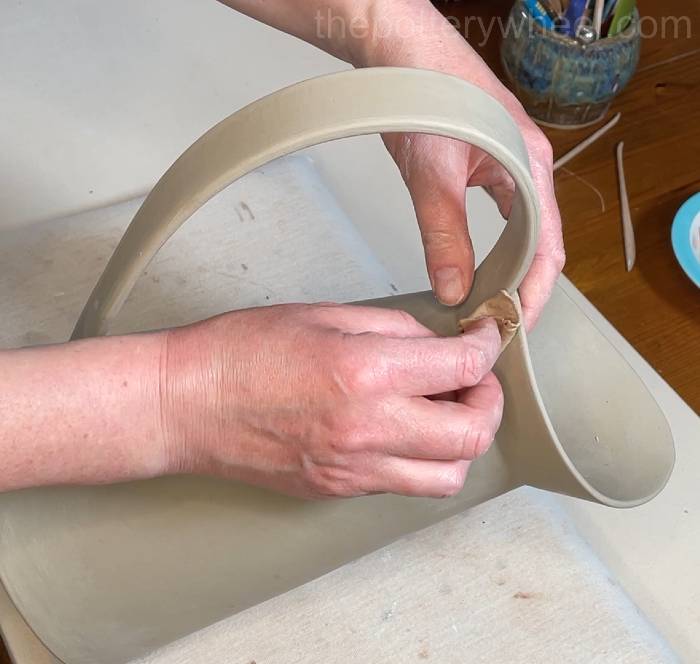
Attaching The Handle
Hold the handle up to the side of the flower jug and position it where you want to attach it. Use your clay knife to make a few marks on the side of the jug where you are going to attach the handle.
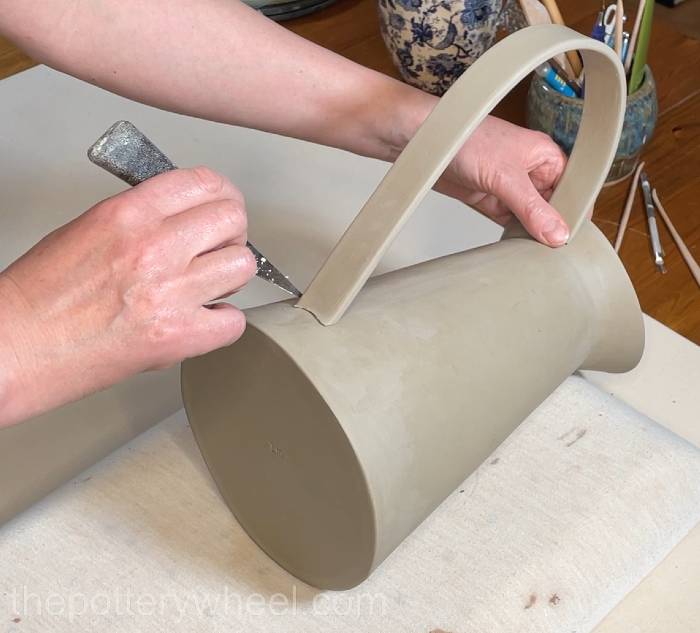
Score into the side of the flower jug vase.
Apply some clay slip to the scored surface on the side of the jug, and also onto both scored ends of the handle.
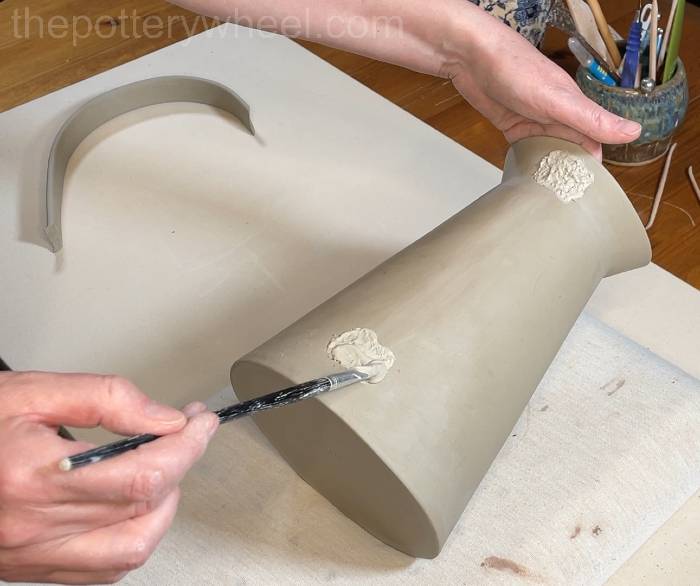
Press the handle into place. Put your free hand on the inside of the jug and support it while you press the handle onto the outside.
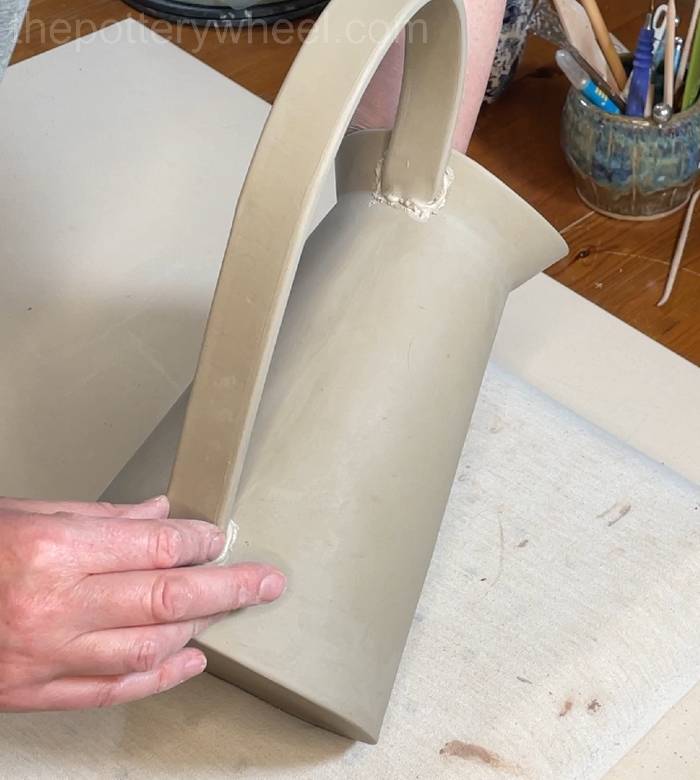
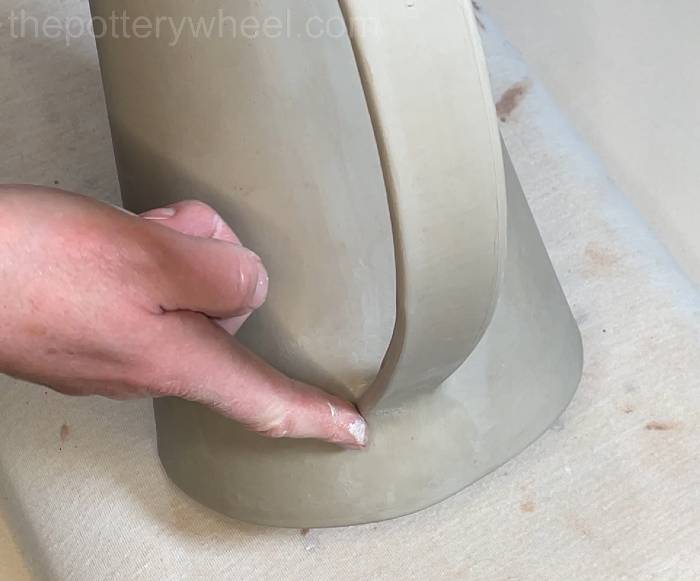
You can strengthen the join between the flower jug vase and the handle by adding a small coil of clay. Wrap the clay coil around the join and press it gently into the join.
Blend the clay coil onto the handle and the side of the jug with a wooden modelling tool.
Wipe away any marks left by the wooden tool with your damp chamios leather.
Repeat this process at both points where the handle meets the flower jug vase.
Leave the jug to dry out slowly before bisque firing. Sometimes handles can crack when they are drying. That’s because the air circulates around them freely and they dry out more quickly than the rest of the pot.
You can help to prevent handles from cracking by wrapping them in plastic and slowing down the drying process.
Or you can paint the handle with wax resist. This forms a rubbery seal on the handle which stops it drying out too quickly. The wax resist burns off during the bisque fire.
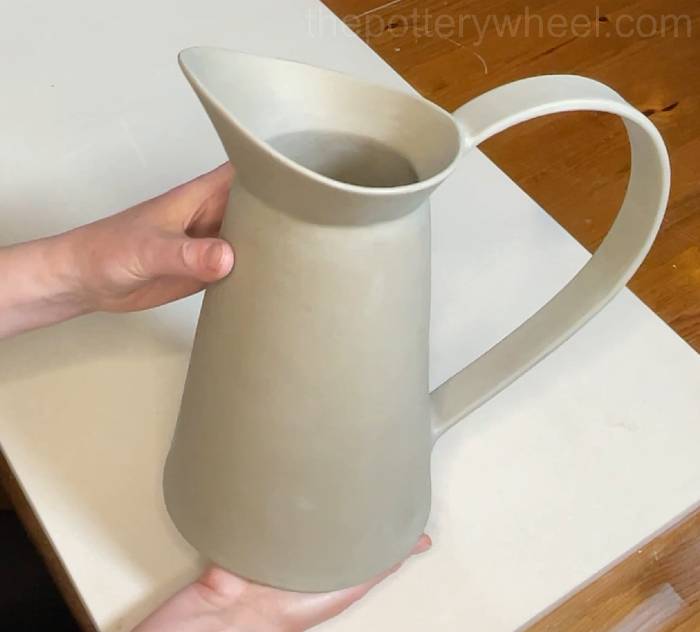
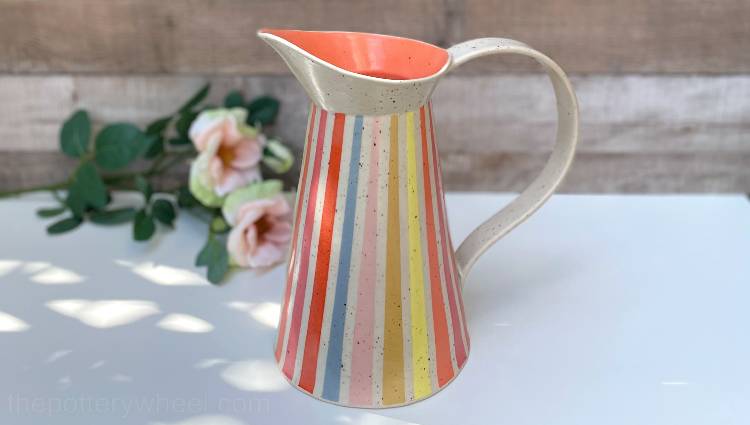
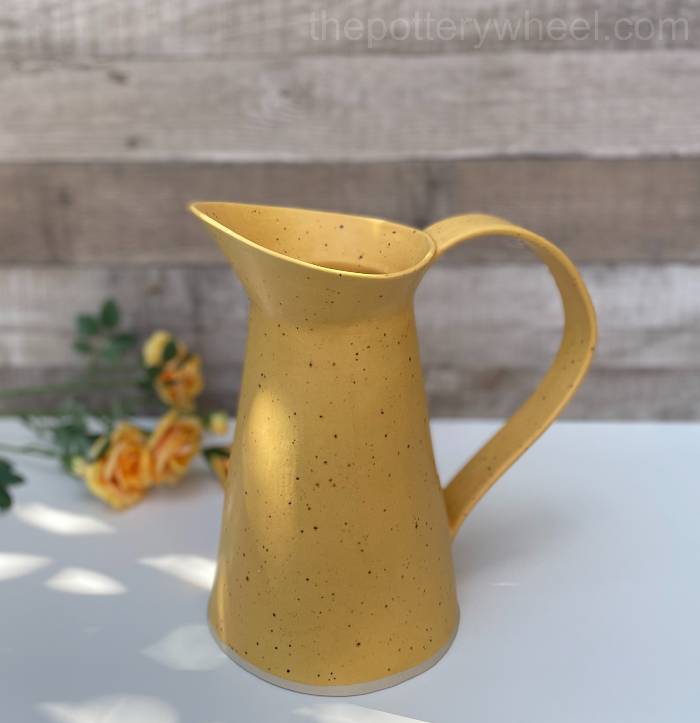
The Glazed Slab Pottery Flower Jug Vase
And here is the finished piece. If you’d like to get a copy of the template you can find it in my pottery shop here.
Get The Template Here
You can get a copy of this template (and my other slab pottery templates) from my online shop here…


Leave a Reply