My first pottery wheel was a budget wheel with short legs and was quite low to the ground. I was surprised by how much lower it was than the wheels I’d used in class. It got me thinking about what height a potter’s wheel should be.
Wheel height is a matter of personal preference, and you can adjust the height of your wheel or your stool so you are comfortable. However, here are some general guidelines for using a sitting wheel:
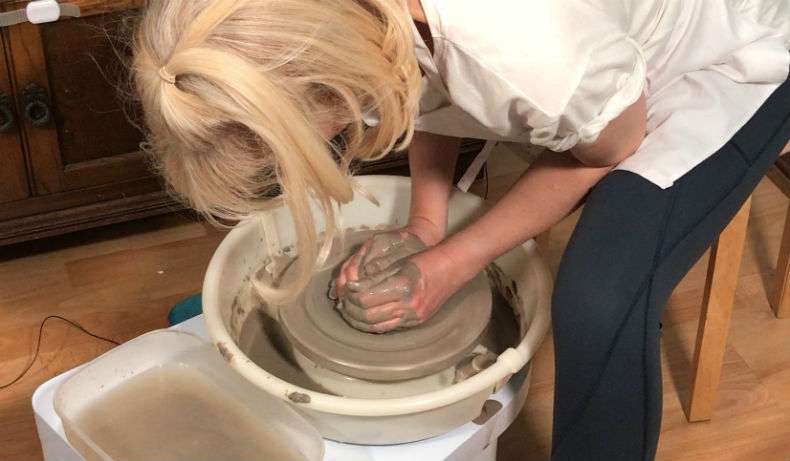
- The splash pan and wheel head should sit comfortably between your thighs
- It can help to have your knees a little lower than your hips
- Your seat needs to be more or less level with the wheel
- If you can, tilt your seat towards the wheel about 10 degrees
- Hinge forward from your hips to avoid hunching your back
- Support your non-dominant foot with a brick the same size as the pedal
The above suggestions might seem like a lot to take on board. But it’s good to remember that they are just suggestions and ultimately you need to find a working position that feels good to you and helps support your pottery making.
Disclaimer: I’m not a medic, I’m sharing this article as helpful information. If you have any physical or postural issues, please consult a medical professional.
Let’s take a closer look at some of the points made above, to consider how you could achieve them and why they might be helpful.
What Pottery Wheel Height is Best?
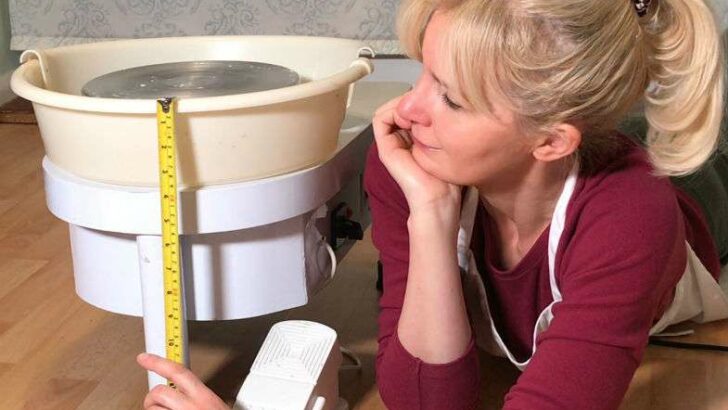
Lots of wheels have a wheel head that is between 19 and 21 inches off the ground. However, some wheels are higher than this and some are lower. But also, potters come in all shapes and sizes. A smaller person at a taller wheel will be as uncomfortable as a tall person at a smaller wheel.
Rather than looking for a measurement in inches, it’s best to figure out the best wheel height for you.
A lot of potters recommend that your butt is sitting a little higher than the wheel head. If this feels right to you, it can be helpful to position your stool about 1 inch above the wheel head.
One of the reasons for this is that it makes bracing when centering easier. If your seat is lower than your wheel head, you will be using mainly arm and upper body strength.
However, if your seat is a bit higher, it’s easier to anchor your elbows at your hip joint. This allows you to use your body weight and strength to center the clay.
Having said that, the ideal position of your chair to wheel head depends on a few factors, including the next two important ones…
Factor 1) Your Comfort Level
The ideal wheel height is a personal preference. For some potters, having their stool an inch above the wheel head feels awkward and they prefer their seat to be lower. I like my seat to be about level with the table part of the wheel.
But people have different physiques and postural preferences. So, the right wheel height is partially something each person needs to figure out by trial and error.
Factor 2) It Depends What You Are Making
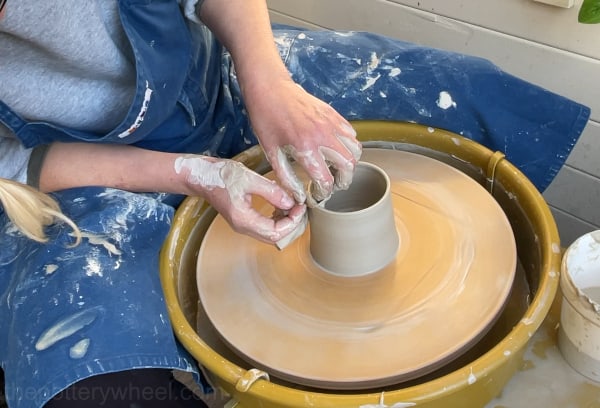
The height of your seat depends on what you are making. For example, if you are making long cylinders, you may want your seat to be taller.
When you are making tall clay pots, you need to pull the clay up towards yourself. This can be easier if your seat is quite a bit higher than the wheel head. Also, you are well likely to pull the clay off-center if you are a bit higher.
Potters sometimes use different height stools or even different wheels for different projects. Some potters throw smaller pieces like cups and bowls at a standing wheel. But if they are making tall cylinders, they will sit on a tall stool so they are above the wheel head.
Some Problems Associated with Wheel Height
Working at a pottery wheel, or using a stool that is putting a strain on your body can be linked to problems.
For example, if your wheel is too low for you, it can encourage you to hunch over. This in turn can cause lower back pain. Especially if you are throwing for longer periods.
It’s a good idea to have your wheel head a fraction lower than your stool. But if it’s so low that you’re hunching forward, this could put a strain on your back and shoulders.
Working on a low wheel can also put a strain on your wrists. This is an issue that I have experienced. Having had surgery on my hands for carpal tunnel, I can experience wrist pain easily. I found that working on a wheel where my hand was at an awkward angle puts strain on my wrists.
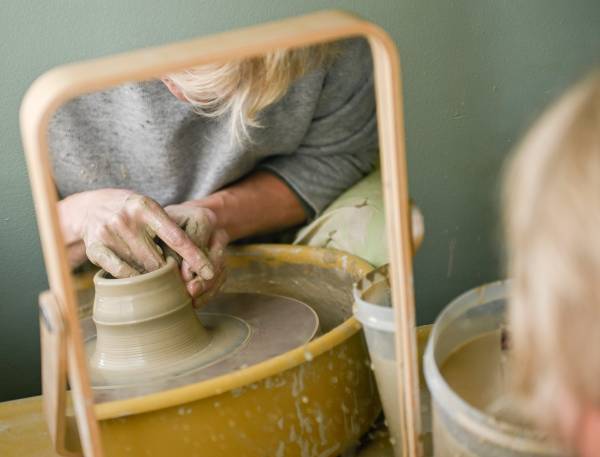
Tip: Another suggestion that might help you look after your back and posture when you are throwing, is to use a mirror. Position a mirror in front of you and the pots on your wheel. That way, you can see the other side of your pots whilst you are throwing, without having to lean over so often to check your pot from different angles.
The Standing Pottery Wheel
One of the issues with working at a pottery wheel is that you are sitting down a lot of the time. And sitting for extended periods is not ideal. However, one solution to this is to use a standing wheel.
Most wheels that are available to buy are designed for sitting. However, some can be adapted so that you can throw whilst you are standing. Here is an inventive solution to raising a pottery wheel to standing height.
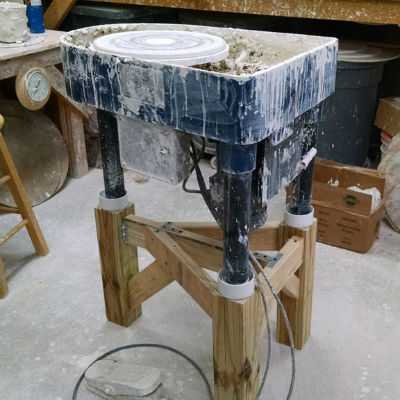
Another alternative is to get a tabletop wheel and put it on a pottery wheel stand that brings it up to the right height for you. Tabletop wheels don’t have legs, and as the name suggests, are designed to be positioned on a pottery wheel table.
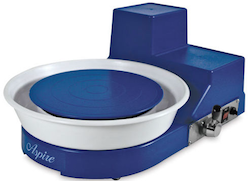
If you put a tabletop wheel like a Shimpo Aspire on a table that gives you enough height you can throw standing up.
Shimpo Aspire Tabletop Wheel
How to Raise Your Potter’s Wheel Height
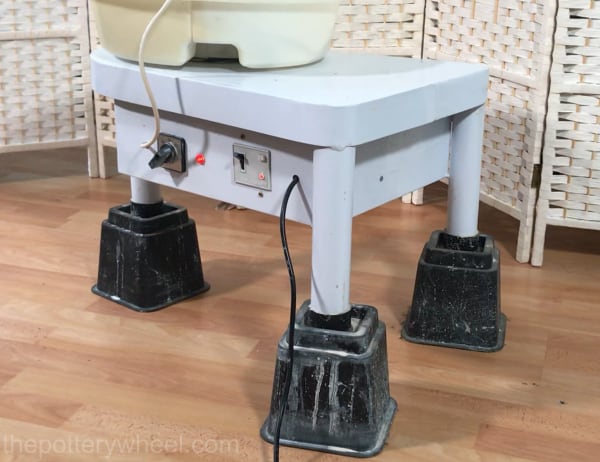
Lots of pottery wheels are designed to be at the right height for sitting and throwing. However, some of the more affordable, starter wheels are quite squat, and you will need to raise them off the ground in some way.
The wheel I bought from Vevor was short and I had to lift the legs using bed risers. Bed risers are designed to raise furniture and make it a bit higher. For example, they are put under beds and sofas to make it easier to stand up. But they double up well as a way of raising a pottery wheel off the ground a little higher.
If you have a potter’s wheel similar to this one, you can buy bed risers here. Here is how I used them on my first pottery wheel.
Here are some other inexpensive ways to adjust the height of your potter’s wheel…
- Cinder blocks
- Building bricks
- Wooden builders pallet
- You can also buy leg extenders for certain models of potter’s wheel. For example, Brent Leg Extension Booties.
Remember when adjusting the height of your potter’s wheel, that it needs to be stable. This is important to protect you and also affects how your work will turn out. And it needs to be level.
Vevor makes a pottery wheel now with extendable legs, which gets rid of the need for bed risers and the like. If I was going to buy a new budget wheel, this is the model I’d go for now. The extendable legs mean you can adjust the wheel height to suit yourself.
Vevor Pottery Wheel
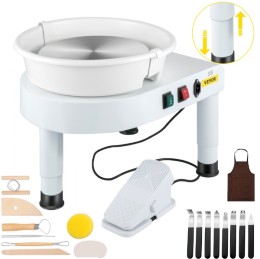
This pottery wheel has extendable legs, so you can adjust them to suit your height.
Body Position and Potter’s Wheel Height
In addition to wheel height, it is important to consider some other things to do with posture. As I mentioned earlier, everyone’s body is different, and finding the right throwing position for you can be a matter of trial and error. Nevertheless, here are some suggestions you might find helpful…
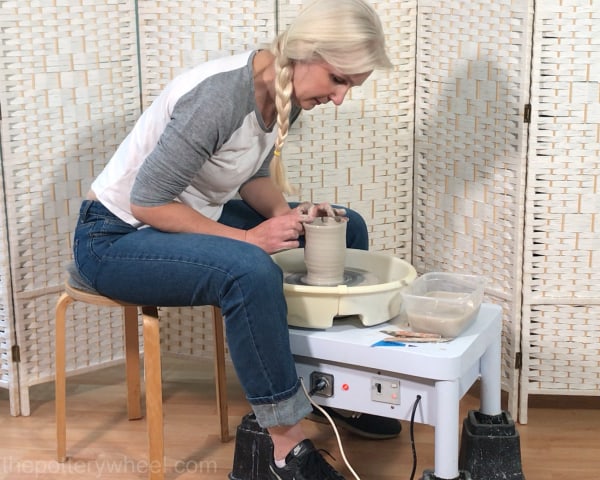
Hinging Forward
I was advised to keep a neutral spine by tipping my torso forward at the hip to the wheel. This gives me more leverage and stops me from hunching over as much.
Position Your Knees a Little Lower Than Your Hips
If your seat is just higher than the wheel head, then your knees will be level with the wheel table. This helps with your circulation and comfort when you are throwing for long periods. It also helps open up the angle between your torso and thighs.
Don’t Forget Your Left Foot
When you have one foot on the pedal, it will raise that foot and leg a bit more than the other. Having one leg higher than the other can feel awkward and make your body wonky.
I use the pedal with my right foot and I put a brick under my left foot to bring my left foot and leg up so it’s level with my right leg.
This makes my whole body more level. It also means I can rest my arms on my legs at the same height.
Type of Pottery Stool And Wheel Height
It is easier to adjust your pottery stool height than your wheel height. It is a good idea to sort your wheel out so that it is generally the right height for you. However, having an adjustable pottery stool that you can quickly change is also handy.
You can buy a pottery wheel stool that is specifically designed for potters. But there are other options available that do the job well too, For example, I now use this mobility shower stool.
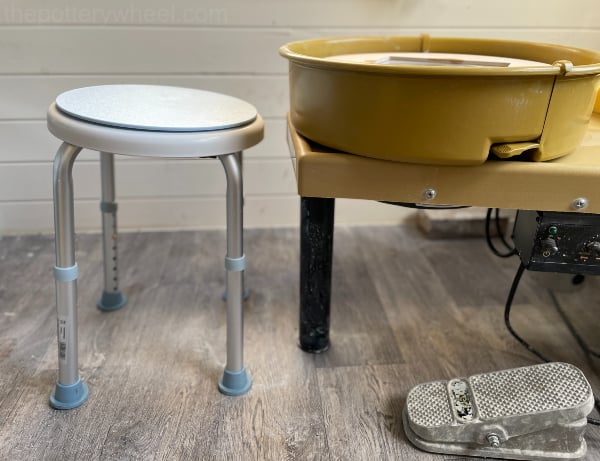
It’s designed to be used in the shower if you find it hard to stand. But it has adjustable legs, just like a potter’s stool, and it’s a fraction of the price.
Another alternative is to use a musician’s drum seat. These are hydraulic, so you can adjust the height easily. But unlike a lot of hydraulic chairs, they have static feet, so you won’t be rolling around on the floor. Also, they tend to be padded, which makes them more comfortable.
Have Your Stool at a Tilt
Potters often set their stool at a slight angle. A rule of thumb is to tilt your stool seat around 10 degrees towards your potter’s wheel. The reason for tilting your seat is so that it tips your pelvis towards the potter’s wheel. This helps to prevent you from hunching forward and puts less strain on your lower back.
If you have a stool with adjustable legs, like the mobility stool in the picture above, you can raise the back legs a little more than the front. This puts a bit of a tilt on the stool seat. I’ve also seen potters who have strapped a block of PVC or wood to the back legs of their pottery wheel stool.
So, putting this all together, in theory, an ideal stool/wheel arrangement is as follows: The front of the stool is 1 inch above the height of the wheel head. The back legs of the stool are higher than the front legs. Giving the stool a 10-degree tilt towards the wheel head.
Final Thoughts
It’s important to remember that bodies are different and what is comfortable for one person may not be for another. The guidelines above are suggestions, and finding a wheel height that works for you may be a matter of trial and error. Also, it’s not just the height of the wheel that is important. It’s a good idea to think about your overall posture and factor that in too when you are throwing on the wheel.


