This article is a step-by-step guide on how to make easy coil pots. The basic coil pottery technique is versatile. Once you have got the hang of coiling you use these skills to make all sorts of hand-built pottery. However simple coil pots can in themselves look great, especially if they are well made. So, read on to see how you can make lovely-looking easy coil pots….
In this article, I will be covering 3 simple coil pot designs. Each method will be building on the coil pottery skills you have learned in the previous section. However, you can click on the link below to take you directly to a particular section if you would like.
The foundation of making easy coil pots is to master making good coils. So, before we get into how to make coil pots, let’s have a quick look at making coils…
First Things First – Making Some Clay Coils
When making easy coil pots, the best way to start is by making a batch of coils. You can make a few clay coils before you begin and cover them with a plastic bag. That way you don’t have to stop coiling to make a clay coil each time you need one. Clay coils do dry out quickly, so if you make them in advance it’s important to cover them with plastic.
On the face of it, making a roll of clay is a simple thing to do. However, there is definitely a knack to making them easily.
Various things can go wrong when you start to make clay coils. For example, it’s common for coils to go flat rather than a round even shape when you start making them. They can also become thin in some places and wider in others. Here are the steps to making perfect clay coils.
- Make a ball of clay about the size of a small orange.
- Squeeze the ball into the shape of a sausage or cigar.
- Use one hand when you start rolling and the clay cigar is quite short.
- Roll the clay for a complete revolution. Start with the tips of your fingers and rolling to the heel of your hand.
- Once the coil is a bit longer, use both hands. As you roll move your hands outwards to stretch the coil out lengthwise.
- The thickness of your coils is a matter of personal choice. However, it’s often recommended that you make your coils the thickness of your pinky finger for medium-sized pots.
Top Tips on Making Perfect Clay Coils:
- If your clay coil starts to flatten out, pat it into a square shape. Then twist the coil at either end like a pastry twist and start rolling again. The twisting action should make the clay take on a round shape again.
- Your coil might become thinner at one point and fatter at another. If this happens, simply focus on the wider section for a while until it catches up with the thinner section.
For a complete description of how to make perfect clay coils, check out this article.
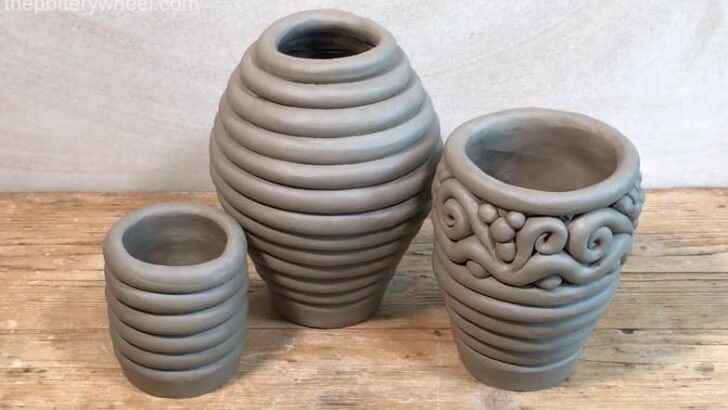
Here is a quick look at some of the coil pottery techniques covered below.
Easy Coil Pots – The Simple Coil Cylinder
The first way of making easy coil pots that I will cover is a simple cylinder-shaped pot.
Simple coil pots made in the cylinder shape can be lovely in themselves. And you can also build upon this technique to make more elaborate coil pots. Mastering the steps outlined below is the basis of the coil pot technique.
Making a Coil Pot Base
Here are three different ways you can make a base for your coil pot.
Method 1
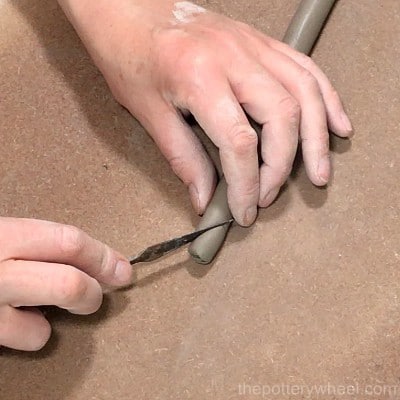
The first technique involves making a base out of a clay coil.
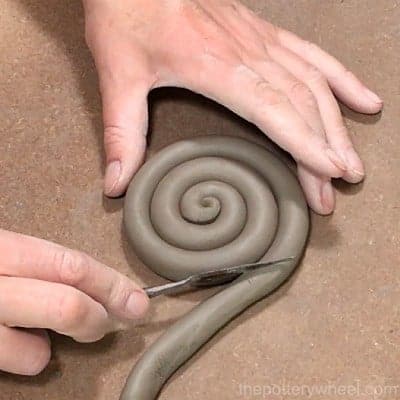
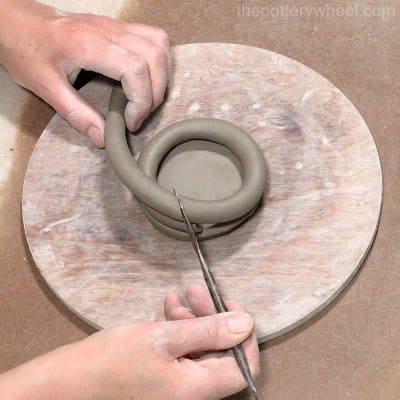
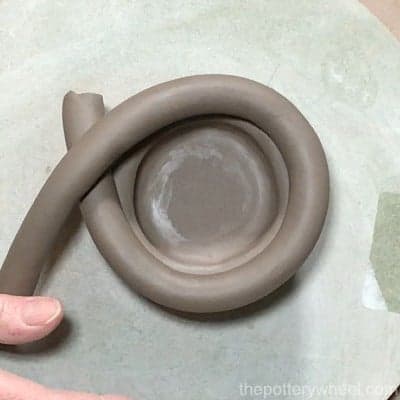
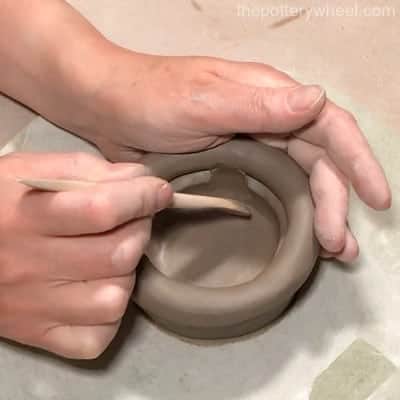
First, slice one end of your coil at a diagonal angle. Then start rolling the coil into a spiral. The reason I cut the end at an angle is that the center of the spiral looks neater and more appealing. If you cut the end blunt then the center of the spiral can look a bit chunky.
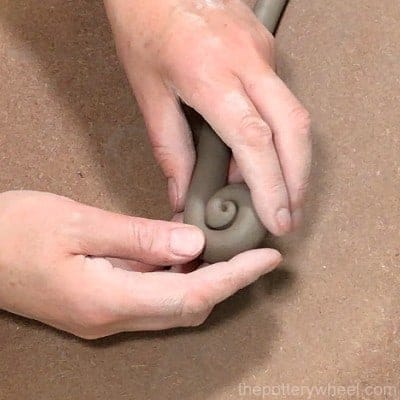
Spiral enough of the clay coil to make a base the right size for your pot. Then cut the second end of the coil to length. Again, I cut this on the diagonal as it’s easier to blend the end of the coil into the base.
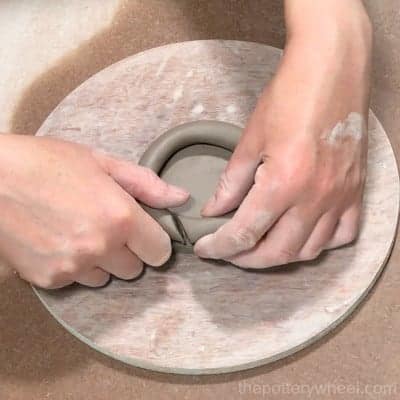
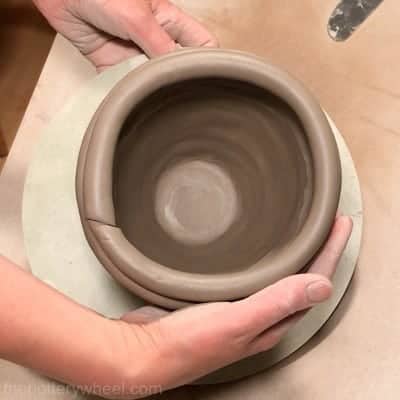
When the end has been blended in, shape the spiral with your hands into a nicely shaped circle.
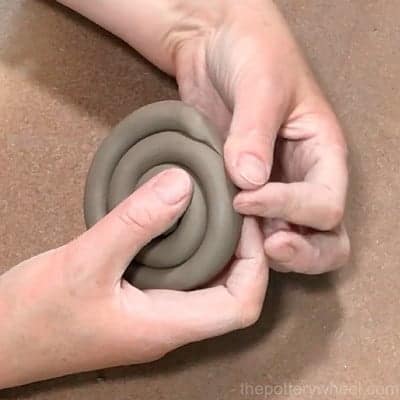
Clay on one side of the base needs to be blended so that the base dries without cracking. If you simply roll a coil up and let it dry without blending one side, the coil won’t hold together.
Therefore, when you are making easy coil pots, you always need to blend one side. The exception to this is when you’re using the slip and score method, which I will say more about later.
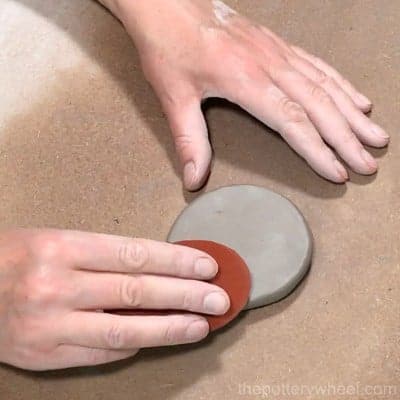
When I’m blending I tend to start off blending with a wooden modeling tool. Then smooth it out with my thumb or fingers. And finally, finish off the smoothing process with a rubber rib.
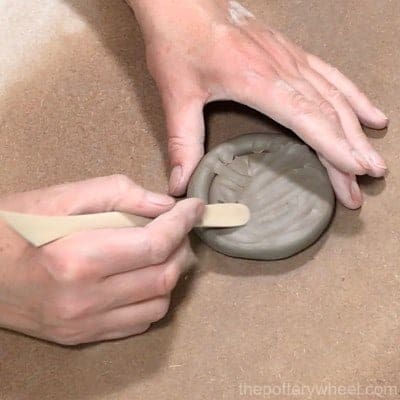
The smooth side can either go on the inside of the pot, or on the outside. This depends on whether you want the coil design to be a feature of the outer or inner surface.
Method 2
If you don’t want a coil design on the base either outside or inside, you can use the following technique.
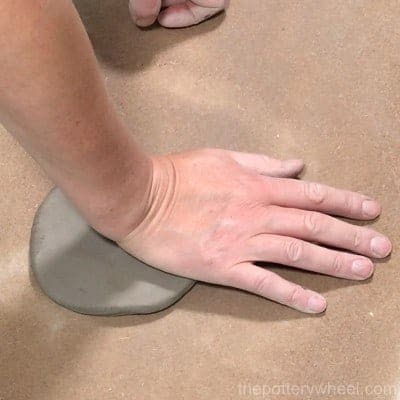
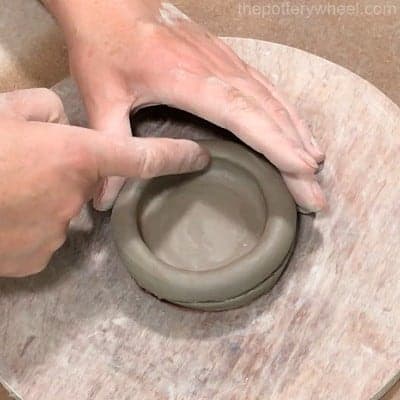
Roll out a ball of clay in the palms of your hand and position it on the work surface. Flatten it with the heel of your hand until it is the thickness of your pinky finger.
Put your clay slab onto a wooden bat. Using a bat is a good idea because it’s easy to move your pottery about and store it between sessions. It’s also easy to wrap the pot and bat in a plastic bag to keep your work soft.
You don’t have to use a pottery bat, an old chopping board would be fine. As long as you position your pot on a base that is steady and can be moved easily.
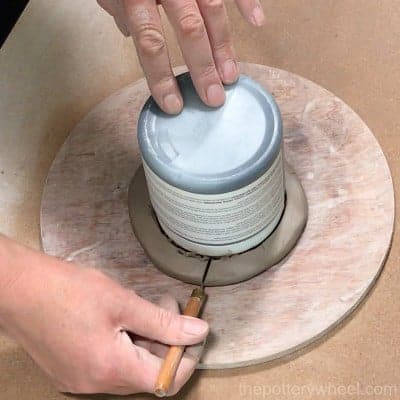
Once your slab is on the bat, you can cut a circular base from the clay. Find a circular object that is the size of the base you would like. I’m using the lid of a glaze pot here.
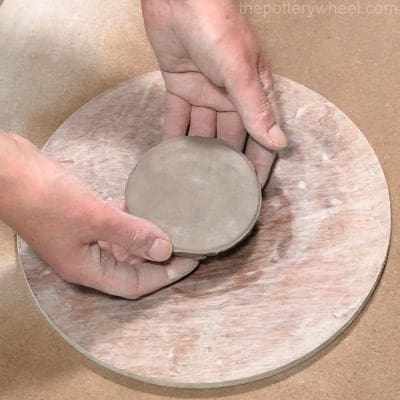
Place it on the slab and using a needle tool, or craft knife, cut the clay around the object. Then remove the excess clay to reveal a nice neat circular base.
Method 3
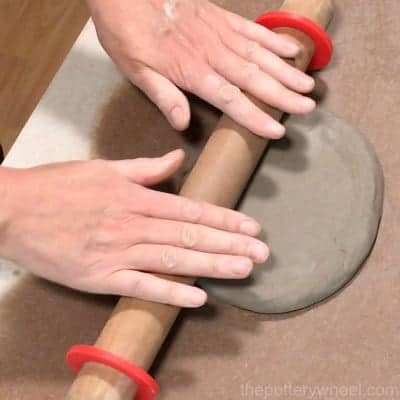
If you want to make sure your base is even, you can use a roller to make your slab. The rubber guide rings on the end of the roller make sure your slab is of even thickness throughout.
Attaching a Coil to The Base of Your Pot
You are now ready to start adding coils to the base.
Firstly, take a coil and wind it loosely around the base to measure the length you need. Then cut the coil to length. It’s a good idea to cut the coil on the diagonal. A diagonal cut will make a more secure join.
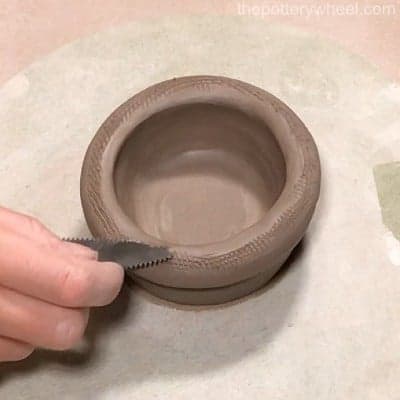
Once you have cut the coil to length, you need to attach it to the base. To ensure the coils are firmly attached to the base and one another you need to use slip and score.
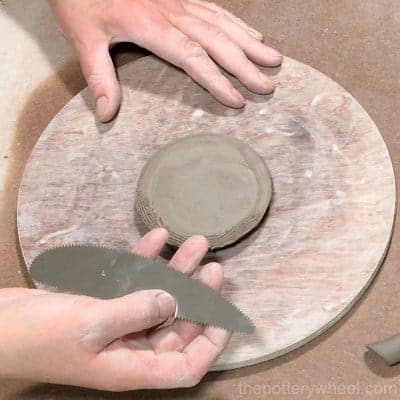
This involves scoring the surfaces of the clay that will be joined with a needle tool, or serrated edge. Then paste a little clay slip onto the scored surface.
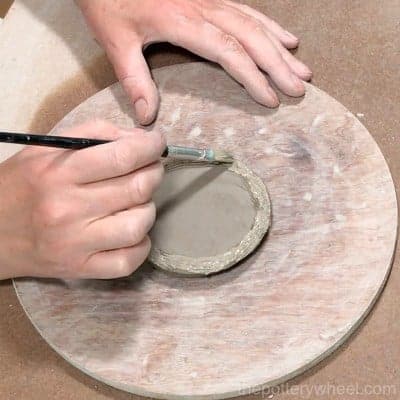
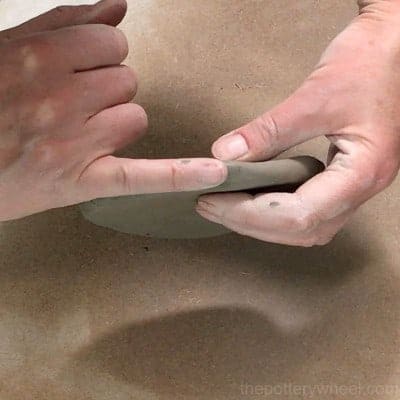
Position the coil on the base, and then slip and score the ends of the coil too. Press the ends of the coil together and the coil to the base of the pot to make a firm join. Blend the clay at the ends of the coil together to make a neat join.
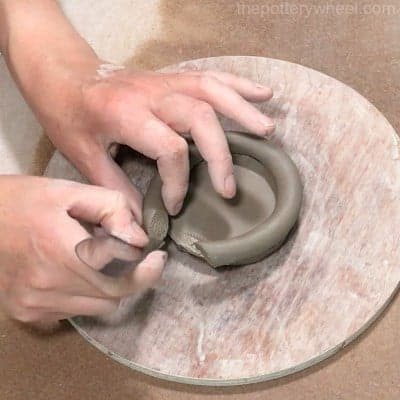
Blending the Surface
Once the ends of the coil have been joined securely, you need to blend the coil to the base too. You can blend the outside of the pot, and have a smooth external surface on your pot. Or you can blend the inside surface, and leave the coiled texture visible. Alternatively, you can smooth both surfaces if that is your preference.
In this example, I’m smoothing the inside surface. If you want your pot to contain liquid, for example, a vase, it’s best to smooth the inside surface. It’s easier to glaze a smooth surface and create a watertight glassy seal.
I find that blending with a wooden tool first and then smoothing this out with my thumb is easiest. You can also run a rubber rib over the inside surface once the walls of your pot are higher. This will give you a very smooth finish.
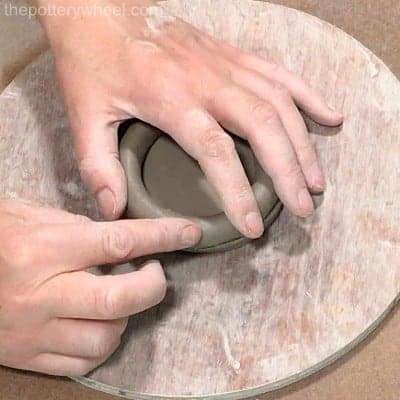
You leave the join between the base and the first ring visible. Or you can blend this out too. I find that it looks neater to blend the first coil into the base. I do this using the same technique of blending with a wooden tool and my fingers and thumbs.
Building the Walls of Your Coil Pot
Once you have added the first coil, repeat this process until the pot is at the height you want.
Position the join in the coil at a different point in your pot each time. If you always put the join in the same place along the side, you will get a weak spot.
Try to keep your coils of an even thickness. If part of your coil is much thinner than another, the sides and neck of the pot will be wonky. If you are intending to make a wonky pot, and it’s a design choice, that’s fine. But it’s best to avoid doing this by accident.
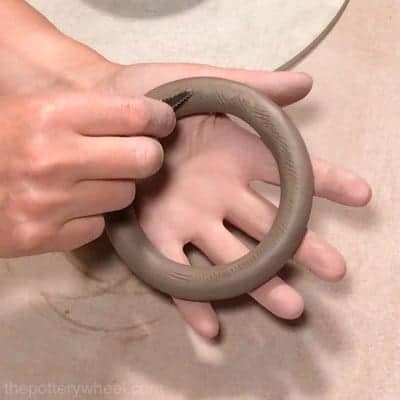
One tip is to join the ends of your coil before you put them on the pot. This will help keep your coil of an even thickness because you can blend the join more easily. The coil then becomes a ring, which you slip and score and add to the top of your pot.
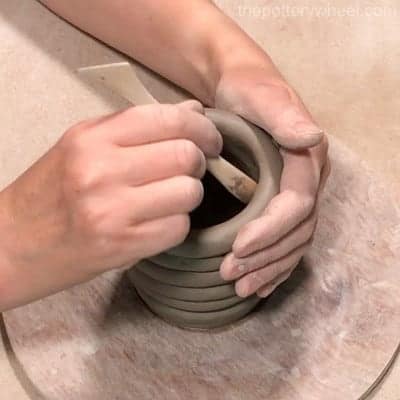
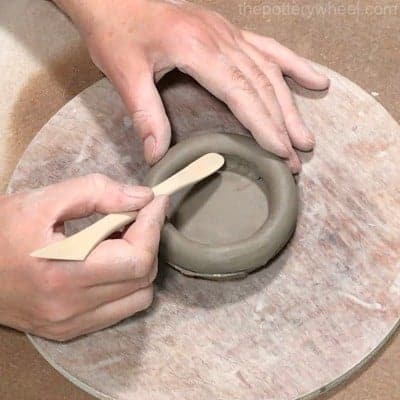
Use your free hand to support the side of the pot as you blend. Once your pot is at the right height you can tidy up the coils.
You may find some slip has squeezed out from between the coils. Or some scoring on the coils may be visible. Once this is tidied up, you can let your pot begin to dry slowly.
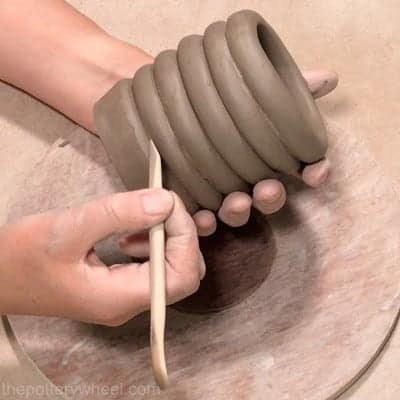
Easy Coil Pots – The Curved Coil Pot
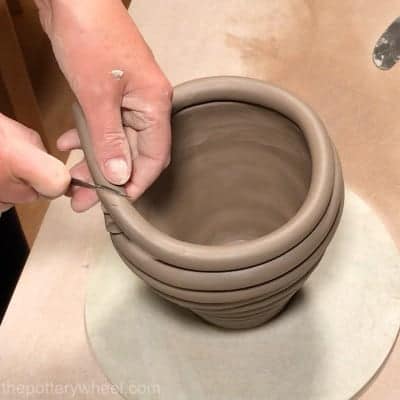
Another one of the most popular easy coil pots is the curved pot. Making a curved coil pot starts off with the same steps as outlined above. Namely, you make a base and add your first coil to your base. Once you have made your base, you can start adding coils that graduate progressively outwards.
You can position your coils so that they make the pot curve outwards, or inwards. To make the pot curve outwards, you need to position your coil a little to the outside of the coil below.
The process of adding your coil is the same as that outlined above. Namely, you cut it to length, join the ends of the coil. Then you slip and score the clay and blend the coil into the one below. However, you are adding the new coil to the outer edge of the coil beneath.
When you score the clay, you need to score a little to the outside of the coil below. That is because your new coil will sit slightly on the outside edge. Likewise, the coil on the top needs to be scored slightly to the inside of the ring.
If you keep adding coils in the same way, your pot will continue to curve outwards. Carry on until you want your pot to start curving inwards towards the neck.
At this point, you need to start positioning the new coils slightly towards the inside of the coil below. This will start to bring the width of your pot inwards.
When you score your clay, you need to score the inside edge of the coil beneath. Similarly, you need to score the outside edge of the new coil that is being added. This is because these are the parts of the coils that will touch when you are joining your coils together.
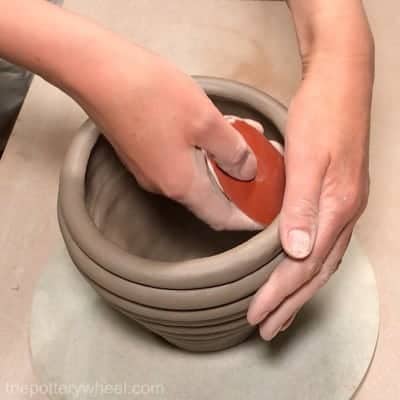
Blend your additional coils in as you have done previously. It’s a good idea to use a rubber rib on the inner surface of the pot. Particularly as you start to reach the top edge of the pot. This will give the inside a nice smooth surface.
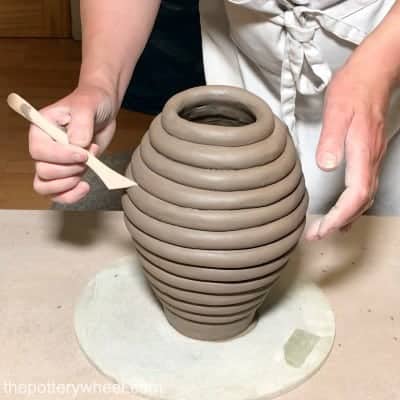
Repeat this process until your pot is the right height and you are happy with the width of the neck. You will probably need to spend some time tidying up the outside of the pot before you finish. Slip may have squeezed out between the coils. And score marks may be visible on the outer surface too. You can tidy these details up easily using an angled wooden tool.
When you are content with the overall finish of your pot, you can begin to dry it out. It’s always a good idea to dry clay pots out gradually. However, I think this is especially true of coil pots. There are lots of joins and differences in thickness on a coil pot. This leaves plenty of chance for your pot to crack whilst it dries or is fired.
Therefore, it’s a good idea to keep your pot loosely covered with a plastic bag to dry it out slowly. I normally dry a coil pot out over the course of a week. And I gradually loosen the bag to enable more airflow as the clay becomes drier.
Easy Coil Pots with Decorative Coil Details
Once you have mastered the basic coil pottery techniques outlined above you can add decorative coils to your pottery. There is almost no limit to the shapes and designs you can use, provided you attach your coils securely.
You can use balls, waves, spirals, twists, plaits, slabs, or modeled shapes like squares and circles. Those are just a few suggestions.
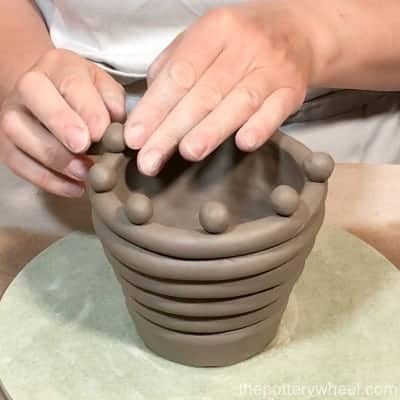
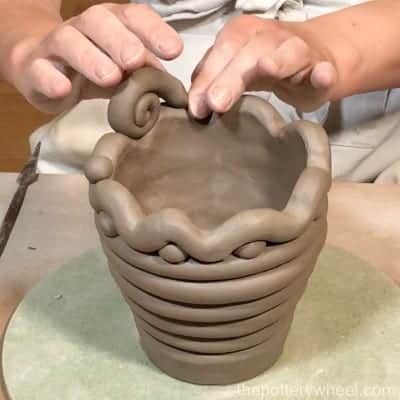
With this pot, I started off by adding a row of clay balls placed around the top edge of the pot. I then shaped a coil into a wave design and positioned that so it fitted snuggly over the balls.
Because of the more complicated shape of this coil, slipping and scoring would have been too fiddly. So, I blended the inside surface of the wave into the pot to make sure it was attached well.

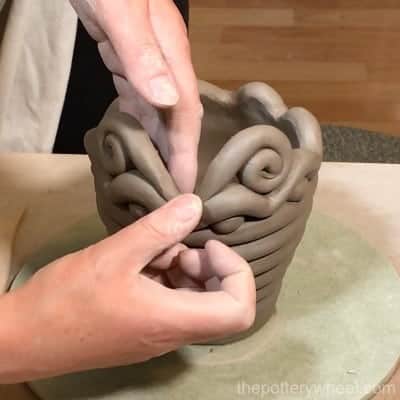
I then added some spirals. The spirals were made in the same way that I described earlier. Again, these were blended well on the inside edge of the pot. And I continued to add a sequence of spirals and balls to complete the design.
Tidying Up Your Coils
When you bend clay into shapes like waves and spirals, the clay surface can crack a little. This can happen if your clay is on the dry side. But some clays are more cracking when they are bent than others, even when they are moist enough. For example, clay with grog in it will often crack when it’s bend and pulled.
Little cracks in the surface of your coils are nothing to be concerned about. You just need to smooth out the surface, once you are happy with the overall design of your pottery. Small cracks and blemishes in the clay can be tidied up with a modeling tool or your fingers.
Small cracks in the clay can open up when your pottery dries. Likewise, joins in the clay that are not securely attached can separate as your clay dries. So, blending and tidying up are important. This is especially true when you are adding decorative shaped coils, that have lots of joins, curves, and angles.
You will see that with this piece I added a series of clay spirals around the top. I then positioned clay balls between the spirals and blended these in on the inside surface. As well as securing the clay, blending seals the inside surface so you can use your pottery as a vase.
Creating Your Own Individual Design
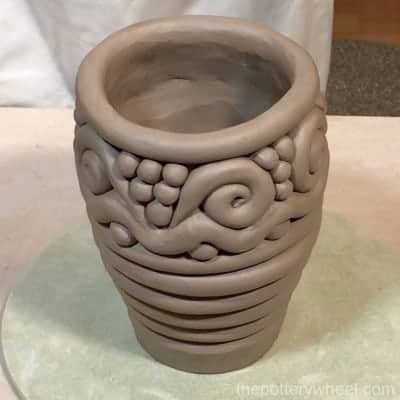
When you are adding decorative coils, you can make a design choice and leave some gaps between coils. An example might be something like this:
This can be a very nice feature of your pottery. And can make easy coil pots look individual and distinctive.
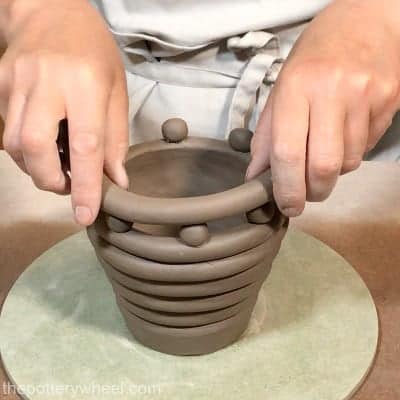
With each step when you are adding decorative coils to your pots, you are making a design choice. For example, with the top edge, you can add a final coil to make an even rimmed pot.
I could also have finished the pot without adding the top coil. So, the top edge would have been made up of spirals and balls. If you choose to have decorative detailing on the top edge, make sure the joins are well blended. If you have unblended joins on the top edge, they may open up as the pottery dries or is fired.
The main point is that you can use whatever design you prefer, provided your coils are secured and blended well.

For a full step-by-step video on the above coil pottery techniques, check out my YouTube video, how to make easy coil pots.
Final Thoughts
Once you have mastered these fundamental techniques of making easy coil pots, you can experiment as you like. The great thing about coil pottery is that it is suitable for children and beginners. It is easy for small hands to work with coils. And coiling lets beginners get the feel of working with clay. However, once you get the hang of it, you can use coiling to hand-build lovely looking refined pottery.


