A sawdust kiln is one of the easiest ways to fire clay at home. The kiln can be made using a simple brick construction. It can be used to bisque fire pottery, or to create lovely smoked effects on already bisque fired ware. Here is an easy to follow step-by-step guide on how to build a brick kiln to sawdust fire clay.
Disclaimer: The description below is intended for informational purposes only and is not advice. Fire is dangerous. If you have any concerns about the methods described below, please consult an appropriate professional. Or consult with your local fire department.
How to Build a Sawdust Kiln
There are a few ways to build a DIY kiln. Making a sawdust kiln is one of the most straightforward. These are some of the things that you will need:
- Bricks
- Steel Mesh
- A sheet of steel
- Sawdust
- Newspaper
- Kindling
- Lighter fuel
- Matches
This is a step-by-step guide on how to build a brick kiln for sawdust firing:
Step 1: Find a Level Patch of Ground
The ground needs to be level so that the bricks will be stable. Also, whilst a bit of grass will be fine, it’s best to avoid vegetation that will catch alight easily.
The same goes for the surrounding area. Find a spot that is a safe distance from trees or plants that might catch alight.
Step 2: Making the Base of the Sawdust Kiln
Position a layer of bricks on the ground. I use reclaimed house bricks that I got for free from Facebook marketplace. A local person had a pile in her front yard that she wanted to get rid of.
House bricks are made out of different materials. Some are concrete and some are clay. I specifically chose bricks made out of clay. I reasoned that they would be more likely to tolerate the heat from the burning sawdust.
The bricks I collected had been lying outside for weeks so they were damp and dirty. Once I got them home I put them in a sheltered area outside, so that they could dry off. I wanted them to be dry before I fired the kiln.
If they were damp when the kiln was fired, the moisture in the bricks might cause them to shatter. When water turns to steam it expands and puts enough pressure on the brick to break the brick apart.
I use two layers of bricks for the base of the kiln. This is to provide insulation and prevent losing too much heat into the ground. It also prevents burning sawdust from falling through the gap in the bricks and scorching the ground.
I use 24 whole bricks in total for a base that is two layers deep. I also used two half-broken bricks to make up the length of one side.
Step 3: Start to Build up the Walls of the Sawdust Kiln
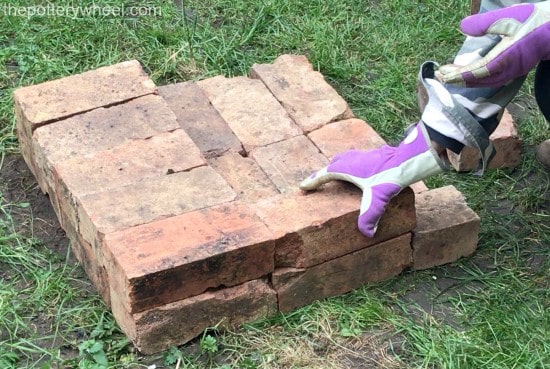
To make the internal chamber a bit larger, I lay the wall bricks on their narrow side. This also means I need fewer bricks to make a taller kiln. I lay two layers of bricks on top of one another, this is the first level of the sawdust kiln.
When laying the bricks, it’s important to position the bricks close to one another. And for the bricks to be steady and stable.
However small gaps between the bricks are inevitable. Particularly if you are using reclaimed bricks. These small gaps are fine. In fact, the small gaps actually allow air to be drawn into the sawdust kiln as it fires. This airflow is necessary to keep the fire burning. So, don’t worry if your bricks are a little gappy.
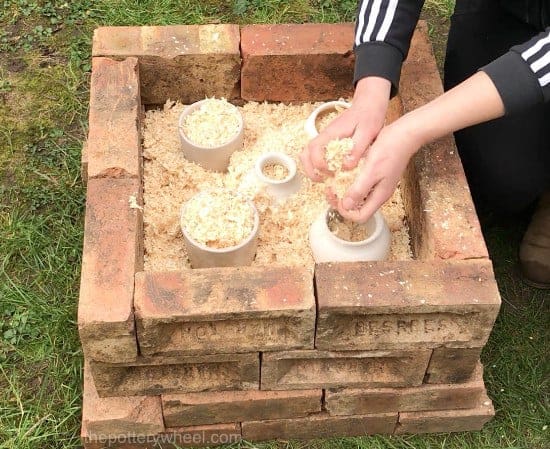
Step 4: Filling the First Level of the Sawdust Kiln
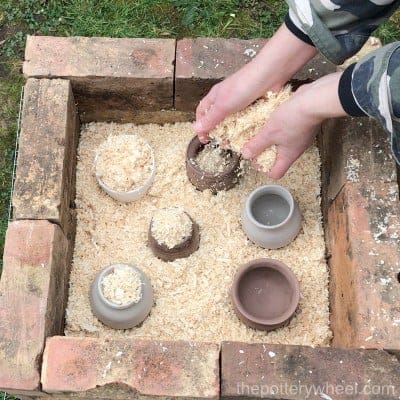
Place a layer of sawdust a couple of inches thick on the base of the kiln. Then position your pots on the sawdust layer.
Each pot needs to be surrounded by sawdust, rather than resting on another pot. So, make sure there is some space between each pot.
When you have positioned the pottery, sprinkle some sawdust into the pots, so they are full. Then fill in the spaces between the pots with more sawdust. Finally, fill the first level with sawdust until it reaches the top edge of the brick wall.
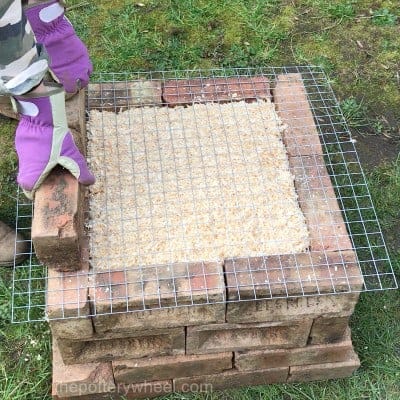
Step 5: Adding the Mesh Wire
Place a piece of metal mesh on the top of the bricks. This acts as a support for the next layer of pottery you are going to add. As the sawdust burns the pots will drop down in the kiln. Adding the mesh prevents the pots on the next layer up from dropping onto the pots below.
I use a sheet of steel mesh that is 24 x 24 inches. This is large enough for a kiln with a base that is made up of 24 standard sized house bricks.
Step 6: Constructing the Rest of the Sawdust Kiln Wall
Once the steel mesh is in position, place another layer of bricks for the next section of the kiln wall. This next layer of bricks will hold the mesh in place.
The second section of the kiln is also two bricks deep. Fill the second layer of the sawdust kiln with pottery and sawdust as you did with the first layer. Make sure that the sawdust comes right up to the top edge of the brick wall. You want as much sawdust in the kiln as you can get. This will help the kiln to burn longer.
You can download your FREE copy of this step-by-step guide as an ebook here!
How to Fire the Sawdust Kiln
Once you have built the brick kiln, you are ready to fire it.
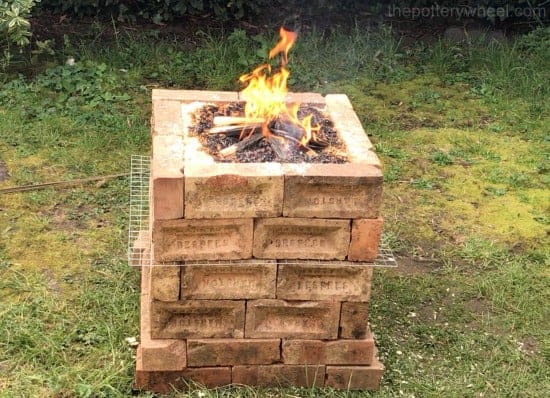
Step 1: Lighting the Sawdust Kiln
Make a little dip in the top of the sawdust in the kiln. Then scrunch up a couple of pieces of newspaper and place these into the dip.
Stack some dry kindling wood around the newspaper. If you want to start the fire easily, squirt a little lighter fluid onto the paper and wood. Then carefully set alight to the paper and wait whilst the kindling starts to burn too. Be sure to keep your fire extinguisher and fire blanket handy just in case you need them.
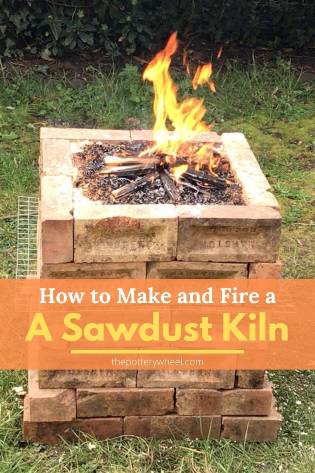
Step 2: Let it Burn
Allow the fire to establish itself well. I tend to wait until most of the kindling has started to turn to charcoal. By this point, the fire will have spread across the whole surface of the sawdust.
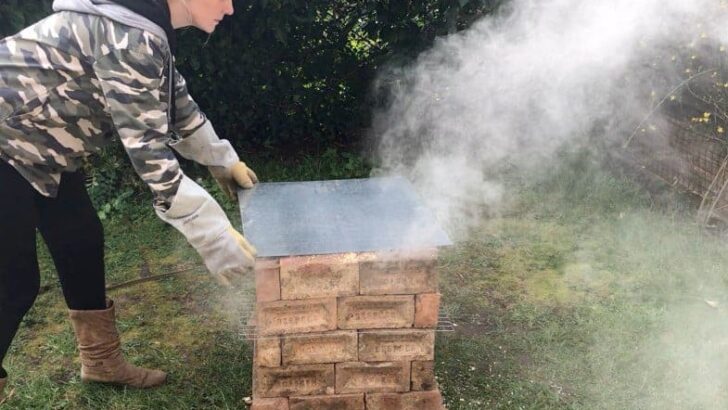
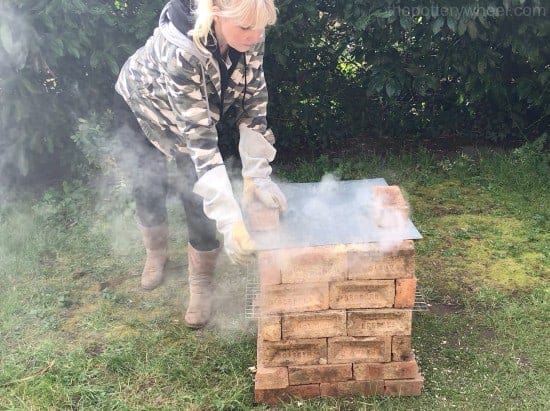
Step 3: Putting the Lid On
Place the steel sheet across about 80% of the top of the sawdust kiln. The steel sheet that I use is 24 x 24 inches large, and 0.035 inches (0.9mm) thick. Position this carefully, and avoid crushing the fire too much and accidentally putting the fire out.
By leaving around 20% of the top open, you allow for enough airflow to keep the fire burning. Let the kiln burn like this for around 30 minutes. Then gradually inch the steel lid in until it covers the whole top of the kiln.
I tend to move the lid over in stages. Every 10 minutes or so, I will cover a little more of the kiln, until completely covered.
Once the lid is in place I put a couple of bricks on the top edge. This prevents any gusts of wind from blowing the lid off. It also creates a better seal between the bricks and the lid.
However, it is important that there is some space between the bricks and the lid. This helps airflow to continue in the sawdust kiln and prevents the fire from being extinguished.
Step 4: Make a Cup of Tea
Your only job now is to allow the sawdust kiln to do its work. If you set sawdust kiln burning in the morning, it will still be hot and smoking at night time. Leave the kiln overnight until it has cooled down completely the next morning.
Do keep an eye on the kiln throughout the course of the day when it is burning. Make sure that it is continuing to burn safely and it is not presenting a fire hazard at any point.
Step 5: Unloading the Kiln
Once the kiln is cool you can lift the lid off the top and take a look at your pots. It is quite common for pots to break during firing using this method. So, you may find one or two of the pots have broken. However, all things being equal, most of them will be intact.
If your sawdust kiln has burned well and for long enough, the pottery will have turned from clay to ceramic. A sawdust kiln can get up to around 1292F (700C)
You can test if your pots have become ceramic in a couple of ways. Gently flick the pots with your finger. Unfired clay will give a soft dull sound, whereas fired ceramic clay will make a sharper, pinging sound.
You can also rub a bit of water onto a section of the pot. If it has become ceramic, then the clay will not dissolve as your rub the water into the pot. Instead, the water will be absorbed into the porous surface.
This is a low fire method of firing clay, so the clay will not be vitrified. However, if your sawdust kiln got hot enough the clay will have become ceramic.
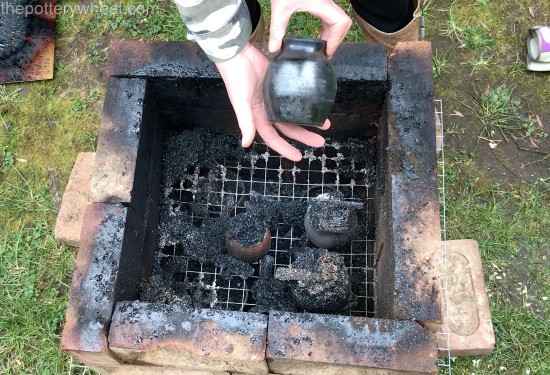
What Do Sawdust Fired Pots Look Like?
When you remove the bisque fired pots from the sawdust kiln, they will be blackened through carbonization. The exact look will depend upon the clay you used, and how you finished your pottery.
It’s likely that some areas of the pottery will be darker than others. Some patches will likely have shiny black carbonized areas. Other patches may be a lighter matte grey color.
You can get a nice dark glossy finish from pottery that has been burnished before it is fired. Applying terra sigillata to your bone dry pots will also create a lovely rich gloss finish too.
Best Clay for a Sawdust Kiln
I have fired a range of types of clay in a sawdust kiln and found that most are suitable. Some of the types of clay that I have successfully bisque fired in a sawdust kiln are:
Whichever type of clay you use, it helps if the clay contains some grog. Grog is clay that has been fired to ceramic, then ground up again into granules. These are then added back into unfired clay. It gives the clay some grit and also makes the clay less likely to crack when it is fired.
If clay contains grog, it is less likely to crack under sudden changes in temperature. This is because it is less vulnerable to thermal expansion. Regardless of what clay you use, some breakage when bisque firing in a sawdust kiln is not uncommon.
It can help to pre-heat your pots in a domestic oven before you fire them in the sawdust kiln. Pre-heating them involves putting the pots in your oven at around 194F (90C) for a few hours. You can also pre-heat your pots in an electric kiln too if you have access to one. This involves candling the kiln for a few hours before putting the pots into the sawdust kiln.
If you’d like to watch a full step-by-step video on how to build a sawdust kiln, here is a link to my complete video.
Final Thoughts
Making and firing a sawdust kiln is an exciting and simple way of firing clay. The materials you require to build a brick kiln are inexpensive, and you can get most of them for free if you look about. And the pottery that you produce can be really very beautiful. It has a dark, rich organic look, which is beautiful enough to rival a lot of expensive pottery glazes.


