If you’re starting to learn about slab pottery, you may have come across the term ‘hard slab pottery’ and wondered what it is.
Slab pottery can be made when the clay slab is still soft and flexible. This is soft slab construction. Or it can be made when the clay slab has been left to dry out to the point of being leather hard. This is hard slab pottery, also known as stiff slab construction.
Whether you choose to make your pottery out of soft or hard slabs, depends on what you want to make. Here are some of the benefits and features of working with stiff slabs of clay.

Why Choose Hard Slab Pottery?
Soft slabs of clay are very flexible and great if you want to make smaller curved pieces of pottery. If handled carefully, they can be bent, draped, and folded easily to create nice fluid curved shapes.
However, it’s hard to build larger pieces using soft slabs. This is because a large soft slab will flop, stretch and collapse. A soft slab doesn’t have the strength or rigidity to support itself when it reaches a certain size.
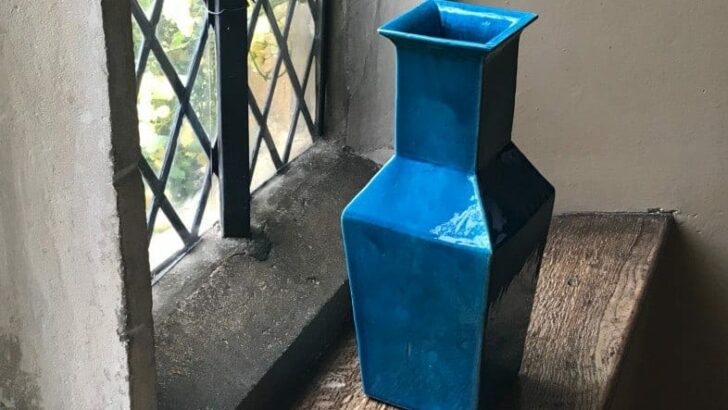
This is why working with hard or stiff slabs is preferable when you are making larger pieces. Ranging from medium to large-sized vases, or much larger sculptural ceramic work.
Hard slab pottery is also the recommended technique if you are making angular pieces. It is easier to create well-crafted edges and angles when you are working with firmer clay.
(CC BY-SA 2.0)
How to Make Hard Slab Ceramics
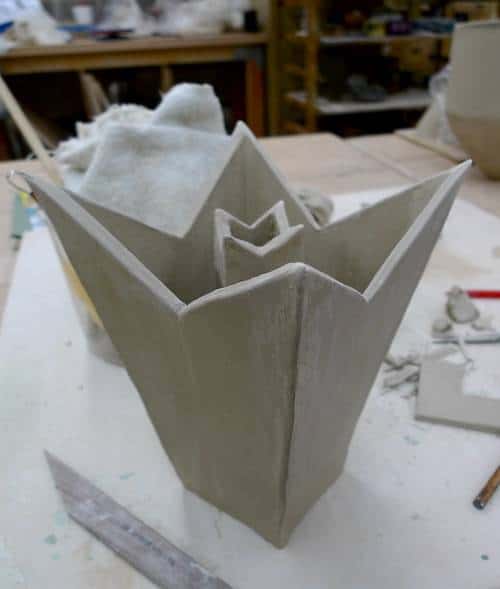
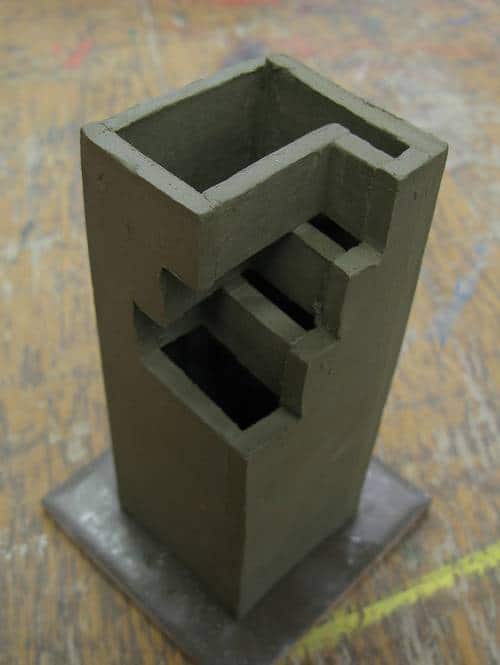
Usually making hard slab ceramics involves cutting out sections of a clay slab, and assembling the pieces together. This can feel a bit like putting together a jigsaw puzzle.
As such, stiff slab construction is often used for pottery that has an architectural quality. Usually, it involves working to a plan and cutting the slabs out with a template, then finally building the piece by joining the different sections together.
What Exactly is a Hard Slab?
Hard or stiff slabs are clay slabs that have been allowed to dry to the point of being leather hard.
However, there are different stages in clay becoming leather hard. The drying process is a gradual one, but it can be helpful to divide the leather hard stage into 3 sections. They are the early, middle, and late stages of being leather hard.
The Early Stage of Leather Hard Clay Slabs
In the early stages of being leather hard, the clay is stiff and can be handled without losing its shape.
However, at this stage, the clay slab will still have enough moisture in it so that you can bend it carefully without it cracking.
Bending clay at this point is a bit like bending stiff cardboard. You can usually bend it in one direction, but you can’t bend it in many different directions in the way that you can a soft slab.
Nevertheless, if you are patient and work slowly, you can coax the clay to take on the shape you want. For example, you can use a paddle to pat the clay gradually into curved or rounded shapes.
The Later Stages of Leather Hard Clay Slabs
In the middle stage of being leather hard, the clay still has some moisture content. However, it is now too stiff to bend without cracking or snapping.
This is a good time to add details to your slab such as carving texture into your clay. Or trimming the slab to size.
The later stage of being leather hard is just before the clay is bone dry. The clay has a little bit of moisture left, which gives it a bit of extra strength. At this point, you can do things like a little fine detail carving or burnishing, but no bending or joining.
Shaping Clay Slabs
You have options when making hard slab pottery. You can wait for the slab to firm up and then shape it.
Or you can use supports and drape a soft slab over the support. The soft slab is then left to firm up on the support. Once it has become leather hard on the support, it can be removed and pieced together with other sections of clay.
The good thing about using supports is that you can design and make your own structures exactly the shape that you want. These can be made out of wood if you are handy with woodwork. Or they can be made out of cardboard or plastic.
Tip
Be aware that if a clay slab is wrapped around a support and left to become leather hard, the slab can crack.
This is because as the clay dries it shrinks. This can put pressure on the slab if it can’t move on the support, causing the slab to crack. Remember to move your slab off a rigid support when has firmed up a bit.
Cutting Hard Slab Pottery
There are different ways of cutting a hard slab of clay.
One of the best ways to cut a stiff slab is a clay knife or fettling knife. These are tough, sharp, and easy to handle.
It’s possible to cut clay slabs with a needle tool. However, needle tools are not as strong as clay knives and the needle end can bend in the clay or drag the clay a bit.
One of the dangers of cutting a stiff slab is that the clay can sometimes break, particularly if the slab is on the drier side.
A way to avoid this happening is to hold the clay firmly and press it down carefully into your work surface as you score into the clay.
Hard slabs are prone to break at the edges as you cut them. It’s a little like sawing into a plank of wood. If the wood isn’t supported when you get to the edge, the plank can snap off as you saw.
One way to avoid this happening is to cut the clay from the edge of the slab to the middle. Stop cutting when you get to the middle of the slab.
Then start the cut again from the other edge, so that with each cut you are ending the slicing motion in the middle of the slab.
This will prevent too much pressure from being applied to the outer edge of the clay slab.

Tip
Using a pizza wheel is a good way to cut a clay slab because you are pressing down into the slab, rather than dragging into the clay. This can help prevent the clay from breaking as you cut it.
Drying Hard Slab Pottery
There are two important things to remember about drying out hard slab pottery.
- Tip 1: When you are making a piece by assembling different slabs of clay, each section should have the same moisture content as the others. This is because when you join clay, you want each section to be shrinking at the same rate as it dries.
If one part is drier than the others, and shrinking at a different rate, the piece is likely to crack at the join. Keep your different sections of the piece covered with plastic or saran wrap when you are not working on them. This will prevent them from drying out too much or too quickly. - Tip 2: When you are working with slabs, always let them dry out very slowly and evenly. This is because slabs have a tendency to curl or warp when they dry. And they are prone to cracking at the seam. Drying your work out slowly will go a long way to avoiding this.
You can dry it slowly by covering it with plastic for a good few days. It can help to cover the piece with a texture-free cloth under the plastic. This will prevent condensation that gathers on the inside of the plastic covering from dripping onto the clay.
As the clay dries out, you can gradually loosen off the plastic bag. Usually, I wait until the clay is almost bone dry before I completely remove the plastic covering.
It can feel like a painfully slow process letting slab pottery dry out. But it’s worth it. It’s very disappointing if your work cracks or warps because it dried out unevenly.
Joining Hard Slab Pottery
If you are working with soft slabs, then you can often join the clay by simply pressing the clay together. When the clay is fresh it usually has enough moisture so that it will bond together if the clay is compressed firmly together.
However, when joining hard slabs, you do need to use the score and slip method. This involves scoring into the edge of the slab with a textured tool like a serrated rib or even a regular kitchen fork. Then apply some clay slip to the join before pressing the seams together.
If you prefer you can simply add water to the scored surface. The water on the scored surface will create its own slip as you are working.
Once the seams have been pressed together, it helps to blend in the clay too. This involves smoothing out the edges of the seam to create a smooth surface.
In addition to blending the clay, you can also add a small coil of clay to the join and blend that in over the seam too. This will reinforce the join even further.
Tip
It’s not uncommon for the edges of a slab to dry out a little more than the center of the slab. If you notice that this has happened, you can spray a little bit of water onto the edge before you start to join your pieces.
This can even out the moisture content across the slab. As such it can reduce the chance that your piece will crack when it’s joined and it’s drying out.
Final Thoughts
Really large pieces of hard slab pottery, like garden sculptures, are not just pieces of art, they are feats of engineering too. However, not all stiff slab construction needs to be on a massive scale. A well-crafted slab vase requires a similar kind of thought, planning, and creative flair. Hard slab pottery is very enjoyable if you like to solve puzzles and find ways to make things work. At the same time, you are exercising your artistic skill too.


