If you’ve started making pottery, you may be wondering how to fire clay at home. The good news is that you don’t need a fancy art studio to fire your own pottery.
There are some simple, inexpensive ways to fire clay at home. This article covers 7 ways of firing pottery and some of the things you need to know about each method.
A Word about Safety
Because firing clay involves high temperatures, you need to take steps to protect yourself. I’m not a health and safety expert, I’m a potter. In this article, I share the steps that I take to protect myself when dealing with hot ceramics. However, I’m not qualified to make specific safety recommendations.
If you have any safety concerns about the following methods of firing clay, please consult a relevant professional. A health and safety officer may be able to provide you with suitable safety precautions.

That said, let’s take a look at some of the techniques you can use for firing clay at home…
How to Fire Clay at Home
Firing clay normally involves three stages. The first stage is drying the clay out before you fire it. The second stage is bisque firing the clay. And the third stage is glazing or decorating the clay.
Bisque firing is the stage in which the pottery is turned from soft clay into hard ceramic. Once this has been done, then you can decorate your pots. There are lots of different options when it comes to decorating your pottery at home.
Drying Your Clay
With all of these techniques below, it’s very important that your clay is absolutely dry before you start firing it. If your pieces contain moisture, and you heat them up, they may well explode or break as you fire them. The boiling temperature for water is 212F (100C). When moisture reaches boiling point, it turns to steam and as it does this, it expands rapidly.
If you have little pockets or bubbles of air in your clay, the steam will travel into those gaps and expand. The pressure of the steam in the bubbles of air can cause chunks of your pot to break off. Or it can cause the whole piece to break apart or explode.
Therefore, it’s important to let your clay pieces dry out thoroughly before you fire them. Even if they feel bone dry, it’s likely that they still have some moisture nestled at a deeper level.
So, even if they feel dry, it’s important to take some extra steps to make sure they are completely dry. One way to do this is to put your pieces in your kitchen oven, and heat them to 194F (90C). This is just below the boiling point of water.
Leave them in the oven for 30 minutes to an hour at this heat. This will be enough to evaporate any left-over moisture left between the clay particles.
7 Ways to Fire Clay at Home
Without further ado, let’s have a look at the different ways of firing clay at home. These are the methods of firing that I’m going to cover. You can use the links below to jump to a particular section. Or you can browse through each method in turn and decide which one appeals to you most:
- Microwave Kilns
- Charcoal BBQ Grills
- Pit Firing
- Sawdust Firing in a Brick Kiln
- Barrel Firing
- Raku Firing
- Plug-in Hobby Kilns
Method 1: The Microwave Kiln
Microwave kilns are small cylinder-shaped containers that fit into a domestic microwave. They are made from a porous insulating ceramic material. They are made up of two parts. The first is a base onto which you place your pottery. And the second part is a dome-shaped cylindrical lid that sits on top of the base covering your clay.
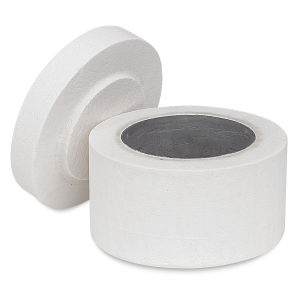
Fuseworks Microwave Kiln – View on Blick Art Supplies
The inside surface of the kiln is coated with a black-colored susceptor material. Susceptor materials are designed to absorb electromagnetic energy from the microwave and turn it into heat.
A lot of microwave kilns are designed for fusing small pieces of glass, to make jewelry and small ornaments. However, many potters who work on a small scale use them to fire pieces of clay too. Some microwave kilns are specially designed for firing clay at home. An example of this is the MagicFuse kiln by Paragon.
Microwave Kiln Firing Temperatures
Microwave kilns are made to reach temperatures up to around 1650F (900C). Although this does vary between brands, so it’s best to check the spec of the kiln you’re thinking of using.
By this temperature, pottery will have turned from clay into ceramic. So, it is possible to bisque fire pots in a microwave kiln. In a normal pottery kiln, clay is bisque fired at temperatures roughly between 1823-1940F (995-1060C).
The exact bisque firing temperature depends on the kiln you are using and how quickly you are firing. Nevertheless, regular bisque firing temperatures are higher than those you will reach in a microwave kiln.
However, the temperatures reached in a microwave kiln are enough to have converted clay to bisque. When bisque firing, the higher the temperature reached the stronger and less porous the pottery will become. So, clay bisque fired in a microwave will not be as strong as bisque made in a regular kiln. But it has been converted to ceramic, and once made into ceramic, it can’t be turned back into clay.
How Long Does Firing in a Microwave Kiln Take?
The amount of time you need to fire your pottery in a microwave kiln depends on a few factors. Two of these factors are the size of your microwave, and the wattage your microwave uses. Some microwaves are more powerful than others, and firing will take less time.
Also, Microwave kilns come in 3 different sizes, small, medium, and large. Bear in mind that even the large one has to fit into a domestic-sized microwave. And a ‘large’ microwave kiln is typically just over 6 inches in diameter. So, any pieces that you fire in the microwave kiln will need to be small. And you are looking at firing individual pieces one at a time, rather than a load of pieces at once.
However, firing in the microwave typically takes minutes rather than hours. The exact length of time it takes depends on the brand of kiln you’re using and the factors outlined above. You should check the manufacturer’s instructions. However, bisque firing can take between 15 and 30 minutes in a microwave kiln.
Glazing in a Microwave Kiln
You can also glaze your pottery in a microwave kiln, using standard pottery glazes. Most potters use low fire pottery glazes that melt and mature at lower temperatures. However, I’ve heard of potters who push the limits of their microwave kilns and manage to fire mid-fire glazes in their kilns too.
Safety When You Fire Clay at Home
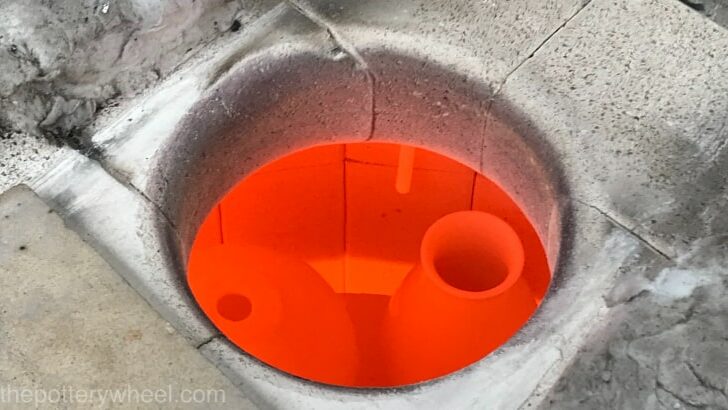
The clay in a microwave kiln will get hot enough to become red hot. So, you need to take the necessary safety precautions when firing clay at home in a microwave kiln. Heat resistant gloves, protective eye goggles, pants rather than shorts, and closed to shoes rather than sandals are a must. Also, if you are handling the pottery when hot, you need to pick it up with tongs.
You need to read the safety recommendations made by the manufacturer. A microwave kiln doesn’t have a temperature reader on it. So, you will only know through trial and error how long to fire your clay for. However, when the kiln is reaching its target temperature, it will become orange hot. You will see the orange glow through the vent hole on the top of the kiln.
A microwave kiln relies on electricity and technology. But if you want a low tech way to fire clay at home, you could try the following method….
Method 2: A Charcoal Grill
It is possible to fire clay at home using a regular charcoal grill that you would use for a BBQ. You don’t need any particular make of grill or anything especially fancy.
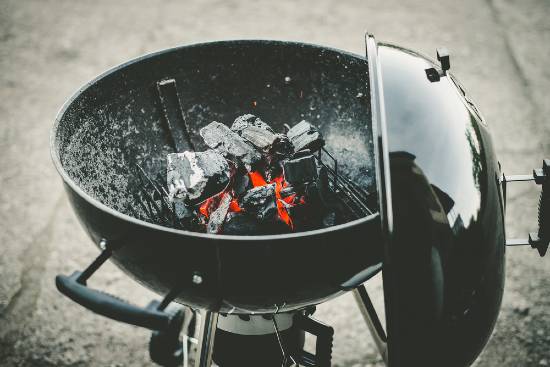
The first thing to do is to light the grill as you would do normally. That means lighting the charcoal and letting the charcoal pile heat up.
Whilst the coals are getting hotter, it’s a good idea to place your pots near the coals. This will help the clay heat up gradually. If clay changes temperature very quickly it can break and shatter. This is called thermal shock. It can happen if clay gets either hot or cold quickly. So, any temperature shifts need to be gradual when you are firing clay.
Certain types of clay are less vulnerable to thermal shock. This means they are designed to cope with sudden shifts in temperature better than other clays.
Stoneware clay that contains ‘grog’, is more resistant to changes in heat. Grog is clay that has already been fired and then ground up again into granules. Because it’s already been fired, it doesn’t go through the same changes that raw clay goes through in heat. As such, it makes the clay more stable in heat. ‘Raku’ clay is also able to cope better with sudden changes in temperature.
Firing Your Pots
When you’re using a charcoal grill to fire pottery, you need the pots to be nestled in the hot coals. However, getting the pots into the hot coals needs to be a gradual process. It’s not a good idea to simply bury the pottery in red hot coals. The change in temperature would be too much for the clay to cope with, and they might crack.
The best thing to do is use the coals as they are heating up, to heat the pots too. You can either put the pots directly over the coals using the BBQ grid. Or you can line the pots up around a pile of coals as they heat up. And then once the coals and the clay are hot, move the pots onto the grill.
When the coals are hot, you can move the pots directly onto the pile. At this point, the coals will be starting to glow red and be dusty grey at the edges.
Use BBQ tongs to move the pots so you don’t burn your fingers and hands. And nestle them into the coals so the pots are surrounded. If your pieces are larger, put some more coals on top of the pots gently to cover the pots entirely.
Charcoal Grill Firing Temperature
Charcoal can burn at temperatures over 2010F (1100C). In a domestic charcoal-burning BBQ grill, the coals can reach around 1100F (600C).
It is possible to boost the temperature of the grill by blowing air onto the hot coals. You can do this with good old-fashioned bellows if you have the patience. Alternatively, you could use a fan or a leaf blower. You may have a vacuum cleaner that can be set to blow air rather than draw it up.
Increasing the oxygen going into the coals will help the coals to burn hotter more quickly. Another option is to place some wood on top of the coals. This will seal in some of the heat in the coals and is another source of combustible fuel.
How Long to Fire Your Pots
Once your pots are in place, you can cover the grill with its lid. The lid will help the grill retain heat. However, the coals will need oxygen to burn, so place the lid a little askew. This will create a small gap for air to enter and keep the coals alight.
You can either take the pots out after around 30 minutes to an hour. Or if you prefer you can leave the pots in the burning coals until the fire dies out.
If you are removing the pots once the coals have burned out, be careful of any hot embers. And if you are removing the pots from hot coals remember to wear safety gear. Goggles are essential to protect your eyes if any pieces of clay crack as they come out of the heat.
Remember to handle the pots with tongs and wearing heat-resistant gloves. Kevlar gloves or welders gloves are an option.
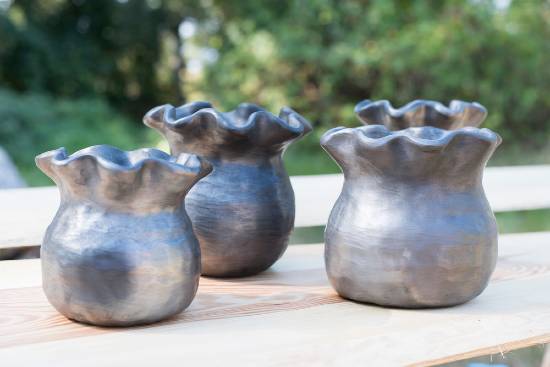
Once you have got the hang of bisque firing in your charcoal grill, you can experiment with achieving decorative results. Burnishing is a good option when you are firing clay at home in a charcoal grill. Burnished clay makes for a beautiful smooth pot with a satin finish once fired.
Using a charcoal grill is really just a modern version of an old method of firing clay called pit firing. If you don’t have a BBQ grill, and you’re happy to use a shovel, pit firing might be for you. If you are firing clay at home and you have a back yard and a shovel, read on…
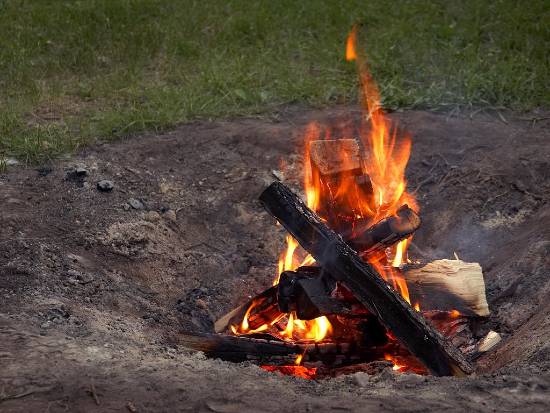
Method 3: Pit Firing
Pit firing is one of the oldest methods of firing clay. In essence, pit firing involves digging a hole in the ground and filling it with combustible (burnable) material. The pottery is positioned amongst the combustible material and the fire is set alight.
The heat from the fire can be used to either bisque fire the pottery. Or it can be used to decorate pots that have already been bisque fired.
There are a number of different ways of pit firing. For example, you can burn different materials. And some potters add oxides and salt to the fire to add color and effects to the pottery.
Bearing in mind that there are different ways to pit fire, here’s an overview of the process. This is a description of bisque firing in a pit.
Bisque Firing in a Pit
The first step is to make your pottery. It’s usual to have quite a few pots crack or break when bisque firing in a pit. You can expect to lose a few pieces. So, make a range of pots so that some survive. The pots are less likely to break if their walls are of an even thickness. And if the pieces are not too thick overall. It’s best if your walls are just under half an inch thick or less, if possible.
Decorating your greenware. When you’re preparing your pots, it can be nice to burnish them before pit firing. This will give the bisque fired pieces a nice silky finish.
Make sure that your pots are as dry as they can be before you start firing.
Digging the Pit
Next, you need to dig a pit. The size of the pit depends on how big your pieces are, and how many you have. But if you have a selection of smaller pieces like bowls, then a pit about a foot deep can work. If your pit is a foot deep, it protects the fire from the wind. But at the same time, it’s shallow enough to allow some airflow to keep the fire burning.
Pit Firing the Pots
Build a fire in the pit using kindling and wood.
As the fire is heating up, position the bone dry pots near to the fire to warm them up.
When the fire has burned down, but the wood is still hot, spread the pieces of smoldering hot wood out. This will provide a level surface to position your pots. Then place the pots on the hot embers. Remember to wear protective gloves and goggles.
Add more wood around the pottery and build up the fire, so it’s burning around the pots.
When the fire around the pots is established, lay pieces of wood across the top of the pottery.
As the fire burns down keep adding more wood to keep the fire burning. Once the fire has been burning for around 5 hours, you can let the flames burn out. Then gently cover the glowing embers with dirt or a sheet of corrugated metal.
This can now be left until the fire has burned itself out. Once the heat has gone and the pots are cool enough, you can remove them from the burnt-out embers.
When you remove the pots from the fire, they will be black and sooty with carbon from the fire. They can be cleaned up and polished to a lovely sheen.
Another way of pit firing is to build a simple brick kiln rather than digging a pit in the ground. So, if you don’t relish the prospect of digging in the earth, you could consider building a brick kiln. If this idea appeals to you, then read on…
Method 4: Making a Simple Sawdust Kiln out of Bricks
Lots of sophisticated kilns are made out of bricks. And some of their designs are complicated feats of engineering. However, they don’t need to be complex or difficult to build.
In fact, you can use bricks to simply build a pit above ground. Rather than digging a hole in the ground, you can use the bricks to build up the walls of the pit above the ground. This above-ground pit fire made from bricks can have a very simple design.
Making your Brick Kiln
First, you need to decide how large you want your brick kiln to be. You can gauge this based on the size of your pottery. The larger your pots the bigger your kiln needs to be. To make a small brick sawdust kiln, you can make a base about 2 ½ feet wide and long.
It’s a good idea to put a base on the ground. If you have a patch of land that is bare earth, you don’t need to lay a base. However, the fire in the kiln will scorch the ground. If you want to protect the ground from this scorching effect, use a concrete or brick base.
The base can be made out of concrete paving slabs, or a couple of layers of brick. You can also make the base out of hollow cinder blocks. By doing this you raise the base off the ground. This will create a bit of airflow under the kiln and protect your grass if you are working on grass.
Once you have made the base, you can start building up the walls of the kiln.
Using Shelves?
You can build the walls in one go. Then once the walls are constructed you can fill the kiln with sawdust and pottery.
Another suggestion is to make some shelves in the kiln as you build it. You can make the shelves out of galvanized mesh or chicken wire. Using shelves in the kiln can be a good idea because as the sawdust burns, it drops down. As the sawdust drops, the pots drop too. You can protect your pottery from breaking by adding some layers of wire mesh.
To do this you follow these steps:
- Add a couple of layers of brick to the walls. Then fill this hole with sawdust and nestle some pots in the sawdust too. Next, cover that layer of bricks with some galvanized metal mesh. This will create a mesh shelf in the kiln.
- Add another couple of layers of brick to the walls. The mesh shelf is held in place by the next layer of bricks. Once you have added more height to the walls, you can add more sawdust and more pottery.
- Depending on how tall you want your kiln to be, you can add more mesh shelves. It’s a good idea to tamp down the sawdust in each layer. The more compacted the sawdust is, the longer the fire will burn.
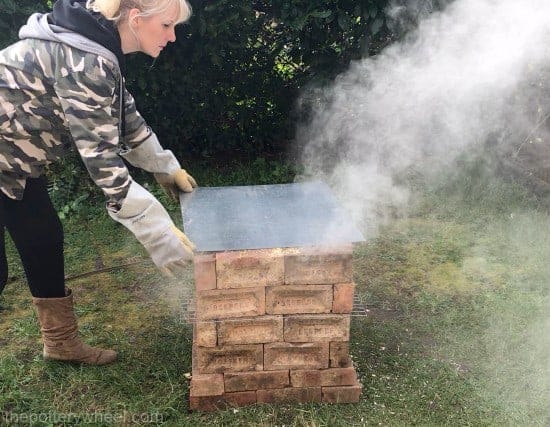
How to Fire Clay at Home in a Brick Kiln
Once you have packed your kiln, you can add a little lighter fuel on the top and light the sawdust. Allow the fire to establish itself. When the fire is burning nicely, you can cover the burning material over with a piece of corrugated metal.
One tip is to ensure that there is a decent air supply when the kiln is first burning. You can do this by removing a brick on the top edge for the first part of the firing. This will create a vent and create airflow.
Or you can use a brick in each corner of the kiln and place the lid on those. This will create a vent on all sides of the kiln until the fire is burning strongly. Once the fire is established, you can remove the corner bricks and place the lid on the walls. This will help retain the heat. The kiln will reach up to around 1292F (700C) (source).
Allow the fuel in the kiln to burn itself out. Then once the kiln has cooled you can remove your pots. Being careful to check that the pottery is cool enough to handle.
Pottery that is fired from greenware to bisque in a brick kiln, will have a black carbonized look. This can look a bit matte and crusty when it’s removed from the kiln. However, if you burnish it before you fire it this can give it a smooth look. Also, you can clean it up afterward and polish it. This can give it a lovely rich dark sheen.
Check out my full step by step video on how to make a sawdust kiln, for a complete guide.
And you can download a free ebook on how to make and fire a simple sawdust kiln here…
Method 5: A Barrel Kiln
Barrel firing works on in a similar way to pit firing and the sawdust brick fire outlined above. The difference is that it reaches a higher temperature than pit firing. This is because like the brick kiln it has a lid on it and the heat is more contained.
Like the brick kiln, the barrel kiln is like a pit overground. But it has the advantage of being easy to move about. Unlike a brick kiln that needs to be taken apart and rebuilt, a barrel kiln can be stored easily. And moved under cover if need be.
As with pit firing, you can use a barrel to bisque fire your pottery. But like most of these simple methods of firing, greenware pottery is prone to cracking in the crude heat. So, whilst you can bisque fire in a barrel, most of the time, they are used to decorate bisque ware.
Glazing pottery and then firing it in a barrel is not an option. This because as glaze is fired, it melts. And in a barrel fire or pit fire of any kind, debris would stick to the glaze as it melts.
Decorating Clay for Firing in a Barrel Kiln
Often potters will decorate their bisque ware in the following ways when barrel firing:
The bisque ware is wrapped in aluminum foil. The foil is used to hold various colorants, salts, and organic material against the bisque surface. Potters use a whole variety of materials like copper scouring pads, Miracle-Gro, and coffee grounds.
These materials are held against the bisque surface by making something called a saggar. A saggar is like a jacket that the pot is wrapped in as it’s fired in the barrel. You can make a saggar by sprinkling oxides, salt on a sheet of foil. Organic materials like straw, banana skin, and salt-infused seaweed can be added too. Then lay the pot onto the material on the foil, and then wrap the foil around the piece. This makes what makes the saggar.
Once the pottery is fired, the foil saggar can be removed easily to reveal the saggar-fired pots. If you want to know exactly how to make a foil saggar, check out my step-by-step guide on saggar firing here.
Making a saggar isn’t essential. Alternatively, you can burnish your greenware and then apply a layer of terra sigillata. Terra sigillata is a very refined clay slip, which forms a lovely satin-smooth finish on pottery. This is then bisque fired. Before putting the pots into the barrel, you can wind copper wire around the piece. As it fires, this leaves decorative lines on the pottery.
Types of Barrel Kiln
Like most types of DIY kiln, barrel kiln designs range from the very simple to the more complicated.
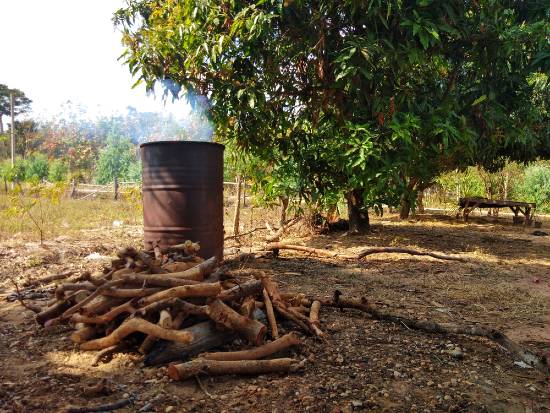
A Simple Barrel Kiln
A simple barrel kiln really is just a metal barrel with a lid. Combustible material is burned in the barrel to generate heat. To boost the temperature, and keep the fire burning, it’s important to have some holes along the side of the barrel. This allows for some airflow, otherwise, the fire would not reach the bottom of the barrel. Or it would snuff itself out when the lid was put on.
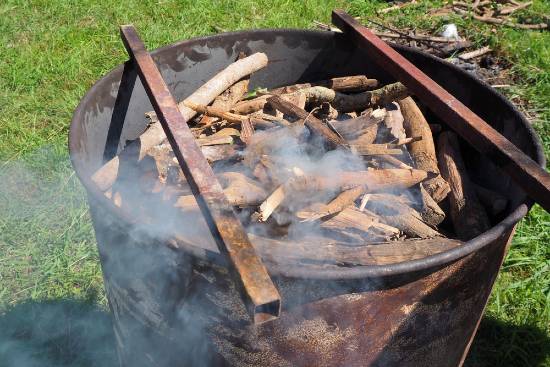
One way to fire a simple barrel kiln is to put a layer of sawdust on the base. Nestle some pots on this layer. Then add some more sawdust and pottery. As you work your way up the barrel, add bits of wood kindling. And eventually on the top of the pile carefully add some larger pieces of wood.
Light the fire using some paper pressed into the gaps between the wood. Then allow the fire to burn for a couple of hours. Once the flames have burned down, put the lid on the barrel. Leave a crack in the lid so that air can continue to flow for a while. Eventually, you can completely cover the barrel with the lid and allow the embers to burn out.
It takes a while for the embers to completely burn out. In fact, if you leave it over-night, you will likely find that the barrel still has some red hot embers. If that’s the case, then simply leave it longer until the embers are grey, sooty, and cool.
It is possible to boost the temperature in a barrel kiln even more by creating a draft using a flue. This can take a downdraft or an updraft design. Let’s take a brief look at those in turn.
A Downdraft Barrel Kiln
A downdraft barrel kiln has a flue at the bottom of the barrel. The flue is basically a hole in the bottom edge of the barrel, which is attached to a chimney that goes upwards to the side of the barrel. The chimney can be made out of a stove pipe. Air is drawn in through the top of the barrel and down through the chamber. This then exhausts out of the flue at the base.
You can control the amount of airflow and oxygen in the barrel by putting a lid on the top.
An Updraft Barrel Kiln
With an updraft barrel kiln, the chimney is on the lid of the kiln. Vents are cut into the side of the barrel itself. These are open at the start of firing. Once the fire is established, the lid is put on. The smoke and fumes exhaust out of the chimney on the lid.
Once the fire has burned down and the embers are heating the chamber, the side vents can be closed. One way to do this is to cover the vents with insulating ceramic fiber.
Like the downdraft barrel, the airflow can be controlled by opening or closing the vents.
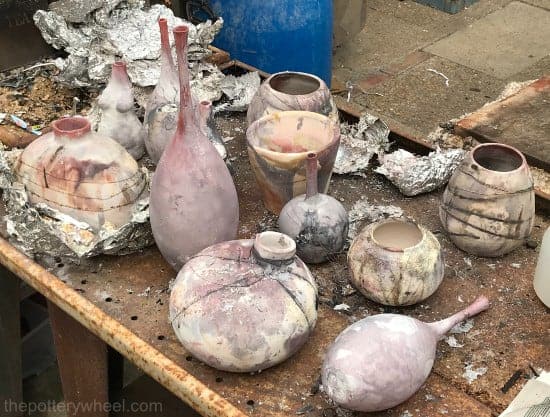
Finishing your Barrel Fired Pottery
Whichever barrel kiln you use, once the embers have died down and cooled, you can remove your pottery. The pottery will be sooty and covered with ash from the fire. This will need to be washed off gently with a sponge and some soapy water. Once cleaned, the pots can be waxed and polished.
Method 6: A Raku Kiln
You can also fire clay at home using a raku kiln. ‘Raku’ is a word that is used to refer to a particular firing technique. It involves heating the pottery up in the kiln until it’s red hot. The pottery is then removed with metal tongs from the kiln whilst it’s still hot.
Once the hot pottery is out of the kiln, it is put into a small metal container. The container has combustible material in it like paper, sawdust, or straw. This catches fire because of the heat of the pottery. The container is sealed, either by putting a lid on it or by placing the pottery under an inverted bucket. The inverted metal bucket in effect acts as a container.

Because the container is sealed the burning material next to the pottery eats up the oxygen. This creates a ‘reduction’ atmosphere in the canister and creates all sorts of lovely effects on the glaze being used.
A raku kiln is basically a kiln that you can easily remove pottery from whilst it is hot. There are lots of different types of raku kilns. Some are professionally made and can be bought from a ceramic supplier. However, it’s actually extremely easy to make your own raku kiln to fire clay at home.
One way to make a raku kiln is to use a steel trash can, and line it with insulating ceramic fiber. I have a step-by-step guide here on how to build a raku kiln using this method.
How Does a Trash Can Raku Kiln Work?
A DIY trash can raku kiln has a hole in the lid so that heat and fumes can vent out. There is also a hole in the bottom edge of the trash can. This is called the ‘burner port’ and it is where your kiln is heated. Most often, DIY raku kilns are heated using propane gas. You can buy canisters of propane which are then hooked up to an inexpensive burner torch. The flame from the propane torch enters the kiln through the burner port and the inside chamber of the kiln heats up.
Using a Trash Can Raku Kiln
Before heating the kiln, you position the pottery on a kiln shelf in the trash can. The lid is put on the top of the kiln and you like the propane burner. This is then positioned at the burner port to heat the kiln.
Raku kilns can be used to bisque fire or glaze fire pottery. The process is different depending on whether you are bisque firing greenware or glaze firing.
Normally when you are glaze firing your pottery in a raku kiln, the process is quite quick. Raku is known as a quick, low fire method of glazing. It can take a little time as 25 minutes for a trash can raku kiln to reach its target temperature.
When I glaze fire in my raku kiln, I aim for around 1850F (1010C). Once I’ve reached that temperature, I turn the kiln off and take the pottery out quickly using tongs. As with all these ways to fire clay at home, you need to wear safety gear. That involves safety goggles and suitable heat-resistant gloves. Some potters raku fire with special aprons that are designed to protect the body.
The reason it’s so important to be careful with raku firing is that you’re removing hot pottery from the kiln. When it’s removed from the kiln it will experience thermal shock. Special raku clays are designed to tolerate these sudden changes in temperature well. Nevertheless, it’s important to protect yourself as even raku clay can do unexpected things.

Bisque Firing in a Raku Kiln
It is possible to bisque fire in a raku kiln. However, if you do, you will need the temperature in the kiln to ramp up much more slowly. If you heat the greenware up too quickly it will explode.
Method 7: A Small Plug-in Hobby Kiln
Another way to fire your clay at home is to get yourself a small plug-in hobby kiln. There is a huge range of electric pottery kilns on the market. Some are enormous and intended for use by production potters who are making large amounts of pottery. However, there are also some really compact kilns available for home use.
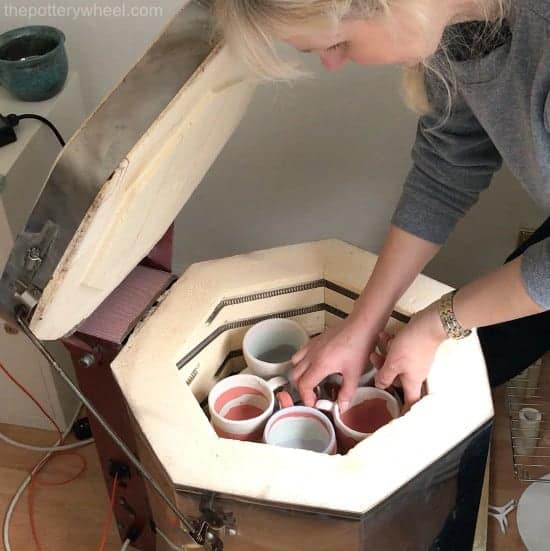
The size of kiln you need depends on the pottery you are making. If you make jewelry or doll heads then a little tabletop electric kiln is probably adequate.
Or if you are learning how to make mugs and smaller pieces of ceramic then a top-loading hobby kiln will probably suit you.
There are a few things to consider about using a kiln at home. For starters, you need to have enough space, and ventilation. You also need to check your power supply. A lot of kilns require more power than a standard domestic power outlet. However, some kilns are suitable for plugging into a domestic power socket.
Buying a New or Used Electric Kiln?
There is no way around it, pottery kilns are not cheap. This is particularly the case if you are buying a brand new kiln. Even a small kiln is pricey if you are buying it new. However, pottery kilns often come up for sale on second-hand forums like eBay, Facebook Marketplace, and Craigslist.
I bought my Cromartie kiln second hand from Facebook marketplace. It took a while to find the right kiln for me, but it was worth the effort. I managed to get a kiln that had been hardly used for half the price.
It’s a small hobby kiln and doesn’t take up too much space. It plugs into a domestic power supply, and it fires up to stoneware temperatures. What’s not to like?
Opting for a New Electric Kiln?
Although buying a used kiln can be a great option when you are starting out, you may want to go for a new kiln.
The advantage of buying a new kiln is that you get after-sale support. Also, new kilns are more efficient than used kilns. So it will take you less time and electricity to fire clay at home with a new kiln.
Skutt makes a wide range of kilns in smaller sizes that are perfect for home firing. The KMT 614 is a good example of this.
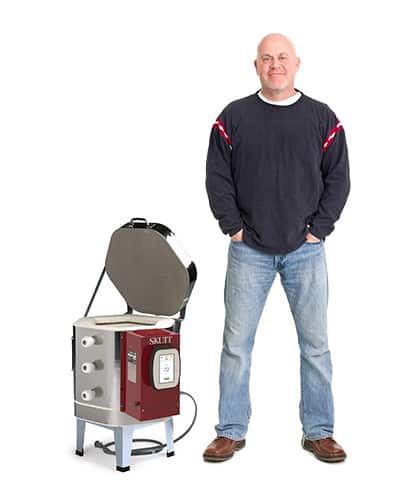
Skutt KMT 614 – View on Blick Art Supplies
You can see from here, that it’s pretty compact. As far as I’m aware the man in jeans is not included in the price.
Can you Fire Clay at Home in an Oven – is it Possible?
Firing clay means that you are turning it from clay to ceramic material. Transforming clay to ceramic bisque requires that certain temperatures are reached.
One of the key changes that takes place in clay when it’s fired is the loss of water. There are two types of water in clay. The first is mechanical water which sits between the clay particles and helps the clay particles glide over one another. This is what makes it moist and plastic.
Mechanical water evaporates from clay at room temperatures, and also at the temperatures that are reached by an oven. So, a domestic oven can be used to thoroughly dry a piece of clay. It can help make the pottery bone-dry.
However, the other kind of water in clay is chemically bonded to the clay particles. This is water that is inside the clay particles and counts for some of the volume in the particles themselves. For clay to turn to ceramic, this water needs to be driven out of the clay. As the clay heats up the chemical bond is loosened and the water is separated from the clay platelets. When this happens, the clay becomes denser and the clay particles move closer to one another. The surfaces of the clay also begin to bond to one another.
Once the chemical water has been driven out, the clay has undergone a chemical change that can’t be reversed. The clay has now changed forever into ceramic material. It is now harder and will no longer dissolve in water. The clay undergoes other changes, but this is a crucial change that needs to take place during firing.
The Domestic Oven
The process of driving out chemical water starts to occur at around 660F (350C) and continues to about 1470F (800C). Unfortunately, these temperatures are much higher than those reached by a domestic oven. Most ovens will reach up to around 480F (250C) at a maximum. This means that you won’t be able to fire clay at home in an oven. You can dry your clay out thoroughly in an oven. But if you want to fire clay at home, you need to use one of the 7 methods outlined above.
These are the sorts of temperatures that can be reached by each of these methods:
| Firing Method | Aprox Target Temp |
| Microwave | 900F (480C) |
| Charcoal Grill | 1100F (593C) |
| Pit Fire | Up to 2000F (1093C) |
| Brick Kiln | 1292F (700C) |
| Barrel Kiln | 1292F (700C) |
| Raku Kiln | 1850F (1010C) |
| Electric Hobby Kiln | 2372F (1300C) |
Unlike the temperature reached in a domestic oven, each of these temperatures is sufficient to turn clay into ceramic.
How to Fire Clay at Home – Final Thoughts
There are lots of ways to fire clay at home, I hope that this article has given you some ideas to experiment with. The amount of choice available can feel a bit overwhelming. But just choose whichever one appeals to you most and start there. Once you have got the hang of one method, you can branch out and try other things. Whatever you do, remember to keep safe when you fire clay at home. And do consult with a health and safety professional before you get started.


