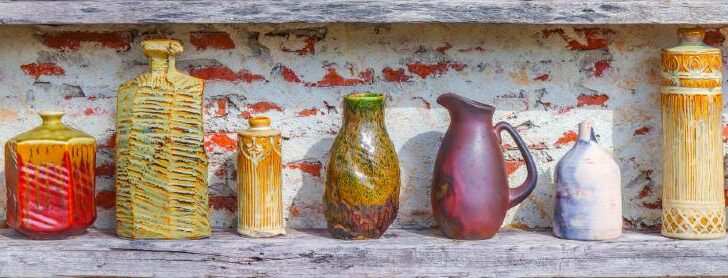
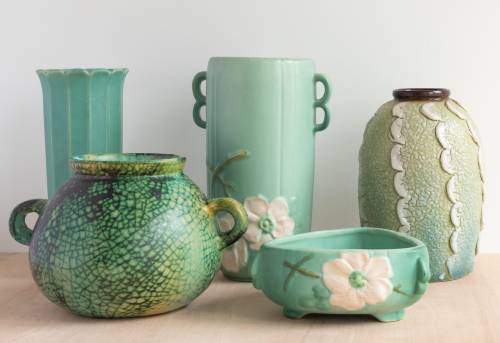
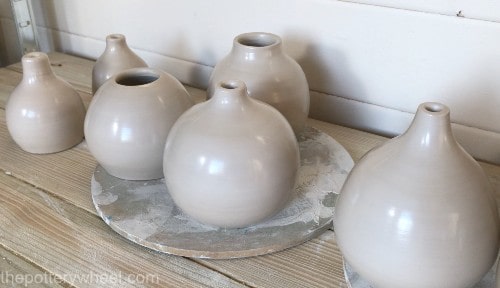
There are lots of different ways of decorating pottery. And each of these techniques can be used to put your own individual stamp on a piece of ceramics.
Decorating pottery can be done at different stages in the process of making a piece of ware. For example, glazing pottery is done after the pot has been fired at least once. Whereas creating a texture on your pottery surface is usually done when it is fresh or leather hard.
The fact that pottery can be decorated at any stage means that you have a lot of creative scope. So, let’s dive in and take a look at some of the different ways to decorate pottery.
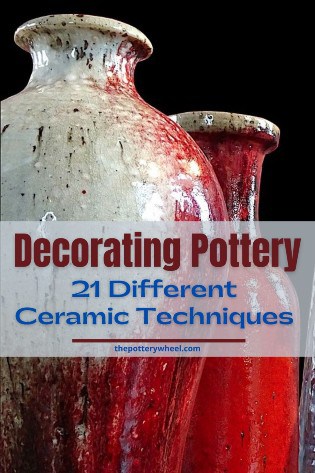
21 Different Ways of Decorating Pottery
Here are the techniques that will be covered in this article. If you want to take a look at a particular method you can use the links below to jump to that section:
- Glazing
- Underglazing
- Overglazing
- Decorating Slip
- Slip Trailing
- Oxides
- Marbling
- Carving
- Sgraffito
- Mishima
- Chattering
- Terra Sigillata
- Stencils
- Lettering
- Transfers and Decals
- Bubble Glazing
- Modeling
- Wax Resist
- Textured Rollers
- Burnishing
- Kintsugi
Let’s begin with the first item on the list, which is glazing…
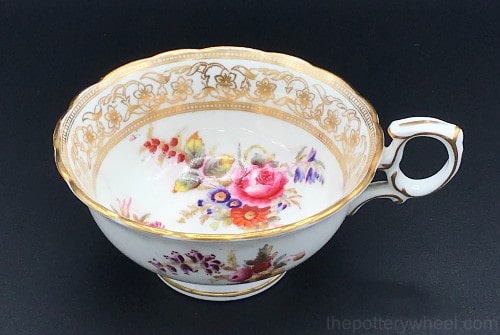
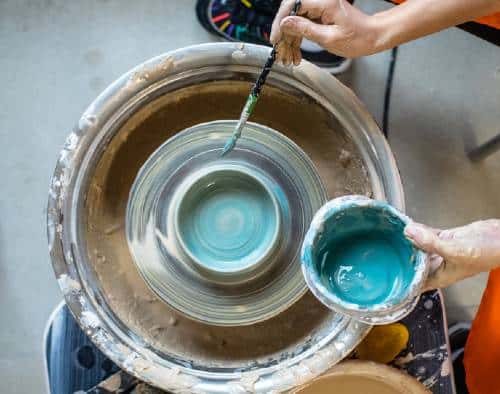
Pottery Decorating Technique # 1 – Glazing
Glaze is normally applied to pottery once it has been bisque fired. At its simplest, glaze is made up of ingredients that melt and turn to glass when they are heated in the kiln.
When the kiln cools, the liquid glass turns solid again and forms a non-porous glass cover on the pottery.
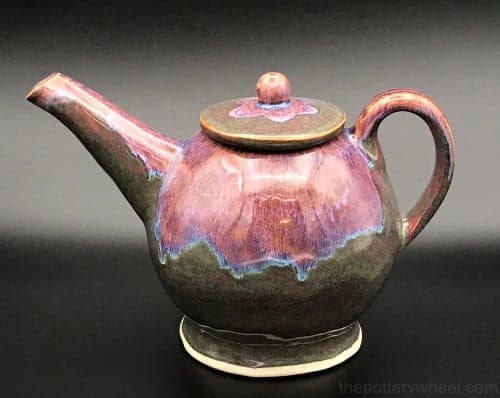
A glazed finish can be clear. Clear glaze is often used to seal, protect and enhance decoration that has been added to the pottery already. Or, the glaze itself can have color, texture, and character which is used to decorate the pottery.
How is Glaze Applied?
In its raw, unfired state, glaze is a liquid. And that liquid can be applied to pottery in a number of different ways.
One way to apply it is to dip your pottery into a bucket of glaze. The bisque pottery is only in the glaze mix for a matter of seconds before it is taken out again.
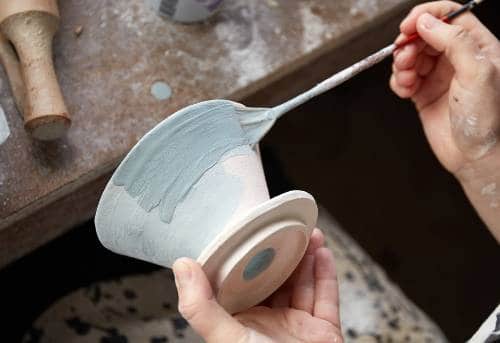
Another way to apply glaze is to brush it on. Brushing glaze is thicker than dipping glaze because it needs to stay on the pot without sliding or dripping down the side when applied.
Glaze can also be poured and sprayed onto pottery. If you’d like to know more about the different ways to glaze pottery, you can check out this article that I wrote on glazing pottery at home. It will give you a good idea about exactly how to glaze your pottery.
Different Types of Glaze
Some potters make their own glaze, whilst others use ready-made glaze from a pottery supplier. The advantage of making your own glaze is that it is much more cost-effective. However, using a ready-made glaze has the advantage of being convenient.
If you like chemistry and experimenting with recipes, then you might love making your own glaze.
Either way, there are lots of types of pottery glaze that can create very different effects when you are decorating pottery.
Some glazes are known as static glazes, these glazes stay in place when they are fired. So, the pattern that you paint onto the pottery will be the pattern that appears when the pot comes out of the kiln.
Other glazes are called flowing glazes, and these tend to move about on the surface of the pot when it’s fired. This can create a nice liquid, drippy effect when fired, with different colors blending into one another.
Glazes vary in opacity, meaning that some are dense block colors, whilst others are partially transparent.
In addition to this, some glazes are designed to highlight the texture on the surface of your pottery. These are known as breaking glazes. If you have carved into the surface of your pottery, a breaking glaze will pool in the recesses of the texture.
I’ve written a post all about the many different types of pottery glaze you can choose from. Why not check it out here? Hopefully, it will give you a good idea of what kind of glaze you want to try out.
Pottery Decorating Technique # 2 – Underglazing
Using underglaze is another way of decorating pottery. Underglaze, as the name suggests, is designed to be applied before pottery is glazed.
Pottery glaze has two main functions. Its functions are to decorate the pot and also to create a non-porous glassy seal on the piece. By contrast, underglaze is really intended to be used to decorate pottery rather than seal it.
If you want to know more about the difference between glaze and underglaze, check out my article on exactly that subject here.
Underglaze
Underglaze comes in different forms. Probably the most common way to use underglaze is in its liquid form.
Liquid underglaze is very versatile and can be used a lot like many water-based paints.
For example, it can be painted onto pottery using liquid underglazes like these. When it’s applied as a paint, it can be used to create a watercolor wash effect. Or it can create dense rich colors by applying several thicker layers of underglaze.
Alternatively, underglaze can be sprayed onto pottery. The effect that is achieved from spraying depends on the type of equipment you are using. If you spray using an airbrush, then you can achieve a fine-looking gradient.
However, you can also spray underglaze with an atomizer. This is a simple gadget that is operated manually by blowing through a pipe to spray the underglaze across your pottery. This creates a spray made up of different-sized droplets and can look lovely.
Applying Underglaze
The beauty of underglaze is that it can be applied to clay at any stage. It can be painted onto leather hard clay, bone dry clay or bisque fired pottery.
If it’s applied to leather hard clay, you can use underglaze to highlight carved features in your pottery. This decorating pottery technique is called sgraffito which we will take another look at later.
One way to make sgraffito is to paint leather hard pottery with underglaze. Then when the underglaze has dried, you can carve a design into the clay surface. When you carve, the clay underneath is revealed and contrasts with the underglaze colors on the surface of the pot.
Different Types of Underglaze Medium
Whilst underglaze is often applied as a liquid, there are other really great underglaze mediums.
You can buy underglaze crayons, pastels, chalks, and pencils. If you like drawing these can be used to decorate pottery with your drawing skills.

Different underglaze mediums can be combined. For example, you might paint on an underglaze design with a brush. Then use underglaze pencils or pastels to highlight areas on your design. Really, you can combine them in whatever way you choose.
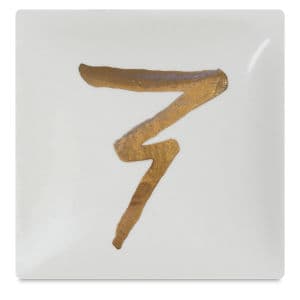
Pottery Decorating Technique # 3 – Overglazing
Overglaze is a specialist type of decorative glaze that is applied to pottery that has already been glaze fired.
These decorative glazes are also known as luster glazes. They are made of metal particles in a liquid suspension. And they come in different metallic colors and effects. These include gold, platinum, and mother of pearl.
Usually, overglaze lusters are applied using a fine painting brush. They are painted directly onto the glazed surface of the pottery. Then they are fired again at a much lower temperature than the original glaze was fired at.
There are a couple of reasons why they are fired at a lower temperature. The first is that you don’t want the original glaze layer to soften up again and start to melt along with the luster.
But also, when firing the luster, the ingredients in the overglaze burn away leaving the melted metal particles on the pottery. It doesn’t need to be fired at a very high temperature to melt the metal particles.
Usually, overglaze lusters are fired at between cone 017 and 022. This is equal to temperatures between 1405F(763C) and 1094F (590C).
Gold Overglaze – View on Blick
The Overglaze Effect
Overglaze is sold in small bottles because it is intended to be used on smaller detailed areas for decorating pottery. It’s generally intended to be a small accent or embellishment on a larger piece.
The overglaze will take on the finish of the glaze beneath it. So, if the first glaze layer is shiny and glossy then the overglaze will have a high shine too. Equally, if the original glaze is matte or satin, then the overglaze will have a matte or satin finish as well.
Pottery Decorating Technique # 4 – Decorating Slip
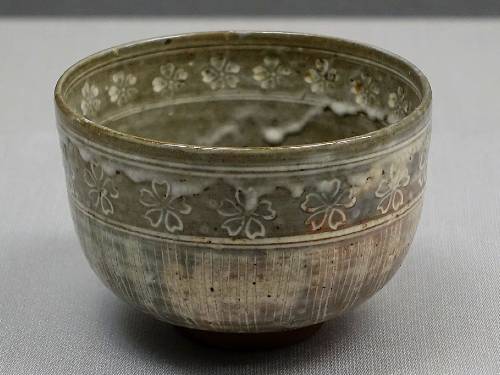
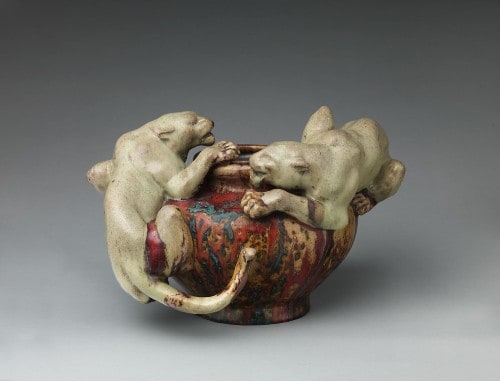
‘Slip’ refers to clay particles that have been suspended in water to form liquid clay. It is used for a number of purposes in pottery. For example, it’s used to join pieces of unfired clay together, a little like glue. But it is also used for decorating pottery.
York Art Gallery, CC BY-SA 3.0, via Wikimedia Commons
Decorating slip is normally colored using ceramic stains or oxides. You can buy bottles of decorating slip. But equally, it’s quite easy to make your own colored slip.
The advantage of making your own colored slip is that you can make it exactly the color that you want it to be. And, it is much more cost-effective to make your own. If you’d like to know more about making colored slip, you can check out my article on exactly that process here.
How to Apply Colored Slip
Slip is applied to greenware clay, that is, clay that has not been bisque fired yet. Clay shrinks when it dries out. If you apply clay slip to bisque fired pottery, it will shrink and flake off as it dries.
For that reason, decorating slip is applied to unfired clay. It is also best to apply slip to clay that is still reasonably moist. I generally apply slip to pottery that has been allowed to firm up a bit but is not quite leather hard yet.
If you apply slip to clay that is very dry, then there is the risk that it will shrink as it dries and flake away from your pottery. So, ideally, it’s applied to reasonably fresh, but firm pots.
If you want to know more about the different stages of leather hard clay, you can have a look at my post on leather hard clay here.
The great thing about slip is that because it’s made of clay, you can apply it to the whole pot. Even the base of your pot. Slip doesn’t melt in the same way that glaze melts, so it won’t stick to your kiln shelf as it is fired.
You can also mix different colored slips without worrying that they will interact badly in the same way that glazes can. If you make your different colored slips out of the same clay body, then you can blend, mix and layer your colors on your pottery in whatever way you like.
Once you have decorated your pottery and allowed it to dry out, it can be bisque fired. A clear glaze can then be applied to the bisque-fired pottery. Clear glaze will bring out the colored slip and can create a really rich gently textured finish on your pottery.
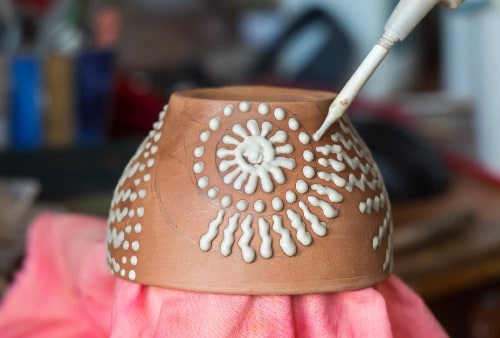
Pottery Decorating Technique # 5 – Slip Trailing
Slip trailing is another way of decorating pottery using clay slip. One of the effects you can achieve when slip trailing is to add some texture to your pottery.

The only equipment you need when slip trailing is some reasonably thick clay slip and a slip applicator. A slip applicator is sometimes called a ‘slip bulb’ or a ‘slip trailer bulb’. The applicator has a bulb-shaped rubber container to which is attached a nozzle.
When you remove the nozzle from the bulb, you can fill the bulb with clay slip. The easiest way to do this is to squeeze the bulb so that it is flattened.
Then dip the hole into a container of slip and release the bulb. Clay slip is then drawn up into the bulb. Wipe the neck of the bulb down and then put the nozzle back on.
Once the bulb is full of slip, you are ready to start decorating your pottery.
Using a Slip Trailing Bulb
If you gently squeeze the bulb, a small amount of slip will come out of the end of the nozzle. You can use this to ‘trail’ slip onto your pottery.
As with painting on colored slip, it’s best to do slip trailing when the clay is soft leather hard, and still has a good amount of moisture in it.
This will help avoid a drying differential between the pottery and the slip, which would cause the slip to flake off.
When slip trailing you can create all sorts of textured patterns, using dots, lines curves, and pictures.
This adds can add a lovely feel to the pottery. And it can be visually quite stunning too. The slip that you use can be a different color to the clay body. Or you can use the same colored slip and simply use the trailing to add texture.
Experimenting with Slip Trailing
There are lots of different ways that you can experiment with slip trailing and other decorating techniques. Here are a couple of examples…
- When the slip trailed texture is leather hard, paint the clay with underglaze. Then when the underglaze has dried gently scrape away the very top surface of the slip trailed texture. You can do this with a metal rib.
This will remove the underglaze from the slip trailed design and expose the clay underneath. The underglaze will remain in the recesses of the design. - Once the pottery has been bisque fired, you can use the lines and texture of the slip trail as a template for your glazes. Textured shapes can be painted with different colored glazes, using the trailed lines as the outline of the design.
The nozzles for your slip trailer come in different gauges. So, you can adjust the amount of clay that is trailed onto the clay, and control the type of texture you create.
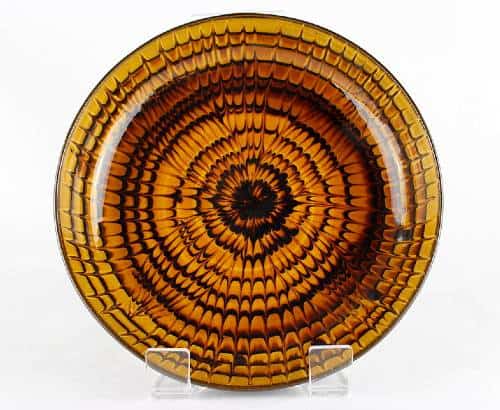
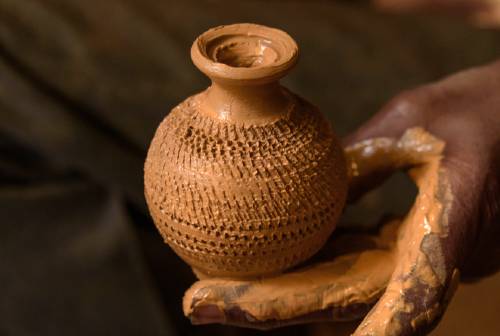
Pottery Decorating Technique # 6 – Oxides
Oxides are powdered metals that can be applied to your pottery for a decorative effect.
Really, metal oxides are metal elements that are combined with oxygen and ground to a powder. One great example of an oxide that can be used for decorating pottery is iron oxide.
Iron oxide can be used to create a lovely rustic antique look on bisque-fired pottery.
How to Use Iron Oxide
You can buy iron oxide in its powdered form from a local pottery supplier or here through Amazon.
Make the iron oxide powder into a solution by mixing it with some water. I find the best way to do this is to take a cup of iron oxide and put it into a plastic container. Then gradually add water to the oxide until it has the consistency that I want to use.
Iron oxide is best applied to bisque pottery that has a textured design on it. The bisque is very absorbent and will take the iron coloring really well. You can apply the solution by either dipping the bisque into the liquid, or painting it on with a brush.
Dipping in Oxide
If you are going to dip your bisque into the solution, it’s best to make the liquid the consistency of whole milk.
Wear rubber gloves to avoid staining your hands. Then holding the bisque in a gloved hand, dip the bisque into the iron oxide solution. Hold it in the solution for around 5 seconds.
As you hold the bisque in the solution, move it around a little in your hands. This will ensure that all bisque is covered by the oxide.
Remove the bisque from the solution and allow the oxide mix to settle and absorb into pottery. This should only take a moment as the bisque is very porous.
Then use a damp sponge to wipe off the solution from the high points on the pottery. It’s best to have a clean bucket of water nearby to rinse your sponge regularly. The iron oxide will stain the sponge quickly and you will need to rinse it to keep wiping.
As you wipe the oxide will be removed from the high parts of the design on your bisque. By contrast, the recesses of the design will stay dark with the oxide.
This lovely way of decorating pottery will give your piece an aged, antique look.
Brushing on Oxides
Another way to apply the oxide is to brush it on. It’s best when brushing the oxide, to make the solution a bit thicker. Something more of the consistency of single cream works well.
Image is cropped.
Apply the solution to the piece with a brush, and allow it to absorb into the bisque. Then as with the above technique, use a damp sponge to wipe away the oxide on the raised areas of your piece.
Once you are happy with the look of your decorated ware, allow it to dry thoroughly.
You can then apply a clear glaze to the decorated piece. If you want the oxide surface to have a matte or satin finish, you can put a liner glaze on the inside of the pot. This will seal the porous bisque and make it functional.
Or you can apply a clear glaze to the entire piece to give the whole pot a shine.
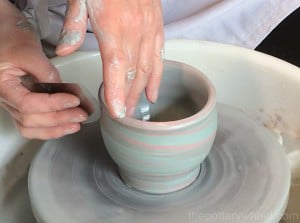
Pottery Decorating Technique # 7 – Marbling
Marbling is a fantastic way of decorating pottery. There are a number of different ways of achieving a marbled effect on your pots.
And depending on the approach you use you can marble pottery at different stages in its production. Let’s have a look at 3 approaches to marbling…
a) Agate Ware
One way to marble your pots is to create a marble effect in the clay itself. That is, you are using a combination of different colored clays to create the marbling.
You can do this on the potter’s wheel or when you are hand building. Whether you hand build or wheel throw you will need to get your hands on some colored clay.
It is sometimes possible to mix different clay bodies with different colors together and fire them successfully. But sometimes they are not compatible and you can have problems when you are drying or firing them.
I find the best way to combine different colored clay is to color quantities of the same clay body with different ceramic stains.
Making colored clay is quite a simple (if messy) process. If you want to try coloring clay with ceramic stains, have a look at my step-by-step guide on coloring clay.
How to Make Agate Ware
Take two balls of clay, colored with at least two different ceramic stains. Slice the balls of clay into sections and then sandwich the slices together alternating the colors. You will end up with a stack of clay made up of different colors.
Pat the stack together to make a single ball of clay, and then wedge that ball of clay a few times. The wedging ensures that the slabs of clay are bonded together and will begin the marbling process.
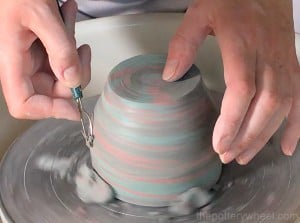
You can then throw this multicolored ball of clay in the same way that you would throw any ball of clay. The difference is, that when you throw the clay, the different colors will be dragged around the pot.
After you have thrown the pot, you can scrape away the slip on the outside with a metal rib. This will reveal a lovely marbled clay effect. And trimming your pot when it’s leather hard will further enhance the effect.
b) Marbling with Slip
You can also marble pottery when it is leather hard. The best way of decorating pottery in this way is to use colored slip. You can either buy colored decorating slip, or as mentioned above, you can make your own colored slip very easily.
Fill a couple of slip trailing bulbs with at least two different colors of slip. You can also use plastic bottles with nozzles on them.
I find this marbling technique works best on larger flatter pieces of pottery like plates, platters, and tiles.
Sometimes before I start marbling, I paint the plate with a block coat of colored slip. But this isn’t essential.
Once I’ve applied the background color, I drizzle colored slip over the plate using the slip trailing bulb or dispenser. When I’ve added one color, I drizzle at least one other color over the plate too.
After a good amount of slip has been drizzled on, pick up the plate and tilt it around so that the slip runs and moves about the plate.
This will create a marbling effect. Once you are happy with the marbling, let the plate dry slowly before you fire it.
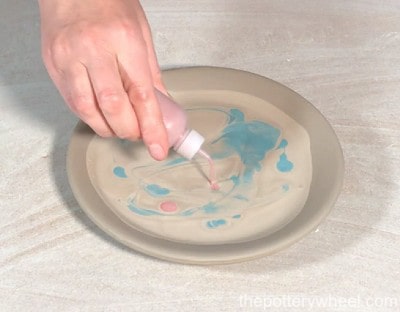

c) Marbling with Underglaze
The third way of decorating pottery by marbling is to use underglaze on bisque ware.
Perhaps the easiest way to do this is to spread a layer of shaving cream over a large tray. Then drizzle a combination of underglaze colors over the shaving cream. Make swirly patterns in the underglaze by dragging a pencil nib or modeling tool over the underglaze.
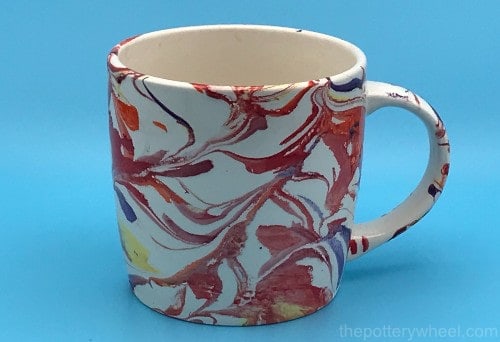
Then carefully roll your bisque ware over the surface of the shaving cream. The underglaze will transfer onto the surface of the bisque.
Once the underglaze and shaving foam has been applied, let the mixture settle on the surface for a minute or two.
Then put the bisque underneath a running tap and allow the water to wash away the excess mixture. What will be left behind is a marbling effect made by the underglaze colors. Once dry this can then be coated with clear glaze and glaze fired.
Pottery Decorating Technique # 8 – Carving
Carving is a way of decorating pottery that creates nice textures on your piece. It also creates a nice visual design.
There is an endless number of ways to carve into your pottery. Rather than carving very soft fresh clay, it’s best to wait until the clay has firmed up a bit.
Different potters will carve their clay at different points in the drying process. Some prefer to wait until the clay is really quite leather hard. I prefer to carve when the clay is a little softer.
So, generally, I carve when it is soft leather hard. At this stage, you can handle the clay without damaging the shape of the pot. But the clay is still soft enough to carve easily and to get nice soft rounded shapes when you are carving.
The other advantage to carving when the clay is soft leather hard is that you create less clay dust. The drier the clay, the more dust you create in the air. Because of the health concerns associated with clay dust, it’s best to minimize it in your environment.
You can carve into your clay with whatever implement works for you. There is a large array of clay carving tools to buy from pottery suppliers. However, you can use whatever feels comfortable to you and achieves the effect you are looking for. I’ve heard of potters using Kirby grips and pen lids to carve their pottery.
I like to use a mini loop tool to carve into the surface of my pots. As you carve, small balls of clay will come away from the piece. You will need to gently brush these away, either with a soft brush or your fingertip.
Pottery Decorating Technique # 9 – Sgraffito
Sgraffito is a particular way of carving. It usually involves applying a colored layer to your pottery and carving into and through the colored layer. As you carve your design, you reveal the clay body underneath the colored layer. The carved design then sits in contrast with the colored layer.
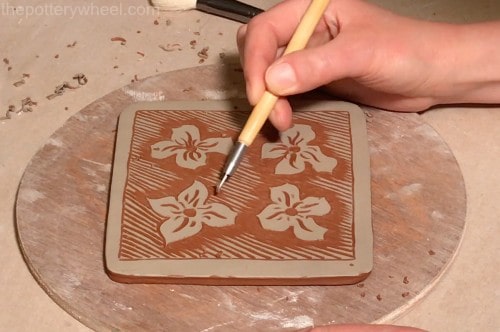
You can use sgraffito as a way of decorating pottery on greenware or bisque ware. And the color is normally applied using underglaze, colored slip, or engobe. Engobe is similar to clay slip, but it has a lower clay content and contains fluxes so it melts a little when fired.
This is an overview of how to use the sgraffito technique on leather hard clay. If you’d like a full account of how to make sgraffito, check out my guide on how to make sgraffito using greenware and bisque pottery here.
How is the Sgraffito Technique Done?
As with the carving method described above, I find it best to make sgraffito when the clay is soft leather hard. If you wait until the clay is quite dry, it can be crumbly and hard work to carve into.
Also, there is a risk that the slip, underglaze, or engobe will flake a little at the edges where you carve. So, you don’t get such a nice clean line.
Make your piece of pottery and allow the clay to firm up. Then apply the color in whatever way you prefer. You can then draw your design onto your pot lightly with a normal pencil. Any marks that are not removed when you carve will burn away in the kiln.
Once you have an idea of where your design is going to go, you can carve away your image using your carving tools. Some tools that are good for sgraffito are:
- Mini ribbon tools
- Carving/sculpting tools
- A stylus tool
However, you can improvise and use whatever tool works for you.
When making sgraffito, it helps to decide if you want the color or the exposed clay to be the focus of the design. And it’s useful to remember that black and dark colors will recede in a design.
This means that if you use black underglaze or slip, and carve out a design, your eye will be drawn to the design rather than the dark-colored areas of the pot.
Once you have carved your design, allow the pot to dry slowly, and then bisque fire it. Afterward, apply a clear glaze and glaze fire it.
Pottery Decorating Technique # 10 – Mishima
Mishima is a similar way of decorating pottery to sgraffito, in that you are carving into the pottery surface. However, with Mishima, you are coloring in the carved line rather than using the carved lines to expose the underlying clay.
There are different ways to Mishima clay. Here 3 different Mishima techniques:
Mishima Method 1
Carve your design into your leather hard pottery. Then paint underglaze or engobe over the area carved lines. You don’t have to cover the whole of your piece, just paint the carved area.
When the color is touch dry, take a damp sponge and carefully wipe away the color on the surface of the clay surrounding the carving.
Be careful that the sponge is not too wet. If it’s very wet you can wipe away the color in the incised lines too. And you can also smear the clay ruining your carved design.
This will leave the underglaze or engobe in the carved lines and clean up the rest of the pot.
Mishima Method 2
Instead of wiping away the excess underglaze or engobe, you can scrape it away using a sharp edge. This can be a metal rib or the flat wide edge of a modeling tool.
This can be an effective way to remove the unwanted color. And it also gets rid of any balls or burrs of clay left behind by the carving process.
Mishima Method 3
Another way to make Mishima pottery is to paint your pot with wax resist. Then carve your design through the wax resist. The colored underglaze or engobe is then painted onto the incised lines.
The wax resist makes it very easy to wipe away any excess unwanted color on the surface around the carved lines. And the wax will burn away in the kiln when the pot is bisque fired.
Pottery Decorating Technique # 11 – Chattering
Chattering is a way of easily adding a repeating texture onto pots that have been made on the wheel.
The pot is positioned upside down on the wheel head and secured in place using ‘lugs’ of clay. These are just strips of clay that are positioned around the pot to keep it secure and in place.
The speed of the wheel is then set, and a chattering tool is positioned gently against the surface of the pot. As the clay rotates beneath the lightly positioned tool, the chattering tool bounces up and down on the surface of the ware.
When the tool hits the clay, it gouges out a small chunk of the clay and then bounces up again. The clay rotates and the tool falls again onto the pot as it goes around.
Each time the tool hits the pot it gouges out a small amount of clay. Because the tool hits the clay in a rhythmic way, the tool creates a regular pattern on the surface of the pot.
Using a chattering tool is not essential and you can adapt a regular trimming tool to create a chattering effect.
The difference between trimming and chattering is that when you trim your pots, you hold the tool firmly and evenly on the surface of the pot. This removes the excess clay in an even strip and creates a regular surface.
By contrast, when chattering the tool is held loosely and allowed to bounce as the pot turns.
Altering the angle of the tool and the speed of the wheel will change the type of pattern that you create.
Pottery Decorating Technique # 12 – Terra Sigillata
Applying terra sigillata (also called terra sig) is a way of creating a lovely smooth warm buttery finish on your pottery.
Terra sigillata is a very refined clay slip that can be applied to the surface of your pot to create a high shine to your piece. Because it is made out of the finest clay particles, it creates a very smooth finish.
You can buy terra sigillata but it can be a little tricky to get hold of. Fortunately, it’s reasonably easy to make. If you’d like to know how to make terra sigillata, you can follow my step-by-step guide here.
Applying Terra Sigillata
The best time to apply terra sigillata is to bone dry clay. If you apply it to leather hard clay you can lose a bit of the shine from the finish. The reason for this is that as your pottery continues to shrink it will create micro crinkles in the surface of the terra sigillata.
One way to apply terra sigillata is to position your pot on a pottery wheel or banding wheel. Turn the wheel head and dip your mop brush into the terra sigillata. Then apply the brush to the pot as the pot turns.

Be careful not to overload your brush, as this can create drips on your pot which may cause streaks. The terra sig will dry quickly on the bone dry clay.
Once it’s touch dry you can apply another layer. Usually, 3 layers are enough. The more layers you add, the greater the chance that it will flake when you fire the clay.
Once all three layers have been applied and are dry, you can buff the surface with a soft lint-free cloth. This should bring the surface up to a high shine. The pot can then be bisque fired to around 1823F (995C).
The terra sigillata itself creates a lovely finish to your pots. However, it can also make a nice smooth glossy base for other low fire ways of firing pottery such as raku firing or saggar firing.
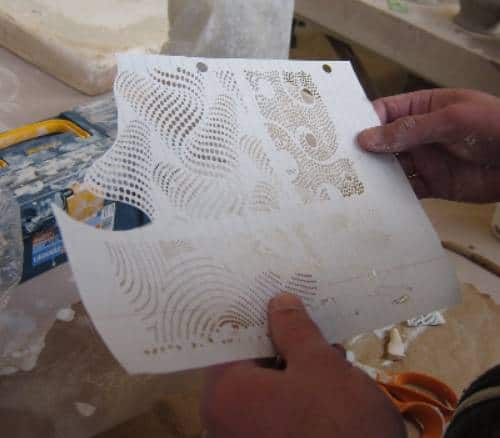
Pottery Decorating Technique # 13 – Stencils
Are a great way of decorating pottery, if you want to achieve a nice precise looking design.
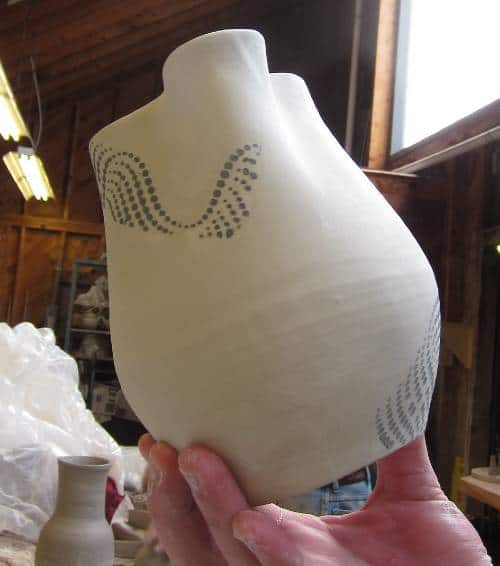
Image is cropped.
You can buy pre-made stencils from most pottery suppliers, and, also on Etsy. However, they are very easy to make, and if you make your own you can design them exactly as you wish.
Stencils can be made from paper, card, or vinyl. Craft foam is also a good option as it is flexible and non-absorbent.
There are lots of different ways of using stencils. And the technique you use will depend on what materials you are using, what the stencil is made from, and also whether the pottery is greenware or bisque fired.
Here are just a couple of ways to use stencils for decorating pottery.
Stencils on Greenware
Draw your design onto absorbent paper like newspaper. Then with a craft knife, carefully cut out the design from the paper. Alternatively for more intricate designs, the image can be cut out using a die cutting machine, like a Cricut.
(CC BY 2.0)
Image is cropped.
Place your soft leather hard pottery on a banding wheel, and spray it with some water. Place the paper stencil onto the damp pottery surface. Press the stencil onto the pot so that the edges of the stencil stick well to the damp clay.
Be careful to ensure that the stencil is stuck flat against the side of the pottery and that there are no wrinkles.
Then brush your underglaze or colored slip over the design. If you are using underglaze, apply at least 3 layers, making sure that they dry between applications.
Once you have applied your color, you can carefully peel the stencil off to reveal your design. This can then be bisque fired and then coated with a clear glaze.
Stencils on Bisqueware
Sticky stencils can be effective if you have a detailed design. You can draw your design onto self-adhesive craft paper and then cut the design out using a craft knife or a die cutting machine.
This is the die cutting machine that I have. It’s great. It makes very light work out of making really precise templates and stencils.

The Cricut Maker – View on Blick
Once you have cut out your design, peel the paper off the back of the stencil. Carefully stick your stencil on your bisque-fired pottery. This can be a bit tricky and take practice, as the stencil can stick to itself or stick on the pot in the wrong place.
Once the stencil is applied, you can use this to apply underglaze. When the stencil is peeled off, you can then apply a clear glaze to the underglaze design.
Or you can use the stencil to apply your pottery glaze to your pot according to your stencil design.
Pottery Decorating Technique # 14 – Lettering
Lettering is a way of decorating pottery that can add a graphic and literary quality to your work.
There are a number of ways of writing on your pottery. You can either carve the letters into the clay using a carving tool or another implement that feels comfortable to you. Or you can use letter stamps.
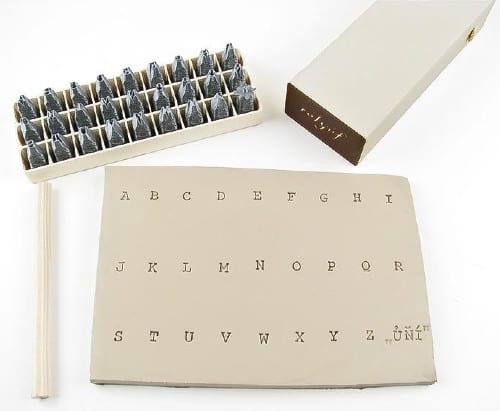
If you are good at calligraphy, freehand writing your own lettering can look fantastic. Equally, using letter stamps can give your pottery a vintage typeset look.
With some letter sets, you can snap the letters together to form words in a perfectly straight line. This can be effective, as positioning the letters evenly on your pottery can be tricky. Nevertheless, slightly wonky letter can give your pottery a handmade charm.
It’s best to use the stamps when your clay is soft leather hard.
Also, you can highlight the lettering by painting underglaze over the letters and wiping away the excess before it’s fired.
This is similar to the Mishima technique described above, with the underglaze color picking out the details of the recessed lettering.
Pottery Decorating Technique # 15 – Transfers and Decals
One of the easiest and nicest ways to apply images to your pottery is to use transfers. The images on pottery transfers are most often made out of underglaze. Therefore, they can be applied to your pottery when it is greenware or bisque ware.
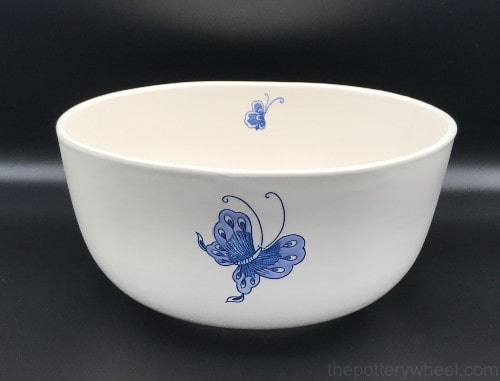
Underglaze transfers consist of underglaze patterns that are mounted on thin absorbent tissue-like paper. You can usually buy them in sheets and cut out individual images from the sheet. Or you can choose a selection of images and apply them as a group or strip to your work.
Equally, the transfers can be used as stand-alone decorations on your piece. Or you can incorporate them into a bigger design using underglaze painting, or drawing too.
You can also make your own transfers out of ceramic stains. This process is simple and effective. If you’d like a full step-by-step overview with images and a video on how to transfer images onto clay, you can check out my guide here.
Applying Ceramic Transfers
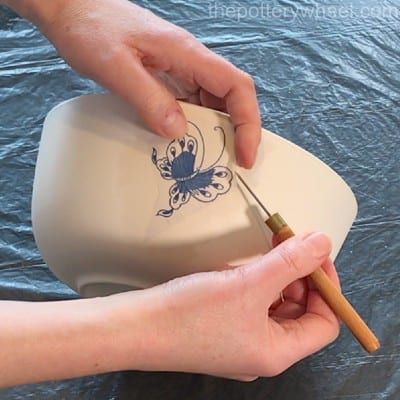
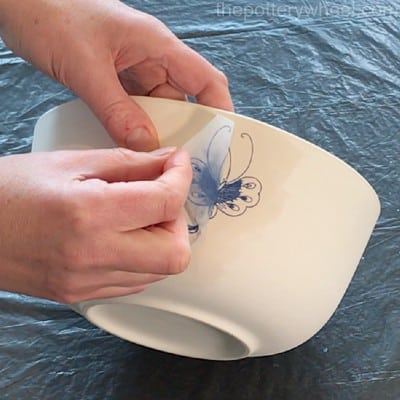
The transfers are easy to apply. Simply select the image you want to apply and cut it out from the sheet of tissue.
Hold the image up against your pottery, with the dull side of the tissue paper facing outwards.
Then use press a damp sponge against the tissue paper. You don’t need to rub the paper with the sponge. Simply press and dab the transfer to make sure the paper is thoroughly wet.
You can carefully peel off a corner of the paper to make sure that the image has transferred to your pot. If some of the image has been left behind on the paper, place the transfer back in place and continue to dab until all the image is on your pot.
Then carefully remove the tissue paper with a needle tool and your fingertips and allow the image to dry.
Although underglaze decals can be used on greenware, I find they work best on bisque ware.
This seems to be because the bisque is very absorbent and soaks up water. As a result, the image seems to stick to the bisque more easily.
Pottery Decorating Technique # 16 – Bubble Glazing
Bubble glazing is a fun, simple way of decorating pottery. To bubble glaze, you will need some bisque ware pottery, some underglaze, dishwashing liquid soap, and a straw.
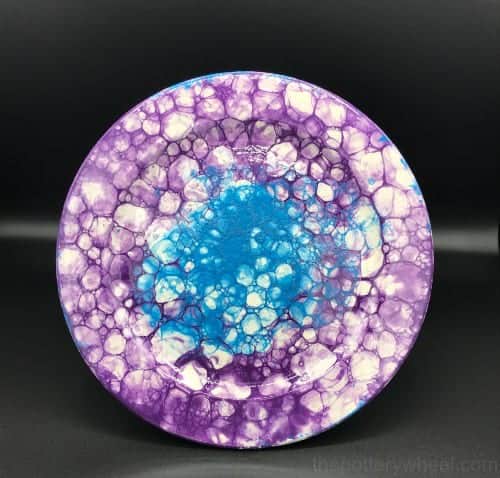
Simply add a few tablespoons of water into a mug or glass. Then add an equal amount of dishwashing soap to the water. Choose the color of underglaze that you want the bubbles to be, then add a few tablespoons of underglaze to the glass as well.
Find an old, shallow kitchen tray that you don’t need any longer, and put your bisque ware rim down in the tray.
Place your straw into the mixture in the glass and start to blow into the mixture. The mixture will start to bubble up. Allow the bubbles to spill out over the top of the glass and let them fall naturally onto the bisque ware in the tray.
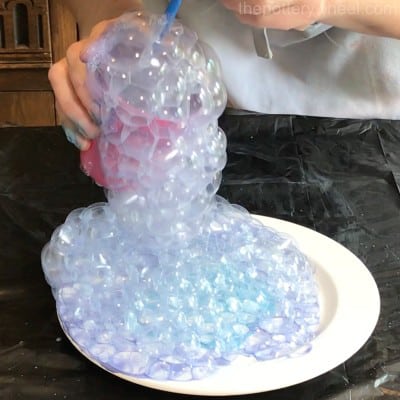
Move the glass of bubbles around as you blow, allowing the bubbles to cover the bisque. Once covered, you can let the bubbles burst in their own time. This will take a few minutes.
When the bubbles have burst, they will leave behind a colored bubble effect impression in underglaze on the pot.
After the pot and underglaze have dried thoroughly, you can carefully apply a couple of layers of clear glaze before glaze firing your piece.
Bubble Glazing Tip
One tip is that bright and darker colored underglaze works best with this technique. Because the bubble pattern is quite delicate, muted or pale colors don’t stand out quite as well against the ceramic background.
Pottery Decorating Technique # 17 – Modeling
Adding modeled details to your piece can also be a distinctive way of decorating pottery.
When your pot is leather hard, you can add sculpted and modeled details to your design. This can add character and individuality to your work, making it truly one of a kind.
Modeled details on a pot can be added to hand built work or a wheel thrown piece. The modeling can be added to the pot itself, or you might add a sculpted lid to a piece with an otherwise simple design. Alternatively, you might like to add sculpted details to the handle of your piece.
When decorating your pots with modeled details, the choices are endless.
Pottery Decorating Technique # 18 – Wax Resist
Wax resist is a liquid that can be painted on pottery. When it dries it forms a water repellant layer on the surface of the pot. This means that when liquids like glaze, underglaze, or slip are then applied to the pottery the waxed areas don’t absorb the liquids.
Wax resist can therefore be used to create patterns on the pottery by creating unglazed or uncolored areas of clay.
Bowl decorated using wax resist.
In that way, wax resist can be used a bit like a stencil that you paint directly onto your pottery.
There are many ways to use wax resist as a way of decorating pottery. Here are just a few:
Wax Resist Method 1
Paint your design onto the surface of your pottery using wax resist. You can paint the wax resist onto leather hard pottery or bisque ware. However, it dries more quickly on bisque ware. This can be an advantage because you avoid getting drips in the wax design.
Then apply either underglaze or glaze over the wax design. If any of the glaze balls up on the wax resist surface, you can wipe this away easily.
When you fire the pottery, the wax resist burns away, leaving the design intact, with that area of your pot unglazed.

Bowl decorated using wax resist.
Wax Resist Method 2
You can create interesting glaze effects using wax resist. For example, you can apply one layer of glaze, and then paint a wax resist design on the first layer of glaze.
Then if you apply a second different glaze, the original glaze shows through under the second coat of glaze when the piece is glaze fired.
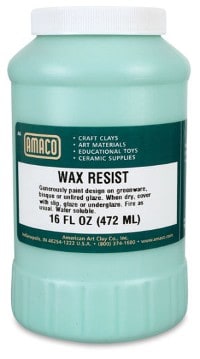
Amaco Wax Resist – View on Blick
Wax Resist Method 3
Wax resist can also be used when you make Mishima pottery. You apply a layer of wax resist to your leather hard piece, then you carve into the pot through the waxy coating.
After you have carved your design, you can apply a layer of underglaze to the carved areas. The excess underglaze around the surrounding area can easily be wiped away. When you fire your pot, the wax burns away, to leave a neatly incised and colored design on your bisque ware.
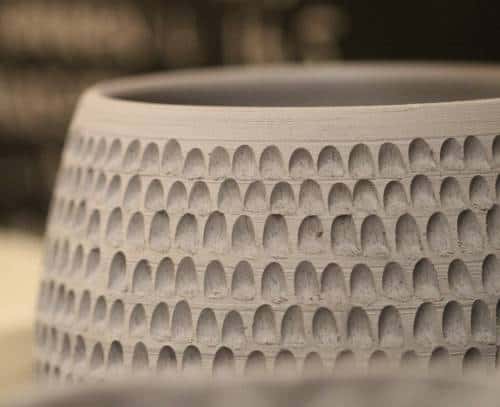
Pottery Decorating Technique # 19 – Textured Rollers
Textured rollers are rolling pins, made out of wood, rubber or plastic, with a pattern carved into the surface of the roller.
These are then usually rolled over soft leather hard clay. As they are rolled across the clay, they leave the texture of the design behind them on the clay surface.
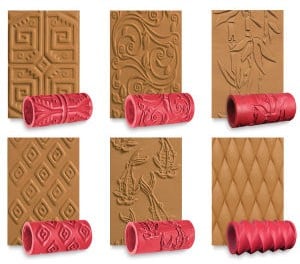
Clay Texture Rollers – View on Blick
Some potters will use a roller directly on a freshly thrown pot, to get a maximum impression of the design on their ware.
But when pottery is freshly thrown, it is very soft and loses its shape easily. So, after the texture is added, some work has to be done to restore the pot to its thrown symmetry.
Alternatively, you can use textured rollers as a way of decorating pottery when you are hand building. I think one of the best ways to use a textured roller is when you are slab building.
The reason for this is that it’s easy to get a nice even impression from the roller on flat slabs of firm but workable clay.
You can either use the roller once the piece has been formed. Or, you can add the texture to your unformed slab and then shape it carefully into whatever form you choose to make.
Pottery Decroating Technique # 20 – Burnishing
Burnishing pottery is a way of creating a lovely smooth, warm, skin-like surface on your pots without using a pottery glaze.
(CC BY-NC 2.0)
It involves rubbing the surface of your greenware with a small hard object like a burnishing stone. The rubbing action compresses the clay particles on the surface of the pottery and creates a smooth finish.
Clay can be burnished when it is stiff leather hard or bone dry. You can use almost any object that is hard and very smooth to burnish your pots. The object needs to be smooth because if you have any small dents or bumps in your burnishing ‘stone’, this will scratch the surface of your pot.
Some of the items potters use to burnish are smooth pebbles, large marbles, or the back of a metal spoon.
You can experiment with the rubbing action that feels best for you. It can be circular or back and forth, just as long as you cover the whole pot.
Burnishing Bone Dry Clay
The advantage of burnishing bone dry clay is that you can sand it lightly before you start burnishing. If you want to know more about sanding pottery, check out my article on the best pottery sanding techniques here.
However, if you are going on to burnish bone dry clay you will need to add a little moisture to the pot. Adding moisture will enable the clay particles to compress down, rather than crumble when you burnish.
You can add moisture by adding a little water or oil to the surface of the dry clay. You can use different types of oil, including vegetable, mineral, and baby oil when burnishing.
It’s best to add the water or oil a small section at a time as you burnish. If you cover the entire pot with moisture, by the time you work your way around the clay will have dried out again, and you will need to add more.
Burnishing is a time-consuming way of decorating pottery, but the effort involved pays off in how extraordinary the finished result can be.
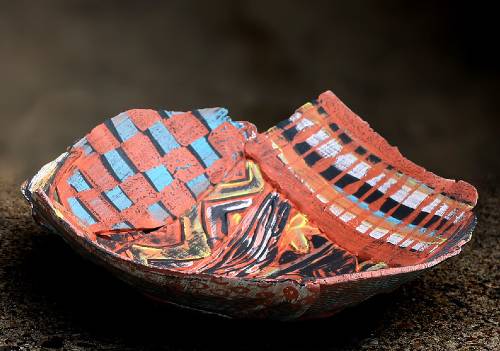
Pottery Decorating Technique # 21 – Kintsugi
Kintsugi is a decorative way of restoring broken pottery. It is an ancient Japanese technique that has been developed over the years. It involves gluing broken pieces of pottery back together with lacquer and then decorating the cracks with gold.
Kintsugi Repair to Dish
The philosophy behind Kintsugi is that everything and all of us are broken in some way. And that being broken is not a bad thing.
In fact, imperfection in all things gives character and can be the beginning of something new.
This is connected to the Japanese tradition of wabi-sabi, which centers on the imperfection and impermanence of all things in life.
The wabi-sabi philosophy was central t the development of traditional Japanese raku pottery. If you want to know more about this ancient tradition check out my article about traditional Japanese raku pottery here.
Kintsugi celebrates what is broken and makes something new and beautiful from what has been damaged. It’s seen as a metaphor for restoring the broken parts of ourselves too.
In traditional Kintsugi, the broken parts of a piece of pottery are glued back together using a lacquer that is made from the sap of a Japanese tree. The lacquer can take months to dry and harden before it’s decorated with gold dust.

This time-consuming traditional approach has been adapted more recently, and potters will often glue the piece back together using two-part epoxy glue. This dries in a matter of minutes rather than months!
The join is then dusted with gold powder and polished to compress the gold dust firmly into the lacquer or glue.
As such, the healed fractures in the pot become a beautiful golden feature of the restored piece.

Final Thoughts
There is an endless number of ways to decorate pottery. The techniques outlined above are but a few of them.
However, I hope that this has given you a good idea of the variety available for decorating your ware. And that it has inspired you to experiment and perhaps come up with your own unique way of decorating pottery.


