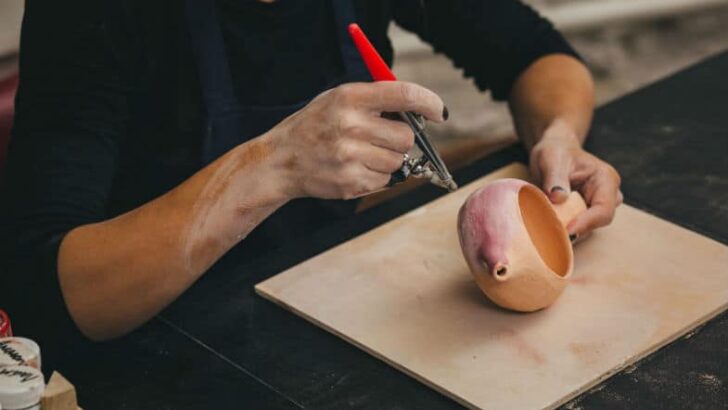
Airbrushing underglaze is very versatile. You can use it to create sharp lines, shadows, and blended gradients. I wanted to know more about how to airbrush underglaze, so I did some research and tried it out. Like most pottery techniques it takes practice, but with some trial and error, this is what I found out.
Airbrushing can create an underglaze gradient or ombre effect. It can also be used with stencils or to highlight textures on pottery. Airbrushes mix underglaze (and other pigments) with a pressurized airflow to create a mist. A simple non-electric atomizer without a compressor can create a similar effect.
On the surface, airbrushing seems like a simple process. You load the airbrush with underglaze and you spray, right? Well, not exactly. There are a few things that it’s helpful to know from the off. These will help you find your way through this particular underglaze technique.
Firstly, airbrushing underglaze can create quite different effects. And there are specific techniques associated with creating these effects. Secondly, there are different kinds of airbrush tools, which can have quite an impact on the way your underglaze looks.
I will have a look at both of these factors. Hopefully, this will help you decide which approach you want to try first.
Airbrushing Underglaze to Create Different Effects
There are a number of different underglaze effects that can be achieved with an airbrush. Here are some of the best.
Creating a Gradient by Airbrushing Underglaze
An airbrush can be used to create an even seamless gradient with underglaze. This is sometimes called the ombre effect. It is possible to create gradients using a wide brush, and an underglaze wash. However, creating a gradient with an airbrush is usually more successful and smoother.
The beauty of underglaze is that it can be used on greenware or bisqueware. Often potters will recommend airbrushing underglaze onto greenware. In particular leather hard, or even slightly moist greenware.
One of the reasons for this is that when you spray underglaze onto pottery, you are applying a fine mist. Compared to applying underglaze with a brush, the mist from an airbrush is relatively dry. Although the underglaze is suspended in an atomized vapor, it is drier than other underglaze techniques.
This means that once it is sprayed on, the underglaze is quite dry and crumbly. It is vulnerable to being smudged and damaged. This is particularly the case if you spray it onto bisqueware. If you apply it to greenware with a bit of moisture content, it has a bit of water to key into.
So, although you can airbrush underglaze onto bisqueware, it is often recommended that you apply before the bisque fire.

Applying a Base Coat of Underglaze
A good tip before you apply a gradient, or any underglaze pattern, is to apply a base coat first. You don’t have to do this. It may be that you want the color or speckles from the fired clay to be part of your finished piece.
However, if you want to obscure the clay, apply a base color that will work well with your design. You will need to apply a few layers of the base color to achieve an opaque finish.
Pots or Plates?
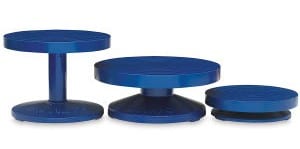
You can create an underglaze gradient with an airbrush on most kinds of pottery. If you are applying the gradient to a vessel, it’s a good idea to put it on a banding wheel.
That way you can turn the banding wheel as you spray the airbrush. This enables you to apply an even layer all the way around.
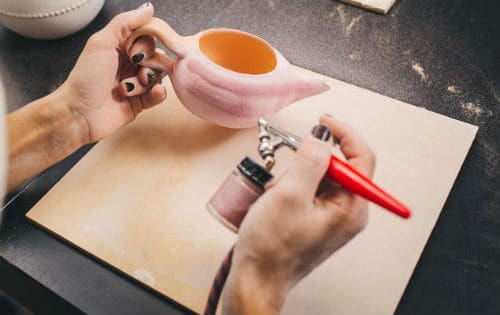
If you are creating a gradient on a plate or flat item, you can simply hold it in your hand. Or, you can prop it up against something on your table.
Either way, to create a gradient, it is best to start off holding your airbrush off and away from the pottery. Start to spray the underglaze before you come into contact with the piece. Move your hand across the pottery surface going in one direction and then back again.
Pointing away from the ware and then bringing your hand over it as you spray, creates an even effect. If you point your airbrush at the ware and press, you can create splotches and uneven patches.
If you are using a banding wheel, keep your hand still and move the pottery under the stream of underglaze. You can also place your piece on a potter’s wheel and turn the wheel. Bear in mind that you will end up with underglaze on your wheel if you do this.
However, if your piece is flat and on a table, you need to move the airbrush smoothly across the piece. Spray in one direction e.g. left to right and then go back again spraying in the other direction.
Creating An Underglaze Gradient – How Many Layers?
Generally, with underglaze, it is recommended that you apply 3 layers for an opaque finish. However, when you airbrush underglaze it does apply a thin layer. When airbrushing underglaze, you will need to apply quite a few layers to get an intense color. You can speed the process up by using a handheld drier or hairdryer.
The thickness of the layer will depend on the thickness of the underglaze in the airbrush. So, it’s not possible to give an absolute number of recommended layers. You will need to gauge visually if the underglaze looks dense enough. It is also a matter of trial and error.
At the point where you want to blend one color into another, make the layers of the current color thinner. You can do this by applying fewer layers. Also, if you move the airbrush nozzle further away from the piece, the underglaze application becomes broader and thinner.
You can use as many different colors as you like in a gradient. It does not have to be limited to two colors.
Picking Up Textures and Angles by Airbrushing Underglaze
Some potters recommend that a very smooth texture is best for creating a gradient effect when airbrushing underglaze. This is true if you are aiming for a smooth canvas-type effect.
However, airbrushing underglaze can also be used to pick out and highlight textures and angles on pottery. You can airbrush your pottery at any angle. If your form is textured, the underglaze will hit only some parts of the texture. This can have the effect of making the texture a real feature of the piece.
Similarly, you can airbrush particular parts of the pottery to highlight them. For example, spraying the lip or handle of a piece with a particular color to make it into a feature.
Layering Underglaze by Airbrush
As with other underglaze techniques, you can layer up different colored underglazes. This can look nice once it has been fired, with different colors showing through.
As with making a gradient, you should leave your layers to dry between applications. Unless you are aiming for the underglaze colors to bleed into one another.
With underglaze, you can choose if you want the color to be translucent or opaque. Very simply, one layer will be translucent, and the more layers you apply, the more opaque it will become. When applying underglaze with a brush or dipping, 3 layers is usually enough to be opaque. When airbrushing underglaze, opacity may require more layers.
If you are layering colors, you can vary degrees of opacity across your piece. When applying one color on top of another, the top color can be translucent in parts and opaque in others. This can create a smoky cloudy look.
Airbrushing Underglaze Through Stencils
You can also create more defined or harder lines when airbrushing underglaze by using stencils or masking. Stencils are usually made from plastic, or vinyl sheets like Tyvek or Mylar. Shapes have been cut out of the plastic sheeting.
The stencil can easily be wrapped around a piece of pottery and held in place with your free hand. Or if you are making a flat piece you can simply place the stencil down. The air current from the airbrush may cause the stencil to move. So, it may be a good idea to pin it gently down with a finger as you work.
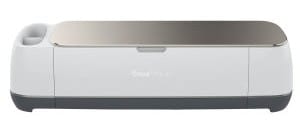
You can either buy ready-made stencils for this exact purpose on ETSY, or it is easy to make your own. Buy some stencil sheets like this, and then just cut out your preferred design. If you have a digital cutting machine, like a Cricut, you can create intricate and accurate stencils.
The Cricut Die Cutter will cut out any shape or design with ease of precision. Design your own patterns, templates, and stencils on your computer and send them to your Cricut as you would a printer.
The Cricut will then cut your pattern to perfection on vinyl, card, paper, and over 100 other materials.
Perfect for creating your own custom underglaze stencils.
One good thing about a stencil sheet is that it can be washed off and used again. This is handy if you are creating a range of pottery.
However, if you want to keep things low-tech, you can simply mask areas on your pottery. This can be done with masking tape if you are masking off bare clay or bisque. If you use tape on pottery that has been underglazed, you will lift the underglaze off with the tape. Or a simple mask is to hold a piece of paper or toweling against your pottery and airbrush over that.
Broad Brush Strokes or Fine Lines?
Airbrushes come with different-sized nozzles. This means you can adjust the radius of the spray that comes out. It is easier to create fine lines with some airbrushes than others. This is discussed below.
But also, if you move the airbrush further away from your pottery it will create a more diffuse, rounder mist. Bringing it closer to your piece will create a denser, narrower mark.
Fine Mist or Splatter?
Generally, an airbrush is designed to create a finely misted layer. A splatter effect is usually a mistake when a large droplet of the pigment drips by accident on your work.
However, if you would like to achieve a pattern with larger droplets, you might want to use an atomizer.
And on that note, let’s have a look at the different kinds of airbrushes and sprays you can use.
Different Types of Airbrush Suitable for Underglaze
There are two main types of airbrush, a gravity feed airbrush, and a siphon feed airbrush.
Gravity Feed or Siphon Feed Air Brush
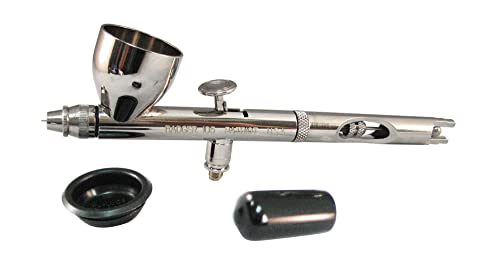
A gravity feed airbrush has a container (also called a hopper) on top of the airbrush, which feeds underglaze into the mixing chamber. When the underglaze enters the mixing chamber it meets an air stream and exits the chamber in an atomized mist.
A siphon feed airbrush has a bottle underneath the sprayer. A tube or siphon runs into the bottle and dips into the underglaze. As the pressurized air passes through the sprayer, underglaze is drawn up through the siphon and atomized.
There is another kind of airbrush called a side-feed airbrush. However, most potters use a gravity feed or a siphon feed airbrush.
Pros and Cons of Different Airbrushes for Underglaze
A gravity feed airbrush is better for creating finer lines. You can also create more diffuse effects with a gravity feed, but you do have more scope for finer lines too. So, in that sense, a gravity feed is more versatile.
On the other hand, a siphon feed is fine if you are mainly working on larger areas.
The other advantage of a gravity feed airbrush is that it has gravity on its side. By contrast, a siphon brush has to work against gravity. It needs to draw the underglaze particles up from the bottle, which can be harder if the underglaze settles. One of the problems with airbrushing underglaze is that the underglaze can separate out in the airbrush bottle.
When airbrushing, the underglaze needs to be thin enough to pass through the nozzle. It is not uncommon for the nozzle to get clogged up with sediment in the underglaze.
Blocked Nozzle?
One way to cope with that is to thin the underglaze out with water or even a deflocculant. However, particles settle to the bottom of the bottle. This is more of an issue with the siphon feed because as the underglaze settles, the liquid drawn up is more dilute.
A way around this problem is to give your airbrush a regular shake whilst you are working. If you shake the airbrush at regular intervals, you mix the underglaze up in the chamber.
Another solution to a blocked nozzle is to pass your underglaze through a mesh sieve before airbrushing. Passing your underglaze through a 100, 120, or 150 mesh may lift out sediment that could potentially block the airbrush.
If you do that, you may need to monitor how your underglaze responds.
As you sieve out sediment, you may also remove particles of underglaze.
The finer the mesh, the greater the risk that you alter the way the underglaze responds when it is fired.

Double Action or Single Action Airbrush?
This feature refers to how you operate the airbrush.
A double-action airbrush involves depressing two buttons. You press one button to stop or start the airflow. And you pull back another button to introduce underglaze to the stream of air.
You can control how much underglaze is sprayed by adjusting how far back you pull the trigger.
Pulling the trigger back completely will introduce the maximum amount of underglaze to the air stream.
A single-action airbrush has one trigger or button. Pressing the button down activates airflow and atomizes the underglaze. The amount of underglaze that is atomized is controlled by a separately adjustable screw.
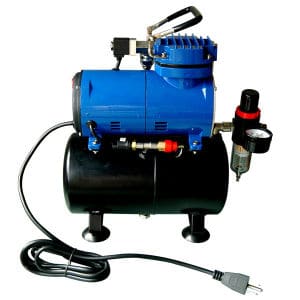
Airbrushes employ pressurized air to atomize the underglaze. As such, they rely on compressors to put the air under pressure.
The airbrush is connected to the compressor. Generally, the compressor is set to around 35 psi.
Using an Atomizer to Apply Underglaze
If you have a limited budget and want to keep things simple, you can use an atomizer instead.
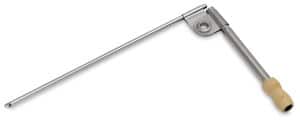
Some atomizers have very simple designs and are very inexpensive to buy. An atomizer consists of two parts. The first part is a bottle or container that you put the underglaze in. A lid is then snapped onto the container. A fine pipe or siphon dips down into the underglaze from the lid.
You blow through another pipe that is attached to the lid. As you blow through the second pipe, the underglaze is drawn up through the first pipe. When the underglaze mixes with the air stream it atomizes and is directed through a nozzle.
The atomizer creates a mist, however, the droplets are larger than those created by an airbrush. As a result, the atomizer can create more of a splatter effect.
Because atomizers are inexpensive, you can use more than one when you are working on a piece. Simply fill the chamber of two or more atomizers with different colored underglazes and switch between them as you work.
The thicker the underglaze the more opaque the layer will be. A good rule of thumb is to start with a ratio of two-thirds underglaze, one-third water. You can adjust this ratio to your taste. The bowl doesn’t need to be filled with underglaze. And any underglaze that you don’t use can be stored for a later date.
Is an Atomizer Safe to Use?
When you are using an atomizer, you are using your breath through the blowpipe. As a result, you can’t wear a face mask.
Whilst this may pray on your mind, remember that an atomizer is generally used for small areas. Therefore, you won’t be spending long periods of time inhaling underglaze mist. Another measure that you can take is to use the atomizer outside, rather than in an enclosed space.
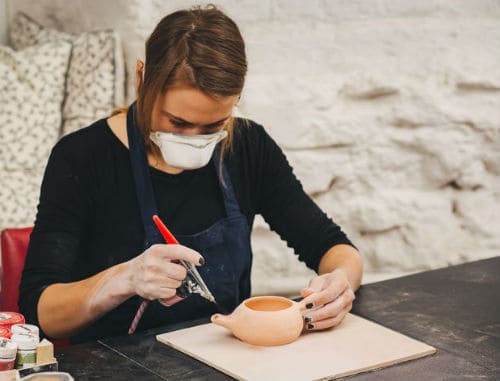
Normally when airbrushing, it is essential that you wear a suitable face mask. Potters will sometimes recommend that you use an N95 face mask as it is suitable for aerosol use.
However, if you are doing a lot of airbrushing, it’s an idea to use a respirator, rather than a face mask. Respirators do a better job of creating a seal around your face and filtering out the vapor.
Other Useful Equipment for Airbrushing Underglaze
In addition to a face mask, you will benefit from using other equipment when airbrushing underglaze.
A Spraying Booth
Airbrushing creates a lot of vapor known as overspray. This will leave a fine layer on almost everything in the vicinity. As such, it’s a good idea to use a spraying booth.
You can buy made-for-purpose spraying booths. These are good because they have built-in lights, turning plinths, and extractor hoods to suck out excess vapors.

Bear in mind that a compressor and extractor fan at the same time can create quite a bit of noise.
It is also possible to make your own spraying booth for next to nothing.
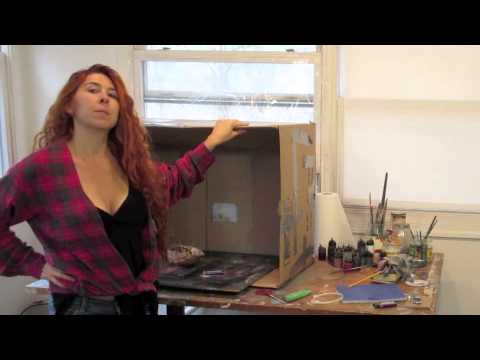
If you make your own spraying booth, you can use a banding wheel in the booth to turn your pottery.
Final Thoughts
The practice of airbrushing is a whole creative field of its own. If you are new to airbrushing underglaze, just give it a try. Airbrushing takes a little time to master, but once you are confident, you can achieve some beautiful results. And if you aren’t happy with your results as you learn, you can always wash underglaze off and try again.


