
When I bought my kiln, I was so excited to use it, I didn’t think too much about kiln maintenance. But kilns are like cars, they have parts that wear out and need replacing. And the more you use them the more quickly they will need replacing.
Also, like a car, if you look after your pottery kiln with routine maintenance, it will perform better and last longer.
These are some of the things on your kiln that will need attention. For some of these items, you can do regular routine preventative maintenance to help prolong their life. Other items will simply wear out with time and need replacing, regardless of preventative steps taken.
Kiln Maintenance and Safety
This article is about electric kilns. It’s important to unplug your kiln before you do any kiln maintenance. And if you are uncertain about electrics, you can hire a kiln engineer to do the work for you.
I’m a potter, an electrician, so I’m not qualified to offer any advice about electricity. If you have any concerns, do consult an electrical professional.
19 Tips on Kiln Maintenance
Even if your kiln is working, it’s recommended that you have a kiln engineer check it over once a year.
Not all potters do this. Some are happy to do all the kiln maintenance work themselves. I like to get mine checked over by a professional annually. This does cost money, but for me, the peace of mind is worth it.
But what can you do yourself in terms of general housekeeping with your kiln? And what will need attention as you use your kiln regularly? Read on….
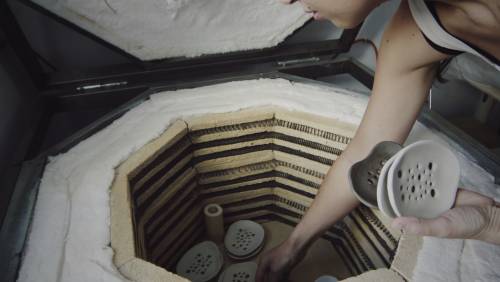
Kiln Bricks
Kilns are insulated by kiln bricks. Here are some ways to take care of your kiln bricks:
Tip 1: Keep the Kiln Level and Steady
Position your kiln on a level steady surface. If the kiln is at an awkward angle, this can put stress on the kiln bricks. This means they are more likely to crack with time. Also if the surface is wobbly, it can also put a strain on the bricks.
Tip 2: Be Careful with the Bricks
The kiln bricks that line the base, walls, and lid of your kiln are soft, and I mean really soft. If you knock a kiln brick by accident, it will chip or crack very easily.
Compared to kiln bricks, kiln shelves, and kiln props are hard. It is very easy when you are lifting a kiln shelf in and out of a kiln to bump the brick wall. Over time, if you aren’t careful you can make small dents in the walls of the kiln.
Small dents and bumps in your kiln walls won’t affect its performance. However, if you are regularly knocking chunks out of your kiln bricks, then eventually make the brick less insulating. This will lead to heat loss during firing.
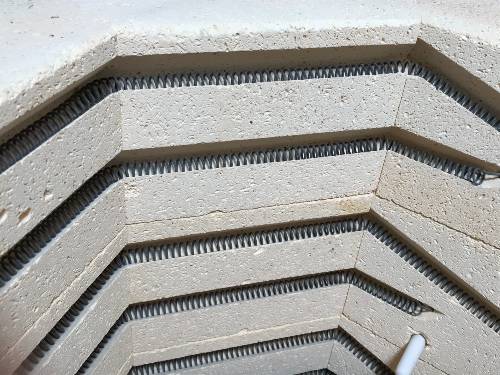
Also, the grooves in the kiln brick support the elements. The elements are the metal coils that run around the side of the coil and heat the kiln. If the side of the grooves break off, they stop supporting the elements. And the elements will start to pop out of their grooves.
So, the key tip here is to be very careful when you are taking things in and out of the kiln. Don’t bump the walls.
Tip 3: Be Careful With the Top Edge
A related tip is to be careful with the top edge of the kiln. If you have a large kiln, it’s natural to want to lean on the edge as you load the kiln.
It’s best to avoid leaning on the top edge with your hand or body as you load and unload. Regular pressure applied to the top edge can cause accidental chips and stress fractures.
You can put a plank of wood on the top edge of the kiln as you load or unload it. This can protect the kiln brick. Or you can put a soft towel on the edge.
Tip 4: Don’t Use Your Kiln as a Cupboard
It sounds obvious but it’s important to avoid storing anything in your kiln when you aren’t using it. If you are pushed for space it can be tempting to use the kiln for storage. This is a bad idea because the bricks and elements are easily damaged.
Tip 5: Vacuuming Your Kiln
Vacuum the kiln regularly. Dust, particles, and fine pieces of pottery can build up in your kiln over time. This affects how efficiently your kiln works.
In particular, dust or debris can build up in the element grooves. Dust around the elements can cause heat to build up around the elements. This will make the elements less efficient at radiating heat. And it will affect how long they survive.
The solution is to vacuum the kiln carefully. The best way to do this is by using a vacuum nozzle with a soft brush adaptor on the end. A brush adaptor will help you avoid accidentally damaging the bricks or elements.
Pay attention to the grooves and make sure you remove dust and debris from those. I’ve heard that it’s a good idea to keep the vacuum nozzle away from the thermocouple and digital controller. My understanding is that static electricity from the vacuum can affect how these work.
Tip 6: Keep the Kiln Lid Closed When Not in Use
One way to reduce dust in the kiln is to keep the lid closed when it is not in use. This will also prevent the kiln lid from dropping closed accidentally too. If the prop that keeps the lid up is knocked or fails, the lid can slam closed heavily. This is likely to damage the kiln bricks.
Tip 7: Close the Kiln Lid Gently
A related point is to close the kiln lid gently. Slamming it closed, or letting it drop may cause cracks in the lid or top edge.
It’s worth noting that the seal between the lid and the kiln does not need to be airtight. When your kiln is on, you will most likely be able to see a band of glowing orange light. This is normal and doesn’t mean that the lid isn’t sealing the kiln adequately.
Tip 8: Remove Drips of Glaze
Over time, as you glaze fire, you will likely get the odd drip of glaze on your kiln bricks. Sometimes these drips go onto your kiln shelf. Other times they might end up on the wall or floor of your kiln.
It’s important to remove glaze from kiln shelves and walls. If you don’t remove drips of glaze, the next time you fire, the glaze will melt again. Over time the glaze will be absorbed into the wall or shelf and eat through the brick.
If you do get drips, it’s best to chip them off immediately. You can do this with a flat head screwdriver, a chisel, or a plasterer’s tool.
It’s important to be as gentle as you can, and careful with the kiln bricks. But the most important thing is to get rid of the drips. Even if you take out a small chunk of the brick. It’s best to have a little dent in the brick and remove the glaze.
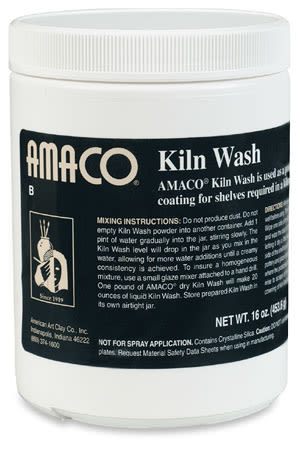
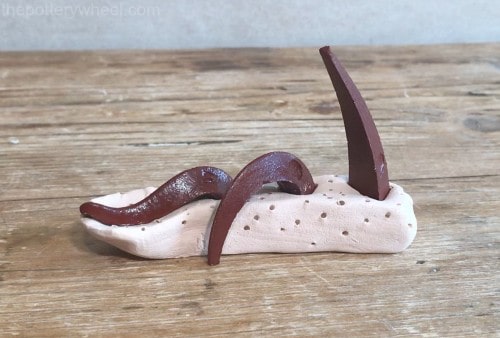
Tip 9: Use Kiln Wash
You can minimize the damage of dripping glaze by using kiln wash on your kiln shelf. Also known as batt wash.
You can buy this as a ready-made solution. But the most inexpensive way to buy kiln wash is to buy it as a powder. It’s extremely easy to make. You just mix some of the powder up with water.
I aim for a consistency somewhere between whole milk and single cream.
Then paint 2 or 3 layers of this on the top side of the kiln shelf. Kiln wash only needs to be applied to the top side of the kiln shelf. Not the side edges or the underside.
Some manufacturers advise applying kiln wash to the bottom of the kiln too. This is not something I do. I avoid messing with the kiln bricks as much as I can.
Nevertheless, it is something that some potters will do. If you choose to take this step, it’s important to avoid getting the batt wash on your elements accidentally. You can do this by lining the sides of the kiln with cardboard or paper before you paint the base.
Tip 10: Cracked Bricks
Don’t worry too much about cracked bricks. It is normal for kiln bricks to crack with time. When you fire the kiln, the bricks expand, and the gaps between the cracks close up.
A lot of the time, cracks do not need to be repaired. Paragon recommends that you only need to attend to a crack if it’s affecting the kiln’s ability to insulate. Or if the crack or chip means that the brick isn’t supporting the element properly.
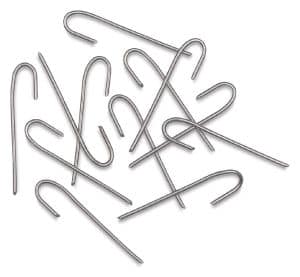
If a chunk of kiln brick comes out around the element groove, the element might start to sag. There are a couple of things you can do to fix this. Either you can cement the chunk of brick back in. Or you can pin the element back in place using element pins. Or you can use a mixture of both of these solutions.
Using kiln cement is quite easy. You simply mix a small quantity of the cement, with a little water. A couple of spoonfuls of cement would be enough for a small repair.
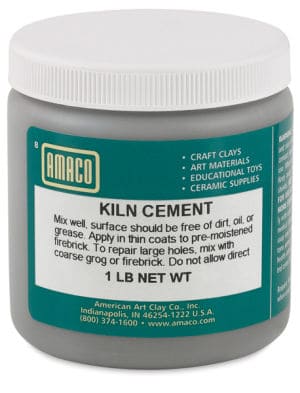
You mix the cement up to the consistency of thick yogurt. Then dampen both of the surfaces to be joined.
Put a little of the cement on the chunk of brick to be repaired, and press it in place.
You will need to hold it for a moment, but the cement will grab on quite quickly. The cement will set in around an hour.
It’s not recommended that you use kiln cement on small cracks in the kiln. Kiln cement can make small cracks worse over time, and as mentioned earlier, small cracks don’t need repair.
If you have big cracks in your kiln affecting its insulation, you may need to have sections of brick replaced.
Tip 11: Open the Kiln When it’s Cool Enough
Some hairline cracks around the door of the kiln are caused by opening the kiln when it’s too hot. When the kiln is hot, the bricks expand.
With some kiln designs, the edge of the kiln will expand and hold onto the lid of the kiln. If you pull the lid or door open when the sides are gripping onto the door, it can cause cracks. This normally happens if you open the kiln above 212F (100C).
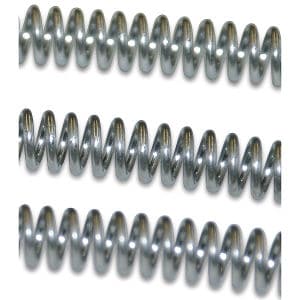
Kiln Elements
As mentioned earlier, kiln elements are the metal coils that circle around your kiln. These coils rely on electrical resistance to radiate heat. An electrical charge is sent through the element. The coil needs to have a certain amount of resistance to reach the right temperature for your kiln.
With time, coils corrode and the amount of resistance in the element will increase. As the resistance in the metal increases, the element will find it harder to radiate enough heat.
Eventually, the element becomes so inefficient that it needs to be replaced. This is an inevitable cost of running a kiln. It’s like needing to change your car tires when they wear out. It’s an unavoidable necessity.
The number of firings you get from a set of elements will vary from kiln to kiln. It is also affected by the temperature you fire to.
If you fire to higher stoneware temperatures regularly, the elements will need replacing more frequently. Whereas if you fire to earthenware temperatures, or use the kiln just for bisque firing, they will last longer.
Here are some tips on maintaining your kiln elements:
Tip 12: Always Use Pyrometric Cones
It’s a good idea to use pyrometric cones in each firing even if you have a digital controller.
Cones are small pieces of ceramic material that bend when they are hot. They bend to a particular angle when they have had a certain amount of heatwork. ‘Heatwork’ is a combination of the temperature reached and the time it took to reach that temperature.
Cones will tell you if your kiln is getting hot for too long. This is ‘overfiring’. Or if the pottery is not getting enough heatwork. This is called ‘underfiring’. Pottery can be underfired if some or all of the elements aren’t working properly.
Tip 13: Doing the Paper Test
If your cones tell you your elements aren’t getting hot enough, you can find out which set using a ‘paper test’. Roll or fold up a small piece of paper. Insert one of the paper rolls between a couple of coils on each element. Remember to unplug the kiln before you do this.
When the pieces of paper are in place, replug the kiln and turn it on high. Leave the lid of the kiln open and wait for a couple of minutes for the elements to heat up.
As the elements heat up, the paper should start to smoke and burn. Once they are smoking turn the kiln off and unplug it.
You can remove the pieces of paper with a pair of tweezers or needle nosed pliers. If any of the pieces of paper haven’t burned, then you know which element circuit/ring has an issue. Either the element is broken, or not wired correctly. Or perhaps that relay for that element isn’t working.
If each of the pieces of paper has burned, then no element, in particular, is causing the drop in heatwork. This may be because all the elements are reaching the end of their life and need replacing.
Remember to vacuum the paper ash and debris out of your kiln once you are finished with the test.
Tip 14: Check the Resistance of the Elements
You can use a multimeter to measure the resistance of each individual element. Multimeters read ‘ohms’, which is the unit used to measure resistance.
Look up in your kiln maintenance manual what the resistance of your elements ideally is. Once the resistance in your element is 10% higher than the recommended resistance, you know that they need replacing.

Tip 15: Repositioning Saggy Elements
Sometimes elements are working well enough, but they have started to pop out of the grooves in the brickwork. If that’s the case, you can reposition them back into the grooves.
However, once elements have been used a number of times, they become less flexible. When they have become brittle if you try to simply press them back into the grooves, they will probably break.
You can reposition older elements by heating them up first with a propane torch. Use a small handheld propane torch with a push-button on/off switch. These are easy to handle and control.
Heat up the element with the flame from the torch. Once the element is glowing orange hot, it has become soft again.
The elements can then be repositioned when they are soft. Once they are in place, they can be secured using element pins to hold them in place.
Elements Bulging Out on a Straight Wall of the Kiln:
If the elements are popping out on a wall, gently pinch a couple of the coils together when they’re hot. You should use needle nose pliers to pinch them. Pinch them gently, and not so much that the coils are pressed together.
When you pinch them together, this naturally shortens the element and it will move back over the groove. Once the element is over the groove, you can heat it again and then press it down into the groove. Use a blunt kitchen knife to press it down into the groove.
Elements that Have Popped Out in a Corner
If the elements have bulged out at the corner, you will need to separate the coils a little. This is because when the bulge out at the corner the coils are being pressed together rather than bulging apart.
Again, heat the coil up with the propane torch, and then use snap ring pliers to gently spread the coils. By spreading the rings a little the coil will extend again a bit and move back over the groove.
The coil can then be heated again and pressed back into the groove with a blunt knife.
Tip 16: Replacing Kiln Elements
Kiln elements can break and corrode to the point where they aren’t working well enough. At this point, they need to be replaced.
Buying new elements is an unavoidable expense of kiln maintenance. You can either pay a kiln engineer to fit the new elements for you. Or you can fit them yourself.
Different models of kiln will have slightly different procedures for fitting new elements. If you want to fit the new elements yourself, check your manual for a step-by-step guide. Even if you have an old used kiln, you will probably be able to download a PDF of the manual online.
When you are changing kiln elements, you strip out the old ones and replace them with the new ones. It can feel a bit nerve-wracking to do for the first time.
However, once you know the process, it’s quite straightforward. And learning to do it yourself will save you some money on your kiln maintenance bill.
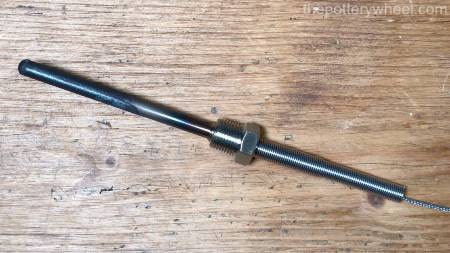
Tip 17: Replacing Thermocouples
The thermocouple is the probe that passes through the wall of the kiln and reads the kiln temperature. Thermocouples are made from two wires made from different metals that are welded together. The welded end is positioned at the tip of the thermocouple.
There is a very small electrical charge at the point that the wires are welded. The size of the charge changes according to the temperature around the thermocouple. So, changes in temperature can be read by measuring changes in the charge at the welded point. This is how the thermocouple measures the temperature of your kiln.
The tip of the thermocouple is sitting in your kiln and it is exposed to high temperatures. So, with time it corrodes and crumbles. If you inspect a thermocouple that has been used a lot, it will be black and crumbly.
Thermocouples need to be replaced quite regularly. You may need to replace it once a year if you use your kiln regularly. Some kilns have one thermocouple, others have several depending on how large the kiln is.
Thermocouples are quite easy to replace, and like elements, you can consult your kiln manual for specific instructions.
Tip 18: Replacing Relays
The relays of the kiln are components that turn the power to the elements on and off. Power enters the terminal box from the power outlet. The power is then sent to the relays. Lots of kilns will have 3 relays, with one relay feeding power to each set of elements.
The information from the thermocouple tells the relay if the kiln is heating up to quickly or too slowly. If the kiln temperature needs to rise, the relay will turn the power to the elements on. If the kiln temperature needs to pause, the relay will turn the power to the elements off.
During a firing, the relays will switch off and on repeatedly. As such they are subject to wear and tear and will need to be replaced at some point.
Relays are relatively cheap to buy. They usually cost between $20 and $30. However, they are quite fiddly to replace. If you feel confident with circuits electricity boards, then you may feel happy to replace the relays. But if like me circuit boards make you nervous, you can get a kiln engineer to do this for you.
Tip 19: Check the Wiring
The other factor that you need to consider with kiln maintenance is the condition of the wiring. With most kilns it’s quite easy to remove the metal box on the side of the kiln that contains the wiring. It is usually just a matter of removing a few screws and lifting the box to one side.
It’s worth giving the wiring in the box a regular visual check. As always, you should unplug the kiln before you do this. Have a look at the wiring. Is any of it burnt out? Does it look crusty, brittle, or charred? If it does, then you need to get the kiln assessed by a kiln technician.
Final Thoughts on Kiln Maintenance
I hope that this list of tips on kiln maintenance was helpful. It’s an overview of the items that you need to keep on top of when you use a pottery kiln. When I bought my kiln I had a vague idea that I’d need to replace bits of it now and then.
But it wasn’t until I started using it that I realized there was a little more to kiln maintenance. Ignorance is bliss I guess! Maintaining your kiln may seem like a daunting prospect. However, once you get to know your kiln and its quirks, it may start to seem like routine housekeeping.


