Life is busy and having somewhere to store half-finished pottery for a week or a few days is handy. You may have heard about a helpful piece of pottery kit called a damp box and wondered what it is. In this article, I will go through what it is and how to make a damp box for pottery clay.
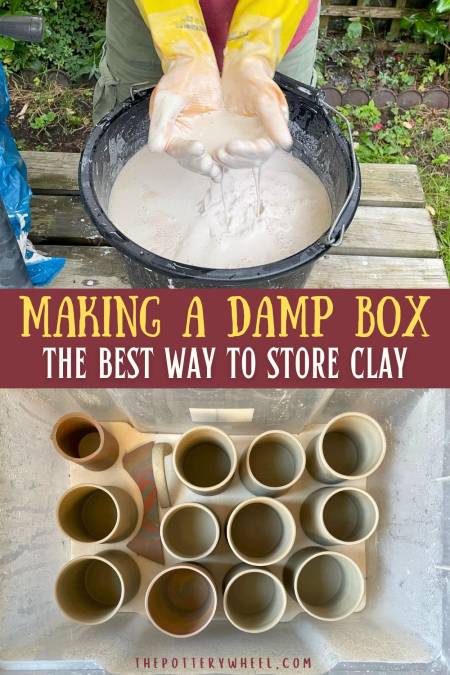
To make a damp box for clay, pour 1-2 inches of plaster into a plastic container. When the plaster has set, rub it down to get rid of bumps and loose bits. Pour water onto the plaster to make it damp. Then place your pottery on the damp plaster and seal the lid of the box.

Making a Pottery Damp Box
A pottery damp box is sometimes called a wet box or clay box. Making a damp box is extremely easy, but it is also a game-changer when making pottery.
I have several damp boxes and they are in constant use. Here are a few things that they are handy for.
Clay storage: a pottery wet box can be used to store clay in a workable state for as long as you like.
Rehydrating your clay: a damp box for pottery can help you rehydrate pots that have become too dry.
Drying clay: It can be used to help you dry your clay out slowly so it doesn’t crack whilst drying. Thirdly, it can be used to rehydrate clay that has become too dry. The method
There are a few ways of making a damp box for pottery. The method that I describe below is the way that I use. It’s inexpensive, easy, and doesn’t take up too much space.
Here are the steps to follow to make an invaluable damp box that can last for years.
You will need
- A plastic storage box
- Some plaster (I use Plaster of Paris)
- Petroleum jelly (or a release agent if you have some)
- A couple of buckets
- A measuring and pouring jug
- Rubber gloves
- A pottery rasp or Surform
- Green scrubby
- Respirator mask
- Rubbing alcohol in a spray bottle (optional)
Simple Steps to Build a Damp Box For Clay
Preparing the Box:
- Find a plastic box that is going to be large enough to store your greenware. Choose something that will give you enough room to lift your pieces in and out without damaging them. If the box is too small, it will be hard to put them in and take them out carefully. Give yourself 2 or 3 inches of clearance all the way around.
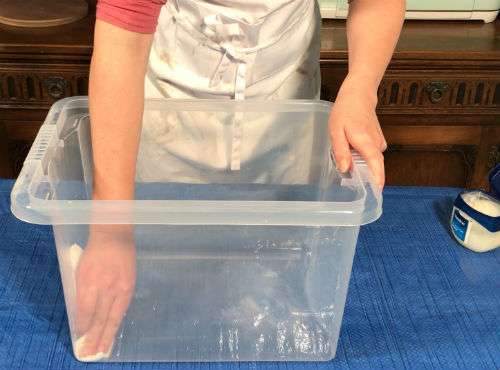
- Put a thin layer of Vaseline (or release agent) onto the inside of the box. You only need to cover the bottom few inches.
Preparing to Mix the Plaster:
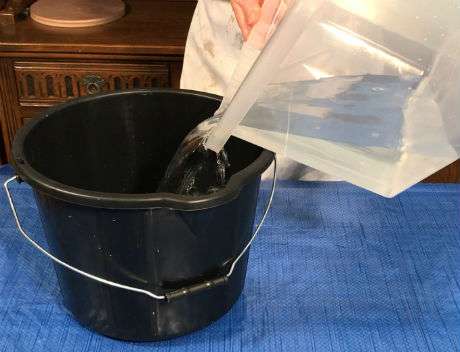
- Measure how much water you need. You can do this by pouring enough water into the plastic container to cover the base with 1-2 inches. Then transfer the water into one of your buckets.
- I would recommend using room-temperature water. Not too cold, not too hot. Warm water will set your plaster quickly. If it is room temperature, it gives you a bit more time to work (source).
- Fill your other bucket with water and keep it to one side. You will use this bucket to wash/rinse things as you go along. This will stop you from having to rinse plaster down your sink and will save your drains.
- Put on your respirator mask and gloves. It’s important not to breathe in the plaster dust and avoid getting it on your skin.
Mixing the Plaster:
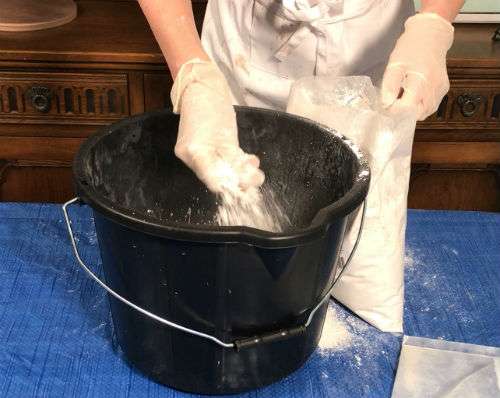
- Sprinkle the plaster into the bucket of water. You can use a jug or a spoon to sprinkle. Or you can pick up handfuls of the plaster with your gloved hand. Sprinkle the plaster into the water rather than dumping big chunks in. Big clumps of plaster will tend to clump together in the water in a lump. If you sprinkle it, you give the plaster a chance to dissolve into the water.
- Keep sprinkling the plaster in until there is enough in the water to create plaster islands. I usually don’t measure a plaster-to-water ratio out exactly. You can easily do it by eye. Once the plaster starts to poke out of the top of the water in a little mound, you have added enough plaster. This is sometimes called the plaster islands method (source).
- With a gloved hand and your mask still on, gently mix the plaster into the water. You can mix it slowly with a spoon or stick, but it is easier to feel lumps with your fingers. I’d recommend using thin latex gloves so you can feel the lumps. You can mix the plaster with a drill and mixing bit. But this can add a lot of air bubbles to the mixture, which you do not want. I’d recommend just using your gloved hand. Stir until it has all dissolved and the mixture has the consistency of double cream. Once the plaster is all mixed in, you can take off your mask.
Pouring the Plaster:
- If you are strong you can pour the mix directly from the bucket into the plastic box. Try to pour it into the corner of the plastic box. This reduces the amount of air that gets dragged into the plaster mix. Think about pouring a fizzy drink into a glass. If you pour it straight into the center of the glass, it gets agitated and bubbles up. However, if you pour it against the side of the glass it will settle more easily.
- If the bucket is too heavy you can use a jug to transfer the mix to the container. You can put a thin layer of Vaseline on the jug to make it easier to clean afterward.

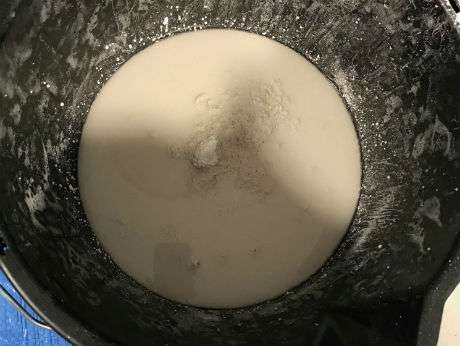
Letting the Plaster Go Off:
- Once all the plaster has been transferred, tap the side of the container. This will help bubbles rise to the surface. I also put my gloved hand into the mix and give it a very gentle ‘shuggle’. This gets rid of more bubbles than just tapping.
- You can get rid of any bubbles that appear on the surface of the plaster by spritzing it with rubbing alcohol. Put some rubbing alcohol in a small spray bottle and spray it a few times onto the surface of the plaster.
- Leave the container to sit until the plaster has gone off. This can take as little as half an hour, but I usually leave mine overnight to make sure it isn’t too soft.
Finishing Touches:
- After the plaster has cured, the surface will still be a bit soft and ‘cheesy’ for a while. This is normal and nothing to worry about.
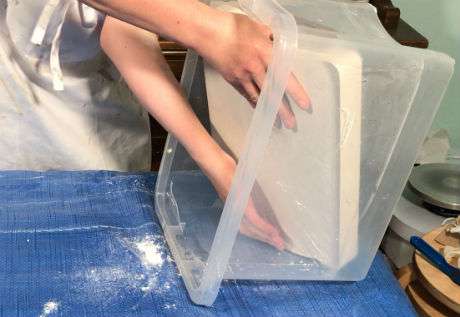
- Once the plaster is solid, you have options. You can leave the plaster in the container and use a scrubber to rub down the surface. Or you can turn the container upside down, and pop the plaster slab out. This is the reason for putting the thin Vaseline layer onto the container earlier.
- If you are leaving it in the container, just rub it down with a scrubbing pad. Remember to clean any plaster splashes on the side of the container too so they don’t flake off later.
- To pop the slab out of the container, turn the box on its side or upside down, then gently press the underside of the box. It should slide out fairly easily.
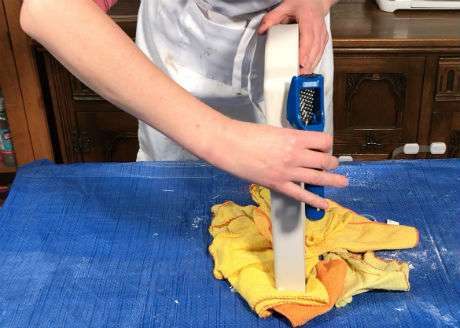
- Being careful not to drop the plaster slab, you can use the pottery rasp to file the edges. This will get rid of sharp bits of plaster that could flake off and get into your pottery. Also, scrub down the surface of the slab to get rid of bumps and lumps.
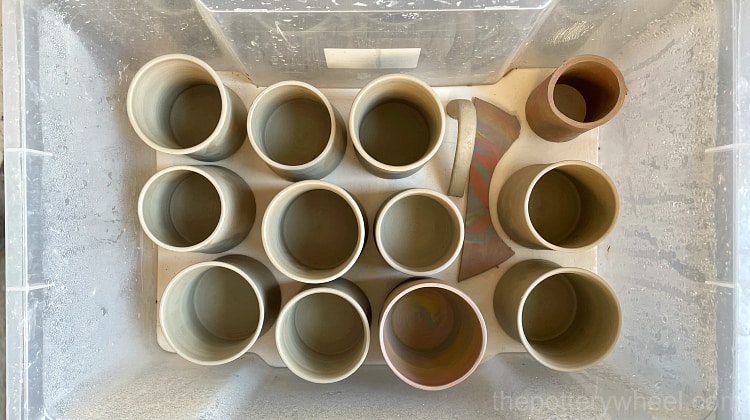
- Once you have done this, put the slab back into the container. You now have a damp box! To use the box, pour enough water onto the plaster to make the plaster damp. If excess water is sitting on the plaster surface, soak it up with a sponge.
- You can then put your greenware onto the plaster and seal the box with a lid.
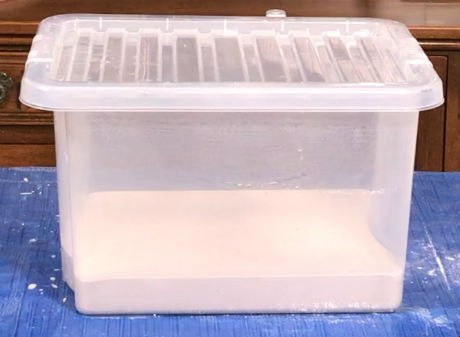
If the box is airtight, your pottery can be kept in the damp box indefinitely. I would recommend checking the moisture levels in your plaster regularly. You can top the water in the plaster up as time goes on.
More Tips for Making Your Damp Box
- A key part of how you make a damp box for clay is to get the plaster the right thickness. If it is too thick it will be very heavy. But if it’s too thin it may break with wear. Between 1.5 and 2 inches is usually right.
- Line your plaster mixing bucket with a plastic bag. When you have finished mixing, you can just throw the bag away. This will save you from washing your bucket out in the sink. It’s best to avoid plaster going down the sink if you can.
- If you are storing your unused damp box for a while, keep the lid off to let the water evaporate. If it dries out with the lid on, it can go moldy.
- You can, however, get rid of mold in the damp box by spritzing it with a mixture of water and bleach.
Different Uses for Your Damp Box
Damp boxes can be used to keep clay workable or to dry it out slowly. If you want to dry your clay out slowly to avoid cracks you can put holes in the lid of the box. The more holes you put in the more air that can circulate. You can control how quickly the clay dries out by adjusting how much air gets in.
I have a few damp boxes. Some are used to keep clay damp, but one is used to dry pots out slowly. The box that I use to dry the clay out has a few holes in the lid. If I want to slow the drying down, I cover the holes up with masking tape. If I want to speed the drying up, I remove some of the tape, to increase the number of holes.
How to Make Different Kinds of Damp Box
A damp box can be anything in your pottery tool kit that helps you control the humidity around your greenware.
There are other variations on the damp box theme, that are very simple to use. Here are a few ideas…
- Putting your pottery under an inverted bucket works like a damp box. You increase the moisture level in the bucket by putting a wet sponge in a bowl underneath the bucket too. Alternatively, you can gradually reduce the humidity by making holes in the top of the bucket. Buckets are handy because they protect the pottery and can also be stacked, which saves valuable studio space.
- Simply putting your pottery in a plastic bag is a very simple kind of damp box. I often put a loose-fitting bag or plastic sheet over my greenware to stop it from drying out.
You can buy specially designed damp cabinets to keep your greenware moist. For example, the Debcor Damp Proof Cabinet.
You can also make a damp cabinet quite easily. Simply cover an old cabinet well with plastic sheeting.
You can use any kind of plastic sheeting, as long as it is not water permeable. Cover the cabinet in such a way that it traps moisture. You can store larger pieces in a damp cabinet. Also, you can add a tray of water in the bottom to boost the humidity.
Final Thoughts
Making a damp box for your pottery clay is not the most glamorous or exciting part of making pottery. But it will make your life a lot easier and they last for years too. It’s worth investing a few hours of your time now to save yourself so much time in the future. If you want to know more about how to store your pottery clay, you can check out my guide on storing clay here.


