Transporting your greenware all over town to get it fired can be stressful. Perhaps you are wondering if you should buy a kiln. Having a pottery kiln at home is certainly convenient. The question is whether it’s practical and safe to have a kiln at home. And if so, what do you need to bear in mind when deciding which kiln to buy for home use?
It is entirely possible to have a pottery kiln at home. To use a kiln at home you need 18 inches of clearance around the kiln. You also need to ventilate the heat and fumes from the kiln effectively. Additionally, your electricity supply needs to be enough to power the kiln.
There are lots of different kinds of kilns and methods of firing clay. The two most commonly used methods of firing are gas and electric kilns.
Electric kilns are definitely the most popular option for potters who want a pottery kiln at home. The reason for this is that they are simple and economical to use and buy. Electric kilns also heat up comparatively quickly. Because they are the most popular choice for home potters, this article will focus on electric kilns.
Using a Pottery Kiln at Home – Factors to Consider
Even small kilns are large, hot, and use a lot of energy to run. So, you need to think about where and if they are suitable for your home. Let’s have a look at some of the factors that need to be taken into consideration.
Disclaimer – this article is for informational purposes, and does not constitute advice. There are health and safety considerations in using a kiln. Please consult an appropriate professional about using a pottery kiln in your home.
Ventilating Your Pottery Kiln at Home
When a kiln is firing it emits noxious gases and fumes. Clay and glaze undergo significant chemical changes when they are fired. At different stages in the firing process clay and glaze give off hazardous fumes.
This can smell unpleasant and be uncomfortable to be around. For example, during a bisque fire, organic matter in the clay will burn off and emit sulfur. Sulfur gives off a potent eggy smell.
But more importantly, the fumes can be bad for you. In particular, when you are glaze firing, the glaze can emit metal vapors and other noxious chemical substances.
However, many potters want the convenience of having a pottery kiln at home. So, what can be done about the gases and fumes?
Two possible solutions to this issue are to consider where in your home you are thinking of putting your kiln. And, to make sure you have adequate ventilation. Let’s have a closer look at those two solutions…
Solution 1: Kiln Location – Where to Put Your Kiln
Suppliers often recommend that you locate your kiln in a basement or garage. This is because these spaces are relatively large, so the gases, fumes, and heat will be less concentrated. Also, basements and garages are somewhat separated from the main body of the home.
Nevertheless, even if you have a basement or garage, you will still need to consider ventilation. Fumes still build up, even in larger spaces. And if your basement or garage doesn’t have ventilation, the fumes will simply migrate into your home.
What if You Don’t Have a Basement or Garage?
If you don’t have a basement or garage, where else can you keep a pottery kiln at home? If you have a yard or a garden, then an option is to put your kiln in a storage shed.
When planning to use a storage shed as a studio, you need to consider some of the factors below. Namely, how big is the shed? Is it large enough to accommodate a kiln? Is it made of the right material – a wooden shed is not a good idea as it’s too flammable.
However, provided that your shed meets the other criteria below, then you might consider converting it into a studio space.
Alternatively, if you don’t have an existing shed, then you could consider installing one. This is what I chose to do.
Unfortunately, I don’t have a garage, but I’m lucky enough to have a (smallish) backyard. After much consideration, I decided to install a concrete workshop in my yard. It was a pre-fabricated outhouse that cost around $2500 including installation.
Whilst $2500 is much cheaper than a home extension or moving house, it is still a considerable amount of money. In fact, the studio cost more than the kiln itself, so it really was a commitment. However, I was already fed up with having my pottery wheel, shelves, clay, etc. in my home. So, I was ready to take the step up.
What if You Don’t Have a Back Yard?
So, the question remains, if you don’t have a basement, garage, or backyard, what do you do? Perhaps you live in a one or two-bed city apartment. What are your options then for having a pottery kiln at home?
Well, it’s really a matter of choice as to whether you want to use your kiln actually inside your home.
Ideally, if you are using your kiln inside your property, then you would have a dedicated kiln room. Perhaps you have a spare room that you use as a pottery workspace. If so, then you close the door and keep it separate from the rest of the home whilst firing.
I have read accounts from potters who have a kiln in their kitchen or living room. Other potters will strongly recommend against this because of the smell and the fumes.
I have to say, from a personal point of view, this is not something I would be happy with. Even if I did have a really good ventilation system. The smell and the anxiety about the fumes and carbon monoxide would have been too much for me.
Is it Safe to Have Your Kiln in Your Kitchen?
I’m not a health and safety expert, nor am I a chemist. So, I can’t make definitive claims about whether the fumes are harmful or not. However, research1 has been carried out which indicates that exposure to kiln fumes is problematic.
Some potters are willing to take the risk and have a kiln in their kitchen. Other potters are adamant that for health and safety reasons, this is really not a good idea. In the interests of transparency, I have to say, I’m in the latter category.
It is not illegal to have your kiln in a central location in your home. So, it does seem to be a matter of personal choice. You just need to weigh up the pros and cons and make a decision for yourself.
Bear in mind that firing pottery (including the heat up and cool down) can take around 24 hours in total. It’s a good idea not to leave a kiln unattended. However, if the kiln is nearby, that doesn’t mean you need to sit with the kiln whilst it is firing.
As long as you are nearby and can check it regularly and monitor it as it fires. In fact, many potters deliberately don’t use their kiln room whilst it is firing, for the reasons outlined above.
It’s worth remembering this if you are firing in a central room in your home. 24 hours is a long time not to be able to use that room properly.
Solution 2: What Kind of Kiln Ventilation to Use
Wherever you situate your kiln, you must use adequate ventilation. Broadly speaking there are three different ways of ventilating your kiln.
Creating a Cross Draft for Your Kiln
This is the simplest and least expensive way of venting your kiln. Make sure that there is an open window near the kiln. Then, use a fan to create a cross draft in the kiln room. Ideally, you should keep the door propped open too so that fresh air circulates through.
The cross-draft method of ventilation is the way that potters ventilated their kilns for many years.
However, more recently, different ways of power venting kilns have been developed. These are more efficient for removing fumes, but also they even out the temperature in your kiln. This means that you get better results when you fire. Here are two options:
Updraft Kiln Ventilation
This kind of venting system works much like an extractor fan for a domestic oven. A hood is positioned over your kiln. Fumes, gases, and heat are then drawn through a hood and out of the room through a venting tube.
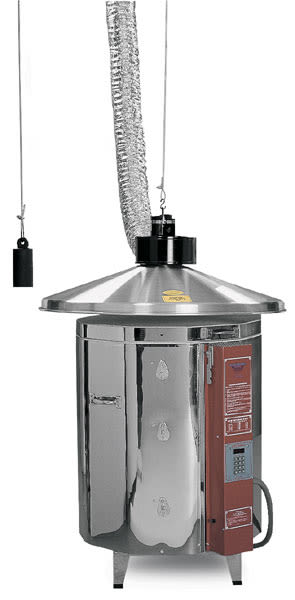
One example of the overhead venting system is the Vent-a-Kiln, made by Vent-A-Kiln Corporation. An updraft ventilation system will draw off fumes and also keep the ambient temperature down in your kiln room or studio.
The fumes and heat are drawn up and out of your studio. So, you can continue to work in there comfortably as the kiln fires.
This particular system by Vent-A-Kiln has a very good reputation and is widely used. In fact, it outperforms other venting systems, in the area of fume removal and ambient temperature control.
It also comes in different sizes, with hoods ranging from 27-54″. The blower rate of the extractor also varies according to the size of your kiln.
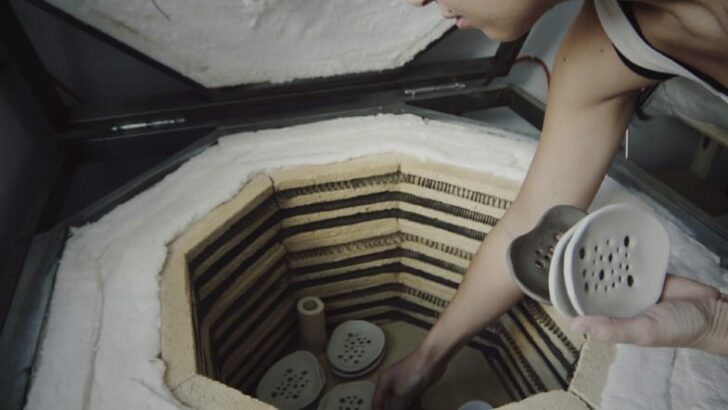
When using an updraft ventilation system, the peephole on top of the kiln is left open during the firing.
Normally it would be okay to close this during firing to make the best use of the heat generated. But with an updraft vent, your fumes need to exit via the peephole or flue.
This is not a small piece of kit. The hood itself is relatively large, as is the venting tube. However, it hangs in the air above your kiln, so you don’t lose any floor space.
Downdraft Kiln Ventilation
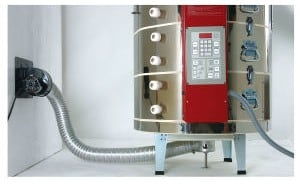
An alternative is downdraft ventilation for your kiln like the Skutt Envirovent. Like the updraft system, the downdraft also extracts fumes from your kiln and blows it outside the studio.
The difference is that this system draws fumes and heat out through the bottom of the kiln. To install a downdraft vent you need to drill holes in the bottom of the kiln.
A device called a plenum cup is then fitted over the holes. This is a metal cup that funnels the fumes into the ducting pipe and out of your wall vent.
Holes are also drilled in the top of the kiln. This allows air to be drawn in through the top of the kiln to replace the fumes that are exiting.
Overall Verdict?
Research2 indicates that cross-draft ventilation is better than no ventilation. However, out of the different ways of venting your kiln, it is the least effective. If you’re in a position to invest in a purpose-built ventilating system, then it is wise to do so.
Alternatively, if you are feeling handy, you could always go the DIY route and build your own kiln ventilation system. Check out this video…

Do You Have The Space for a Pottery Kiln at Home?
Kilns are bulky. Even smaller hobby kilns are sizeable pieces of kit. Take the Skutt KMT-822. This is one of the more compact kilns produced by Skutt. And the shipping dimensions are 32 x 32 x 37.
Also, the recommendation is that you leave between 12 and 18” clearance around your kiln. Some suppliers specify 12” clearance. Others state a minimum of 18” to be on the safe side.
The reason for this is that kilns generate heat. The surface of the kiln will get hot when you are firing. It’s important that the kiln is not close to any flammable materials like curtains.
But also, if the kiln is enclosed, without enough space around it at all angles, you will get heat buildup. This can lead to the kiln overheating. It’s one of the reasons why you should not use a kiln in a small enclosed space like a closet.
Some potters use non-flammable materials like cement board on the surrounding walls. This gives extra fire protection and helps them feel happier using the lower clearance distance of 12”.
If you are thinking of doing this then you would be wise to check local building codes. These will make recommendations about what non-combustible material can be used on walls near a kiln.
Furthermore, some manufacturers of cement board will state that it shouldn’t be used to reduce clearance distances.
The makers of HardieBacker state ‘clearances to combustible materials shall be obeyed, even if they are protected by non-combustible materials’3. They go on to recommend that you refer to ‘your local building and fire code for specific combustible clearance details’.
It’s best to follow the suggestions made by the supplier of your particular kiln about clearance distances.
What Size Kiln do you Need?
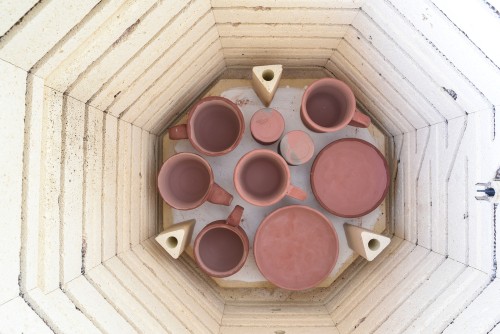
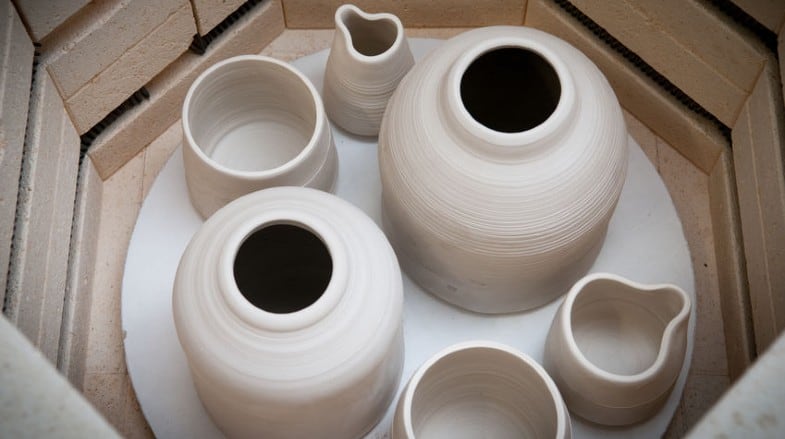
Kilns come in a variety of sizes. The volume of the internal chamber will determine how much you can fire at one time. And will restrict the size of the pieces you can fire.
Kilns with a larger internal chamber will also have larger external dimensions. If you make large or tall pottery, or if you produce a lot of work, you’ll need a bigger kiln. You need to consider whether you have room to accommodate a kiln that is big enough to meet your needs.
Flooring
Kilns generate heat out of their base too, so you need to consider your floor material too. It is not safe to use a kiln on a wooden floor or carpet. Some potters will use a kiln on a linoleum floor surface. However the heat can cause the linoleum to become discolored with time.
An ideal flooring material is concrete. If your kiln is in a garage or basement you may already have a concrete floor. Alternatively, you can position your kiln on concrete paving slabs. If you do this, then you should make sure the pavers extend 12-18” beyond the bottom edge of the kiln.
Electrical Requirements for a Pottery Kiln at Home
The way that electric kilns work, is that an electric current is passed through heating elements in the kiln. As the current passes through it radiates heat, much like an electric domestic fire.
The more powerful your electrical supply the hotter you will be able to make your kiln. If your power supply is not up to much, then it may not be able to support kilns that fire at hotter temperatures.
It’s important to check that the wiring in your home is sufficient for a kiln. And if it is, what kind of kiln would it be able to handle? Different kilns have different electricity and wiring requirements.
Here are some factors that you need to take into consideration when deciding whether to have a pottery kiln at home.
Volts
Different kilns run on different volts. Some run on 120 volts. Others run on 208, 240, 380, or 480 volts.
The kiln that you buy needs to match the voltage that is available in your home. Most homes in the US are supplied with 120 volts. Smaller kilns generally run on 120 volts. However, larger kilns require more power to reach higher temperatures.
You should check with your power supplier or an electrician and confirm what voltage you have access to. If you want to run a larger kiln that requires 240 volts, and you currently only have 120, you can get a rewire. However a rewire is of course an additional expense.
Bear in mind that some homes do have 240 or 208 volts. The outlets for these supplies look the same, so again, you should ask an electrician to confirm the voltage.
Single or 3-Phase Electricity
When considering different kilns, you’ll notice that some are described as single phase, others are 3 phase. Very simply, in single-phase electrical systems, one circuit carries the power. In 3 phase systems, three circuits carry the power.
Most domestic electric systems are single-phase. Whereas most commercial buildings and some schools are 3-phase systems.
Generally, single-phase kilns are plug-in items. This means you can simply plug them into a power outlet on the wall, out of the box. Other kilns need to be wired in by an electrician. This is the case with 3-phase kilns.
If in doubt, check with an electrician or your supplier which system you have.
Amps
Amperage is the amount of electrical charge that is flowing through the circuit. You need to check that your property can manage the number of amps required by the kiln.
Most modern properties will have a sufficiently up-to-date electrical supply. But some other properties won’t have enough amps to power a kiln. If this is the case, you would need to upgrade your electrics, which is expensive.
Again, you can consult with an electrician, who can confirm if your circuit is up to powering a kiln. And if so, what size of kiln it can manage?
Electrical circuits have breakers in them. Breakers shut off the electricity supply to your home if the demand for electricity exceeds a certain amount. Many homes in the US have a 15-20 amp breaker. Larger kilns may require more amperage than this. So, if you are hoping to use a larger kiln, you may need to update your circuit breaker.
Other Factors to Take into Consideration
- Children and pets do not mix with kilns. If you have either, you need to consider whether you can keep them away from the kiln.
- Do you have a sprinkler system in your home? If the heat of your kiln sets off the sprinkler it will ruin your kiln and cause damage to your property. It is possible to get sprinklers that detect smoke rather than heat. However, you would be wise to consult a health and safety professional about this decision.
- Having a pottery kiln at home might affect your building’s insurance policy. You may want to check that your policy covers you for every eventuality. Or whether having a kiln invalidates your insurance, or increases your premium.
Final Thoughts
Having a pottery kiln at home can be exciting and liberating. It’s much easier to experiment with pottery techniques and glazes if you are your own boss. You may find that your pottery skills will take a big leap up if you get your own kiln. Exciting times!


